Replacing the stove tap
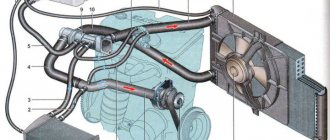
It often happens that a part such as a faucet breaks (it is worth noting that on the 2114 it is not very reliable). When replacing it, you should simultaneously replace the pipes, even if they are in good working order (the location of the pipes of the VAZ 2114 stove was described above).
All faucet replacements are performed in the following order:
- place the car in the pit and secure it;
- unscrew the screw plug and drain the coolant;
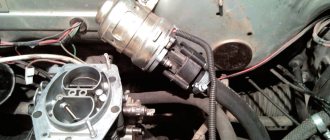
- using a screwdriver, loosen the clamps on the pipes located in the engine compartment, and then remove them;
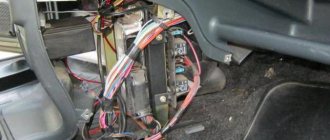
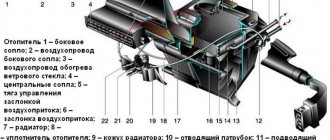
- find the tap in the passenger compartment on the passenger side (located under the panel), loosen the clamps of the pipes suitable for it, and then remove them;
- Using a 10mm wrench, unscrew a pair of nuts screwed onto the studs and securing the valve body;
- from the interior side, pull out the tap and disconnect the control cable from it;
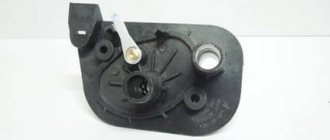
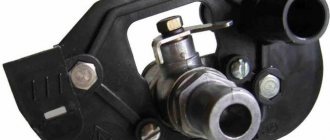
- install a new (similar) faucet in its original place;
- perform assembly in the same sequence, but in reverse order.
Many car enthusiasts who carry out such a replacement are sometimes interested in how to properly connect the pipes to the VAZ 2114 stove? After all, by mistake or forgetfulness, you can connect them incorrectly, which will disrupt the normal circulation of coolant.
In order not to make a mistake, it is worth remembering that the connection diagram for the connection pipes of the VAZ 2114 stove is as follows: the pipes located in the engine compartment are connected: the first - from the tap (inlet) to the hole in the cylinder head, the second - from the tap (outlet) - to "saxophone". The connections in the cabin are connected: the first - from the tap to the thermostat, the second - from the tap to the pump inlet.
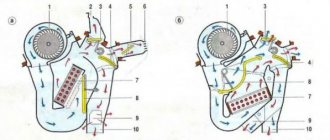
For even greater convenience, you can use the following general diagram of the heating system:
Examination
If there is no inspection hole in the garage, then the car must be placed on an overpass. In bad weather conditions, it is still better to drive it into the garage. Raise it higher with a jack and place reliable supports under each part of the machine.
Note: Never leave your vehicle on a jack for long periods of time.
To work you will need:
- tool set;
- a lamp with a protective cap - in case of a fall or impact, the lamp will not break, and the fragments will not cause injury;
- antifreeze for topping up.
Let's get started:
- First you need to disconnect the negative terminal from the battery.
- Lay a sheet of plywood or thick cardboard on the floor.
- It is necessary to start the inspection from the engine compartment and first make sure that the temperature of the cooling radiator and the engine has reached the ambient temperature.
- Check the connections of the pipes on the outlet and inlet fittings of the radiator.
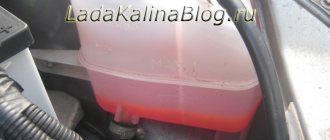
- The connections to the thermostat at the expansion tank are also carefully checked.
Note: check with the palm of your hand, running at the bottom of the connections. You need to determine whether liquid is accumulating.
Let's continue:
- Tighten the clamps, but do not tighten them too much, as you can damage the pipe itself if you overtighten the clamp.
- Then lie down on the prepared cardboard at the bottom of the car under the engine and check the pipe, as well as the suitable pipe of the water pump.
Note. Don’t forget to check the pipes that go to the interior heating system.
- Then continue checking under the hood.
- Rubber tubes suitable for the carburetor are carefully checked.
- Don’t forget to check the tightness of the radiator drain plug and coolant temperature sensor.
- After completing the inspection, make sure that all inspected connections are tight.
- Make a conclusion about the condition of the pipes.
Main causes of malfunction
There can be several reasons for such problems, but the most common are:
- Worn or damaged pipes.
- Incorrect connection of pipes.
- Broken stove tap.
- Radiator failure.
The first of these reasons - wear of pipes - can occur for natural reasons during operation, since the chemicals contained in coolants have a corrosive effect, which is complemented by the influence of high temperature.
In addition, the hoses of the VAZ 2114 stove can be easily damaged by over-tightening the clamps on them. When such damage occurs, fluid leaks from the system.
In total, VAZ 2114 cars have 4 pipes. Two of them are located under the hood and two in the cabin.
Their damage, which led to a coolant leak, can be judged by the following indirect signs:
- there is a constant drop in the liquid level;
- a specific smell appeared in the cabin;
- A puddle of coolant forms under the car or in the passenger compartment while parked.
If at least one of these signs is observed, then urgent diagnostics of the pipes should be carried out and their replacement.
VESKO-TRANS.RU
AutoNews / Reviews / Tests
How to change pipes on a VAZ 2109
Replacing stove
pipes on
a VAZ 2109
is a labor-intensive task that requires time, patience and some knowledge about its structure, but it saves you money. Our instructions will help you cope with this task yourself.
Changing
heater
pipes on the engine side takes no more than an hour.
This is if you don't rush. It took me a little less. I will briefly describe the replacement of stove
pipes under the hood. For those who have a carb, I advise you to remove the air filter housing, the work is much easier.
Lada 2109
TURBO MIGRANT