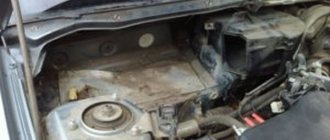
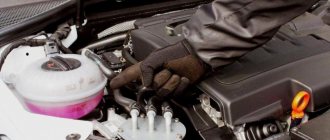
Today I went out to the car in the morning, started it up and sat there warming up. As usual, out of habit, I got out of the car, opened the hood and saw that the level of antifreeze in the tank had dropped sharply. Usually he always stayed at the maximum level, but here I see that he has dropped almost to the very bottom:
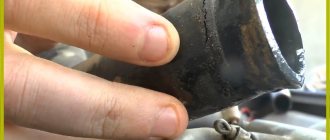
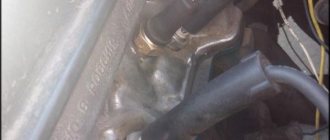
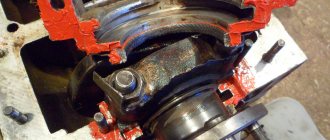
I looked carefully under the hood and at first did not see any traces of coolant anywhere. But then I looked at the radiator on the left side and saw a rather unpleasant picture, which, by the way, I also captured:
As you can see in the photo, the leak was from the upper pipe, since everything is in antifreeze from top to bottom. Apparently, the severe frosts made themselves felt, and they “fried” them to the fullest for two weeks!
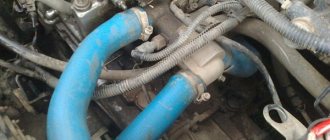
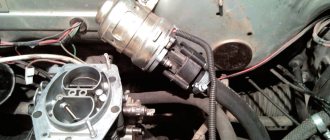
Since it is impossible to just crawl up to the pipe to tighten the clamp, it was necessary to remove the air filter housing completely. After this, at least somehow you have access to the clamp, but you still won’t be able to use a long screwdriver there. I had to tighten it with a short screwdriver, but there wasn’t much room for it to turn around either.
In general, after a minute of effort, we managed to tighten the clamp a little, the bolt turned about one turn.
It looks like the pipe is intact, but it’s hard to say for sure; it will become clear over time. After tightening, I poured antifreeze into the expander to the MAX level. So far there seem to be no traces of a leak, but it is better to look on a cold engine in good frost, since at low temperatures the coolant becomes more fluid.
Procedure for checking the Lada cooling system
1. Check the coolant level in the expansion tank; it should be between the “MIN” and “MAX” marks. If antifreeze has to be added periodically, then the system is not sealed (we check the integrity of: hoses, radiator drain holes, cylinder block, sensor installation locations, expansion tank housing, pump and its connections, engine and heater radiators).
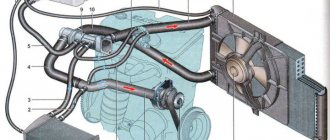
2. Check the thermostat. We warm up the engine to 85-92C and check the lower radiator hose leading from the radiator (in diagram No. 10), if it is cold, it means the coolant is circulating only in a small circle, the thermostat is faulty and should be replaced.
3. Check the circulation of antifreeze in the cooling system. Open the cap of the expansion tank and monitor the flow of antifreeze into the tank. Attention, the cooling system is under pressure, and the antifreeze in the system may be hot; open the expansion tank cap very carefully. Poor circulation of antifreeze indicates a malfunction of the water pump (pump), or the cooling system is clogged (needs to be cleaned).
Replacing the thermostat on Kalina 8 valves
The thermostat on Kalina consists of 2 parts - the so-called thermostat cover and housing. The cover is the part in which the thermocouple is located, and the housing is the part that is attached to the engine. Housings are not sold separately, unlike covers, at least I haven’t seen them. Therefore, you can either replace the cover or buy a completely assembled thermostat.
It is attached to the engine with 2 nuts along with the ground wire from the battery. We unscrew them and remove the thermostat. In most cases, the remaining gasket will stick to the engine. They will need to be removed with a knife or blade.
The coolant temperature sensor is screwed into the thermostat housing. You need to unscrew it from the old one and screw it into the new thermostat, or just buy a new one. It is attached under a copper gasket, which seems to need to be replaced with a new one, but practice shows that a used one also holds up normally. The thread of the sensor itself, closer to the gasket, can be lightly coated with sealant.
How to change a radiator
The operation is very labor-intensive, for which the car service center will charge you a hefty sum. But there is another, slightly barbaric, but fast and widely practiced method. The work flow diagram is as follows:
- Drain the antifreeze, disconnect and remove the battery, and then disconnect the hoses from the heater pipes.
- Unscrew the nut located near the fittings in the engine compartment. It holds a steel plate that will interfere with the removal of the heater.
- Remove the gas pedal and pull out the steel brake pedal shaft. Unscrew the decorative panel and behind it the plastic panel covering the stove radiator.
- To remove it, cut an opening in the plastic frame that allows you to pull the radiator towards the driver.
- Install the new element and reassemble in the reverse order. The cut opening can be sealed with plastic and decorated in any suitable way.
When performing the operation, it is worth moving the controller located directly under the stove to another place. Antifreeze dripping from it can damage sensitive electronics. Also, with the radiator removed, it is easy to change a faulty heater valve or gear motor, because access to them will be open. The gearbox is a single unit with a damper position sensor and can also be changed entirely.
What if you turn the standard radiator upside down?
So, friends, with the arrival of cold weather, I noticed that the stove was heating rather weakly, and at an outside temperature of -10°C, the windows thawed only after 30-40 minutes of intense traffic. It was impossible to drive like this, and during the next thaw I decided to start the third (I hope the last) replacement of the stove radiator.
By this time, I had come to the understanding that enough experimenting and I still needed to install the original heater radiator from Kalina. ideal in size and shape. Moreover, before installation, it must be carefully sealed with foam rubber so that the air from the fan passes through the radiator fins and not past it.
At that moment, I didn’t yet know how I was going to install a standard radiator, but I still didn’t intend to cut out the air ducts or disassemble the dashboard. It seemed to me that there must be some simpler and more logical way to install a standard radiator. Having purchased new pipes and a heater radiator from Kalina in advance (650 rubles), I removed the installed radiator from the gazelle and tried to install the standard radiator in its place. As one would expect, the fittings rested against the partition of the engine compartment, so the standard radiator could not be pushed into the niche even half its length.
After dismantling the radiator from the gazelle, I began to think about how to install a standard radiator without breaking anything. I twisted and turned the radiator, placed it this way and that way, and suddenly an idea came to my mind: what if we turn the heater radiator over with the fittings not towards the engine, but towards the driver?
The idea, although bold, was viable, so after 4 hours hot air was already blowing from the heating system deflectors. Now, let's look at the whole process of replacing the stove on Kalina from start to finish using the radiator reverse method. Let's start by making a list of everything we'll need.
Kalina heater diagram
The Lada Kalina heater device is designed for heating and cooling the car interior. If the car does not heat up, the windows fog up, or you feel discomfort, then you need to test the performance of the heating system. Understand the functioning of the stove on Kalina.
General layout of the Kalina stove
The location of the stove was designed for easy installation of an air conditioner. The system is simple, but at the same time quite reliable.
- Left side flow outlet.
- Left air duct.
- Heated side window.
- Air flow splitter.
- Stove.
- Right ventilation duct.
- Right side flow exit.
- Bottom heating duct.
- Interior heating duct.
- Central outlet of ventilation flows.
The supply and exhaust principle is used. The air masses inside the car are heated using a special liquid, which simultaneously cools the engine. The operating principle of the Kalina stove is based on the fact that the liquid warms up the radiator, where heat exchange occurs, and the heated air passes into the cabin through the air ducts.
If we analyze Kalina’s heater, the operating principle and the heater circuit will differ in configuration. The first option has a simple and reliable design. And in the other - full electronic control. The air passes through the filter into the air intake, and then the fan blows further through the system. The engine is running and warmed up. Antifreeze moves through the system in which the heater radiator is involved.
The amount of air that is heated by the stove radiator is regulated by a damper. Controls the operation of the fan and dampers by a unit located on the central panel.
Heating device control unit
- Temperature regulator. We change the heating of the air flow by turning the knob. The blue zone produces cold air, the red zone produces warm air.
- Fan speed switch. By turning the knob clockwise, the intensity of the air flow is adjusted. Choose one of 4 fan speeds.
- Air flow separation selector. Distributed in specific areas:
The flows pass through the upper part of the cabin.
The air is directed downwards.
Air flows are directed onto the windshield and down.
Air flows are concentrated in the area of the windshield, as well as the side ones.
- The handle that controls the recirculation of cabin air. We turn on the mode when driving off-road or in a traffic jam. Used for a short time, the glass fogs up.
- Rear window heating mode switch.
We regulate the direction and saturation of air flows through aerodynamic devices. We turn the guide blades and change the position of the dampers to achieve the desired air direction.
Interior ventilation of Lada Kalina
The outlet pipes are located in the car body under the trunk. The heater is located under the dashboard. The air flow enters the car interior through an intake, which is designed in front of the windshield in the engine compartment. The air enters through the filter and is accelerated throughout the cabin under pressure created by the fan.
1.Pipes for supplying air to the rear of the cabin.
2.Side ventilation nozzles.
3.Blowing the side windows.
- Windshield blower nozzle.
5-6-7. Central deflectors for flows entering the car interior.
We direct the supply air through the deflectors by turning the handwheel. If we turn it up, the flap opens and vice versa. You already understand how the stove on Kalina works.
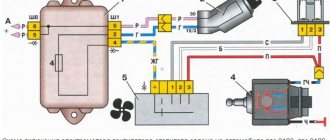
Electrical diagram of the Kalina stove
- Relay with fuse assembly.
- Mode switch.
- Resistor.
- Electric stove motor.
- Egnition lock.
A. To the power source.
Preparatory process with preliminary disassembly
To ensure the ability to carry out repair work to replace the radiator, you will need to acquire the following tools:
- locksmith set, which includes a wide range of standard keys;
- a hacksaw for metal with the ability to extend the blade;
- a container paired with a hose to drain antifreeze;
- silicone sealant or other means for gluing plastic;
- with a rag.
During the procedure for replacing the heater in the LADA Kalina model, we also recommend replacing its power supply and return pipes. On old hoses there is a high probability of cracks appearing, which can manifest themselves unexpectedly and negatively. This approach will eliminate the need to repeat the labor-intensive disassembly procedure in order to replace the pipes. We advise you to pay attention to silicone products.
Replacing radiator pipes Kalina
When replacing radiator pipes, no difficulties should arise. We take off the old ones and put on new ones. The inlet pipe is attached to the top of the radiator, the outlet pipe is attached to the bottom. It is worth noting that the outlet pipe consists of 2 - one part (the main one) goes to the thermostat, the second goes to the expansion tank. This pipe is the most expensive - its cost exceeds the total cost of all other pipes taken together. Therefore, it is advisable to treat it with care.
There is only one connecting pipe left (from the thermostat to the siphon) and heating hoses for the throttle assembly. Replacing them shouldn't cause any problems either. I bought a hose for the throttle (10mm) separately, 1 meter long, then cut it to the length of the old ones.
I did not touch the hose for the overflow from the radiator to the expansion tank. She appeared to be in good condition.
Replacing the pipes of the Kalina stove
In my case, the heater pipes were in the worst condition. In addition, unscrewing the clamps on the heater radiator itself was very problematic, since they are located immediately under the steering rack. To do this job I used a small ratchet with an 8mm head. It was simply impossible to get through with a screwdriver.
Before removing the pipes, be careful - the liquid remaining in the heater radiator will flow from them, so prepare small dishes in advance. Do not allow liquid to get on the speed sensor, which is installed exactly under the heater pipe.
Principle of operation
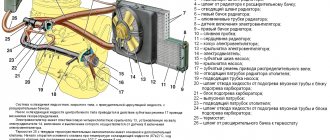
The operating algorithm of this system consists in the close interaction of various sensors, parts and elements, including devices that measure oil temperature, outside temperature and many other factors. Taking into account all these points, on the VAZ Kalina the cooling system automatically sets the optimal switching conditions and operating time of all structural elements, thereby ensuring effective engine cooling.
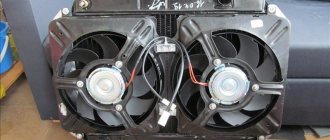
It should also be noted that depending on the temperature, the liquid can pass through a small or large circle. In the first case, the antifreeze passes through all the channels of the system, bypassing the radiator. The thermostat is in the closed position during such circulation. When the engine temperature increases, this part gradually opens, and the antifreeze begins to “run” in a large circle, getting into the radiator. The latter is cooled by a counter flow of air, and if the SOD is not enough, it will send a signal to the fan, which will force cold air onto the cells.
After cooling, the coolant flows back to the small circle. Then, depending on the engine temperature, the system automatically circulates antifreeze either in a large or small circle, maintaining the optimal operating temperature of the internal combustion engine (95-105 degrees Celsius).
