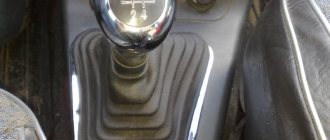
Not long ago, the rattling of the gearshift knob began to irritate me. All speeds had their own tonality of rattling and this terribly spoiled the nerves. At first I thought that the end of the bushings had come again, but after disassembling it, it turned out that everything was in place and they could still walk and walk. And then, taking a closer look, I noticed the hinge itself into which the handle rests. He did not naturally feel at ease in his place. It was decided to get into it, but before that I finally got there and bought a new one. For some reason I was sure that I would have to change it. And now the new thing is in hand, the car is in the pit, the tools are ready, coffee is in the mug - you can get started!
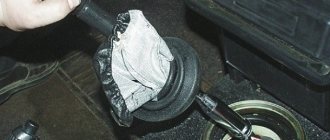
First, we climb into the cabin, remove the cover from the gearshift knob and the knob itself. Then we unscrew the fastening of the handle to the poker, where our favorite, often rattling bushings are located. I also had to unscrew the reverse speed guide in order to remove the screw from the connection between the handle and the poker. After that we climb under the car; now we won’t be back up soon).
Below we see the factory protection, maybe it’s the screen, but it’s not that important. He's bothering us. It is secured with 4 x 10 nuts, after which it is relatively easy to remove.
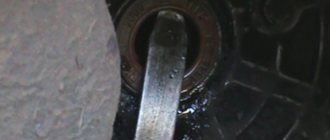
Now a view of the mechanism itself opens. The reaction rod from the gearbox is attached here, the limiter bracket is formed and the hinge itself is formed. All bolts are 13. In order to easily unscrew everything and not tear it off, I spilled everything with a liquid wrench.
Removing and disassembling the gearbox control drive
We disassemble the drive to replace the bushings of the gear lever shaft and the lever ball joint. We change the plastic bushings of the lever axis if there is a large play in the connection of the lever with the drive rod. We replace the parts of the ball joint if they are worn out or broken. We change the control rod when it deforms. Remove the floor tunnel lining (see “Removing the floor tunnel lining”). If it is necessary to replace the plastic lining of the reverse gear lock bracket, which can be worn by the mating part during long-term use...
...using a 10" wrench, unscrew the two nuts of the upper fastening of the lining...
...and the lower mounting bolt.
Remove the bracket cover. Replacing the gearshift lever axle bushings, as well as all plastic (subject to wear) elements of the lever ball joint, can be done inside the car without dismantling the entire drive. For clarity, we show these operations on a removed drive. To remove the drive, it is necessary to release the fastening of the ball joint race from the bottom of the car and the rubber boot in the car interior. We turn the head “10”...
...six nuts securing the drive pressure plate to the body.
Remove the pressure plate. Remove the protective cover from the pressure plate mounting studs. From the bottom of the car, remove the power unit mudguard (see “Removing the power unit mudguard”) and dismantle the drive rod (see “Removing the power unit mudguard”). We mark the position of the control rod relative to the shank of the gear shift rod hinge.
Using a 13mm spanner, loosen the tightening of the nut of the coupling bolt of the clamp securing the control rod to the shank of the gear selector rod hinge. Using a slotted screwdriver, we open the clamp and move it along the rod. Remove the control rod from the rod joint shank.
We remove the mechanism with the control rod, removing the gear shift lever from the hole in the floor.
What manual transmissions are on the Priora?
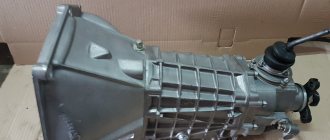
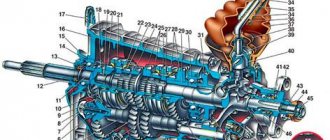
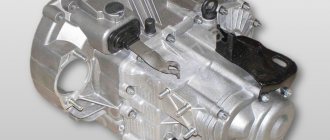
VAZ cars of the Lada Priora family are equipped with three types of manual transmissions (2170, 2180 and 2181), which differ in the way the gearbox is controlled - rocker (2170 and 2180) and cable (2181).
In the first case, the operation of the box is controlled directly through a rigid rod, pivotally connected at one end to the gear selection lever in the cabin, and at the other end to the control rod of the actuator inside the gearbox itself.
In the second case, a pair of flexible cables are used to control pendulum levers located on a separate speed selection and activation device mounted on the top of the box.
The appearance of sound, play and creaking
Replacing the backstage cushion
Generally speaking, the appearance of sound in the wings indicates either wear or the initial low quality of the cushion, and both options are essentially equivalent, since there is only one way out - replacing the wing cushion of the VAZ 2110. Many VAZ cars, due to the structural features of the design, often have the support is, to put it mildly, not of high quality. This fact becomes obvious when the car is not driving on a level surface. The sound is so noticeable that it becomes noticeable even to the driver who is in relative sound isolation.
Note: If you hear a sound in your car that was not there before, you should visit a technical service department or your own garage as soon as possible to determine the cause of the defect. Since if the defect is not identified immediately, the economic costs will be many times higher. Because the best way to fight is prevention in the first place.
Replacing the backstage cushion on a VAZ 2110
Recommendations
Drivers have accumulated extensive experience in servicing and repairing gearboxes. A gearbox is a complex and important mechanism, especially for a unit with automatic shifting. The main advice is to be careful and attentive.
Recommendations:
- Keep an eye on the oil level.
- Avoid sudden starts and accelerations.
- Engage reverse gear after the vehicle has come to a complete stop.
- Do not carry trailers on a car with a robotic gearbox, do not push start the car.
- Follow the rules for towing your vehicle.
- Don't skip maintenance.
- Carry out a daily inspection of the unit, listen to the operation of the motor.
Priora gearbox
For self-diagnosis and repair you need special precision equipment. Knowledge and skills of dismantling and assembly are important. For example, how to correctly measure the gap between a pair of meshed gears. If you are not a professional car mechanic, it is better to entrust the box to service companies.
Alternative supports
Replacement cushion for VAZ 2110
Considering the long-standing problem of Samara and a dozen, the manufacturer immediately released a whole series of alternative pillows:
Let's now consider their features:
- The support of JSC-BRT and the peculiarity of its structure is contained in a hinged product, which replaced the bearing in this place. At first glance, it looks like a panacea, since the general principle of operation seems to be clear: the creators of this technical innovation used an element that has increased rigidity in the radial direction. At first glance, the sounds should disappear and the car should become silent on uneven roads, however, conflicting reviews from the motorists themselves do not allow us to completely agree with this fact.
- An alternative to OAO-BRT is SS-20, where a steel bushing was installed in place of the standard bearing, which was completely welded into a rubber damper. The manufacturer of this new product claims that the SS-20 will completely eliminate the appearance of elevators and extraneous sounds. Moreover, the manufacturer directly promises that the SS-20 will be able to guarantee the classic behavior of the rocker (see Replacing the rocker on a VAZ 2110 on your own): regardless of the topography of the road surface, the lever will be stable and without extraneous sounds.
- The developers of "Assomi" boldly claim that the use of a special prescription rubber mixture will completely smooth out all impacts and sound noise, thereby significantly increasing the overall level of comfort of the car.
VAZ 2110 gearbox rocker
So, you need to choose who to trust, because there are a huge number of manufacturers to choose from, who all guarantee the high quality of their products. And most importantly, they guarantee that they managed to create a universal high-tech product that is most effective from a practical point of view.
Note. But it’s not entirely clear why some manufacturers of backstage cushions use rubber ears that quickly break?
Practical Feature of Alternative Choice
Unfortunately, “Assomi” and SS-20 are quite difficult to find in local stores; in the future they will go on wide sale, however, it is impossible to answer exactly when this will happen. It all depends on the store owners. The motorist is mainly offered imported products, as well as from national manufacturers, but only standard ones. It should be objectively understood that the quality of imported products varies significantly in comparison with national standard factory models, as does the price. Therefore, if you are pressed for time, it is best to order your own national alternative via the Internet, which is much lower in price than its foreign counterpart, and the quality is almost identical.
It's no secret that the Priora has a congenital problem - the rattling of the gearbox driveshaft.
In almost all Priors, the rubber boot of the gearbox driveshaft is destroyed after some time. One glance is enough to give a verdict: the boot is made of burnt rubber, so it doesn’t last long! The markings on the cardan shaft boot were not Balakovsky.
It was decided to replace the Priora boot with a Viburnum boot, and also replace the Priora gearbox driveshaft itself with a Kalina driveshaft - it is too praised on various forums.
| The original boot of the gearbox driveshaft was cracked, and there was even a hole in its “accordion” |
| I purchased a Balakovo-made boot and a Tolyatti gearbox driveshaft, all from Kalina |
| I had to tinker a little with the Kalina gearbox driveshaft: the Kalina driveshaft rod is longer than the Priora rod by about 2 cm. Since I didn’t have the opportunity to compare the Kalina driveshaft with my own driveshaft (it was still on the car at that time), I had to cut it “blindly”. I measured 1.8 cm from the edge and started sawing |
| I don’t have a grinder, I sawed with a hacksaw for metal - it took about 40 minutes of time, 2 hacksaw blades and a slightly ground corner on the emery))) It’s very difficult to saw, because the metal is strong! After sawing off part of the rod, I made a conical chamfer using sandpaper and a file. |
| Let's start removing the original gearbox driveshaft. We loosen the clamp and tighten the torn boot. Next, we unscrew the fixing bolt, but unfortunately this is not so easy to do: the bolt is coated with red thread locker and there is no way to unscrew it. The open-end wrench turned, “licking” the edges, but the powerful socket head did not fit; the gearbox housing interfered with it. In general, in order to remove the fixing one, stock up on spanners. Replacing the boot and drive shaft itself takes about 10 minutes |
| I sawed at random, but the size was amazingly accurate - the length of the rod of the original Priora gearbox driveshaft and the Kalina gearbox driveshaft are the same! |
| The original driveshaft of the Priora gearbox is essentially not a driveshaft at all: it bends only in one plane, while the Kalinov gearbox driveshaft bends in 2 planes. In addition, the photo clearly shows a huge gap of 2-3 mm on the original Priora driveshaft |
| The anthers differ slightly, but the Kalinovsky anther has better workmanship than the original Priora anther |
| A little about adjustment. While unscrewing the fixing bolt, the reverse gear jumped out. We had to manually select the desired gear using pliers, but we couldn’t do it the first time. Having assembled the mechanism, it turned out that in place of the reverse gear it turned out to be the first, and the second could not be engaged due to the reverse speed limiter. I had to redo everything. The repeated adjustment turned out even worse, only 3, 4, 5 gears remained. It was possible to adjust it normally only the 4th time, using pliers to find the reverse gear. And we found it this way: having removed the link and clamped the cardan shaft with pliers, turned it counterclockwise until it stops and pushed the hinge forward. In order to make sure that we had engaged reverse gear, I started the engine and carefully moved off - the car went backwards! Let me make a reservation right away: absolutely nothing will happen to the box, nothing will fly out or break. |
| We install the gearbox driveshaft in place. Having straightened the clamp clamp a little, we connected the gearbox driveshaft to the rocker, set the lever to the reverse gear position and tightened the clamp clamp! The check showed that all the gears are there and they work perfectly. The feeling is very pleasant, the gears are engaged very softly and smoothly, no snagging. The lateral play of the lever has not changed, the longitudinal play has become smaller, but this difference is not noticeable either while moving or standing still. The position of the lever has changed a little, it has become a little closer to the driver’s seat, but it doesn’t touch anything, and it’s not noticeable from the outside, just by feeling it! But now you don’t have to reach so far for fifth gear |
Replacing the wing cushion with your own hands
- we place the car on the overpass;
- we go into the salon;
- remove the cover and the plastic handle on top;
- Use special pliers (platypus) to remove the retaining ring;
- we climb under the car;
- The rocker pad is held in place by four nuts that need to be unscrewed.
Note. It is worth noting that the standard ring can be removed very easily, because it has special lugs. If you bought a new imported set of backstage cushions, then there is another locking ring without ears, but it is better not to install it, but to use the old one.
After replacement, defects in the backstage support are not detected in most cases. Assembly is carried out strictly in the reverse order: a support is installed, which is secured with nuts. It is necessary to consolidate the above listed theoretical aspects of replacing the backstage cushion with the help of photo and video materials. Instructions on how to do the replacement yourself will be most effective if you have some visual reinforcement. In most cases, the price of the issue is small, but everything depends directly on the quality of the part itself. You can also find out about replacing the short-stroke rocker on our website.
Attention!
If you first assemble the reverse gear locking mechanism, the long rod will not allow you to put the rod on the cardan shaft. The problem can be solved by shortening it
It is important not to forget to put the boot on the driveshaft
Adjust the reverse gear locking mechanism, since the consequence of adjusting the scenes is that the mechanism does not match the plate to which it clings. The problem can be solved by removing the plate and adjusting the hook (it is a cutout on the mounting bracket). You can sharpen it with sandpaper or a file.
The photo shows the adjusted toe.
To complete the procedure, you need to put on a manual transmission cover with a knob.
