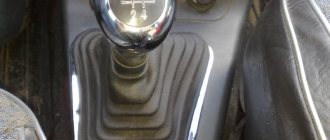
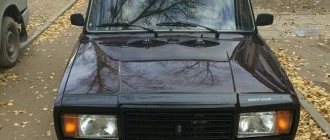
How to remove the gear shift lever on a VAZ 2110
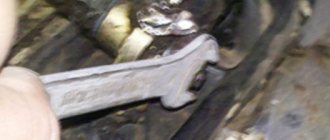
To remove the lever, you only need a set of open-end wrenches, as well as a Phillips and slotted screwdriver. Remove the protective cover and lift it up to secure it to the lever handle. If possible, unscrew the lever handle and completely remove the cover. Using a “13” key, unscrew the nut of the bolt securing the lever to the rocker (it goes inside the tunnel). Then, using a “10” key, unscrew the nuts securing the plastic guide plate (it is screwed to the tunnel wall). Remove the guide plate, then insert a Phillips screwdriver between the top and bottom of the tunnel to the right of the lever and remove the screw that secures the plastic guide to the lever. Then press the lever in the neutral position all the way to the right and pull out the bolt and guide. Remove the retaining ring from the ball joint and pull out the lever. Do not pull it when the ring is installed, this may cause the bowl to collapse.
How to change the gearshift lever on a VAZ 2107 with your own hands
Instructions for repairing the VAZ 2107 gearbox 5 mortars with your own hands
The need to replace the VAZ 2107 gearbox knob can be caused by various reasons. Thus, as a result of natural wear, the internal bushings and part of the lever may become unusable, and accordingly, shifting gears will become difficult. Heavy gear shifting, a pronounced crunch and extraneous sounds in the area of the casing are the first signs of a malfunction. Since the bushings and hinges are made of fairly fragile plastic, breakage is only a matter of time. It is quite rare that the lever itself breaks on the side visible from the interior along its length. This phenomenon may occur due to excessive mechanical stress on the handle or an accident, as a result of which the mechanism will be broken.
Most often, removal of the VAZ 2107 gearbox lever is required as a result of wear of the knob or internal parts, as well as the casing, which, with intensive handling, wears out over 60-70 thousand kilometers. At the same time, it is quite possible to change the gear lever of a VAZ 2107 yourself. To do this, you will only need a small set of screwdrivers of various shapes, and also in case of troubleshooting, you will need a repair kit for the VAZ 2107 gearbox lever along with keys for 12, 10 and 14.
How to remove the gear knob VAZ 2107
The procedure for removing the VAZ 2107 gearbox lever consists of several stages:
- First you need to put the lever in neutral gear. And the car itself is on the hand brake.
- Then it is necessary to dismantle the protective casing, which is located directly on the floor tunnel itself. To do this, use a screwdriver to pry up the plastic latches and remove the casing through the lever.
- After this, separate the knob from the lever if it is necessary to change it. This part is firmly attached to the handle, and to dismantle it it is necessary to apply quite a lot of force. When installing a new part, in some cases silicone grease or sealant is used to seal.
- Then it is necessary to dismantle the lever itself, which is secured to the system using two bolts with 12-head heads. With bolts, the handle is attached to the rocker and the rest of the clutch system. After separating this part, you can continue disassembling the system if necessary. The rocker is removed by separating the bushings and hinges, also using a Phillips screwdriver. The damaged lever is subsequently replaced with a new one, like the rest of the damaged elements.
How to assemble a VAZ 2107 gearshift lever
Assembly of the unit occurs in the reverse order, also in several stages:
After using the repair kit and replacing used parts, reassembly must be done, starting with the gearshift bushings. They are located behind the casing and the rocker directly in the floor tunnel in the car interior. The bushings are attached to the hinges with the obligatory use of silicone grease. This substance is necessary to eliminate mechanical damage that occurs as a result of mechanical friction. After this, you need to secure the new lever to the rocker using a 12mm wrench by screwing two bolts. Also, after securing the joints, they can be treated with lubricant. After securing the handle, it is necessary to mount the casing, securing it to the standard mount in plastic latches
This procedure must be carried out with caution, since the standard fasteners and places for latches are quite fragile and can easily break off if handled carelessly.
How to install the gearshift lever on a VAZ 2107
Installation of a new mechanism with similar or non-standard dimensions is carried out according to the same algorithm that is carried out when repairing a unit. However, in the case of installing non-standard equipment, it is necessary to take into account the mounting points, which will have to be modified by installing additional fastenings. When installing, it is necessary to center the new element when attaching it to the rocker. To do this, it is also necessary to move the gearbox to the neutral position and bolt the rocker to the lever, aligning it in the center relative to the axis of the rocker.
Device location and characteristics
The gearshift lever of the VAZ 2107 is located directly in the car's interior. It is used to be able to change gears while moving. The gear lever fails only in rare cases, and the reason for this is negligence towards the product. If the product fails, it must be replaced. But before replacing, it is necessary to remove the product in question. We’ll find out in more detail how to remove it, as well as replace it on the “seven”.
On the “seven” the gear shift knob has a common problem - rattling and chattering. If you fix such a malfunction using improvised means, then replacing the device will not be necessary. Before you begin replacing the device, you will need to find out the exact causes of the malfunction. After all, sometimes not only the part in question can “fail,” but also the gearbox or clutch.
If you are convinced that it is the gearshift lever that is faulty, then only then should you start replacing it.
Replacement features
Before you begin the replacement, you need to stock up on tools such as wrenches and a screwdriver. We start with the following steps:
- Set the lever to neutral position.
- After this, you need to slide the top cover up. There is no need to completely remove the cover.
- The next step is to move the cover, which is located below, to the top. This cover is also called a thermal protection valve. In the photo below it is shown with a red arrow.
- Now you need to press the device, pushing it to the bottom. After this, you need to insert a screwdriver into the lower part of the product, where the plastic sleeve is located. The bushing is located at the very bottom of the device, as shown in the photo below.
- It is necessary to move the locking sleeve to the lower part, and then remove the product from the box.
- If the device emits strong vibrations, it needs to be replaced with a new one. In this case, you can exchange the part for a product of shorter length, as on foreign cars. A short device is much more comfortable to operate than a standard product.
Many motorists replace the standard gear shift levers with more modern ones, which allows them to uniquely customize the interior of the Seven.
After the standard product is dismantled, we install a new handle in its place. Let's look at what the installation is.
Installing the device on a VAZ 2107
After the standard mechanism has been removed, you will need to remove the rubber bushing from it, if it remains inside. To remove the bushing, you need to use a screwdriver or hook. By prying the sleeve, we remove it from the device, as shown in the photo above.
If you plan to install a standard product in place, then it is advisable to replace the bushing by purchasing a repair kit in advance. When choosing a repair kit, preference should be given to products manufactured by VAZ. The installation process is similar to removing the device. Initially, a rubber bushing is installed, recessing it into the device. Following the bushing, it is necessary to install a rubber band in the form of a washer, which softens the control of the mechanism. Next, you need to install a plastic lock inside the mechanism, due to which the device is fixed to the gearbox “scene”. The assembly is completed by installing the locking sleeve, which had to be moved down at the initial stage in order to dismantle the gearbox lever.
Once the product is ready for installation, you will need to insert it into the drawstring. To do this, you should initially lubricate the slide, and then hit the mechanism handle well with your hand until you feel that the lever has settled into place. This is how the installation of both new and old mechanisms, which were dismantled to replace component parts, is carried out.
Self-tuning of the handle
Some drivers are not satisfied with the quality of repair kits for installation, and they came up with a kind of tuning of the gearbox handle itself: to reduce rattling and vibration going to the shift handle, instead of standard plastic bushings and rubber bands, they insert a piece of hose that fits the outer and inner diameters. This upgrade also allows for easier future installation of the handle.
Additionally, you can make the gear shifting process more convenient by slightly reducing the length of the standard handle. To do this, you need to remove the lever, cut it with a hacksaw to 5-6 cm in length and cut a thread at the end, the same as it was on the cut piece (if you wish, you don’t have to cut the thread). These upgrades are advisory in nature and have their pros and cons. Each driver decides for himself whether to produce them or not.
When choosing products for foreign cars, you should make sure that it can be reliably installed on the VAZ-2107. Otherwise, an incorrectly secured mechanism will lead to an emergency situation while driving.
VAZ 2107 box repair
Removing and replacing the VAZ-2107 stove with your own hands
Before starting work, you should thoroughly clean the outer surface of the gearbox and wash it with kerosene.
Important: before repairing the VAZ 2107 gearbox, it is necessary to drain the transmission oil from it. It's easier to do this before removing it from the car.
Further actions are performed in the following sequence:
- Remove the clutch fork from the gearbox.
- Remove the rubber coupling flange from the gearbox output shaft.
- Unscrew and remove the cross member securing the gearbox.
- Remove the speedometer drive.
- Remove the reverse lamp switch.
- Remove the cuff from the ball joint of the gearshift lever.
- Unscrew the nuts securing the gearshift lever housing cover to the rear wall of the crankcase.
- Remove the housing and gasket from the studs.
- Unscrew the nuts securing the gas exhaust pipe.
- Remove the mounting bracket and remove the mounting bolt.
- Unscrew the 5 nuts of the gearbox rear cover with a 13mm wrench.
- Unscrew the 10 nuts of the bottom cover with a 10mm wrench.
- Remove the cover along with the gasket.
- Unscrew another rear cover nut.
- Press in the 1st and 2nd gear rods using a screwdriver.
- Tapping the rear cover, remove it from the gearbox along with the gasket.
- Remove the plug for the reverse gear and 5th gear block (repairing the 5th gear of a VAZ 2107 often involves replacing worn gears or bearings).
- Remove 5th gear and reverse gear.
- Place the rear cover on wooden blocks and press out the 5th gear block bearing.
- Remove the sealing gasket.
- Press the oil seal out of the front gearbox cover and remove it with pliers (if it needs to be replaced).
- Remove the spring ring from the gearbox shaft.
- Unscrew the bolt securing the front bearing and remove it along with the washers.
- Unscrew the gear bolt
- Move the 5th gear fork and remove the gear block.
- Clamp the gear block in a vice.
- Remove the secondary shaft washer.
- Unscrew the cover bolts and remove the cover together with the gasket.
Important: repairing a VAZ 2107 gearbox involves mandatory replacement of all gaskets with new ones. Therefore, before work you should stock up on a set of gaskets.
- Remove the springs and fixing rods from the crankcase holes.
- Remove the retaining balls using a rubber bulb (by creating low pressure in it).
- Remove the 5th gear and synchronizer from the output shaft.
- Remove the ring.
- Remove the 5th gear clutch by sliding the shift fork.
- Remove the reverse idler gear from the axle.
- Remove the reverse and 5th gear shift rod, shift fork and rod bushing.
- Unscrew the bolt securing the rod.
- Pull out the locking pin.
- Release the locking ring associated with 5th gear.
- Remove the hub, spring washer, gear and reverse bearing from the shaft.
- Remove the front intermediate shaft bearing.
- remove the intermediate shaft.
- Remove the rear bearing ring part.
- Unscrew the bolt securing the 3-4 gear fork to the rod.
- Remove the 3-4 gear rod and fork.
- Pull out the locking pin.
- Unscrew the fastenings of the 1-2 gear fork.
- Remove the rod and fork of 1-2 gears.
- Unscrew the screws securing the secondary shaft bearing plate using an impact screwdriver.
- Pull the bearing out of the crankcase.
- Remove the input shaft.
- Remove the roller bearing from the shaft.
- Pry off the retaining ring of the secondary shaft intermediate bearing and remove the bearing.
- Remove the secondary shaft.
- Unscrew the nut and remove the reverse axle.
- Remove the 3-4 gear synchronizer and the hub shaft spring washer from the shaft.
- Remove the stabilizer clutch hub and 3rd gear.
- Press the secondary shaft out of the gear.
- Remove the shaft gear bushing and remove the gear and 1st gear synchronizer.
- Remove the 1st-2nd gear clutch hub and the synchronizer clutch.
- Remove the 2nd gear and bearing race.
- Remove the Belleville washer.
- Press the secondary shaft out of the bearing race.
- Pull out the retaining ring and 4th gear spring.
- Continue repairing the VAZ 2107 gearbox (5 mortar), disassembling other gears.
- Replace all worn parts with new ones.
- Reassemble the gearbox by performing the steps in reverse order.
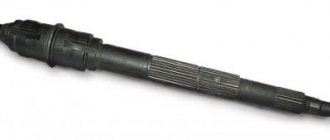
Gearbox device
Features of gear shifting on mechanics
In general, the concept of “remaking” the box is not entirely correct, since the design of the VAZ-2105 gearbox with 4 speeds was practically no different from the same gearbox 2101. The 2105 gearbox has a three-shaft layout, with constant gear meshing and manual control. Externally, the Kopeika and Pyaterki checkpoints can be distinguished almost only by the markings on the body of the box.
The VAZ-2105 gearbox diagram with 4 stages is presented below, and structurally it does not differ from modifications 2101 and 2106:
| 1 | Bottom cover; | 40 | Needle bearing of the front end of the secondary shaft; |
| 2 | Filler and inspection plug; | 41 | Synchronizer spring thrust washer; |
| 3 | Intermediate shaft second gear gear; | 42 | Fourth gear synchronizer ring gear; |
| 4 | Intermediate shaft third gear gear; | 43 | Sliding clutch for synchronizer of third and fourth gears; |
| 5 | Intermediate shaft; | 44 | Third and fourth gear synchronizer sliding clutch hub; |
| 6 | Front intermediate shaft bearing; | 45 | Synchronizer retaining ring; |
| 7 | Clamp washer bolt; | 46 | Synchronizer locking ring; |
| 8 | Intermediate shaft front bearing clamp washer; | 47 | Synchronizer spring; |
| 9 | Intermediate shaft constant mesh gear; | 48 | Third gear synchronizer gear and ring gear; |
| 10 | Constant mesh gear of the input shaft; | 49 | Second gear synchronizer gear and ring gear; |
| 11 | Spring washer; | 50 | Secondary shaft; |
| 12 | Retaining ring; | 51 | First gear synchronizer gear and ring gear; |
| 13 | Rear input shaft bearing; | 52 | First gear gear bushing; |
| 14 | Input shaft oil seal; | 53 | Secondary shaft intermediate bearing; |
| 15 | Transmission front cover; | 54 | Intermediate bearing lock plate; |
| 16 | Bearing mounting ring; | 55 | Secondary shaft reverse gear; |
| 17 | Clutch housing; | 56 | Elastic cushion for gear shift lever damper; |
| 18 | Gearbox input shaft; | 57 | Damper rubber bushing; |
| 19 | Reversing light switch; | 58 | Damper spacer; |
| 20 | Intermediate shaft reverse gear; | 59 | Damper locking sleeve; |
| 21 | Reverse intermediate gear; | 60 | Inner gear shift lever cover; |
| 22 | Reverse fork; | 61 | Secondary shaft rear bearing oil seal; |
| 23 | Gear shift lever release spring; | 62 | Flange of the elastic coupling of the propeller shaft; |
| 24 | Tension spring bolt; | 63 | Screw; |
| 25 | Gear shift lever guide cup; | 64 | Centering ring seal; |
| 26 | Ball joint of the lever; | 65 | Centering ring retaining ring; |
| 27 | Spherical washer; | 66 | Centering ring; |
| 28 | Spring; | 67 | Rear secondary shaft bearing; |
| 29 | Gear shift lever; | 68 | Drain plug; |
| 30 | First and second gear shift fork; | 69 | Mud deflector; |
| 31 | Third and fourth gear shift fork; | 70 | Speedometer drive gear; |
| 32 | Fork rod for first and second gears; | 71 | Speedometer drive; |
| 33 | 3rd and 4th gear fork rod; | 72 | Rear gearbox cover; |
| 34 | Locking blocks; | 73 | Reverse idler gear axis; |
| 35 | Reverse fork rod; | 74 | Rear intermediate shaft bearing; |
| 36 | Rod lock ball; | 75 | Intermediate shaft first gear; |
| 37 | Retainer spring; | 76 | Gearbox housing; |
| 38 | Retainer cover; | 77 | Sliding clutch for synchronizer of first and second gears. |
| 39 | Breather; |
Since the box from the VAZ-2105 is structurally similar to the 2101, the kinematic diagram of the gearbox is the same. But the gear ratios are different; on 2105 gearboxes they are:
- 1st – 3.67;
- 2nd – 2.10;
- 3rd – 1.36;
- 4th – 1.00;
- Rear – 3.53;
As for the differences in the design between gearboxes 2105 and 2101, they mainly come down to different numbers of teeth on different gears. So, on the intermediate shaft of the gearbox, a 1st speed gear with 14 teeth is used (15 for 2101), and their inclination angle is greater. The constant mesh gear of this shaft has 28 teeth (29 for 2101). The input shaft uses an 18-tooth gear (19 for 2101). Because of these features, the shafts with gear blocks of these two gearboxes are not interchangeable if you try to install them separately. But in the case of a complex replacement - the input shaft along with the intermediate shaft and all gear blocks, then installation is quite possible. As for the secondary shaft, modification 2105 differs from shaft 2101 in the first gear gear (its teeth have a different angle, although their number is the same, and its diameter is also slightly larger).
Features of repair of the PP lever and replacement of its parts.
If you notice any malfunctions when switching gears, you need to check and repair (replace) the corresponding parts of the PP lever. To do this, you must first completely remove the latter:
- remove the cover to have access to the plastic bushings of the lever,
- unscrew the plastic protective plate to release the hinge cage;
- move the reaction rod aside and eventually remove the entire gear shift lever.
First, you should check the movement of the axle; if it is too loose, you will have to replace all the bushings (before installing new bushings, they are first lubricated with a special lubricant).
If the spring fails, then first you will have to pull it out of the mechanism. To do this, the hinge with the lever and the locking ring are disassembled, the old ball washer is carefully removed (to remove it, spread the spherical washer with your fingers) and a new one is installed. Before doing this, it should be lubricated.
The gear shift rods change a little differently. We find a clamp at the bottom of the machine and loosen its tension. Then unscrew the nut securing the hinges and disconnect the clamp. After this, you can safely remove the rod and replace it with a new one. Now let's put everything back together in reverse order.
And don’t forget about the need to periodically adjust the lever!
Gearbox repair, the procedure for assembling and disassembling the Lada 2172 gearbox, the procedure for replacing oil seals in the Lada 2171 car gearbox, the stages of removing and installing the Lada Priora clutch discs.
Diagnostics of transmission and chassis VAZ 2101-2107
The appearance of any extraneous sounds while driving a VAZ indicates a malfunction of the car. Every driver will be able to detect the presence of extraneous noise and determine its approximate location, but not everyone will be able to determine its real cause.
In the same way, you can notice the presence of malfunctions by changing the operation of the clutch or gearbox, but finding the actual cause is quite difficult. It is to determine the faulty unit or part that we will consider in more detail the procedure for diagnosing the transmission and chassis of the VAZ 2101-2107.
Transmission diagnostics.
The main signs of problems in a VAZ transmission are related to the clutch and gear shifting. It often happens that when changing a gear, it does not grab well, does not always shift, or the shift is accompanied by slipping or jerking.
Malfunctions may also be indicated by extraneous sounds in the area of the gearbox - crunching or clicking. If any of these signs appear, the clutch should be checked first.
Clutch.
You need to check from simple to complex, so you should start with the VAZ clutch pedal. It should have a free movement of about three to four centimeters. If the amount of free play is different, this may be the reason.
After the clutch pedal has been checked and adjusted, it is time to move on to the clutch slave cylinder. The free play of its pusher should be around five millimeters. If the course is significantly different, the reason may lie there. It is also worth inspecting the cylinder for fluid leaks.
It would be a good idea to check the tension of the clutch cable and try to adjust it. If after all the work the extraneous sounds do not disappear, a possible reason is wear of the clutch itself, but this is a job for professionals.
Gear shift.
If problems arise with shifting gears on a VAZ 2101-2107, three options are possible - a malfunction of the lever, the rocker, or the reason lies in the box itself. If you have problems shifting one or two gears, then the problem most likely lies in the box itself.
In another situation, it is worth checking the gearshift lever and rocker. As with the clutch, let's start with the simplest thing - the lever.
The gear shift lever may simply become loose. There is no point in diagnosing or checking it - it’s easier to just remove the casing that covers the place where the lever enters the tunnel and tighten all the fasteners. You can also purchase a lever repair kit and replace the parts, since the old ones may be worn out, and tightening the fasteners will not give the desired effect.
You can often feel a slight play when changing gears. The reason for this usually lies in the yoke driveshaft. If it is factory-made, we can say with confidence that this is precisely the reason, since rapid wear of the cardan is a disease of the factory scenes.
You can check the operation of the cardan yourself - just disconnect the link from the rod and remove the boot. After this, you can shake the cardan rod to determine the presence of play. If it is present, it is enough to simply replace the slide.
Quite often, extraneous sounds are heard in the gearbox. In such a situation, you should not look for the cause on your own, since the gearbox is a very complex mechanism and it is better for a professional to diagnose and repair it.
Rear axle.
The cause of extraneous noise in the rear of the VAZ may be the gearbox. In order to check this point, you need to accelerate the car until noise appears, then increase the speed by another 20-30 km and begin to reduce it.
If the noise appears at the same speed as during acceleration, it is worth repeating the process, but after reaching maximum speed, switch to neutral gear. If noise does not appear when the speed decreases, most likely the reason is in the gearbox itself.
If the noise appears again, it may be caused by worn bearings, since in neutral gear the gearbox does not experience load.
In order to make sure that the reason lies precisely in the gearbox, and, say, not in the suspension or other components, you need to hang the rear drive wheels and listen to the operation of the rear axle from under the car.
This method does not always help - it happens that other noises appear, signaling malfunctions of other parts that overlap each other.
Chassis diagnostics.
Possible problems with the chassis of the VAZ 2101-2107 can be judged both by the appearance of extraneous noise and by the deterioration of the vehicle’s handling. Malfunctions are also indicated by “beating” of the steering wheel or extraneous sounds when turning it.
There can be many reasons, so the chassis must be checked as a whole. The easiest way is to drive the car into a pit and ask someone to rock it longitudinally and then transversely.
With a strong swing amplitude, you can hear extraneous noises, which will allow you to determine the approximate location of faulty parts. In order to more thoroughly check the chassis, the car needs to be suspended in order to have access to the chassis parts.
Silent blocks.
First of all, you should check all silent blocks and bushings. If the silent blocks have cracks, tears or signs of drying out, they must be replaced.
Ball joints and steering ends.
Ball joints fail quite often. Outwardly, they may look good, but at the same time have little resistance to moving the finger (with good support, it is quite difficult to move the finger with your hands).
The wear of the ball joint can also be indicated by a knocking or clicking sound when it is suddenly moved. The same malfunctions can be noticed on the steering ends, since the principle of operation of their hinge is the same as that of a ball joint.
Shock absorbers.
Next, you should inspect the VAZ shock absorbers. If traces of oil are visible at the junction of the rod and the cylinder, it means the shock absorber is leaking. Most often this occurs due to wear of the seal or when the rod is deformed due to an impact.
If the shock absorber is gas, the streaks will not be visible, so in order to accurately determine its condition, you need to free it from the lower arm and check for compression and decompression. A good shock absorber compresses when a lot of force is applied with both hands.
You can also compare the performance of shock absorbers on both sides - the one that compresses with less force is more worn out. It is also worth inspecting the shock absorber cushions with which they are attached to the wheel arch. This can be done from the engine compartment. If the pillows are dry or worn out in a certain direction, they need to be replaced.
Hub.
In order to check the condition of the wheel bearing, it is necessary to hang the wheel and remove it. After that, just try to move the hub in different directions - vertically and horizontally.
If even a slight play is felt, the wheel bearing is worn out. Of course, it will still be able to serve for a certain time, but it is better to replace it.
Stabilizer's pole.
In order to check the VAZ stabilizer struts, you need to drive the car onto an overpass or inspection hole, since they need to be checked with the wheels loaded. Alternately, you need to “shake” the upper and lower pins of each rack - if displacements or slipping are felt, and clicks and crunches are heard, then they must be replaced.
It is also worth paying attention to the silent blocks of the struts - if they show signs of wear, in this case it is also better to replace the stabilizer struts.
Also, when diagnosing the chassis of a VAZ 2101-2107, it is worth paying attention to all threaded connections. They must be tightened, and if mating parts are replaced, bolts, cotter pins, pins, washers and nuts must be replaced.
It is worth inspecting all the anthers - if they have signs of wear - they have dried out, cracks or tears have appeared, traces of lubricant are visible - they must also be replaced. When replacing anthers, it is also necessary to change all clamps.
The gear shift lever in the VAZ 2107 is directly dependent on the gearbox, at the same time it helps to steer and switches gears.
This is not a particularly breakable gearbox part and rarely requires replacement. But it happens periodically. In this article we will show you how to remove the gear shift lever on a VAZ 2107.
Why do you have to repair the gearbox link?
Failure of the link can be caused by many factors. Different car models are equipped with different types of mechanisms
First of all, it is important to understand what can cause this structure to fail. Sometimes the reasons may lie in your driving style, which will have to be changed if you want to use the car further and longer. Most often, problems with gearbox elements are caused by:
Most often, problems with gearbox elements are caused by:
- abrupt gear changes, unnecessary effort, significant load on the mechanism during vehicle operation;
- installation of a low-quality backstage - even in a store, sometimes you can buy not an original spare part, but a fake;
- incorrect installation of the part - if there is a misalignment of even a couple of millimeters, the entire assembly can fail after just a few hundred kilometers;
- displacement during operation, causing uneven loads and pressure on the elements of the unit, the application of forces to change gears;
- failure of nearby parts - often the working elements of the rocker are located in close proximity to the transmission and are exposed to the influence of parts located nearby.
The cause of failure of this complex but fragile unit can be any mechanical impact. Therefore, regular maintenance and inspection of the gearbox is the key to trouble-free driving and avoids additional costs for repairing the gearbox rocker. Early diagnosis of the problem and taking preventive measures are more effective and less expensive than repairing a failed structure.
In most cases, the link does not break suddenly; this is only possible if it is subject to unexpected mechanical damage. Most often, the weak points of the assembly, such as plastic connectors, hinge joints, bearings and other elements, depending on the design of the scenes, will gradually fail.
An impending breakdown can be judged by the following signs:
- difficulties when switching certain gears, the need to apply force to move the gearshift lever to the required position, the feeling of an obstacle when moving the transmission handle;
- the appearance of a crunching sound when changing gears, louder when engaging first and reverse gears (this is due to the fact that the need to engage them occurs after the car has stopped, and in silence the sounds are heard better);
- vibration of the selector lever while the car is moving (this sign may indicate problems with the gearbox, but may be associated with the design features of the vehicle);
- difficulty in switching gears, possible slippage when driving, inability to shift caused by blocking the lever path, blocking of individual transmission functions;
- inability to change gears, jamming of the mechanism - this problem does not arise very rarely and certainly requires a visit to a car service center, since the car cannot move independently.
The latter case will require delivering the car to the station on a tow truck or in tow with the clutch constantly depressed. If the second gear is jammed, an independent trip to the service station is possible
The main thing is to exercise extreme caution while driving, otherwise you can burn out the clutch.
Above we have listed the main symptoms of malfunctions that indicate the need to repair the gearbox. Having noticed them, you should contact a service station for repairs as soon as possible.
Lever tuning
The gear lever is located on the “seven” somewhat poorly, some believe that it is too long, others stretch far, and a general remark when turning on the reverse gear is added to the main ones, that we hit our hand on the passenger’s knee.
Some select levers from foreign cars that are suitable in size and secure them. The second, and easiest, thing to do when upgrading the handle yourself is to simply make it shorter. To do this, the lever rod is sawed off to 5 - 7 cm in length and the thread is re-cut.
The most radical way of tuning is to move the lever closer to the driver and reduce its travel when changing gears. It looks, when brought to its logical conclusion, solidly.
Read more about this procedure on the website.
The above “tuning of the lever makes the interior of your car unique, but do not forget about driving safety because the given examples have their pros and cons, and it’s up to you to decide whether to do them or not.
ATTENTION!
The electronic catalog of spare parts intended for reference purposes only!
Our company does not sell all spare parts presented in this list. If there is a “Cost” link in the right column, these spare parts are on active sale. Availability in warehouses for details and prices, see the product card. If there is no “Cost” link in the right column, we do not sell such parts and do not accept orders for them.
Replacing the scenes on a VAZ 2107
It was necessary to write which gearbox is 4 or 5 speed. If there is a 5th mortar, then there are no problems at all, because the slide can be removed as an assembly, but if there is a 4th mortar, then there really is a spring that can fall. When I was doing repairs, I took a wire hook in advance, unscrewed the drawstring, pulled it up and hooked this spring with the hook. Assemble in the reverse order, but instead of a hook it is better to take a string - it will be easier.
You'll start to take it apart and you'll see everything. Everything is just there
Here's a little instruction. ru/ — remove spaces
How to repair a gearbox on a VAZ 2107
A four-speed gearbox was installed on the “old” model VAZ, and a five-speed gearbox on the “new” model VAZ. However, working with both mechanisms is not much different from each other. The essence of the repair work is to perform the following steps:
- Removing the box from the car.
- Disassembling the gearbox into its component parts.
- Replacement of failed elements with new ones.
- Assembling the box.
- Installation of a gearbox on a car.
With such a defect, the shaft will not be able to work correctly, which will immediately affect the convenience of gear shifting.
Preparing tools
To carry out all of the above work, you will need to prepare in advance:
- heads for 13 and 17;
- extension to the heads;
- Phillips screwdriver;
- flat screwdriver with a thin blade;
- flat screwdriver with a powerful flat blade;
- impact screwdriver;
- tweezers;
- wrenches 13 (2 pcs), 10, 17, 19 and 27;
- circlip puller (or pliers);
- hammer.
How to remove the gearbox
The box can only be repaired after it has been removed from the car, so you will need to be patient and time-consuming. Repairing a gearbox is clearly a difficult and slow task.
To remove the box from a VAZ 2107, you will need to drive the car into a pit or viewing platform. The jacking option will not work, since it will be impossible to complete all stages of the work:
- Remove the wire from the negative terminal of the battery.
- The first stage of work is carried out directly from the salon. For convenience, it is necessary to remove the panel in which the radio is located.
- Press the gear shift lever and insert a flat-head screwdriver into the hole in the gearbox locking sleeve.
- Using a screwdriver, pull the bushing towards you.
- Disconnect the rod from the gear shift lever.
- Use tweezers to hook the edge of the damper insert and remove it.
- Using two flat screwdrivers, press apart the petals of the damper insert and move them apart.
- Then remove the damper and bushings from the gear lever.
- In the cabin, move the foot mat near the gearbox.
- Using a Phillips screwdriver, unscrew the four screws on the box lid.
- Remove the cover from the gear shift lever.
- The second stage of work is carried out directly under the car. The first step is to remove the exhaust manifold pipe from the box.
- Disconnect the clutch mechanism.
- Immediately remove all connections from the gearbox (at the same time, you can check the integrity of the wires).
- Disconnect the cardan drive.
- Remove the flexible shaft mounting mechanism from the speedometer.
- Unscrew the two bolt connections on the side cover of the gearbox.
- Remove the box from the car.
- Place something strong and stable under the body of the box, as it may fall out.
Video: dismantling instructions
The box body weighs more than 20 kg, so it’s better to ask your friends for help to safely remove it from the car
How to properly disassemble the box
Repair work on the gearbox is possible only after identifying the real cause of the breakdown. Therefore, it will be necessary to disassemble the device correctly and safely for each component of the box and perform troubleshooting.
To ensure the disassembly process goes quickly and without interference, it is recommended to immediately prepare the following tools:
- impact screwdriver;
- wrench 10;
- socket wrench 13;
- three-jaw puller;
- vice;
- tweezers;
- torque wrench.
Of course, as necessary, gaskets, oil seals, and those parts that were discarded during the work will be needed.
There are many large and small parts in the box design
Operating procedure
Disassembling the box yourself in a garage is a completely doable task. However, the work will require maximum concentration and attention:
- After removing the gearbox from the car, it is recommended to wash the housing from dirt. You can even use kerosene or white spirit to ensure the surface of the box is clean.
- Remove the bell (casing).
- Turn the box over and unscrew the cover bolts.
- Remove the gear block plug from the rear cover.
- Pull out the retaining ring with tweezers.
- Press out the gear block bearing.
- Press out the reverse gear bearing.
- Remove the secondary shaft oil seal.
- Pull out the thrust washer from the rear bearing of the secondary shaft.
- Press out this bearing.
- Remove the speedometer drive gear and pull out the roller ball (clamp) behind it.
- Remove the gear fork mounting bolt.
- Block the shafts by inserting a thick bolt or a powerful screwdriver between them.
- While turning the input shaft, pull it towards you along with the gears and bearings.
- Then pull out the secondary shaft.
- The intermediate shaft comes out easily.
Instructions
- Place the VAZ 2107 car on stands.
- Eliminate the exhaust system and remove the thermal protection valve.
- First remove the cover from the handle.
Removing the cover - Remove the retaining clip and washer. And take out the shift rod, it is located on the side.
- Place a wrench at the bottom and turn it 90 degrees. Press out the spherical liner.
- Pull out the handle.
- Lubricate the liner with lubricant.
- Install the handle with the insert (the arrows should indicate the direction of the longitudinal axis).
- Press down on the liner from above. Secure it.
- Attach the cover so that the arrow points forward.
- Place the washers and insert the rod. Screw on the bracket.
- Replace the thermal protection valve, as well as the exhaust system.
- Secure the cover and put on the handle. Record the state.
Now you know how to make this replacement on a VAZ 2107. We hope that our article was useful. Let your car work long and well.
How to remove a VAZ-2107 gearbox yourself
Before you begin dismantling the gearbox, you should prepare the tools and materials that may be required during the work, and also decide on the location for disassembly.
What tools will you need?
To remove and replace the VAZ-2107 gearbox you will need:
- a set of open-end and ring wrenches, among which there must be keys for 10, 13, 19;
- a set of sockets of the same size as the keys, as well as cardan joints with an extension;
- pliers, screwdrivers, tweezers;
- funnel and container for oil;
- jack and wooden beams;
- rags.
Preparatory work
Work on removing the VAZ-2107 gearbox is carried out, as a rule, in an inspection hole, on an overpass or using a lift. The sequence of actions may be as follows:
- the car is raised with a jack on both sides, wooden beams are placed so that the rear part remains suspended;
- the driveshaft is disconnected. To do this, the gear shift lever must be moved to neutral so that the driveshaft can be rotated by hand. After this, unscrew the three nuts that secure the cardan coupling to the gearbox flange;
- by rotating the propeller shaft, it is necessary to remove the bolts that were held in place by the nuts and disconnect the cardan coupling from the gearbox flange;
- the four nuts that secure the driveshaft to the rear axle are unscrewed, the driveshaft is disconnected and moved to the side;
- the car battery is disconnected (or completely removed);
- The entire muffler is removed, i.e. its rear part, the resonator and the exhaust pipe located in the front part.
After this you need:
- disconnect the oxygen sensor;
- disconnect the electrical wire supplying the reversing lamp;
- loosen the speedometer cable nut and disconnect the cable;
- remove the clutch slave cylinder, and the cylinder only needs to be removed from the bracket without unscrewing the cylinder hose nut;
- remove the starter by unscrewing the two upper mounting bolts and one lower one.
Removing the gearbox control lever and other work in the interior
Inside the car, you need to disassemble the gearbox control lever. To do this, lift the handle cover and secure the locking sleeve at the very bottom of the lever with a screwdriver. Then you need to remove the bushing from the lever, and remove the lever itself from the mechanism. Using tweezers, remove the rubber lever damper from the pulled out rod. Next you need:
- remove the three remaining bushings on the so-called rocker;
- Unscrew the bolts that secure the lever cover to the floor and remove the cover;
- Unscrew the bolts that secure the parking brake handle cover;
- remove the handbrake cover and unscrew the screws holding the mat;
- unscrew the nuts that secure the front seat slides to the brackets;
- remove the metal plate by unscrewing the bolts holding it;
- lift the rug and roll it up so it doesn’t interfere;
- Remove the warm air supply hose to the air filter.
Removing the gearbox
Then you need to go under the car again, drain the used oil from the box into a previously prepared container, and then do the following:
- Unscrew the bolts that secure the clutch housing protective cover;
- support the bracket (or cross member) with a wooden beam and unscrew the two nuts that secure the bracket to the body;
- place a jack or a wooden block under the box and unscrew the 4 bolts holding the clutch housing attached to the cylinder block;
- remove the crankcase from the cylinder block using a screwdriver;
- move the gearbox back and remove the input shaft from the driven disk hub.
The gearbox weighs more than 50 kilograms, this should be taken into account when removing fasteners to avoid injury.
Removing and installing the gearbox lever VAZ 2101-07.
I created this video with the help of YouTube Video Editor ()
2) Then slide the upper cover of the lever to the top, but do not remove it, just leave it in the upper part.
3) Then, in the same way, move to the top but only the lower one, or as it is also called the main cover of the lever, and also leave it at the top, supporting it with your hand.
4) Next, pushing the lever to the very bottom, use a screwdriver to secure the locking sleeve.
Note! The bushing itself is not visible in the photo, but its approximate location is indicated by an arrow!
5) And then remove the locking sleeve from the lever, and at the same time remove the lever from the mechanism.
Note! If your shift lever emits strong vibration, then you don’t have to replace it with a new one at all, you just check the condition of the inner bushing, if you find that the bushing is deformed or very hardened, then replace it with a new one! (For information on how to remove this bushing, see the bottom of the article in the “For Beginners!” section)
Installation: 1) Installation of the new lever is carried out in the reverse order of removal.
For newbies! Question: How do I remove the inner bushing from the lever? Answer: Take a wire hook or a screwdriver in your hands, and use it to remove the bushing from the lever as shown in the figure:
Additional video clip: For more details on the process of removing and installing the lever, see the interesting video clip located just below:
1200 rub. for the photo report
We pay for photo reports on car repairs. Earnings from 10,000 rubles/month.
Write:
This photo report presents to your attention a detailed description of the assembly of a manual 5-speed gearbox of a new model VAZ car (Niva).
There will be no description of the defect, since a detailed inspection of the gears and bearings will make everything clear. The main attention will be paid to the synchronizer locking ring (popularly synchronized), as well as the gear shift fork.
The synchronizer blocking ring should not have a circular groove at the end where the teeth are (the presence of this fact indicates that the clutch reaches the synchronizer blocking ring with its teeth, which means the pair does not work with cones). A yellow coating should be present on the forks.
The photo shows a secondary shaft with a clutch hub and a third-fourth gear clutch installed on it; insert the third gear gear (all parts must be lubricated with transmission oil during installation).
Difficulty engaging second gear, video
5 convenient gear shift knobs from AliExpress
The owner of the ten may encounter the same problems as when turning on the first speed. In any case, malfunctions are due to the following reasons:
- abrasion of gear teeth. At the first stages, the speed turns on poorly, but over time it will start to crash. Therefore, surgical intervention is required;
- there is insufficient adhesion of the gear to the gear shift clutch;
- the speed is switched off when hitting uneven road surfaces. In this case, the problem is the clutch.
Sometimes, to eliminate the knockout of the second gear, it is enough to replace the clamp. If replacement does not achieve the desired result, then a major overhaul is required.
Adjustment in this case will not solve the problem. Carrying out repair work yourself is quite difficult. Unlike adjusting and replacing oil seals, major repairs require professional skills.
Nuances, video
It should be noted that the gearbox is a fairly stable component of the vehicle. Compared to other units, breakdowns occur much less frequently here. At the same time, you need to remember that for the normal functioning of the box, you should change the oil in a timely manner, and use products from trusted brands. In terms of their performance, the gearboxes are almost identical. If we are talking about front-wheel drive cars, which include the VAZ-2110, then you can use oil poured into the power unit. If we are talking about rear-wheel drive VAZs, then special oil is provided for them. Sometimes car owners notice an oil leak. This is caused by weak fastening of the box and crankcase. The problem is solved with the help of seals, as well as careful tightening of the bolts.
If problems arise with the box, first of all it is necessary to adjust the drive and replace parts that have failed as a result of physical wear.
If the car owner has the skills and experience, then repairing the gearbox of a VAZ-2110 car can be done with his own hands. In other cases, it is better to visit a trusted auto repair shop and eliminate the deficiencies after professional diagnostics.
Where is
It is located in the car interior, below the dashboard, to the right of the driver (or to the left if the car is right-hand drive). It is used to change gears in the gearbox.
The shift lever is a reliable and stable part. But due to careless and careless use, it also breaks. If you suddenly begin to grab the control lever or press on it, then repairs cannot be avoided. Before you start replacing the VAZ 2107, you need to understand how to remove it from the box.
Common illnesses include rattling and loose handles. Let's call this the first stage. If you do not fix the problem immediately, you will have to completely replace the element in the future. This part, like others in the car, must be treated with care and calm. Don’t pull it, hurry up and press it into the “feeder”. If the gears do not shift smoothly and comfortably, then you probably did not press the clutch all the way, or there are problems with the gearbox. And you need to repair it, not the handle.