The VAZ 2107 gear shift lever is used to enable the driver to control the car, which is possible using a gearbox. The gearbox, in turn, is a mechanism inside which there are gears of different diameters. This device is the link between the engine and the drive wheels of the car. For rear-wheel drive cars, which is the VAZ 2107, the manual transmission is typically located under the lever itself. To connect the lever to the gearbox, no additional link is required, as is typical for front-wheel drive car models. The VAZ 2107 rocker is presented in the form of a small half-bent tube onto which the gearshift lever itself is placed. In the material we will pay attention to the question of how to replace it, as well as the features of dismantling.
Device location and characteristics
The gearshift lever of the VAZ 2107 is located directly in the car's interior. It is used to be able to change gears while moving. The gear lever fails only in rare cases, and the reason for this is negligence towards the product. If the product fails, it must be replaced. But before replacing, it is necessary to remove the product in question. We’ll find out in more detail how to remove it, as well as replace it on the “seven”.
On the “seven” the gear shift knob has a common problem - rattling and chattering. If you fix such a malfunction using improvised means, then replacing the device will not be necessary. Before you begin replacing the device, you will need to find out the exact causes of the malfunction. After all, sometimes not only the part in question can “fail,” but also the gearbox or clutch.
If you are convinced that it is the gearshift lever that is faulty, then only then should you start replacing it.
Replacement features
Before you begin the replacement, you need to stock up on tools such as wrenches and a screwdriver. We start with the following steps:
- Set the lever to neutral position.
- After this, you need to slide the top cover up. There is no need to completely remove the cover.
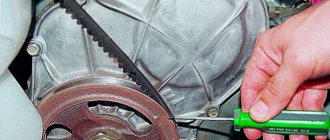
- The next step is to move the cover, which is located below, to the top. This cover is also called a thermal protection valve. In the photo below it is shown with a red arrow.
- Now you need to press the device, pushing it to the bottom. After this, you need to insert a screwdriver into the lower part of the product, where the plastic sleeve is located. The bushing is located at the very bottom of the device, as shown in the photo below.
- It is necessary to move the locking sleeve to the lower part, and then remove the product from the box.
- If the device emits strong vibrations, it needs to be replaced with a new one. In this case, you can exchange the part for a product of shorter length, as on foreign cars. A short device is much more comfortable to operate than a standard product.
Many motorists replace the standard gear shift levers with more modern ones, which allows them to uniquely customize the interior of the Seven.
After the standard product is dismantled, we install a new handle in its place. Let's look at what the installation is.
Installing the device on a VAZ 2107
After the standard mechanism has been removed, you will need to remove the rubber bushing from it, if it remains inside. To remove the bushing, you need to use a screwdriver or hook. By prying the sleeve, we remove it from the device, as shown in the photo above.
If you plan to install a standard product in place, then it is advisable to replace the bushing by purchasing a repair kit in advance. When choosing a repair kit, preference should be given to products manufactured by VAZ. The installation process is similar to removing the device. Initially, a rubber bushing is installed, recessing it into the device. Following the bushing, it is necessary to install a rubber band in the form of a washer, which softens the control of the mechanism. Next, you need to install a plastic lock inside the mechanism, due to which the device is fixed to the gearbox “scene”. The assembly is completed by installing the locking sleeve, which had to be moved down at the initial stage in order to dismantle the gearbox lever.
Once the product is ready for installation, you will need to insert it into the drawstring. To do this, you should initially lubricate the slide, and then hit the mechanism handle well with your hand until you feel that the lever has settled into place. This is how the installation of both new and old mechanisms, which were dismantled to replace component parts, is carried out.
Self-tuning of the handle
Some drivers are not satisfied with the quality of repair kits for installation, and they came up with a kind of tuning of the gearbox handle itself: to reduce rattling and vibration going to the shift handle, instead of standard plastic bushings and rubber bands, they insert a piece of hose that fits the outer and inner diameters. This upgrade also allows for easier future installation of the handle.
Additionally, you can make the gear shifting process more convenient by slightly reducing the length of the standard handle. To do this, you need to remove the lever, cut it with a hacksaw to 5-6 cm in length and cut a thread at the end, the same as it was on the cut piece (if you wish, you don’t have to cut the thread). These upgrades are advisory in nature and have their pros and cons. Each driver decides for himself whether to produce them or not.
When choosing products for foreign cars, you should make sure that it can be reliably installed on the VAZ-2107. Otherwise, an incorrectly secured mechanism will lead to an emergency situation while driving.
Diagnostics of transmission and chassis VAZ 2101-2107
The appearance of any extraneous sounds while driving a VAZ indicates a malfunction of the car. Every driver will be able to detect the presence of extraneous noise and determine its approximate location, but not everyone will be able to determine its real cause.
In the same way, you can notice the presence of malfunctions by changing the operation of the clutch or gearbox, but finding the actual cause is quite difficult. It is to determine the faulty unit or part that we will consider in more detail the procedure for diagnosing the transmission and chassis of the VAZ 2101-2107.
Transmission diagnostics.
The main signs of problems in a VAZ transmission are related to the clutch and gear shifting. It often happens that when changing a gear, it does not grab well, does not always shift, or the shift is accompanied by slipping or jerking.
Malfunctions may also be indicated by extraneous sounds in the area of the gearbox - crunching or clicking. If any of these signs appear, the clutch should be checked first.
Clutch.
You need to check from simple to complex, so you should start with the VAZ clutch pedal. It should have a free movement of about three to four centimeters. If the amount of free play is different, perhaps this is the reason.
After the clutch pedal has been checked and adjusted, it is time to move on to the clutch slave cylinder. The free play of its pusher should be around five millimeters. If the course is significantly different, the reason may lie there. It is also worth inspecting the cylinder for fluid leaks.
It would be a good idea to check the tension of the clutch cable and try to adjust it. If after all the work the extraneous sounds do not disappear, a possible reason is wear of the clutch itself, but this is a job for professionals.
Gear shift.
If problems arise with shifting gears on a VAZ 2101-2107, three options are possible - a malfunction of the lever, the rocker, or the reason lies in the box itself. If you have problems shifting one or two gears, then the problem most likely lies in the box itself.
In another situation, it is worth checking the gearshift lever and rocker. As with the clutch, let's start with the simplest thing - the lever.
The gear shift lever may simply become loose. There is no point in diagnosing or checking it - it’s easier to just remove the casing that covers the place where the lever enters the tunnel and tighten all the fasteners. You can also purchase a lever repair kit and replace the parts, since the old ones may be worn out, and tightening the fasteners will not give the desired effect.
You can often feel a slight play when changing gears. The reason for this usually lies in the yoke driveshaft. If it is factory-made, we can say with confidence that this is precisely the reason, since rapid wear of the cardan is a disease of the factory scenes.
You can check the operation of the cardan yourself - just disconnect the link from the rod and remove the boot. After this, you can shake the cardan rod to determine the presence of play. If it is present, it is enough to simply replace the backstage.
Quite often, extraneous sounds are heard in the gearbox. In such a situation, you should not look for the cause on your own, since the gearbox is a very complex mechanism and it is better for a professional to diagnose and repair it.
Rear axle.
The cause of extraneous noise in the rear of the VAZ may be the gearbox. In order to check this point, you need to accelerate the car until noise appears, then increase the speed by another 20-30 km and begin to reduce it.
If the noise appears at the same speed as during acceleration, it is worth repeating the process, but after reaching maximum speed, switch to neutral gear. If noise does not appear when the speed decreases, most likely the reason is in the gearbox itself.
If the noise appears again, it may be caused by worn bearings, since in neutral gear the gearbox does not experience load.
In order to make sure that the reason lies precisely in the gearbox, and, say, not in the suspension or other components, you need to hang the rear drive wheels and listen to the operation of the rear axle from under the car.
This method does not always help - it happens that other noises appear, indicating malfunctions of other parts that overlap each other.
Chassis diagnostics.
Possible problems with the chassis of the VAZ 2101-2107 can be judged both by the appearance of extraneous noise and by the deterioration of the vehicle’s handling. Malfunctions are also indicated by “beating” of the steering wheel or extraneous sounds when turning it.
There can be many reasons, so the chassis must be checked as a whole. The easiest way is to drive the car into a pit and ask someone to rock it longitudinally and then transversely.
With a strong swing amplitude, you can hear extraneous noises, which will allow you to determine the approximate location of faulty parts. In order to more thoroughly check the chassis, the car needs to be suspended in order to have access to the chassis parts.
Silent blocks.
First of all, you should check all silent blocks and bushings. If the silent blocks have cracks, tears or signs of drying out, they must be replaced.
Ball joints and steering ends.
Ball joints fail quite often. Outwardly, they may look good, but at the same time have little resistance to moving the finger (with good support, it is quite difficult to move the finger with your hands).
The wear of the ball joint can also be indicated by a knocking or clicking sound when it is suddenly moved. The same malfunctions can be noticed on the steering ends, since the principle of operation of their hinge is the same as that of a ball joint.
Shock absorbers.
Next, you should inspect the VAZ shock absorbers. If traces of oil are visible at the junction of the rod and the cylinder, it means the shock absorber is leaking. Most often this occurs due to wear of the seal or when the rod is deformed due to an impact.
If the shock absorber is gas, the streaks will not be visible, so in order to accurately determine its condition, you need to free it from the lower arm and check for compression and decompression. A good shock absorber compresses when a lot of force is applied with both hands.
You can also compare the performance of shock absorbers on both sides - the one that compresses with less force is more worn out. It is also worth inspecting the shock absorber cushions with which they are attached to the wheel arch. This can be done from the engine compartment. If the pillows are dry or worn out in a certain direction, they need to be replaced.
Hub.
In order to check the condition of the wheel bearing, it is necessary to hang the wheel and remove it. After that, just try to move the hub in different directions - vertically and horizontally.
If even a slight play is felt, the wheel bearing is worn out. Of course, it will still be able to serve for a certain time, but it is better to replace it.
Stabilizer's pole.
In order to check the VAZ stabilizer struts, you need to drive the car onto an overpass or inspection hole, since they need to be checked with the wheels loaded. Alternately, you need to “shake” the upper and lower pins of each rack - if displacements or slipping are felt, and clicks and crunches are heard, then they must be replaced.
It is also worth paying attention to the silent blocks of the struts - if they show signs of wear, in this case it is also better to replace the stabilizer struts.
Also, when diagnosing the chassis of a VAZ 2101-2107, it is worth paying attention to all threaded connections. They must be tightened, and if mating parts are replaced, bolts, cotter pins, pins, washers and nuts must be replaced.
It is worth inspecting all the anthers - if they have signs of wear - they have dried out, cracks or tears have appeared, traces of lubricant are visible - they must also be replaced. When replacing anthers, it is also necessary to change all clamps.
The gear shift lever in the VAZ 2107 is directly dependent on the gearbox, at the same time it helps to steer and switches gears.
This is not a particularly breakable gearbox part and rarely requires replacement. But it happens periodically. In this article we will show you how to remove the gear shift lever on a VAZ 2107.
A short summary
General structure of manual gearboxes on VAZ
The device of a 5-speed manual transmission Lada Priora, Kalina. General diagram of the gearbox.
New cable transmissions installed on car models with 16-valve engines have become much quieter even when braking the engine. They have reinforced synchronizers (which, however, cannot be called problem-free). They are capable, according to the passport data, of withstanding a torque of 160 Nm. In practice, they work properly even under much higher loads when the car engine is boosted.
You should not think that we are deliberately praising VAZ manual gearboxes; we only noted their well-deserved positive qualities. But, of course, they encounter problems during operation. Let us note the most common malfunctions, their causes and solutions.
Table of the most common malfunctions of VAZ manual gearboxes, as well as their elimination and repair
The most successful manual transmission on Ladas is considered to be the one installed on the Lada Vesta
A new level in the design of VAZ manual gearboxes for front-wheel drive cars has become the VAZ 21807 gearbox, this is a five-speed manual transmission installed on the Lada Vesta. It is considered one of the most successful manual transmissions, as it is reinforced and capable of holding high torque. Problems such as gearbox noise, rapid wear of bearings and gears, oil leaks from seals are not typical for this box, but knocking at idle sometimes occurs, although not on all copies, which is an amazing phenomenon.
It should also be noted that the VAZ 21809 manual transmission is installed on the Lada X-ray. It is as durable as the VAZ 21807, but in the operational practice of owners, oil seal leaks and difficulty in engaging reverse gear are often encountered.
Lada X-ray with manual transmission, which is also quite successful
Gear shift diagram for a 4-speed manual transmission used on VAZ 2101, 2102, 2103, 2104, 2105, 2106, 2107, Niva 2121
Small Summary
So, what can we ultimately say about manual transmissions on VAZs and Ladas? Probably the fact that they started out in the 70s with phenomenally high quality, then the 5-speed manual transmissions suffered a little in quality, which, of course, slightly upset the owners. But it’s also impossible not to note how VAZ figured out (well, almost figured out) many of the problems of its manual transmissions. Just look at the box of the Lada Vesta and its Sport version, with a boosted 140 horsepower engine, how wonderfully the box works with a torque of as much as 180 Nm!
All VAZ boxes are incredibly repairable; they can be restored from any condition, and this can be done for relatively little money. Another big question is the quality of spare parts for gearboxes on our market. Now we are talking not only about cheap analogues, but, unfortunately, also about factory spare parts.
Thank you for your attention to this article, we tried to collect a lot of useful information about the operation and repair of VAZ manual transmissions, problems and ways to solve them, as well as other information about VAZ gearboxes. We hope you found it interesting and found something useful and necessary for yourself! Source
Source
Where is
It is located in the car interior, below the dashboard, to the right of the driver (or to the left if the car is right-hand drive). It is used to change gears in the gearbox.
The shift lever is a reliable and stable part. But due to careless and careless use, it also breaks. If you suddenly begin to grab the control lever or press on it, then repairs cannot be avoided. Before you start replacing the VAZ 2107, you need to understand how to remove it from the box.
Common problems include rattling and loose handles. Let's call this the first stage. If you do not fix the problem immediately, you will have to completely replace the element in the future. This part, like others in the car, must be treated with care and calm. Don’t pull it, hurry up and press it into the “feeder”. If the gears do not shift smoothly and comfortably, then you probably did not press the clutch all the way, or there are problems with the gearbox. And you need to repair it, not the handle.
Instructions
- Place the VAZ 2107 car on stands.
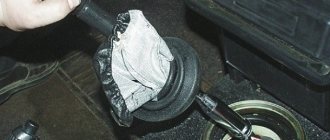
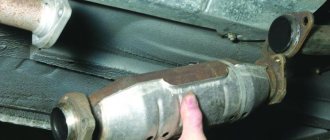
- Eliminate the exhaust system and remove the thermal protection valve.
- First remove the cover from the handle.
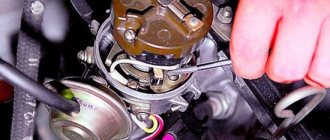
Removing the cover - Remove the retaining clip and washer. And take out the shift rod, it is located on the side.
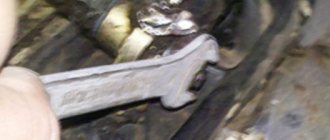
- Place a wrench at the bottom and turn it 90 degrees. Press out the spherical liner.
- Pull out the handle.
- Lubricate the liner with lubricant.
- Install the handle with the insert (the arrows should indicate the direction of the longitudinal axis).
- Press down on the liner from above. Secure it.
- Attach the cover so that the arrow points forward.
- Place the washers and insert the rod. Screw on the bracket.
- Replace the thermal protection valve, as well as the exhaust system.
- Secure the cover and put on the handle. Record the state.
Now you know how to make this replacement on a VAZ 2107. We hope that our article was useful. Let your car work long and well.
Installation of a short-stroke rocker for a VAZ 2107
The VAZ 2107 gear shift lever is used to enable the driver to control the car, which is possible using a gearbox. The gearbox, in turn, is a mechanism inside which there are gears of different diameters. This device is the link between the engine and the drive wheels of the car. For rear-wheel drive cars, which is the VAZ 2107, the manual transmission is typically located under the lever itself. To connect the lever to the gearbox, no additional link is required, as is typical for front-wheel drive car models. The VAZ 2107 rocker is presented in the form of a small half-bent tube onto which the gearshift lever itself is placed. In the material we will pay attention to the question of how to replace it, as well as the features of dismantling.
Short walker
Many people are still wondering whether it is worth changing their standard factory long-stroke linkage to a short-stroke one.
Short walker
Make your decision purely on the basis of individual reflections and do not “be fooled” by statements regarding a significant increase in dynamics with the transition to a short-stroke.
The real difference between short-stroke and long-stroke is shown in the table.
Backstage type
Peculiarities
Draw your own conclusions from here - do you need such a drawstring or not. There is nothing complicated in terms of replacement. The only question is the purchase.
Device location and characteristics
The gearshift lever of the VAZ 2107 is located directly in the car's interior. It is used to be able to change gears while moving. The gear lever fails only in rare cases, and the reason for this is negligence towards the product. If the product fails, it must be replaced. But before replacing, it is necessary to remove the product in question. We’ll find out in more detail how to remove it, as well as replace it on the “seven”.
On the “seven” the gear shift knob has a common problem - rattling and chattering. If you fix such a malfunction using improvised means, then replacing the device will not be necessary. Before you begin replacing the device, you will need to find out the exact causes of the malfunction. After all, sometimes not only the part in question can “fail,” but also the gearbox or clutch.
If you are convinced that it is the gearshift lever that is faulty, then only then should you start replacing it.
Replacement features
Before you begin the replacement, you need to stock up on tools such as wrenches and a screwdriver. We start with the following steps:
- Set the lever to neutral position.
- After this, you need to slide the top cover up. There is no need to completely remove the cover.
- The next step is to move the cover, which is located below, to the top. This cover is also called a thermal protection valve. In the photo below it is shown with a red arrow.
- Now you need to press the device, pushing it to the bottom. After this, you need to insert a screwdriver into the lower part of the product, where the plastic sleeve is located. The bushing is located at the very bottom of the device, as shown in the photo below.
- It is necessary to move the locking sleeve to the lower part, and then remove the product from the box.
- If the device emits strong vibrations, it needs to be replaced with a new one. In this case, you can exchange the part for a product of shorter length, as on foreign cars. A short device is much more comfortable to operate than a standard product.
Many motorists replace the standard gear shift levers with more modern ones, which allows them to uniquely customize the interior of the Seven.
After the standard product is dismantled, we install a new handle in its place. Let's look at what the installation is.
Installing the device on a VAZ 2107
After the standard mechanism has been removed, you will need to remove the rubber bushing from it, if it remains inside. To remove the bushing, you need to use a screwdriver or hook. By prying the sleeve, we remove it from the device, as shown in the photo above.
When choosing products for foreign cars, you should make sure that it can be reliably installed on the VAZ-2107. Otherwise, an incorrectly secured mechanism will lead to an emergency situation while driving.
The VAZ 2107 gearbox is a rather complex device, so its repair is usually entrusted to professional car mechanics. However, this is a feasible task for those who already have experience in repairing complex units. Therefore, knowledge about the structure and methods of repairing the VAZ 2107 gearbox will not be superfluous for owners of the “Seven”.
Repair
Regardless of what exactly you do with the rocker - repair, adjust or change, you will still need to disassemble this unit.
Disassembly is performed as follows.
- Remove the cover from your gear shift knob.
- Place the car on a pit, or raise the front end with a jack.
- Remove the front console. It is held in place by mounting bolts.
- Now remove the curtain itself. To fix it, AvtoVAZ used 6 bolts in the case of the VAZ 2110 model.
- When carrying out dismantling work, be sure to examine the condition of all elements.
- By bending the boot, you will gain access to the support, oil seal and cardan shaft.
Changing the boot
Now as for the repairs. There may be several recommendations in this regard, depending on the current state of the node and its components.
- At best, repairs will require the use of a repair kit for the backstage. It doesn't cost much.
- If the bushing is deformed, it will need to be replaced with a new one.
- Check the lever shaft bore for wear.
- Make sure there is no play in the driveshaft. Otherwise, a regular repair kit will no longer be enough, that is, a complete replacement of the entire backstage will be required.
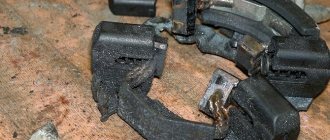
- Often the culprit of extraneous noise and rattling when shifting gears in gearboxes is the rocker pad. Changing it is quite simple, and even a beginner can perform the operation.
Removing and installing the gearbox lever VAZ 2101-07.
I created this video with the help of YouTube Video Editor ()
2) Then slide the upper cover of the lever to the top, but do not remove it, just leave it in the upper part.
3) Then, in the same way, move to the top but only the lower one, or as it is also called the main cover of the lever, and also leave it at the top, supporting it with your hand.
4) Next, pushing the lever to the very bottom, use a screwdriver to secure the locking sleeve.
Note! The bushing itself is not visible in the photo, but its approximate location is indicated by an arrow!
5) And then remove the locking sleeve from the lever, and at the same time remove the lever from the mechanism.
Note! If your shift lever emits strong vibration, then you don’t have to replace it with a new one at all, you just check the condition of the inner bushing, if you find that the bushing is deformed or very hardened, then replace it with a new one! (For information on how to remove this bushing, see the bottom of the article in the “For Beginners!” section)
Installation: 1) Installation of the new lever is carried out in the reverse order of removal.
For newbies! Question: How do I remove the inner bushing from the lever? Answer: Take a wire hook or a screwdriver in your hands, and use it to remove the bushing from the lever as shown in the figure:
Additional video clip: For more details on the process of removing and installing the lever, see the interesting video clip located just below:
1200 rub. for the photo report
We pay for photo reports on car repairs. Earnings from 10,000 rubles/month.
Write:
This photo report presents to your attention a detailed description of the assembly of a manual 5-speed gearbox of a new model VAZ car (Niva).
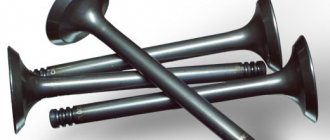
There will be no description of the defect, since a detailed inspection of the gears and bearings will make everything clear. The main attention will be paid to the synchronizer locking ring (popularly synchronized), as well as the gear shift fork.
The synchronizer blocking ring should not have a circular groove at the end where the teeth are (the presence of this fact indicates that the clutch reaches the synchronizer blocking ring with its teeth, which means the pair does not work with cones). A yellow coating should be present on the forks.
The photo shows a secondary shaft with a clutch hub and a third-fourth gear clutch installed on it; insert the third gear gear (all parts must be lubricated with transmission oil during installation).
Frequent defects
The defects listed below are most often found on VAZ 2107 cars. It is important to diagnose the fault in time and try to repair it.
Increased noise
Increased noise or howling of the gearbox is caused by bearings and synchronizers that are suitable for replacement. To find out whether a bearing needs to be changed, just look at it visually and twist it. The teeth of synchronizers often lick off, which results in gear shifting with a crunch.
Difficult gear shifting
After making sure that the clutch is in working condition, you need to look for the following reasons:
- the gearshift lever hinge is clogged (can be treated with regular cleaning);
- the gear shift fork is deformed (if the deformation is minor, it can be straightened);
- The sliding clutch and the shift fork rod are tight.
Knocks out gears
After completely disassembling the gearbox, it will be clearly clear why the gears were knocked out.
Finding the reasons for the transmission being knocked out.
There may be three reasons:
- wear of the blocking ring, coupling and synchronizer ring gear;
- loss of elasticity of the retainer spring;
- synchronizer spring failure.
In these cases, only complete replacement of parts helps.
Oil leak
Again, 3 reasons for this defect to appear:
- seals leak;
- the tightening of the cover bolts has become loose;
- gasket is damaged.
Gearbox VAZ 2107 (“5-mortar”) device
The gearbox is designed to transmit torque from the engine to the transmission. Depending on the position of the lever, it changes the torque of the crankshaft in magnitude and direction of rotation. The “five-speed” gearbox of the VAZ 2107, formally speaking, has six speeds - 5 forward and 5 reverse.
The VAZ 2107 gearbox (“5 mortar”) has a housing, inside of which there are:
- input shaft with 4 gears;
- secondary shaft with 10 gears;
- intermediate shaft.
- forks, joints and gear shift levers.
If the gearbox malfunctions, it must be dismantled and disassembled for repair.
Difficulty switching
The reasons for difficult gear shifting may be severe contamination of the lever linkage or jamming of the sliders.
In order to determine the cause of this malfunction, you need to take the shift lever housing and check if there is any jamming when the lever moves. If there is one, you need to establish the cause and eliminate it.
If the lever in the body moves without much effort, then the reason is in the sliders. After removing them from the gearbox housing, you need to carefully inspect them. Usually, in places where the sliders jam, marks remain in the form of abrasions and scratches.
Then you need to inspect the seats of the slides for the presence of particles that cause jamming. Alternatively, there may be a slight bend in the slider itself. In this case, the slider is replaced.
Removing the VAZ 2107 gearbox
To dismantle the VAZ 2107 manual transmission, you must perform the following steps:
- Place the machine on an overpass, pit, or lift it onto a lift.
- Disconnect ground from the battery. When using a lift, the battery should be disconnected before lifting the machine. Work inside the car also takes place with the lift lowered.
- Remove the beard (radio panel).
- Press the gearshift lever and use a screwdriver to remove the locking sleeve down from the cavity of the rod (handle).
- Remove the gearbox rod (handle) and use tweezers to remove the rubber damper bushing from it.
- Use screwdrivers to spread the petals of the damper spacer bushing and remove it, as well as the lower rubber and locking bushings from the lever.
- Unscrew the screws securing the cover that covers the hole in the floor of the car in the area where the gearshift lever exits.
- Remove the cover and foam seal.
- Go into a hole (under an overpass) or lift the car with a lift.
- Remove the exhaust pipe.
- Unscrew the starter from the clutch housing and move it forward.
- Unplug the reverse switch wire.
- Disconnect the speedometer drive.
After this, you can begin checking and repairing the VAZ 2107 (“5-mortar”) gearbox.
Installation of the box after repair is carried out in the reverse order.
How to remove the gearbox lever of a VAZ 2107, assemble it or replace it. Lever tuning.
When driving a car, the VAZ 2107 gear shift lever is needed in order to be able to vary the speed using the gearbox. Like any part of a car, it is susceptible to malfunctions, so this article is about how to remove the gearbox lever of a VAZ 2107 and, if necessary, repair or replace it.
The lever itself is a short segment coming out of the switching mechanism (in everyday life a rocker), and its continuation with a knob is called a rod. If it loosens too much, it can lead to difficult gear shifting or it may simply fly off the lever. Such consequences usually result when gear shifting is difficult for some reason, or the damper spacer sleeve has simply become loose over time, or the problem is in the rocker.
Location and device
The VAZ gearshift lever is located in the vehicle interior to the right of the driver. It is attached to the rocker arm using bushings. It does not break down often, but it still has to be removed in cases, for example, when the gearbox needs to be removed.
Lever and gear shift mechanism
How to dismantle the gearbox lever of a VAZ 2107
If you had problems with play in the bushings, then you need to purchase a repair kit for the VAZ 2107 gearbox handle in advance and after dismantling it.
Before starting work, prepare a screwdriver.
- Set the box to neutral.
- Slide the cover.
- Push the damper locking sleeve down with a screwdriver.
- Remove the rod with the knob.
- Remove the remaining bushings from it.
- Replace them in reverse order as shown in the picture.
Before reinstalling, fully assemble the rod and bushings, slide it onto the lever, and push down sharply to seat it in place.
If you need to completely replace the rocker, then add a 10mm wrench to the screwdriver (preferably a socket or socket):
- remove the decorative panel;
- unscrew the boot;
- use a 10mm key to unscrew the mechanism;
- remove it from the box.
After repair or replacement, assembly is performed in the reverse order.
The quality of bushing repair kits leaves much to be desired and the backlash of the rod remains quite large, so some, instead of plastic and rubber bushings, simply select a simple hose according to size and attach it to it.
Lever tuning
The gear lever is located on the “seven” somewhat poorly, some believe that it is too long, others stretch far, and a general remark when turning on the reverse gear is added to the main ones, that we hit our hand on the passenger’s knee.
Some select levers from foreign cars that are suitable in size and secure them. The second, and easiest, thing to do when upgrading the handle yourself is to simply make it shorter. To do this, the lever rod is sawed off to 5 - 7 cm in length and the thread is re-cut.
The most radical way of tuning is to move the lever closer to the driver and reduce its travel when changing gears. It looks, when brought to its logical conclusion, solidly.
Read more about this procedure on the website.
The above tuning of the lever makes the interior of your car unique, but do not forget about driving safety because the given examples have their pros and cons, and it’s up to you to decide whether to do them or not.
znatokvaz.ru
Reasons for replacement
There are several situations when the owner of a VAZ 2109 has or wants to get into the design of the gearbox and specifically work with the rocker:
- Oil is leaking due to a damaged rocker seal. It must be replaced;
- The old drawstring was out of order;
- I would like to exchange the long-stroke for a short-stroke in view of its advantages.
Now to the question of when replacing or repairing the backstage is a necessary measure.
- The backlash of the gearbox selector has increased significantly.
- Gears change with difficulty, and when changing speed, extraneous sounds appear.
- It is possible to change gears, but with a lot of effort.
- Speeds change incorrectly. Instead of one, a completely different one turns on.
- It is impossible to turn on all or part of the gears at all.
Even if the resulting play is still insignificant, it is advisable to immediately begin repairs or completely change the drawstring.
Replacing the oil seal
If you find that the oil in the gearbox is gradually disappearing, you can suspect the rocker seal. There is nothing else left to do but change the element.
- First, buy a new shift rod seal. It costs about 70-100 rubles.
- Drain the oil from the box, having prepared a clean container in advance. This is in case you refill the same oil. Although this is an excellent reason for you to change the transmission lubricant at the same time.
- To make sure the oil flows out better, first unscrew the filler plug or remove the speedometer gear. After draining the oil, screw the cap back on.
- We climb under the car and disconnect the fasteners of the gearbox lever driveshaft.
- Pull the boot off the cardan, unscrew the bolts securing it to the gearshift rod. Problematic fasteners that you will have to tinker with.
- After removing the cardan shaft, remove the rod boot.
- We remove the damaged oil seal using an awl or suitable available tools. The main thing here is the stock itself.
- We install a new one in place of the old oil seal and press it with a tube of the appropriate diameter.
- Put the boot back in place and rotate the driveshaft.
- Please note that the bolt securing the cardan to the rod is an adjustment bolt. Therefore, screw it in exactly the same way as before dismantling. Otherwise, some speeds may not turn on.
Oil seal
After the work done, do not forget to check the result.
Replacing the cardan
Practice shows that if problems arise with the slide, it is not at all necessary to completely change it.
Kardanchik
The instructions for replacing the cardan are as follows.
- Using two 13mm spanners, unscrew the clamp that relates to the speed switch drive rod.
- Pull the boot off with a screwdriver, moving towards the box. If you want, remove it completely. So it definitely won’t interfere with the repair process.
- Using a 10mm wrench, unscrew the fixing bolt on the cardan.
- Apply several gentle, not strong blows with a hammer to knock the cardholder off the shaft. Remove the boot to the side if you have not done so before.
- We replace the old cardan with a part from Kalina. It is more reliable, efficient and durable.
- For reassembly you will need the help of a friend. Do not rush to tighten the clamp immediately at the end.
- The assistant will set the position of the gearshift lever at the optimal points from inside the cabin. First you need to catch the center, then move the lever a little to the right while you tighten the clamps from below.
- Check if the gears engage well. If yes, then we continue assembling the unit and check the updated gearbox under real road conditions.
The experience of VAZ 2109 owners shows that when there are problems with the rocker, the essence often lies in an unsuccessful factory cardan. By replacing it with an analogue from Kalina, you will be able to get rid of discomfort and continue to confidently operate your car. By replacing the cardan shaft, the design of the gearbox will improve significantly.
Adjustment
After changing the link or cardan, you should definitely adjust the operation of the unit.
- Engage reverse gear, loosen the clamp tension.
- Set the gearbox selector to the position in which it should ideally be located when engaging reverse.
- Tighten the clamp back.
- A similar operation is performed with other speeds.
There are situations among VAZ 2109 owners when difficulties arise when engaging reverse gear. This is where adjustment can help.
- Set the gear lever to first gear;
- Loosen the rocker clamp;
- Turn the rocker drive counterclockwise;
- Turn the drive until the selector is pressed against the plastic stopper for the reverse gear. You will feel this without any problems;
- Resting against the stopper, tighten the clamp under the bottom. That's it, the adjustment is done.
Adjustment process