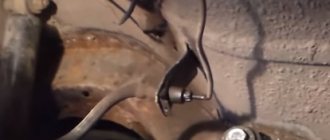
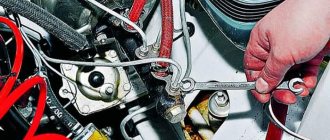
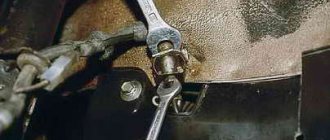
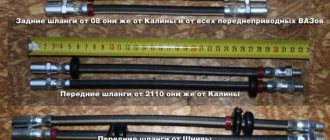
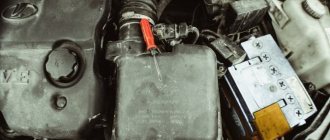
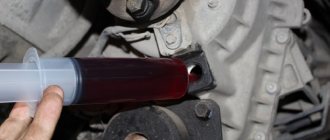
The weak link of the VAZ 2107 brake system is the rubber hoses connecting the metal liquid tubes to the working cylinders of the front and rear wheels. The pipes are bent many times during the operation of the car, which is why the rubber begins to crack and leak liquid. The problem cannot be ignored - over time, the level in the expansion tank will drop to a critical level and the brakes will simply fail. Replacing defective hoses on the “seven” is not difficult and is often performed by car enthusiasts in garage conditions.
- When to change hoses
Video: diagnostics of flexible brake pipes
- Video: how to distinguish counterfeit parts
- Installing the front hoses
Video: Tips for replacing front hoses
- Video: replacing the rear axle brake hose
Purpose of flexible pipes
The contours of the VAZ 2107 liquid brakes are made of metal tubes leading from the master cylinder (abbreviated as GTZ) to all wheels. It is impossible to connect these lines directly to the working cylinders, since the wheel brake mechanisms are constantly moving relative to the body - the chassis absorbs unevenness, and the front wheels also turn left and right.
The brake circuits of the "seven" use 3 flexible lines - two on the front wheels, one on the rear axle
To connect rigid tubes to the calipers, flexible connections are used - brake hoses made of moisture-resistant reinforced rubber. The “seven” has 3 pipes - two on the front wheels, the third supplies fluid to the brake pressure regulator of the rear axle. Short thin hoses between the expansion tank and the gas turbine engine do not count - they do not have high pressure, spare parts rarely become unusable.
Flexible eyeliner consists of 3 elements:
- Textile fiber reinforced flexible hose.
- A steel fitting with an internal thread is pressed onto one end of the pipe, into which a mating sleeve of the metal tube is screwed. There is a groove on the outside of the tip for fixing the element to the car body with a special washer.
- The shape of the second fitting depends on the purpose of the hose. To connect to the front mechanisms, an eye with a hole for a bolt (the so-called banjo fitting) is used; on the rear contour there is a conical tip with a thread.
The front brake circuit pipe is equipped with a banjo fitting for an M10 bolt
The first end of the hose, connecting to the circuit tube, is always attached with a fixing bracket to a special bracket on the body. On the rear axle the second tip remains free, on the front wheels it is additionally fixed to the calipers with overhead brackets. To prevent liquid from seeping through the threaded connection, 2 copper sealing washers are put on the bolt.
A cone with an external thread is screwed into the tee, the second end of the rear hose is connected to a metal tube
Please note: the hose eyelet for the front wheels is made at an angle relative to the longitudinal axis of the pipe, as shown in the drawing.
The eye of the outer tip must be adjacent to the plane of the brake caliper at an angle
Do-it-yourself replacement of VAZ brake pipes
The brake system appeared on the first cars. Its presence has become the key to the safety of the driver and passengers. The first brake system did not have a complex mechanism of action and consisted of several mechanical parts that created the necessary friction on the wheel drive for its subsequent stopping.
The second stage in the development of the braking system was the application of the laws of hydraulics. With this method of braking, the interaction between the brake pedal and the working parts of the brake system is carried out using a special fluid called “brake fluid” (or abbreviated as TF). Brake fluid allows you to stop your vehicle more efficiently. In addition, the use of brake fluid softened the pressure on the brake pedal and made driving more comfortable.
For successful circulation of brake fluid from the brake drive system to the working parts, it is carried out through special pipes. Initially, they were made in the form of hoses, but since they were unreliable, they were replaced by another material.
Design and principle of operation of brake pipes
The car is braked by pressing the brake pedal. The pedal lever acts on a vacuum or any other booster, which creates the necessary pressure on the brake fluid. The liquid compresses and goes into a zone where this pressure is minimal. It enters the brake pipes, through which it is directed to the working parts of the brake system. The fluid puts pressure on the brake pads, causing them to compress. When you release pressure on the brake pedal, the pressure in the booster decreases, and the spring drive of the brake pads unclenches them and sends the fluid back to the booster (the area of least pressure).
The passage of liquid is carried out through tubes made of metal. The tubes extend from the vacuum booster and are laid under the car to the working parts of the brake system. The joints of the tubes are made in the form of threaded connections, which makes it possible to achieve maximum reliability when creating high pressure in the system.
To increase the reliability of the braking system, the pipes are connected diagonally, which allows the brakes to be used if one of the lines fails. So, for example, from the vacuum booster, one tube connects the working part of the brakes of the front left and rear right wheels, and the second tube directs the brake fluid to the front right and rear left wheels. At the junction of all four pipes, a special pressure regulator is installed, which filters out excess pressure from the system so that it does not cause a breakthrough in the lines.
Main malfunctions of the brake line system
Brake pipe malfunctions include:
1. The presence of cracks in the brake pipes and any other external defects.
2. Poor tightness of their connection, as a result of which leakage of fuel fluid may be observed.
3. Fractures and broken tubes.
If any of the above malfunctions are present, it is necessary to immediately repair the brake pipes or replace them.
How to repair brake pipes
This process requires the car enthusiast to have extensive locksmith skills and the ability to use special tools. Repairs are carried out in cases where it is not possible to replace the damaged line; it involves saving money on the purchase of a new pipe system and extends the service life of the old one.
To carry out repairs you must:
1. Unscrew the damaged tube from the cylinder or brake caliper.
2. After disconnecting, it is necessary to cut off the damaged area using a pipe cutter.
3. Clamp the tube 50 millimeters from the edge of the cut and chamfer the edge of the tube using a drill.
4. Remove all that remains of the chips and insert a fitting intended for connecting the tube to the brake operating mechanism into the cut area.
5. Insert the end of the tube into the special equipment and flare it. The main line that has undergone repairs must be purged with compressed air. And only after this is it installed with a working mechanism or another pipeline system using an adapter.
As for the length of the tube, this parameter depends on the car model. On some cars, the brake pipes have a reserve that allows you to shorten the pipe and reconnect it to the working mechanism. The metal from which the brake tube is made is flexible, so there should not be any difficulties with its position.
Video - Replacing the main brake pipe of a VAZ 2106
Replacement of front brake tubes
To replace the front brake hoses, it is necessary to place the car in a pit and prevent any movement. Then:
1. Unscrew the line fitting. Hold the hose with a wrench to prevent it from turning.
2. Unscrew the brake pipe from the car body. Typically, they are covered with rust, so it is necessary to treat them with WD-40.
3. Unscrew the other end of the fitting from the brake cylinder or pressure regulator.
4. Install a new brake pipe and reassemble all components in the reverse order.
After repair work or replacement, it is necessary to fill in the brake fluid and bleed the brakes. Bleeding is mandatory and is needed to squeeze out air bubbles from the car’s brake system.
It is worth noting that in some cars, in order to remove the brake pipes, it is necessary to remove other elements, such as the gas tank. The fact is that the design of many models provides for the passage of brake pipes over these elements and their dismantling is possible only when the latter are removed.
As for the engine compartment, usually everything is quite simple and getting to such elements as the brake pipe is not difficult.
This completes the replacement of the brake pipes. As you guessed, this procedure is not at all complicated and does not require special knowledge and skills from the driver. The only thing that is needed when performing repair work is adherence to a clear sequence of actions and increased responsibility. Because the life and health of passengers and the driver depend on the correct operation of the braking system. Good luck on the roads!
vipwash.ru
When to change hoses
The service life of brake rubber pipes is about 3 years if the car is used regularly. A poor-quality hose may leak after six months or 2-3 thousand kilometers, or even earlier.
In order not to lose the brakes while driving and not become the culprit of an accident, the owner of the “seven” must constantly monitor the technical condition of the flexible hoses and immediately change them if the following signs are detected:
- when many small cracks appear, indicating critical wear of the rubber shell;
- in case of detection of wet liquid stains, which most often appear near the very tips;
Most often, the pipe breaks near the tip, and fluid literally floods the steering rod - in case of mechanical damage and rupture of the pipe;
All the liquid can leak out through a through hole in the pipe, which is noticeable by a decrease in the level in the expansion tank - a decrease in the level in the expansion tank is another reason to check the integrity of all connections;
- It is also recommended to replace the hoses after purchasing a used car.
To identify cracks, the pipe must be bent by hand, otherwise defects may go unnoticed. A friend of mine discovered a fistula in the hose in this way, and quite by accident - he was about to change the upper ball joint, while disassembling it, he touched a rubber tube with his hand, and brake fluid flowed from there. Until then, the hose and surrounding undercarriage components remained dry.
To identify cracks in the rubber part, the hose must be bent by hand
If you ignore the above signs and drive further, the flexible line will break completely. Consequences: the fluid will quickly leak out of the circuit, the pressure in the system will drop sharply, and the brake pedal will fall to the floor when pressed. To minimize the risk of a collision in the event of a brake system failure, take the following steps promptly:
- The main thing is don’t get lost and don’t panic. Remember what you were taught in driving school.
- Pull the handbrake lever to the maximum - the cable mechanism operates independently of the main fluid system.
- Stop the engine without pressing the clutch pedal or changing the current gear.
- At the same time, monitor the road situation and use the steering wheel, trying to avoid collisions with other road users or pedestrians.
The advice regarding turning off the engine is only suitable for Zhiguli cars of the VAZ 2101-07 series, which are not equipped with hydraulic or electric power steering. In modern cars, you should not turn off the engine - the steering wheel will instantly become heavy.
Video: diagnostics of flexible brake pipes
Replacing brake hoses on VAZ 2110, VAZ 2111, VAZ 2112
Welcome! Brake hoses - they usually last for a long time, if they are made of good rubber and were not kinked anywhere during installation, they can become unusable for two reasons, namely because of age and because of mileage, with a large During the mileage, the hoses are subject to stress, in the sense that they are constantly moving, and leaving the car standing for a long time is also not good, the rubber will harden on the hoses and then they will simply crack when the car starts to be used again, so the hoses need to be promptly replaced with new ones. Do not let them get to the point where cracks appear.
Note! To change the brake hoses, you will need tools, namely: Special. a key with which to bleed the wheels (its full name: Special key for brake pipe fittings), in addition, you will need wrenches and stock up on screwdrivers just in case!
Summary:
Where are the brake hoses? On front-wheel drive cars, two brake hoses are used in the front and two brake hoses in the rear, in the front they are easy to find and convenient to change, but to replace the hoses in the rear, you need to crawl under the car (It is best to use the inspection hole in in this case, use it) and then unscrew all the nuts that secure them, in order to see the hoses in the front part and replace them, it will be enough to just take off the wheels (see top photo) to find the hoses in the rear part, climb under the car as we already did They said they would have to, but for more details about where they are in the back, look at the photos below.
When do you need to change brake hoses? Once a year or just when you have to remove the front wheels, you need to look at the condition of the brake hoses, but if you suddenly had to crawl under the car, take a look at the same rear hoses, because there is no certain mileage that would indicate that when the hoses need to be replaced, the manufacturer actually recommends changing them after 125,000 km or after 5 years of operation, but this is already mandatory, but they can become unusable much faster, which is why we say look at them at the first opportunity, and if If the following are found on the brake hoses: Swelling, severe abrasions, cracks, or even worse, delamination of the rubber on the hose, then such hoses must be immediately replaced.
How to replace brake hoses on a VAZ 2110-VAZ 2112?
Note! Before starting repairs, be sure to fill the brake reservoir to the MAX mark and monitor the fluid level, do not let it drop below the MIN mark, otherwise air will get into the brake system and they will need to be bled (And the brake hoses can be replaced without bleeding the system)!
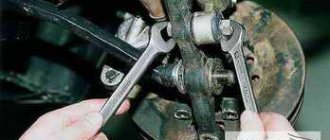
Removal: 1) Both in the rear and in the front, the hoses are removed almost identically, but let’s start with the front hoses, to replace them, you will first need to remove the wheel from the side on which you are going to change the hose and then unscrew the brake brake from above hose where it is attached to the brake pipe (This place is indicated in the photo with a red arrow, the brake hose is unscrewed from the brake pipe as follows: WD-40 is sprayed at the junction of the hose and pipe, then the hose nut is grabbed with a wrench, and the fitting is unscrewed with a special wrench, see the small photo for more details), when the hose is unscrewed and disconnected, brake fluid will immediately flow from the brake pipe fitting, so that it does not leak out, close this fitting with a bleeder cap, the hose can be unscrewed into the lower part simply using one key (Attachment location hose is indicated by a blue arrow), when the hose is unscrewed from below, remove the copper sealing washer; it must be replaced with a new one.
Note! If, while unscrewing the brake hose at the top, you realize that it is very soured to the brake pipe (This is very easy to understand, the brake pipe fitting will spin together with the brake hose when you try to unscrew it), then in this case the brake pipe should be replaced with a new one and by the way, it may still burst (If the car is old and the brake system has not been touched for a long time), it still turns sour over time and such situations often happen, so we recommend initially stocking up on brake pipes so as not to run to the car store for them , especially since they cost mere pennies!
2) Let's talk about replacing the rear hoses, the procedure is the same, so there will be no description of what and how (Everything has already been described in detail in paragraph 1), in general, the rear brake hoses are attached in the same way to the brake pipes in order to disconnect them, You will need to first spray WD-40 on the connections, then, while holding the hose from turning, unscrew the special fitting. key (see photo 1) and immediately plug it with the cap from the bleeder fitting so that liquid does not come out of the tube (see photo 2), in the same way the brake pipe is disconnected from the other end, as is the case with the front hoses, the rear ones are not attached to the caliper, but only to the brake pipes are screwed and therefore they are disconnected identically at both ends.
Installation: Installation of the brake hoses is carried out in the reverse order, while all the sealing washers are replaced with new ones, in addition, do not allow the brake hoses to twist, for this purpose a colored stripe is applied to them, this can be used to determine when the hose is twisted, and that’s it, bleed brakes on a car (How to bleed brakes, read the article: “Bleeding brakes on cars”).
Additional video: You can clearly see the process of replacing brake hoses in the video below:
Post tags:
auto-repair.rapidly.ru
Which spare parts are better
The main problem when choosing brake hoses is the saturation of the market with counterfeit parts of low quality. Such eyeliners do not last long, quickly become covered with cracks or begin to leak near the pressed tips literally a week after installation. How to choose the right rubber pipes:
- Do not buy cheap hoses without packaging, sold individually. Usually the front tubes come in pairs.
- Carefully examine the metal surfaces of the fastening fittings - there should be no traces of rough machining on them - nicks, grooves from a cutter and similar defects.
- Examine the markings on the rubber tube. As a rule, the manufacturer puts its logo and indicates the product catalog number, which matches the inscription on the packaging. Some hieroglyphs clearly indicate the origin of the spare part - China.
- Try stretching the pipe. If the rubber stretches like a hand expander, refrain from purchasing it. Factory hoses are quite stiff and difficult to stretch.
The inscriptions on the paper insert must correspond to the markings of the nozzles
An additional sign of a quality product is 2 pressing contours instead of one. Counterfeit pipes are not made with such care.
Trusted brands that produce brake pipes of decent quality:
- BRT - Balakovo Rubber Products Plant;
- DAAZ - Dimitrovgrad aggregate;
- KRAFTTECH;
- Fenox.
The embossed logo and inscription on BRT products are molded along with the rubber shell
Hoses from the Balakovo plant are considered original. The parts are sold in transparent packaging with a hologram, the marking is in relief (molded along with the rubber product), and not a colored inscription with paint.
Copper washers serve to seal the bolted connection; overhead brackets additionally secure the ends of the pipes
Along with a set of front pipes, it is worth buying 4 new O-rings made of copper 1.5 mm thick, since the old ones are probably flattened from strong tightening. It also doesn’t hurt to make sure there are fixing brackets screwed to the calipers - many drivers don’t bother installing them.
Video: how to distinguish counterfeit parts
About bleeding the brakes
To carry out the operation in the traditional way, you will need the services of an assistant. Its job is to press and hold the brake pedal repeatedly while you bleed air through the fittings on each wheel. The procedure is repeated until there are no air bubbles left in the transparent tube connected to the fitting.
To bleed the brakes, a transparent tube directed into a bottle is connected to the caliper fitting.
Before pumping, do not forget to add fluid to the reservoir. Waste material with air bubbles that you have drained from the brake mechanisms cannot be reused.
To bleed the brakes without an assistant, you need to have a mini-compressor for inflating tires and make a fitting - an adapter in the form of an expansion tank plug. The supercharger is connected to the spool and pumps up a pressure of 1 bar, simulating pressing the brake pedal. Your task is to loosen the fittings, release air and add new fluid.
The integrity of the brake hoses must be constantly monitored, especially when the elements are well worn. If you notice a network of small cracks or a tear with protruding textiles, purchase and install a new pipe. Spare parts do not have to be replaced in pairs; hoses can be installed individually.
Replacing Brake Fluid - Brake Hoses and Tubes
You will need: an “8” wrench, a flexible tube, a container for collecting brake fluid.
WARNINGS
1. Take precautions when working with brake fluid: it is toxic. If brake fluid comes into contact with wires, plastic or painted body parts, they may be damaged. Therefore, always use clean rags when pouring. If liquid gets on parts, wipe them immediately with a clean cloth.
2. Use only brake fluid recommended by the manufacturer.
3. Do not reuse the fluid drained from the system: it is contaminated, saturated with air and moisture. Always add only new fluid to the system of the brand that was filled before.
4. Brake fluid is hygroscopic (absorbs moisture from the surrounding air), so it cannot be stored in open containers.
1. Unscrew the master cylinder reservoir cap and place it on a clean cloth. Be careful: brake fluid may drip from the float.
2. If the rear wheels are suspended, first unlock the rear brake pressure regulator by inserting a screwdriver between the plate and the piston. Don't forget to remove it after finishing work.
3. Clean the air release valve of the right rear brake mechanism from dirt. Remove the rubber protective cap from the valve. Place a rubber hose (it is recommended to use a transparent hose to see the condition of the fluid flowing out) onto the valve fitting and immerse the end of the hose in a clean transparent container.
4. An assistant should sharply press the brake pedal 4–5 times (with an interval of 1–2 s between presses). After the last swing you need to keep the pedal pressed.
5. Unscrew the air release valve 1/2–3/4 turn. Old (dirty) brake fluid will begin to flow out of the hose. In this case, the brake pedal should smoothly reach the stop. As soon as the fluid stops flowing, close the air release valve.
6. Constantly monitor the fluid level in the reservoir, not allowing it to drop below the “MIN” mark, and if necessary, add new brake fluid. Repeat steps 4 and 5 until new (clean) brake fluid begins to flow out of the hose.
7. In the same way, replace the brake fluid in the left front brake mechanism, and then in the second circuit (first in the left rear brake mechanism, then in the right front).
8. Press the brake pedal several times. In this case, the pedal stroke and resistance should be constant with each press. If these conditions are not met, it means that air has entered the brake system and it needs to be bled (see “Bleeding the brake system”).
9. After replacing the brake fluid, be sure to put the protective caps on the air release valves.
10. Add brake fluid to the reservoir up to the “MAX” mark and screw on the cap.
vaz-omg.ru
