Purpose
Color marks are also drawn in a certain place where there is a filler in the form of a porous rubber rod. The insert in the body of the seal is necessary so that when installing it in the door opening, it does not break and become deformed in the corner of the opening, where the transition is not so smooth.
Thanks to the insert, the product becomes level without breaking, which guarantees a tight fit in this area of the opening, which provides a reliable seal.
Differences
An ordinary, cheap sealant has no filler, and therefore there are no color marks. They are mounted on any side of the doors, both left and right. Ask salespeople at your auto store for universal door seals. They also fit on front or rear doors. The only thing you need is to cut off the excess part at the junction with a margin. Rubber sags over time.
Removal
When you have purchased the required number of seals, you can begin to work.
The first step is to remove the old rubber elements, after which the installation of new parts begins.
Let's tell you more about the dismantling procedure.
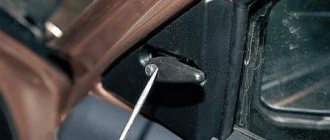
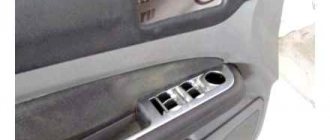
- Remove the plastic trim panels installed on your vehicle's door sills. To do this you will need a thick screwdriver. Remove carefully, being careful not to damage the plastic caps. But it’s better to buy new ones in advance if you can’t carefully dismantle the threshold.
- Now remove the old pieces of rubber from the seats. Simply tear off the sections that are torn off by hand.
- Remaining rubber can be cleaned off with any available tool. Only be careful with sharp objects so as not to damage the metal and paint layer.
- Very small residues and traces of glue are removed using solvents. Make sure that the solvent you choose will not damage your paintwork.
- Go over the doorway with a vacuum cleaner, remove all dust and dirt. Take special care to clean the bottom part. If wet cleaning was used, wait until everything is thoroughly dry.
Upcoming work
Installation
This process cannot be called complicated. You are not required to have any special training or extensive experience. Although you should at least be able to handle glue.
Working with the back door
Each stage is performed consistently and carefully to achieve the desired result and create comfort inside the cabin.
- Even if you have already measured the required length of the seals for your doors, we advise you to do it again. Anything can happen.
- Cut the required length, plus leave a couple of centimeters of reserve. Although if we are talking about a ready-made set of rubber bands, you won’t have to cut or leave anything. Skip the first two points.
- Insert a tube made of silicone or polymer inside the sealing tape. They are sold everywhere, so there should be no problems finding them.
- The length of the tube must match the length of the rubber. This tube will serve to create the necessary elasticity and allow the elastic to press more tightly to the door. This way, ventilation gaps will not appear, and the cabin will become much quieter.
- A shaped side rubber seal is glued to the bottom.
- If the tape is solid, you can start putting it on from either side, as is more convenient for you.
- If it is a measuring rubber band, then start from a point between the door overhangs, or 30 centimeters from the bottom of the threshold. Moving up or down is a personal choice for each master. There is no difference here.
- Push the figured profile all the way down. To do this you will need a rubber or wooden hammer. He's a mallet.
- When the seal is installed around the entire perimeter, an extra piece will be revealed. Cut the tube straight and end-to-end, and make the elastic itself seem slightly deformed. It's like you tore it off by hand. This will avoid the unpleasant phenomenon of siphoning through the joint.
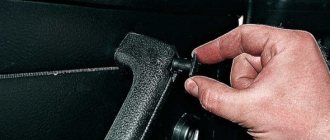
- Replace the pistons; if some were damaged during removal, replace them with new, intact ones.
- Replace the plastic cladding removed from the threshold.
- The second contour of the seal is glued along the edges carefully, but as tightly as possible, after which time is given for the glue to dry completely.
Almost immediately you will feel the difference between the old and new seal. This is a useful exercise that allows you to get rid of unpleasant sounds, knocking, whistling and cold air flowing directly onto your feet.
Door seals VAZ 2110
When developing domestic cars, due attention was not paid to their comfort; extraneous sounds are often heard in the cabin and moisture leaks are possible during precipitation. By replacing the door seals of the VAZ 2110 and slightly modifying them, you can achieve better sound insulation performance. Serial rubber products intended for sealing the interior, as a rule, are not of high quality. Often the problem arises not only with the double-circuit seals of the doors themselves, but also of the lowered side windows. This is due to the low quality of polymer materials and rubber from which these elements are made. Errors during their installation on the conveyor, as well as deformation during prolonged and intensive use, are also possible. The work of restoring the tightness of the interior is simple and will not require much time even for an untrained worker.
Some information about the design of the body as a whole and the doors of the VAZ 2110
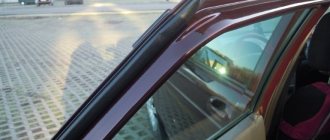
Unlike previous models of the Volzhsky car, there is no drain protruding above the doors. This makes the car more attractive and modern, but raises a number of problems associated with the need for better insulation of the interior volume from external adverse influences.
Implementation of a set of measures to restore the tightness of doors
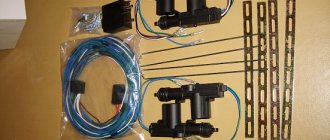
As experience in operating machines of the “tenth” series shows, the rubber elements used are not very reliable and require additional refinement. The official repair instructions provide for the replacement of these parts when deformations and damage occur. Most often, such phenomena are observed in the lower part at the threshold. To perform the operations you will need the following spare parts, tools and accessories:
- three-chamber seal with a fixing insert made of steel strip,
- disposable pistons for fixing elements,
- silicone or polyurethane tube with a diameter of 8 mm,
- screwdriver with flat and figured slots,
- shaped self-adhesive profile gasket.
You can purchase everything you need at any automotive spare parts store; nowadays you can choose between products from different companies. Seals are mainly sold by the meter or in ready-made kits. Before going to the store, you should measure the length of the openings of the front and rear doors of the car, and buy the required quantity.
Replacing the sealing element on a VAZ 2110
Preparation for interior sealing work
The front and rear doors of the VAZ 2110 have a similar design of the points of contact with the openings and, for the purpose of unification, they use the same sealing rubber profiles. Before starting repair work, you should prepare all the necessary materials and accessories . The order of preparatory operations is as follows:
- We clean the doorway from dirt, especially in its lower part; this can be done using water and detergent or dry using a stiff polymer brush.
- Using a flat-head screwdriver, remove the plastic facing panel from the threshold; perform this action carefully so as not to accidentally break the fastening caps.
- We dismantle the old seal, simply removing it from its expired place using improvised means.
- We repeat the operation to remove dirt and debris, which invariably accumulates in hidden cavities during intensive use of the machine.
- The shaped side sealing element is glued, and it should be removed as carefully as possible without damaging the paint layer.
- Degreasing of expired areas is carried out using special solvents that do not harm coatings.
The working surfaces are prepared, and you can begin to perform the basic operations of installing the seal. These are fairly simple actions, but they also require a certain skill. If you are not confident in your abilities, then you can entrust their implementation to professional craftsmen. You can watch the video and try to do the work shown on your own.
Installation of sealing elements
First of all, you need to perform a few simple steps to modify the standard seal. As already mentioned, factory parts have a short lifespan and quickly deform. Introduction of an additional shock-absorbing part into the cavity. The sequence of work is as follows:
- Using a tape measure, measure the length of the seat and cut off the required amount of seal with a small margin.
- We insert a polymer tube inside along the entire length without tension and also cut off the excess. This element will give greater elasticity to the structure.
- We begin to put the seal on the edge from the starting point, which should be located 25-35 cm from the bottom of the threshold. Installation can be carried out either clockwise or in the opposite direction.
- We push the figured profile down using a wooden or rubber hammer until it stops. Having walked around the entire circle, we will see that part of the seal turns out to be redundant.
- We cut off the unnecessary remainder so that the joint is without a gap and at the same time causes deformation of the adjacent areas.
- We install the piston in place and mount the plastic lining in place.
- The second contour is glued along the edge of the door. We carry out this action with all possible care so as not to have any peeling or irregularities in shape.
The installation is completed and if it is done correctly, then when the doors are closed, a change in the nature of the sound is noted, it becomes more dull. In addition, metallic knocking in locks and aerodynamic noise when driving at high speeds disappear.
Advice: As practice shows, VAZ spare parts with such an improvement provide reliable sealing of the interior.
Additional door seals for VAZ 2110
Door seals have a significant effect on the sound insulation of a car. To eliminate wind noise in the cabin, you can modify the door seals or install additional ones. In this article we will talk about an additional set of seals.
Everyone knows what the gaps between the doors of foreign cars are, 1mm-2mm maximum. On my 11th, the gaps in some places reach 5mm. On the Internet you will find many ways to modify the door seals of the VAZ 2110, or maybe try installing additional ones? To reduce wind noise in the cabin, you can install additional door seals made of various materials. The first way is using Flex.
Flex or K-FLEX - the tube is used in many industries, I found it at an air conditioning service and sales store. Flex can be secured with glue (for example, Moment), or with double-sided tape. In both cases, the tube is held quite tightly. The only thing you need to do is degrease the surface.
I ran one Flex tube along the top, starting from the bottom of the windshield and ending with the back door. I laid it along the edge of the back door. You can clearly see how the flex runs along the top of the rear door and then down along the contour. Between the doors I glued it to the post from the top to the door lock. to glue an additional seal on the door , because when opening/closing the door, you will hook it with your hand and sooner or later it will come off. The first door closures will be tight, but after a day the flex will take the form of effort when closing the doors and no longer will be required.
Another option is to replace the standard door seals of the VAZ 2110 with seals from Priora . The fact is that the Priora door seal has 2 chambers, which has a positive effect on the tightness effect. I changed the factory door seals only on the front doors, and left the rear ones with the factory ones, because... The flex fits very tightly there.
I’ll show you in the picture how you can do it: Red color - how I currently have flex glued on (everything is attached to the body). The blue color is the door seal from Priora. Green color is an option to stick a rubber seal (for example from 9ki) on the door. This way the vertical cracks will be completely closed. I didn’t do this modification myself.
The effect after installing additional door seals on a VAZ 2110: I noticed the effect immediately, even very large . Especially when the entire car is soundproofed and additional seals are installed, the cabin has become more comfortable. There is almost no noise, there is no wind in the car, therefore there is less dust and smell from outside. Considering the very low price of the material, minimal time investment (30 minutes) and a very positive effect, I advise you to do this modification first. After a year of using this seal, I can say that weather conditions do not affect it in any way, it is in excellent condition.
RESULTS for modifying the door seals of the VAZ 2110 doors: Material spent: Flex (on both sides of the car) - about 7 m.
Time spent: No more than 1 hour.
Additional seal between the doors of the VAZ 2110 close the gaps between the doors of the car in one of the following ways: Option 1 .
Door seals Don't waste your time - just go to YPAG.RUypag.ru Option 2 .
Option 3 . During installation I used 3m tape 6mm and primer 3m 94. It glues once, there is no second time. Door seal from VAZ 2108. Cut off the reinforced part and glue the part with a thin tube to the door. Be sure to treat it with a primer, it works like a primer, once you stick it, you can’t tear it off. The operation should only be carried out with the door removed, otherwise it can be screwed up. You take a friend, 2 wheels, put it under the front door, open it and lean the door against the body. The wires are in place. Fast and convenient. The first time I did it without taking off, “0′” emotions, only mother.
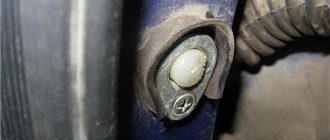
Option 4 . You will need a gasket from GAZ (some kind). The peculiarity here is that the place marked with a red corner is ideally glued behind these two planes into the rear door niche. In this case, the seal seems to turn out towards the front door being closed (overlaid), and the edge of the door itself miraculously neatly fits into the opening indicated by the vertical red line in the seal.
This time I used gray polyurethane sealant, although it was necessary to use black so that it would not be visible
Now it is very decently damped, although for a good fit when closing the doors it is necessary to trim the top and bottom of the seal. On the front doors I left it unchanged - it’s very narrow there and the specificity of the gaps is such that you can’t insert anything thicker there so that it would hold securely.
Additional seal at the bottom of the VAZ 2110 door. The thin tube that remains with the reinforced part fits very well, like original, on the side of the threshold. From the inside it does not close, but only slightly, cosmetically, covers the holes of the water drains from the doors, although when the door is closed it can block, cutting through is not a problem. If I'm not mistaken, then on cars before 2003. The lower door seal came from the factory (my VAZ 2111 2002 has it). Many people write that the seal at the bottom of the door collects moisture and dirt, which quickly causes rust. I can say by the example of my car, I have this seal and no rust has appeared under the rubber yet. By the way, it is not necessary to use all these rubber seals; you can modify the standard door seals.