It is quite possible to replace the handbrake cable on a VAZ 2107 yourself. The serviceability of this device is the key to safety, so it should not be neglected. To replace the cable on the “seven”, you will need to purchase a new part, and then perform the procedure in accordance with the algorithm that will be described in this material.
Replacing the handbrake cable on a VAZ 2107. No service stations. Do it yourself
The work that owners of the same model have to periodically carry out is replacing the handbrake cable on a VAZ 2107. This manipulation is quite simple - if you first understand the design of the handbrake, the characteristic features of the fastenings, etc. But first of all, you need to find out in what cases it is carried out .
The reasons for the repair are intuitively clear: in cases where the handbrake does not perform its functions (does not “hold” the car in the parking position); if a cable break or severe deformation (stretching) is detected. Replacing the handbrake cable on a VAZ 2107 can be done at a car service center - quite quickly and professionally, but due to the simplicity of the procedure, you can do it yourself
. Additional information:
The cost of the part varies between 300-400 rubles. It is recommended to purchase from trustworthy sellers: low-quality cables (that is, made of low-quality material with poor manufacturing technology) usually do not last long.
Required tools: pliers, wrenches, pliers.
Dismantling
- First you need to remove the brake drums - on both sides. The next step is to disconnect the right rear brake pad. The cable tip is removed from it, and then the block itself is removed from the brake shield;
- It is necessary to immediately warn novice repairmen: the front brake pad cannot be removed;
- in a similar way
, after which the lock nut should be loosened. To prevent it from turning, use a second key to fix the adjusting nut. Then, fixing the tip with pliers, unscrew both nuts; - We remove the spring hook from the tip using pliers. Fixing the tip with pliers, remove the spacer sleeve and lock nut from it;
- We remove the guide, then unscrew the nuts that secure the bracket to the body;
- Remove the bracket. Pull out the cable from the bracket mount, unscrew the bolts securing the tip (they are located on the brake shield);
- At the final stage,
we remove the tip of the shell from the brake shield. Disconnecting the left branch of the cable, located on the corresponding side of the machine, is carried out in a similar way.
Installation
Installation of the new part is carried out in the reverse order, after which adjustment is made.
Some useful tips
, which will be useful to those who are doing this work for the first time:
- the sheath of the new cable should be located above the longitudinal rod;
- The cable branches - right and left - are not identical. There is a rubber tube on the sheath of the right branch, but not on the left;
- Before installing the cable, it is necessary to replace the brake pads.
Cable adjustment procedure
The lever is lowered to its lowest position, the lock nut is loosened
. Holding the end of the cable, we adjust (tighten or loosen - determined experimentally) the corresponding nut.
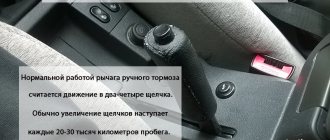
We tighten the locknut, and then check the operation: normal operation of the handbrake is guaranteed if the number of clicks does not exceed 4. A larger number indicates insufficient cable tension; the adjustment procedure should be repeated.
Needless to say, all of the above operations are performed in the inspection pit
, overpass or lift for easy access to the units.
As you can see, replacing the handbrake cable on a VAZ 2107 is a fairly responsible process that requires precision and attention. Those who do this work for the first time may encounter difficulties (mainly regarding the location of individual components and mechanisms). Some practice will provide beginners with the necessary experience - after performing the manipulations even just once, they will be armed with the knowledge of how to fix the problem themselves.
disassembling and assembling the hand brake of a VAZ 2107
We replace the handbrake cables on a VAZ 2107 car if adjustment is impossible due to their stretching or mechanical damage.
Removing the rear hand brake cable from a VAZ 2107 car
1. We install the VAZ 2107 car on an inspection hole or overpass (see “Preparation of the VAZ 2107 car for maintenance and repair”).
2. Use round nose pliers or pliers to disconnect the release spring from the body bracket of the VAZ 2107 car and the tip of the front hand brake cable. 3. Remove the tension spring.
4. Use a 13 mm wrench to unscrew the lock nut, holding the adjusting nut with a wrench of the same size. 5. Holding the tip of the front handbrake cable with pliers, use a 13 mm wrench to unscrew the adjusting nut and remove it together with the spacer sleeve. 6. Remove the rear handbrake cable guide from the front end and disconnect it from the cable. 7. Remove the hand brake cable ends from the drive levers (see “Brake pads for the rear wheels of a VAZ 2107 car - replacement”) without disconnecting the pad support struts. 8. Using a screwdriver, we remove the tip of the handbrake cable sheath from the hole in the bracket of the VAZ 2107 car body. 9. Using a 10 mm wrench, unscrew the two nuts securing the rear handbrake cable bracket to the VAZ 2107 car body and remove the bracket. 10. Using an 8 mm wrench, unscrew the two bolts securing the handbrake cable sheath holder to the brake shield. 11. Pull out the branch of the handbrake cable from the shield. 12. Similarly, disconnect the handbrake cable branch on the opposite side of the VAZ 2107 car and remove the rear parking brake system drive cable.
Attention The right branch of the handbrake cable differs from the left one in the presence of a rubber tube on the casing.
The main purpose
You can install and configure a hydraulic handbrake on a VAZ-2109 yourself if you have certain skills and tools. Despite the prohibitions, such designs can be found on sale and can be installed on any make and model of car. It is advisable to carry out all work on an inspection pit or a lift. With the help of a hydraulic handbrake you can greatly increase the efficiency of the braking system. The design provides for a regulator that allows you to distribute the force between the front and rear circuits. The regulator allows you to prevent complete blocking of the rear wheels.
Removing the handbrake cable
Replacing the handbrake on a VAZ 2110
- To carry out work on installing a hydraulic hand brake, the car must be placed in a garage with an inspection pit.
- Raise the rear of the car with a jack.
- Install wheel chocks under the front wheels.
- Install reliable supports under the rear beam.
- Remove wheels and drums.
- Remove the muffler and resonator from the cushions and move them to the side.
- Remove the equalizer from the rod.
- Completely remove the handbrake cable from both wheels.
- Inside, unscrew and remove the old lever.
Note: the mainline operation system is completely changing. Instead of a diagonal pattern, an axial pattern will work.
Adjusting the handbrake yourself
If you promptly ask yourself the question of how to tighten the handbrake on a VAZ-2107, and do all the work correctly, you will be able to avoid a number of unpleasant situations. Securely locked wheels will prevent the car from rolling away while parked. In addition, a properly functioning hand brake system makes it much easier to move the car away if you are on a steep road. Therefore, if the handbrake on a VAZ does not work effectively enough, read the instructions for adjusting it.
Why the handbrake does not work on the VAZ 2107
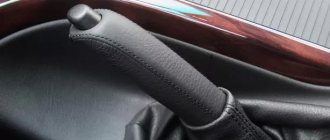
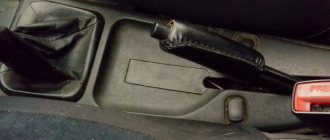
Like any other part or mechanism, the handbrake cable tends to wear out and become unusable. The parking brake on the VAZ 2107 is activated using a lever located in the middle part of the car between the driver and passenger seats.
Periodically, the handbrake cable should be tightened, as it becomes weakened, which leads to a decrease in the efficiency of the device. The reasons why the handbrake on the “seven” may not function are due to the following factors:
- Excessive cable stretch.
- Damage to the cable.
- Malfunction of the brake mechanism in the rear wheel drums.
During prolonged use of the car, when the handbrake is constantly used, owners are faced with the need to periodically restore the cable tension. Over time, the device in question stretches, and there is nowhere to tighten it. The only way out of the situation is to exchange the product for a new one. It is recommended to carry out work on replacing the handbrake cable in an inspection hole, but you can do without it.
Changing the handbrake cable
Replacing the handbrake cable on a VAZ 2107 car begins with the fact that it is first necessary to dismantle the brake drums of the rear wheels
After dismantling the brake drums, you should pay attention to the condition of the rear brake pads and working cylinders. The presence of traces of fluid leakage will indicate that the mechanisms also need repair
Each owner of his car decides individually when it is necessary to change the handbrake cable. It all depends on the degree of wear of the cable. The procedure for replacing the parking brake cable is divided into 2 stages: dismantling and installation, as well as adjusting the tension.
The replacement algorithm is as follows:
- After the rear wheels and brake drums are removed, you need to go down into the inspection hole and find the tension adjusting rod. This rod is equipped with a spring, which must be removed using a screwdriver.
- Both nuts are unscrewed, after which the adjustment bar is removed. Next, the rear and front handbrake cables are dismantled.
- Using a wrench, you need to unscrew the two nuts securing the two brackets. These brackets prevent the cable from falling. There are screws under the nuts that prevent them from unscrewing on their own.
- After this, you should remove the rear brake drums and remove the springs that secure the brake pads. The pads can also be replaced if they show excessive wear.
- Next, you need to pull the cable to disengage it from the bracket against which it rests.
- The brake pads are removed. There is no need to remove both pads on the wheel. To replace the rear cable, you only need to remove one rear brake pad.
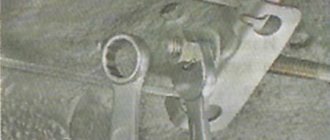
- Now you should unscrew two fixing bolts from the back of the brake shield of both wheels. With their help, the cable tip is fixed. After unscrewing these two bolts, you should pull the cable, as shown in the photo below.
- Using a 10mm wrench, you need to unscrew the front cable mounting brackets. After unscrewing the bolt, carefully remove the roller. To remove the roller, you need to roll it forward in the direction of the tip.
- To remove the front part of the device, you need to pull on the product to remove it from the bracket and intermediate support structure.
- After this, you need to get out of the hole and go into the car interior. When performing work, the handbrake must be in its lowest position. Inside, unscrew the two screws securing the handle trim.
- There are 4 bolts under the cladding that need to be unscrewed. After unscrewing them, you will need to remove the handle along with the front cable.
- To disconnect the cable mount from the handle, you will need to use pliers to remove the small cotter pin that secures the device to the handbrake handle.
- After this, the device can be completely removed from the car and a new cable installed in its place. The installation process of both products is carried out in the reverse order of removal. After this, you should secure them and begin the tension adjustment procedure.
Adjusting the hand brake VAZ 2107
Adjustment of the handbrake should be performed not only periodically when the parking brake is lost, but also after replacing the cable. In order to adjust the cable tension, you will need to take the following tools:
- pliers;
- two keys for 13;
- a can of WD-40 lubricant.
Adjusting the handbrake VAZ 2107
Restoring the handbrake's functionality should begin by checking the cable tension. To tighten the parking brake cable of a VAZ 2107, you will need:
- pliers;
- a pair of keys for 13;
- metal brush;
- WD-40;
- jack.
The adjustment should be made on an inspection pit or a lift. In the latter case, a jack will not be needed.
The procedure is as follows:
- Raise the rear wheels using a jack or lift so that they can be rotated by hand.
- Tighten the handbrake 2-3 clicks (until the locking position).
- Use a wire brush to clean the threads on the adjusting bolt if they are dirty. If corrosion is severe, use WD-40 to remove the nut from the adjusting bolt.
- Using a pair of 13mm wrenches, loosen the locknut;
- Using a 13mm wrench and pliers, adjust the position of the nut so that the wheels are locked.
Note: if even in the extreme position of the nut the VAZ 2107 handbrake is not tightened sufficiently, it is necessary to replace the cable.
- Make sure that the cable is not overtightened and that when the lever is lowered, the wheels are unlocked.
- Tighten the locknut.
- Lubricate the threads of the adjusting bolt with lithol to prevent corrosion.
As you can see, applying the handbrake of the VAZ 2107 is quite simple.
When adjusting the handbrake, it is worth checking the rear wheel bearings. They should rotate easily and smoothly, without noise. The presence of play indicates the need to tighten the bearings.
Parking brake (handbrake) VAZ 2101, 2106, 2107 classic
Installation of a hydraulic parking brake VAZ 2101
A hydraulic handbrake is necessary for effective initiation (setting), and corrections of the trajectory (when over-angling) in order to “keep your butt in check”, or get to the turn without losing the skid without gas. Initiations are especially important, I tormented my clutch with clutches for a long time - an alternative way of setting.
On the list of goals for the new season, the hydraulic hand held the honorable position No. 2.
For me, the issue of price has become fundamental, 5-8k is too steep, and I also need to be in time for the season. And on Avito I came across a nice new, unused vertical handbrake with a 35cm handle, bought it from a guy secondhand for 1.9k.
Hydraulic handbrake with lock
But a problem arose with the incompatibility of the threads on the VAZ pipes with the holes in the Chinese cylinder.
2. Solving the problem of incompatibility of threaded connections. If you choose a Chinese handbrake with such a cylinder,
then you will most likely encounter the same problem. Its two holes have different diameters and thread pitches, which are not only different from each other, they do not fit the VAZ pipes at all.
The hole that goes at an angle has approximately the size M9x1 (where M9 is the thread diameter, x1 is the thread pitch) and the VAZ tube does not fit there at all, and the second hole that comes out at 90 degrees has M11x1 and the tube dangles in it.
The standard VAZ brake pipe has an M10x1.25 thread; where M10 is the diameter, 1.25 is the thread pitch in millimeters.
So what to do? I racked my brain for a long time... At first I tried to find an adapter from Chinese thread to M10x1.25, but to no avail, I walked around the entire evening South Port and my wanderings were not crowned with success. Second step: I read the Internet and thought about replacing the cylinder with TRW #PND121 from a VAZ 2101. Unlike the original VAZ cylinder, it has an aluminum feed fitting in which you can cut an M10x1.25 thread. But. The VAZ clutch uses a different, thicker tube with an M12x1.25 mount. Therefore, an adapter would be needed for the VAZ cylinder. I scoured the Internet and found this MIRACLE.
The fitting (adapter) of the factory brake system is from GAZ 3302 (I heard from the seller in the store that they are used in the stock rear brake cylinders of GAZ 3302), has an external thread M12x1.25 and an internal thread M10x1.25. Just what you need. I looked for these in spare parts stores and found them in my city for 34 rubles.
Adapters from GAZ 3302
Installation method No. 1
According to experts, there are two ways to install a hydraulic handbrake on a VAZ. The simplest and most accessible involves performing the following manipulations:
- Another brake cylinder must be installed in the engine compartment. The clutch master cylinder from a VAZ-2101 is ideal.
- Remove the brake fluid expansion tank.
- You will need to make a small adapter yourself. Cut the thread and install the washer (it should have a thread for the fitting).
You begin assembling the entire system from the original GTZ to the clutch cylinder, then to the regulator, handbrake, and rear brake circuit. To connect all the components together, use tubes from the Gazelle car. Just choose those that fit in size. The tubes are fastened to the places where the handbrake cable was fixed.
Design Features
If a motorist wants to independently figure out how to make a handbrake on a VAZ-2106, he must remember many certain design features. In particular, the right branch (from the machine side) of the cable is not the same as the left branch. The latter has a small rubber tube that is located between the front tip and the bushing.
To assemble the handbrake yourself, you need to know its design features.
To do everything correctly, you need to position the cable sheath so that it runs along the inner side of the limiter, grabbing the longitudinal rod of the rear suspension from below.
In addition, it is necessary to install the ends directly into the body brackets from different sides of the vehicle, and then attach the brackets themselves to the body.
The last tuning step should be to adjust the parking brake drive.
Adjusting the handbrake cable
In order to tighten the front parking brake cable of the VAZ 2101-2107, you need to drive the car onto an overpass or inspection hole. Then you need to lift the rear of the car with jacks so that the wheels sag.
The parking brake cable adjusting nut is located between the roller it goes around and the junction with the rear cables. Hold the end of the cable so that it does not turn, and tighten the nut three to four turns clockwise.
After this, you need to check the effectiveness of the parking brake again. If it does not hold the car well enough, we tighten the cable again in the same way, but we must take into account the fact that the cable will have to be replaced in the near future.
Step-by-step instructions for replacing and adjusting the handbrake cable on a VAZ-2106 car
Replacing the VAZ-2106 parking brake cable is a complex and time-consuming process, however, if you have certain knowledge about its structure, you can do everything quite quickly and simply.
As a rule, this structural element should only be replaced if it is overextended. This device should be changed in situations where there is no way to adjust the brake, there is severe mechanical damage, or there is a loss of normal movement of elements directly in the shell itself. The VAZ-2106 parking brake cable should be changed only if it is overextended
Tension
So, having understood the diagram, you can begin the procedure of tightening the handbrake cables.
Stretch
The tensioning procedure is as follows.
- Place the car on an overpass or pit. If you don’t have a garage and you have the opportunity or desire to carry out the procedure at a service station, use a jack. The rear of the car is raised on a jack. The most extreme option is a curb onto which the car is driven and all you have to do is crawl under it.
- Engage the gearbox in first gear and put the car on the handbrake by pulling the lever up.
- The ideal number of handbrake clicks is from 2 to 5. If there are fewer or more clicks, it is easier to take appropriate measures to tension the cable.
- If there are less than 2 clicks, then the cable will need to be lengthened. If there are more than five clicks, then the cables are shortened.
- Lengthening the cable means relaxing it. To do this, unscrew the locknut. When tightening the cable, the locknut must be tightened in reverse.
- Before you start looking for the required nut on the bottom of the car, release the handbrake lever all the way.
- Take a 13mm wrench under the car and head down.
- Find the handbrake cable equalizer. This is the same element from which the main handbrake cable is divided into two cables.
- In some cases, it is simply not possible to gain access to the equalizer, since the muffler holders made of rubber are in the way. In such a situation, it is better to remove them. This is not difficult to do, but working with the handbrake will be much easier.
- Now there are two nuts in front of you. One is a simple nut and the other is a lock nut. Having two keys in your hands, fix the nut with the first one, and with the second one begin to unscrew or tighten the locking nut. Be careful that the nut does not start to turn.
- Taking into account the condition of the handbrake and the need to loosen or tighten the lever, turn the locknut in the appropriate direction. Remember what is the optimal number of clicks.
- Tighten or unscrew the locknut to obtain the required degree of tension.
Examination
But if you twisted the nuts there, this is not a guarantee that the handbrake now works perfectly. This needs to be clearly verified.
To do this, it is enough to go through a successive stage of verification activities.
Stage
Explanation
Spin the wheels after tensioning is completed
The wheels are lifted one by one on a jack. When the handbrake lever is turned off, they should rotate freely without obstacles. By squeezing the brake, the wheels should lock.
Drive up a slight slope, stop and engage the handbrake
The fact that the wheels do not spin when suspended is good. But you need to make sure that the handbrake holds the car even when exposed to gravity.
If the check shows that the handbrake still does not hold, even if the cable was tensioned exactly according to the instructions, the handbrake is probably simply worn out and the cable needs to be replaced.
Signs that replacement is needed
It is not uncommon for the VAZ 2114 handbrake cable to rust, as a result of which it breaks or weakens so much that no tightening can restore its previous functionality.
At the first sign of cable wear, you should consider replacing it. This problem may manifest itself as follows:
- The handbrake is not able to withstand the required traction;
- Drum brakes overheat;
- When you pull the parking brake lever, the cable does not respond to your actions;
- The cable sheath is seriously worn.
How to change a handbrake cable
Not all car enthusiasts know that the parking brake system includes not one, but two cables - front and rear. It is the second one that often has to be changed. There may be several reasons for this, including critical wear and damage. And also in case of frequent jamming, the cable has to be replaced. In addition, if, after adjusting its tension, you find that the handbrake can no longer block the rear wheels, while the brake pads are fully operational, replacing the VAZ-2107 handbrake cable will be the only correct solution. We will tell you how to do this further.
If you do not intend to contact a car service, you can change the unusable cable yourself. To do this, you need to buy a new part and prepare the same simple set of tools that are used in the adjustment process. You will also need a jack.
The handbrake cable needs to be changed if it gets jammed frequently.
Important! Buy a handbrake cable only from a supplier that has proven itself and is trustworthy, since a low-quality product made in violation of technology will not last very long.
If everything you need is ready, you can start replacing, starting with dismantling. The following guide describes in detail how to change the handbrake cable on a VAZ-2107 in a garage - you just need to follow its instructions:
- First, you need to raise the rear of the car so that the rear wheels can rotate freely. This is necessary to dismantle the brake drums, without which removing the old cable and installing a new one is simply impossible.
- Now you need to remove the brake pads, and there is no need to remove both, but only the rear one on each wheel.
- Next, similar to the adjustment process, hold the adjusting nut on the rod with one wrench, and loosen the locknut with the second. But in this case, both nuts should be unscrewed. First, disconnect the tension spring from the rod using pliers.
- After removing the nuts, you can easily remove the rear cable guide, and then remove the cable itself from it.
- On the left and right sides of the car, two fixing brackets are attached to the bottom, in which the protective shell is placed - they must be removed by unscrewing two nuts on each.
- Further towards the wheels, the protective shell rests with two tips on two more brackets. There is no need to unscrew anything here - just disengage the tips by pulling the shell back.
- Having reached the brake flap on each wheel, remove the two bolts that hold the tips of the protective shell. Then pull the rope to bring them out.
Further, replacing the handbrake cable on a VAZ-2107 car involves installing a new product. To do this, follow the same pattern as when removing, but in reverse order. At the same time, make sure that the protective sheath passes over the longitudinal rod, and the right and left branches are located each on their own side, since they are not the same. So, on the shell of the right branch there is a rubber tube, but on the left it is missing. Before replacing the cable, it is advisable to install new brake pads, and after completing all installation work, be sure to adjust the hand brake system.
How does the handbrake work?
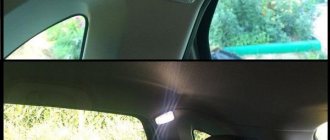
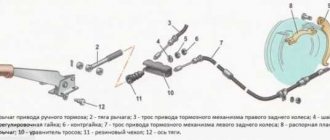
When the driver activates the handbrake, either by pulling the handle between the front seats (3) or by pressing the parking brake pedal under the dashboard, a cable (12) running to the rear of the car is pulled, applying tension to the brake pads. When the driver lowers the handle, the return spring (11) helps return the brake system to its normal configuration.
The system itself is quite simple and banal - the parking brake handle is connected to a cable in a special plastic sheath, in which it can move freely. This cable goes to the adjusting bolt, which can be loosened or tightened. Then it splits into two cables that go to the brakes on the rear wheels.
In simple words, by activating the handbrake, the cable tightens and brings the pads together, which then secure the car.
Replacing the handbrake: instructions
- After dismantling the rear wheels and brake drums, you need to head into the pit and find the tension adjustment rod. This rod is equipped with a spring that must be unscrewed with a screwdriver.
- Next, you need to unscrew the 2 nuts and begin dismantling the adjusting bar. Then the cables (rear and front) of the parking brake are dismantled.
- Use a wrench to unscrew both nuts securing the brackets. The latter just prevent the cable from falling. There are screws under the nuts that prevent them from unscrewing unintentionally.
- The next step is to remove the rear drums and then remove the springs that secure the brake pads. The latter are also timely to be replaced if they are worn out excessively.
- Now you need to pull the cable. This way it will be possible to disengage it with the bracket where it rests.
- Next you need to remove the brake pads. There is no need to remove both elements on the wheel. To replace the rear cable, you only need to remove one rear block.
- On the opposite side of the brake shield of both wheels, you need to unscrew 2 mounting bolts, with which the cable tip is secured. After unscrewing both bolts, pull the cable.
- Using a 10mm wrench, you now need to unscrew the front cable fastening brackets. When the bolt is unscrewed, carefully remove the roller. To do this, you will need to roll it forward in the direction of the tip.
- To remove the front part of the mechanism, pull the device to remove it from the intermediate support and bracket structure.
- Then you can get out of the inspection hole and head to the S7’s interior. The handbrake is kept in the down position throughout the entire process. While in the cabin, you need to unscrew the 2 screws that secure the handle trim.
- So, there are 4 bolts under the cladding. They need to be unscrewed, and then proceed to dismantling the handle with the front cable.
- To disconnect the cable fastener from the handle, use pliers to remove the small cotter pin that clamps the device to the parking brake handle.
- Now the device can be removed from the car and a new cable can be installed. The installation procedure for both mechanisms is carried out in the reverse order of removal. After all, you need to fix them and move on to adjusting the tension.
Note. When installing the rear cable, it is important to remember that this part has both a right and a left side. On the right there is a rubber tube that serves as auxiliary insulation of the braid from the hot pipe of the resonator located nearby.
The procedure for adjusting and replacing the parking brake cable is not as complicated as it seems. Any VAZ-2107 car owner can cope with the task.
When to adjust the handbrake
Proper operation of the parking brake system ensures road safety and should therefore always function properly.
The handbrake needs to be tightened and adjusted when:
- linings or discs (drums) were changed;
- brake pads or linings were adjusted;
- The hand brake cable has been replaced;
- the control mechanism has been reinstalled;
- The free play of the parking mechanism handle has increased significantly.
To fix the system, you can go to a service station, but you can do it yourself, for this you need to know how to properly adjust the parking brake.
In principle, having a general understanding of the process, you can tighten the parking mechanism. The only thing you should remember before tightening the handbrake cable is that the entire process must be carried out in compliance with safety precautions and in the designated place. Otherwise, harm may occur to the person doing the repairs.
How to correctly adjust or replace the hand brake cable of a VAZ-2107 yourself
The purpose of the manual brake mechanism on the VAZ-2107 car is to ensure that the rear wheels of the car are locked during parking. According to the regulations, a properly functioning and properly adjusted handbrake should hold the vehicle in a stationary position on a slope of up to 25%. As brake pads wear out over time, the parking brake no longer does its job effectively and needs to be tightened periodically. In addition, the handbrake cable itself operates in aggressive conditions; sooner or later it stretches, wears out and even breaks, which requires replacement. To repair the handbrake, you can go to a service station, although this system is so simple that any car enthusiast can handle it - you just need to have an idea of how to tighten or replace the handbrake on a VAZ-2107, and have a minimum set of tools.
The handbrake cable stretches, wears out, or breaks over time.
For what other reasons can a car’s parking brake fail? First of all, under the influence of moisture, corrosion, and also due to accumulated contaminants, the cable quite often gets jammed in the protective sheath. The problem can usually be resolved by regular cleaning and lubricant, but sometimes replacement is the only solution. Quite rarely, but it still happens that the ratchet mechanism of the lever fails, which requires disassembling it and replacing the failed parts. But you should start such repairs only if you are confident in the performance of the remaining elements of the system, including correctly adjusted cable tension.
Causes of malfunction and their elimination
As a rule, the reasons why the handbrake does not work are quite simple and do not require long or expensive repairs:
- torn cable. One of the common causes is a broken cable on the handbrake or under the car. The problem is solved by simply replacing the cable;
- jammed cable. Due to damage to the sheath in which the cable moves, it may become jammed, preventing you from using the handbrake. And the cable itself consists of many steel strands, which, if damaged, can also prevent proper operation. The solution is to replace the cable;
- dirty brakes. If dust, dirt, ice or reagents that are sprinkled on roads in winter get on the pads, this can cause the brakes to not work properly. The solution is to press the brake pedal several times smoothly while the car is moving. Thanks to friction, the pads will be cleaned;
- incorrect adjustment. It may happen that the cable system is not adjusted properly, the bolt is not tightened correctly, or the length of the cables is incorrectly selected. The solution is to adjust the system and correct tension of the cables;
- pad wear. The pads are subject to abrasion during operation. Every time you apply the brakes, the pads gradually become unusable. The solution is to replace the pads;
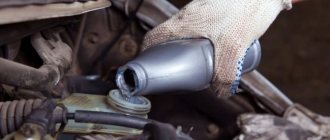
- oil in the pads. Oil or brake fluid leaks can cause the car to not hold up with the handbrake. The most important thing in this case is to identify the cause of the leak - it could be the rear axle seal or the brake cylinder. The solution is to eliminate the leak and clean the pads. If the pads are very oily, replace them.
Do-it-yourself installation of disc brakes on a VAZ 2108
1. Place a jack under the wheel and remove the wheel.
2. It is necessary to release the handbrake and remove the drums.
3. Using a hexagon, remove the hub assembly; for this it is better to use an extension with a deep head.
4. Remove the pads along with the springs.
5. Unscrew the bolts, then knock down the hub with the shield.
6. Next, unscrew the fitting, I bought an 8x10 Jonnesway wrench for this.
7. Plug the tube, then use heavy blows to knock the shield off the beam.
8. Install a new shield and faceplate between the hub and the beam.
9. It’s better to try it all on the removed hub, since you may not have enough free space and then you’ll have to remove everything back, which takes time. In my case, the camber plate took away the entire protrusion that remained on the centering support ring on the back of the hub. The good news is that the length of the bolts that were included in the kit is sufficient to install all the elements.
10. Take sandpaper or a metal brush and go over all the mating planes of the hub and beam.
11. Then fasten it all using the new bolts from the kit.
12. Secure the caliper guide bracket using spacers, then check the clearance and install the disc.
13. The installation of the caliper, as well as the brake pads, was pleasantly pleasing, everything was as it should be, no problems arose, they are attached to the pins using a thread lock, in short, everything is as written in the instructions for the brake pad.
14. Secure the new “ear” of the handbrake cable fastening to the beam using a special clamp from the ZDT kit, then properly lubricate the cable spring.
15. Pull the cable through the caliper bracket and mount, then put on the protective rubber boot (it should fit very tightly).
16. The second “ear” must be placed in a different place on the beam and secured with a larger clamp.
17. Using a “banjo bolt” lined with copper washers, connect the brake hose to the caliper, directing the other end of the hose to the “ear” on the beam.
18. Bend the brake pipe into a spiral and connect it to the hose.
Now we can assume that you have rear disc brakes on one side :-). Do the same thing on the other side, things will go much faster, believe me, His Majesty “experience” will play a big role here.
GTZ malfunctions
The VAZ 2101 brake system has many parts that can fail due to wear, poor quality or untimely maintenance. The following characteristic symptoms of problems can be identified:
- slow stopping of the vehicle after pressing the brake pedal. One of the reasons is that the lip seals of the pistons have become unusable, which led to a loss of tightness;
- high pedal effort. This problem appears when the cuffs increase in size, for example, when installing a low-quality repair kit;
- The brake pedal has a short stroke. The working environment, i.e. the brake fluid, has nowhere to go due to the fact that the compensation hole is clogged. In addition, the canal may be blocked by swollen cuffs;
- The car only brakes when the pedal is pressed to the floor. This indicates a complete failure of the lip seals when the liquid goes into the tank and not into the system;
- Brake pads do not move away from the discs and drums, causing them to become hot while driving.
The reason lies in the jamming of one of the pistons or the formation of a blockage in the bypass hole. If the seal is lost, liquid begins to flow out of the cylinder
These symptoms may also occur if there are problems with other parts of the braking system. For example, the pedal may fail if there is no fluid in one of the wheel cylinders or if air gets into the system
Therefore, for a final diagnosis, it is necessary to pay attention to additional features of the car’s behavior. For example, there are certain signs that clearly indicate problems with other components of the brake system, and not with the GTZ:
- pulling the car to the side when braking;
- jamming of the brake mechanisms on one of the wheels;
- the appearance of sounds uncharacteristic of normal brake operation (creaking, squeaking, grinding);
- heating of brake pads or discs on one wheel.
Checking the brake master cylinder
The most common cause of GTZ problems is wear of the seals. When replacing cuffs, you need to take into account that repairs only make sense if the piston and cylinder walls do not have wear. Otherwise, replacing the rubber seals will not bring any results and soon you will still have to install a new part. Before you start checking the main hydraulic brake drive, you should make sure that there are no problems with other elements of the system:
- Inspect the wheels from the inner surface to identify any leaks of brake fluid from the brake fluid brake system.
- Check the integrity of the tank and hoses connecting it to the gas turbine engine, as well as the presence of fluid and its level.
Fluid leaks on the inside of the wheel indicate a leak in the brake system.
A clear sign that there is a problem with the master cylinder is the appearance of liquid on the unit body. A working mechanism should always be dry without a hint of leakage. If the hydraulic drive has lost its seal, it must be dismantled for further disassembly and repair. You can determine that the gas turbine engine bypasses fluid, i.e., it does not enter the system, but returns to the expansion tank when you press the pedal:
- Open the tank lid.
- An assistant is seated in the driver's seat. The engine does not start.
- Your partner presses the brake pedal, and you listen to the sounds coming from the reservoir.
- If gurgling is heard from the container, and the pedal is pressed lightly, it means that the liquid is entering the tank instead of the system. The malfunction lies in the wear of the seals, which are unable to create the necessary pressure in the cylinder circuits.
How to assess the condition of the parking brake
Before we talk about the parking brake malfunctions, we suggest determining its performance:
If the car with the handbrake activated is stable when stopping on a steep slope, the brake is in good condition.
If the car slows down weakly and continues to move, then adjustment and possibly repair of the parking brake fault is necessary.
There is another way to check the serviceability/failure of the parking brake. The handbrake must be raised all the way, engage first gear, and then smoothly release the clutch. A stalled engine will indicate that the brake is in working order.
If there is no slope or hillock nearby, you can check the condition of the handbrake as follows. Having parked the car on a flat surface, activate the handbrake and engage neutral gear. Then get out of the car and try to push it. If the car does not move, the parking brake does not need any manipulation.
Hydraulic hand brake kit
In automobile stores you can purchase a hydraulic handbrake kit. You can install it yourself, but you will need a few additional elements:
- Copper washers for brake mechanisms, 10 pcs.
- Metal tubes in the amount of 5 pcs. To save a little, you can purchase a complete set for Gazelle cars.
- Plugs.
- Twists.
- Brake hoses for VAZ-2101-2107.
- Tee for the brake system.
- Plastic clamps, 50 pcs.
- Brake regulator for VAZ cars of any model.
- GTZ for VAZ-2101. If this is not the case, then you can use any other cylinder.
In addition to all this, you will need brake fluid for subsequent refilling of the system. After all, the modification includes inserting an additional circuit into the brake lines.
Why do you need a hydraulic handbrake?
The argument about stretching the cable of a mechanical handbrake is a strong argument, but not the only one or even the main one. This tuning is preferred by lovers of sports driving, since the hydraulic parking brake allows you to brake the rear wheels, and with unequal effectiveness. Under normal conditions, such actions are possible only with remarkable driving skills, and even then not on all cars. Note that with such a radical modification of the car’s brake system, the regulator must be installed between the main brake cylinder and the hydraulic handbrake - only in this case will you be able to redistribute the braking force, which is accentuated on the rear axle shaft, over a fairly large range, while the power of the front brakes will also increase. But remember that, according to the rules for operating vehicles, unauthorized intervention to change the standard design of the brake system is unacceptable if this is not approved by the car manufacturer.