Severs+ engine pre-heaters are built into the vehicle's cooling system. When connected to a 220V network, the heating element in the heater body begins to heat up. At the same time, the circulation pump comes into operation, pumping the heated liquid through the cooling system. Cold coolant enters the lower pipe and exits through the upper.
When the required temperature is reached, the heater thermostat is activated. It turns off both the heating element and the pump. When the temperature of the coolant decreases, the thermostat will turn on heating and circulation again, thus constantly maintaining the temperature of the coolant in the specified range.
After approximately 30 minutes of operation of the Severs+ engine heater, the coolant in the system is warmed up to a temperature of about +70 C, and your car is ready for use.
The engine warm-up time depends on climatic conditions (temperature, wind), as well as on the parking conditions of the car (open parking, garage).
The Severs+ engine pore heater is presented in the following modifications:
- 1.5 and 2 kW, as well as 1.5 and 2 kW with a bumper connector - for passenger cars;
— 3 kW and 3 kW with bumper connector — for medium-duty and trucks.
Severs+ engine heaters are equipped with universal mounting kits. They include all the necessary parts and detailed installation instructions.
ATTENTION! INSTALLED VERTICALLY, ACCORDING TO THE INSTRUCTIONS!
The operating and installation instructions can be downloaded from the link: https://podogrev.com/products/main/severs-new/techdata-1/
If possible, we recommend installing Severs+ engine pre-heaters at a service station. However, following the recommendations and observing the requirements of the instructions, you can install the heater yourself. As practice shows, installation takes approximately 2-4 hours.
Below you can watch a video on how to properly install the Severs Plus engine heater.
What is it intended for and how is it designed?
When the engine starts after a long stop, in the first seconds its parts come into contact with each other without lubrication. The viscosity of cold engine oil is higher than in the operating temperature range of the engine. Therefore, it takes some time for the lubricating fluid to penetrate through narrow oil lines to engine parts. Parts of the piston group especially suffer from cold starts. Thus, starting cold motors reduces their service life by up to 1.5 times. In order to avoid this, as well as to make it easier to start the engine in frosty weather, pre-start heaters are designed, powered by a 220 V network.
This device can heat up the engine in 30 minutes even in severe frost
Design and operation of the preheater
A modern heater is designed quite simply and is not much different from a boiler. The principle of its operation is to heat the coolant (antifreeze, antifreeze) to operating temperature, from 60 to 70 °C. When heated, the liquid begins to move through the pipes of the cooling system, heating the engine parts. To speed up heat transfer, many models are equipped with pumps that create pressure in the small circuit of the cooling system.
To create pressure due to temperature differences, heaters without a pump are connected to the cooling system at its lowest point. A device with a pump can be connected to the cooling system anywhere. When the temperature reaches the set value, the relay will simply turn off the heating element. If the temperature drops again, the relay will turn on the antifreeze heating again. Thus, you can connect the device in advance without fear of overheating the coolant.
How to choose Severs-M
The choice of a suitable model is made according to the tonnage of the vehicle:
- a small-sized preheater Severs-M with a power of 1 kilowatt is suitable for engines less than one and a half liters;
- Severs heater for Gazelle and for passenger cars with an engine of more than one and a half liters - model M1 (1.5 kilowatts);
- M2 (two kilowatts) - for vehicles with medium tonnage;
- M3 (two to three kilowatts) - with a large tonnage.
Installation procedure for a 220 V heater
In general, the work algorithm for installing engine heating for passenger cars looks like this:
- Antifreeze drain. There is no need to remove the entire volume - about 2 liters are drained and collected in a separate container.
- The flexible pipes are disconnected at the installation site.
- A heater is installed with a connection to a closed circuit, in compliance with the design features.
- Final assembly. This stage provides for reliable fixation of pipes and power sockets.
- Replenishing the coolant level.
At the final stage, it is necessary to check not only the functionality of the device, but also the normal functioning of the cooling system as a whole. After this, rest assured that the car is ready for winter use.
new car
The process is similar to the previous one, except that the engine was not cold, but in the MMC Pajero Sport-3. It’s a little inconvenient to climb, I warmed my fingers. I’ll immediately add that during the operation, several winters, there were no problems in Toyota, it works perfectly! . On Toyota it's all in working order and very pleasing. easy start, no oil starvation, etc.
(silicone patch with an integrated heater, thermal relay switch-off range: +70*s, reverse switching on +50*s product power 500W, glued to 3M tape, by the way, the real thing is heat-resistant. Double-insulated wires are of excellent quality, it’s all one product. Installation took from strength hour time is additionally purchased
ABRO tube of red sealant (50 rubles - 32 g) - rather just for peace of mind)) - connector in the bumper, see photo costs 20 rubles... ordered with a spring lid has not yet arrived, installed the same with the lid that was - automotive corrugation 10 mm - 1 meter... (30 rubles)... the ties were on the farm
The installation process is trivial. removed the protection. — I wiped the installation site with an anti-force cleaner (left over from painting the sills and arches), just above the power steering. You can crawl up, but preferably in a cold car... I burned my fingers))
— I put on a plaster — due to some cancer accessibility, you must first estimate it, try it on, with the piece of tape still on, mark it with a pencil, it will be impossible to peel it off later! I applied a plaster, spread Abro around the edges, pulled corrugated protection around the edges, secured the corrugation with zip ties. brought it to the radiator grille. All in the photo are the results. checked, it works. I didn’t take temperature readings because it’s not the season..) but everything works) I checked it. The item was sent with some small, very small, discount but I put the item provided. but the essence does not change. the product is really high quality
The product was provided for writing a review by the store. The review was published in accordance with clause 18 of the Site Rules.
I'm planning to buy
+32
Add to favorites
I liked the review
+20
The best electric preheaters
Unlike autonomous heaters, electric heaters operate directly from a 220 V network (from sockets in parking lots).
The heating element warms up the coolant. Temperature distribution occurs when the heated liquid rises upward.
DEFA 411027
Very convenient design in the form of a conical flange for pressing. Allows you to heat the oil without consuming fuel and, accordingly, starting the engine. Reduces the load on the battery when starting, makes it easier to start the engine at temperatures below -10°C.
DEFA 411027
In order to start the machine, an average of half an hour of flange operation is required. If the temperature is critical, some drivers leave the device on all night.
Severs-M
Designed for pre-heating of internal combustion engines of vehicles and units with a liquid cooling system.
Severs-M
Specifications:
| power, kWt | 1,5 |
| Rated voltage, V | 220 |
| Type of current | Variable |
| Current frequency, Hz | 50 |
Other parameters:
- cast aluminum housing;
- sealed design of the electrical part, completely eliminating the ingress of moisture and dust onto live parts;
- built-in thermostat operates up to 95°C;
- thermostat return (switch on) temperature 60°C;
- built-in thermal switch at 140°C;
The body shape and small dimensions allow the heater to be conveniently placed in the engine compartment.
Nomacon PP-201
The 220V engine pre-heater has minimal overall dimensions, low weight and the presence of a special bracket allows you to easily mount the heater in the engine compartment of a car as close as possible to the fine fuel filter.
Nomacon PP-201
Specifications:
| DC supply voltage, V | 12 |
| Nominal input electrical resistance, Ohm | 0,55-0,7 |
| Electrical power, W | 220/180 |
| Fuel consumption through the heater, l/h | 150 |
| Maximum temperature of the heating element, °C | 130 |
| Operating temperature range, °C | from -40 to +45 |
| Dimensions, mm | 100x52x110 |
| Weight, kg | 0,28 |
| Control | Automatic |
| Operating mode | pulsed from battery, continuous from generator |
| Degree of protection against dust and water | IP55 |
It fits onto the fuel filter and is secured with screw clamps. Before starting, you need to turn it on for 5 minutes and the diesel fuel in the filter will warm up.
VIDEO: Engine heating systems in winter. Which system is better?
Principle of operation
The Severs heater is designed for preliminary preparation for starting a car with a liquid cooling system in the cold season. It can be used in combination with passenger cars running on gasoline fuel and trucks running on diesel fuel.
Device operation diagram
The operating principle of the device is the natural circulation of heated liquid. More precisely, the device works as follows:
- when turned on, the tubular heating element starts;
- at the same time, the circular pump begins to function;
- the liquid is heated from the heating element and driven through the cooling system by a pump;
- when the desired temperature is reached, the thermostat turns on, which stops the operation of the heater and pump;
- when the temperature reaches the lower limit, the thermostat restarts the heating system.
This ensures regular maintenance of the required temperature of the liquid in the required range.
The time required to warm up the car completely depends on weather conditions, the power of the Severs heater and the conditions of the area where the car is parked - an open parking lot or a garage.
VIDEO: On which car can Severs M and Severs + be installed?
Device structure
Thanks to a well-thought-out configuration, the unit is designed in such a way that the owner will not have problems with the circulation of liquid or its contact with the contacts of the device.
- Horizontal design - this aspect completely eliminates the possibility of antifreeze getting on the electronic area of the device. This makes the device safe to use.
- Ball valve - helps direct the circulation of heated fluid through the pre-start unit into the cooling system.
- Thermostat - controls the warming up of the engine and prevents the device from heating the liquid beyond the required level. This provides maximum protection of the device from overheating and allows you to save energy.
- Thermal switch - stops the operation of the entire system in case of malfunctions in the functioning of the thermostat and other parts.
Types of devices
On the official website, the Severs engine preheater is presented in two versions:
The first equipment includes a circulation pump. The products are produced in two classes, differing in power rating.
General characteristics of Severs + modifications:
Options
Index
From a power supply with a voltage of 220 V
Turn-on temperature 80°C
Starting temperature 140°C
The housing of preheaters, regardless of modification, is made of aluminum with an anodized coating. The devices operate from an electrical network with a standard voltage of 220V AC with a frequency of 50 Hz. The price of devices with a power of 2 kW is 3900 rubles, 3 kW - 4800.
Also in the assortment of JSC Leader there are models of the Service-M series. In this case, the cost also depends on the power, which varies between 1-3 kW.
Model name
power, kWt
price, rub.
The “Plus” series modification is capable of heating a car engine in a short period of time. This result is achieved due to the fact that the package includes a circulation pump that helps the heated liquid move through the system. At average winter temperatures, the unit is capable of heating a car within half an hour.
Components
A device that allows you to prepare the engine for easy starting and fill the interior with warmth is still considered an element of luxury. But it can really protect the health of both yours and your car.
Cold starting an engine is a difficult test for all its systems, comparable to several tens of kilometers in difficult conditions. The driver and passengers also have a hard time: frozen fingers do not hold the steering wheel well, the cold from the seats reaches almost to the spine, and the steam from the breath tends to freeze on the windows. But how nice it is to sit in a salon where the temperature is almost room temperature, throw off the gloves, hats and scarves that restrict your movements and not have to wait for the frosty windows to thaw...
So those living in cold regions have a reason to spend money not on a leather interior and all sorts of bells and whistles, but on a preheater. Its installation allows not only to extend the life of the engine, but also to save fuel, which a cold engine consumes much more readily.
Owners' opinions
Reviews of Gazelles with Cummins engines show that many purchased this car because of the desire to have a diesel engine. Some were confused by the production in China, but given the reputation of the American company, they still purchased the car. Buyers are not disappointed; the engine met their expectations. There are few negative reviews; some honestly indicate that this or that problem arose due to improper use.
Owners of new Gazelles with Cummins describe their first impressions, in which they note that the car is not inferior to foreign cars of a similar class, but costs much less
Pay attention to the good engine thrust, low noise and vibration levels even after a cold start. After a short period of operation (a month or two), they write about the absence of oil and coolant leaks. The engine has no loose mounts and is in excellent condition.
The engine has no loose mounts and is in excellent condition.
No. 5 – Start-Turbo (Russia)
A Russian-made product cannot boast of ease of installation, and for high-quality installation, an inexperienced car owner will have to seek help from a special center. However, this drawback is fully compensated by the excellent technical performance of the heater and its reliability. For example, antifreeze is heated up to 49 degrees, after which an emergency shutdown occurs until the temperature drops. The time required for the car to start is significantly reduced, and after it there are no various noises and malfunctions that are familiar to every driver. Even in winter, for the first time after starting, the car will drive at a decent level of traction. The price starts from 1800 rubles.
Main technical characteristics and design features
- Power 1.5 kW
- Rated voltage 220V
- Type of current – alternating
- Current frequency 50 Hz
- Cable length 1.5m
- Die-cast aluminum housing
- Sealed design of the electrical part, completely eliminating the ingress of moisture and dust onto live parts
- Built-in thermostat (operation temperature 90°C (not lower) - does not allow the heater to heat above the set temperature, which protects the device from overheating and saves energy.
- The built-in thermal switch (operation temperature 140°C (not higher) protects the heater in emergency situations (insufficient amount of coolant or lack thereof), in case of failure (failure) of the thermostat.
- The body shape and small dimensions allow the heater to be conveniently placed in the engine compartment.
- Horizontal design eliminates the possibility of antifreeze (coolant) getting into the electrical part of the heater, which makes its operation safer.
- Ball valve - ensures directed circulation and optimal engine heating, protects the heater from overheating and makes heating more efficient in various installation schemes.
- The drain plug is an optional feature that provides easy access to drain coolant through the drain hole in the heater. (! In the Severs-M1 model it is installed at the request of the customer)
Severs-M device
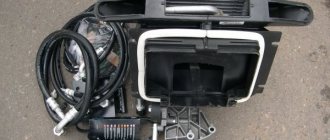
The device consists of the following parts:
- Heating element in a sealed housing.
- A ball valve that circulates heated liquid.
- The thermostat monitors the temperature and limits heating above the specified parameters.
- The thermal switch duplicates the protective function of the thermostat in the event of its failure.
- Power cable.
- The case is metal.
Heaters without pump
These are heating units Start-M, Severs, Alliance and others. They do not have a pump and work on the basis of convection. That is, the cold liquid goes down into the heating, while the already heated liquid rises up, as a rule, into the head.
Well, let's begin. Errors when installing a heater without a pump
1.
The engine heater housing is level or higher than the block drain plug. The whole point is that liquid flows into it almost by gravity, or is displaced by heated liquid from above. If it is above the plug level, there will be no circulation, the heating will turn off after the pipe warms up, because the temperature in it will quickly reach 80 degrees.
2.
The thermostat cuts off the upper radiator hose. In this case, the same thing will happen as in the first option. The maximum that is possible is to warm up the upper radiator tank, but the cylinder block will remain cold. This is a common problem with Grant and Kalina cars.
In this case, it is necessary to draw liquid from the drain plug, and push the heated liquid into the stove supply pipe. The heater will not flow through the radiator, because the liquid frees up space in the block.
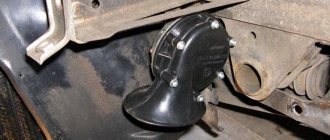
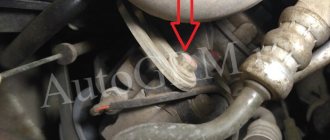
Installation of the Severs+ engine heater on L200 (photo report)
Hello! I decided to share today’s experience of installing the Severs+ heater. They may ask - what to share? There are two topics https://www.pickupclub.ru/forum/showt. B0%D0%BC%D0%B8 and https://www.pickupclub.ru/forum/showt. A%D0%B8/page28. But the fact is that I took a model with forced circulation of antifreeze, and, as it turned out, this is a slightly different installation principle. Installation in general has become easier because... The heater is placed in the gap in the antifreeze supply hose to the stove. But pitfalls became clear, which are discussed below. So, in order to successfully install this gadget, we will need: 1. A warm garage. No, of course, if you feel strength, dexterity and talent, coupled with experience and a thaw in the yard, then you can do it on the street, but personally for us this process with all the brainstorming and brakes took no less than 4 hours, so I I would have died outside even at minus 5 degrees (and here it was -31 this morning). 2. Neighbor Volodya (optional). Actually, the name of your neighbor is not so important, what is more important is that he repairs cars, and he also had missing parts in his stash. But in the absence of a neighbor, you can do it yourself. 3. My heating kit comes with a universal installation kit. When I hear the word “universal,” I immediately think - in what way will this “generalist” be worse than a “specialist”? Here's what was additionally needed: a) In this case, the main thing is that there was only one hose, sorry sleeve, and 80 cm long, which turned out to be not enough. Neighbor Volodya filled this gap by bringing a sleeve from home. Another hose may come in handy, but more on that later. b) We also didn’t like the studs for fastening the pump itself - we took the existing 6 bolts, approximately 60 mm long, and self-locking nuts. True, I had to drill holes in the mounting plate, but this is a trifle. c) Drill size 10. This will be needed to drill out the mounting plate in order to secure it to the body of our car. d) A knife for cutting the hose, that goes without saying e) It will be convenient to twist the clamps from the kit with a 7-point head - they are very tight, you can’t tighten them with a screwdriver, it’s difficult to get around with a wrench. f) Curved pliers will most likely be useful to you - remove the tight clamp from the pipe. g) Wrenches, screwdrivers and entrenching tools upon request. h) A screwdriver for screwing in the bumper connectors (if you have chosen such a modification). i) If you do not drain the antifreeze completely, then place a basin (preferably two) - when the antifreeze starts to flow, place it under the pan. Wow, so many letters. I’ll go have a smoke, put the battery fasteners back in place (I remembered that it’s my dear, I forgot to put it on) and post some photos with explanations.
Last edited by marino; 12/18/2016 at 21:27 .
So, first of all, we remove the left battery, and remove the terminal from the right one as a precaution. Then we thought for a long time about where to put the boiler. It should stand vertically, with the pump up, and this is a fundamental difference from the Severs-M heater. We found the only place - the space next to the battery platform. And there, right in this area, there is an unused hole where we attach the plate. There is a large hole in the plate for a bolt, but it doesn’t suit us - we would have to lower the boiler too low, and all sorts of things get in the way below, so we apply the plate, see which of the small holes suits us, and drill it out.
Attachment 106308 In the second photo the boiler is already attached. Before screwing the boiler, do not forget to fasten the sleeves on it and tighten the clamps, then it will not be convenient to do this. The protective corrugation that comes with the kit can be put on the upper hose; this is also more convenient to do in advance. The length of the lower hose (entrance to the boiler from the engine) was 50 centimeters, the upper hose (going to the stove) did not measure the length, maybe a little longer. In any case, we cut it in place when the two hoses meet and are ready for joining. Next we work on the pipe going from the engine to the stove. Actually, here he is entering the partition
I decided that I don’t want to cut him, he’s so cute. What if something goes wrong, and I’ll have a whole pipe, that’s the first thing. Secondly, it is small and U-shaped, so I decided that if I cut it, it would be inconvenient to attach thick hoses to them. Moreover, the neighbor brought this:
These were hoses with an internal diameter of 16 mm, like the original ones, and they could easily be turned in the direction we needed. We started removing the pipe from the engine. We struggled with the evil clamp for about 10 minutes - it fits tightly, and my pliers are not very branded. Then they tried to remove the hose from the pipe, but it was stuck, and there was nowhere to turn around. As a result, they turned it with the same pliers and it slowly gave up. Don't forget to put the basin. First, antifreeze leaked from the left side of the pan (i.e., just above the pipe), where I had placed the basin in advance. When the flow seemed to have stopped, I heard it was pouring from the right, so I had to move the basin there. Therefore, if there is, then two basins are better. It was worse with the second end of the pipe. The same struggle with the clamp, then fruitless attempts to pull it off the pipe. Well, it sits tightly! I’m already saying screw it, let’s cut it! And only then did it dawn on me - why remove it? We put the adapter directly into it and connect it to the thick hose going to the boiler. Yes, I say, two geniuses have come together, they have the strength, no need for intelligence, they wasted about twenty minutes! In general, it turned out something like in the last photo. On the left, the clamp on the engine pipe shines, and on the right, the same hose, unrolled, is connected through an adapter to the boiler tube. There is a clamp in the middle - this is the pipe that goes to the stove.
Last edited by marino; 12/19/2016 at 20:39 .
Actually after this the most difficult part is over. All that remains is to lower the wire down and thread it through the grille. It just fits through the grate with tension but without any difficulty. We fasten it with two self-tapping screws from the kit and put on a protective corrugation.
Then I began to study where to attach the ground wires. A round tip is crimped onto the wire; a screw is included, which is recommended to be used to screw the tip to the body. I don’t quite understand why this wire comes not from the body of the boiler itself, but from the socket. I dragged this wiring back into the engine compartment and its length was enough to reach a special ground bolt to which two wirings fit. Ours will be the third.
Then we put the battery back, don’t forget to secure it, and add fluid. To be honest, describing all this I don’t understand why it took us so much time. Somewhere there were distractions, somewhere unproductive body movements. I hope that my description will help reduce your installation time by about half.
Thank you, well described. It’s a little unclear with the hoses, maybe at first glance. As I understand it, this is heating from 220V?
Well, yes, at 220V. Maybe something is not clear (ask), but I simply wrote as if in continuation of those topics about forced circulation boilers, to which I gave a link. And from my bell tower, my story seemed clear to me, and I wanted to talk about the nuances that I encountered regarding this boiler. But then let me expand a little about hoses and connections. There is a Severs-M boiler, where the antifreeze is heated, and due to convection, its movement and heat exchange occur. In this heater, at least in our cars, it is connected according to the following scheme, described by a user with the nickname gefest72. The hose going to the stove is cut, a tee is inserted, the third hose goes to the boiler. The same is done with the hose going to the thermostat (it seems like this from memory). The second link was more difficult for the person to connect, so options are possible. On the Severs+ boiler everything is somewhat simpler because... There is only one insertion point, and in my case I didn’t even cut the hose. Those small bent hoses in the photo, or rather one of them, allowed me to compactly turn the hose almost 180 degrees towards the boiler, because a simple hose can break and narrow the passage hole. The severs comes with two springs included with the hose, which can be respectively inserted inside the two hoses, bent, and they will not become narrow in this place. Well, if you don’t have tricky little bent hoses, then you’ll do it with a spring, it’ll just be a little more compact with these kids, otherwise there’s too much stuff crammed in that corner. Now, if only you could stick the boiler on the other side of the engine, there would be more space there. Every time, even if not often, you have to look under the hood, I think that those people who organize the engine compartment are probably champions in playing Tetris. But those who come up with all sorts of tricky connectors and latches are autists!
To avoid bending the hoses, I bought a corner (metal L-shaped fitting) from a UAZ for 16 rubles. The diameter was perfect.
Instructions for the heater - paragraph 6.3 requires installation of the heater with a pump from below.
Operating a car becomes more difficult with the onset of cold weather. Before setting off on the road, the driver needs to warm up the engine and interior. Special antifreeze preheating devices cope with this task faster, safer for the car and more reliably. One of these is a product from the Severs company - a pre-heater of the same name facilitates the process of starting the engine and reduces the load on it. Let's take a closer look at how the device works, what its advantages and necessity are.
The best diesel engine preheaters
The driver and passengers can wait for warmth in the interior of a diesel car only 30-60 minutes after starting. Therefore, pre-heating will solve this problem, while making it easier to start a frozen unit. But not all owners of diesel cars can decide on an expensive purchase and complex installation. Experts have selected several effective devices for trucks.
EBERSPACHER Hydronic D5W S (diesel) 24V
An excellent option for heating the cooling system of a truck would be to install the EBERSPACHER Hydronic D5W S device. This diesel version was created for vehicles with a 24 V on-board voltage. Experts note the high-quality manufacturing of the device and economical fuel consumption. In an hour, the heater consumes from 0.27 to 0.62 liters of diesel fuel. The manufacturer has equipped its product with a timer, which allows you to start the device, adjust the intensity and duration of operation. It is recommended to install on cars with an engine capacity of more than 1.9 liters.
The heater becomes the winner of our rating, because Russian motorists have no complaints about it. It is unpretentious to the quality of diesel fuel and is easy to operate.
- high quality;
- light weight (2.3 kg);
- economical fuel consumption;
- durability.
APZh-30D (diesel, 24V)
An alternative to imported pre-heaters is the Russian development of APZh-30D. It is intended for installation on trucks with an on-board 24 V power supply. The heater is integrated into the liquid cooling system of a diesel engine, the thermal output of the device ranges from 7.30 kW. The device not only warms up the engine, it additionally warms up the coolant, speeding up the return to operating mode and heating the interior. Diesel fuel consumption is 0.75-3.7 l/h. Experts gave the model second place in our rating, appreciating the automatic mode of operation.
Domestic users speak flatteringly about the military development, its reliability and simplicity. The disadvantages include serious consumption of diesel fuel and large dimensions.
The best preheaters for passenger cars
Preheaters for passenger cars are presented in a large assortment; let’s look at the most popular models of 2018.
WEBASTO Thermo Top Evo Comfort+
The Webasto T400vl heater is designed specifically for the Russian market. A distinctive feature is the ability to warm up not only the car engine, but also create a comfortable temperature in the cabin.
WEBASTO Thermo Top Evo Comfort+
The power of the Webasto brand unit is 5 kW, which is enough for normal operation on gasoline engines with a displacement of up to 4 liters. The delivery set does not include a standard control unit.
Maximum efficiency is achieved by higher coolant temperatures, early start of the adp5 fan, faster heating thanks to liquid pump control and better heat transfer.
Severs 103.3741
Severs is a budget energy-dependent heater that operates from a standard electrical network. The package includes a thermostat that protects against engine overheating. Heating to 60°C is carried out in 1-1.5 hours. At a temperature of 85°C the system stops working. If the coolant temperature drops to 50°C, the heater starts working again. It is noteworthy that the heater is protected from moisture and electric shock.
Severs 103.3741
The only downside of Severs is that it needs an outlet, so such a device can only be used if there is an electrical outlet.
Defa Warm Up Warm Up 1350 Futura
DEFA WarmUp 1350 wFutura is the maximum system for pre-heating the engine, interior and charging the car battery. The system is controlled via the Futura mini-timer.
Defa Warm Up Warm Up 1350 Futura
The kit includes:
- electric cabin heater with a power of 1.3 kW;
- battery charger MultiCharger 1203 12 V, 3 A;
- Futura salon mini timer;
- set of power cables;
- set of connecting cables.
The big advantage is that the device consists of module blocks and armored connecting cables. Optionally, they can be installed either as separate blocks or as a whole complex.
Brand Archive
| ALFeco (Alfeko) - protection of the crankcase (pan) of the engine and gearbox |
The best diesel engine preheaters
At sub-zero temperatures, diesel becomes thick like jelly, as a result of which starting the engine even at -10°C becomes extremely difficult. Some people choose diesel of special winter brands, but it is not sold at all gas stations. Others choose an engine preheater for diesel engines. One does not interfere with the other, but together will create ideal conditions for any frost.
Teplostar Diesel engine-heater 14TS-10-12-S
TEPLOSTAR 14TS-10, 20TS, 15TSG are new models with a power of 12-20 kW, designed for buses and trucks that run on diesel fuel or compressed natural gas. It can even be installed on Kamaz
Teplostar Diesel engine-heater 14TS-10-12-S
Such heaters provide warming up of the vehicle engine and interior during the cold season. The main advantages of cars (diesel) with the TEPLOSTAR heater installed:
- guaranteed start of the vehicle engine at low temperatures (up to -45°C);
- When the engine is not running, it is possible to heat the interior.
Operating instructions Teplostar Diesel engine-heater 14TS-10-12-S
Hydronic D5W S (diesel) 24V
Liquid Hydronic 35 is intended for installation in buses, freight transport, container structures, special equipment, and ships. Heating power is 35 kW, which contributes to the fastest and most efficient heating of the engine, car interior, cabins, and truck cabins.
Hydronic D5W S (diesel) 24V
The hydronic is structurally divided into two main units - the pump and the fuel pump, which allows it to be installed in any chosen location, which significantly saves space. This design is optimal for installation in cars with a lack of free space under the hood.
Operating instructions Hydronic D5W S (diesel) 24V
APZh-30D (diesel, 24V)
APZh-30D is a pre-heater for a diesel engine. The heater requires 24V power to operate.
The heater is recommended for use in trucks, construction and specialized equipment.
APZh-30D (diesel, 24V)
Specifications:
| Heating power, kW | 7-30 |
| Maximum power, kW | 30 |
| Voltage, V | 12-24 |
| Fuel consumption, l/h | 0,75-3,7 |
| Operating temperature, °C | -50 |
Operating instructions APZh-30D (diesel, 24V)
The best preheaters for passenger cars
Preheaters for passenger cars are presented in a large assortment; let’s look at the most popular models of 2018.
WEBASTO Thermo Top Evo Comfort+
The Webasto T400vl heater is designed specifically for the Russian market. A distinctive feature is the ability to warm up not only the car engine, but also create a comfortable temperature in the cabin.
WEBASTO Thermo Top Evo Comfort+
The power of the Webasto brand unit is 5 kW, which is enough for normal operation on gasoline engines with a displacement of up to 4 liters. The delivery set does not include a standard control unit.
Maximum efficiency is achieved by higher coolant temperatures, early start of the adp5 fan, faster heating thanks to liquid pump control and better heat transfer.
Operating instructions WEBASTO Thermo Top Evo Comfort+
Severs 103.3741
Severs is a budget energy-dependent heater that operates from a standard electrical network. The package includes a thermostat that protects against engine overheating. Heating to 60°C is carried out in 1-1.5 hours. At a temperature of 85°C the system stops working. If the coolant temperature drops to 50°C, the heater starts working again. It is noteworthy that the heater is protected from moisture and electric shock.
Severs 103.3741
The only downside of Severs is that it needs an outlet, so such a device can only be used if there is an electrical outlet.
Operating instructions Severs 103.3741
Defa Warm Up Warm Up 1350 Futura
DEFA WarmUp 1350 wFutura is the maximum system for pre-heating the engine, interior and charging the car battery. The system is controlled via the Futura mini-timer.
Defa Warm Up Warm Up 1350 Futura
The kit includes:
- electric cabin heater with a power of 1.3 kW;
- battery charger MultiCharger 1203 12 V, 3 A;
- Futura salon mini timer;
- set of power cables;
- set of connecting cables.
The big advantage is that the device consists of module blocks and armored connecting cables. Optionally, they can be installed either as separate blocks or as a whole complex.
Operating instructions Defa Warm Up WarmUp 1350 Futura
Installation instructions for heaters of the PLANAR model range:
Dear clients and users of Advers products, we inform you that in December 2022 a new edition for the installation of air heaters of the Planar model range was released. You can read and download the new instructions in the “Service and Documentation” section. In order to avoid adverse consequences, the Advers company kindly requests that you comply with all installation requirements set out in the manual as amended in December 2022. It is necessary to check the installation for compliance with the requirements of the above instructions, installed heaters, and the Planar model range before December 2022.
The best autonomous engine preheaters
Autonomous liquid heaters are installed under the hood of a car and operate on one of the types of fuel: gasoline, diesel fuel, gas.
Longfei with 3 kW pump
Heats up the coolant and forces it to move through a small cycle, warming up the power unit even without idling, without wasting fuel. A heating element is used for heating, and centrifugal pumping equipment is used for circulation. These elements are located in the device body and operate from a household power supply with a voltage of 220 Volts.
This model has a thermostat and power control system. When the coolant reaches the upper temperature limit, the equipment turns off. As soon as it cools down to the lower set limit, the heating and pump are automatically turned on. As a result, the engine is always in a state of readiness to start and start moving.
Longfei miniature auxiliary heaters are designed to meet market needs. Their dimensions are only 8x7.7x11.8cm. The heaters are securely attached to the pipes using clamps, without requiring special fastening. They are fixed using a sequential method by inserting into the inlet tube of the interior heater. The model evenly warms up the engine at high speed. The electronics are highly protected from moisture and are reliable.
Longfey price from 2390 rubles.
Eberspacher HYDRONIC 3 B4E petrol 12V
Eberspächer HYDRONIC 3 B4E is installed on gasoline engines. Power 4 kW. On-board network voltage is 12V. Very easy to install and use, the kit includes a disk with a description of the installation process and technical characteristics.
Eberspacher HYDRONIC 3 B4E petrol 12V
BINAR-5S-COMFORT
The Binar-5S heater is designed to warm up a gasoline engine with a capacity of up to four liters before starting. Used at low temperatures down to -45°C. It can operate in two modes: preheater and reheater.
For residents of Russia and other cold climate zones, it is advisable to use an engine pre-heater. The car is operated in a gentle mode, there are no heavy loads due to highly thickened oil, and so on.
Main manufacturers and models of autonomous heaters
In the market of liquid and air heaters, the leading positions have long been occupied by two German companies: and Eberspacher. Among domestic manufacturers one can name the company Teplostar.
Webasto heaters
They are reliable and economical. Their products are somewhat inferior in cost to their competitors. Webasto's line of heaters includes many models that differ in power. For cars, trucks, buses, special equipment and yachts.
Webasto heater
The Thermo Top Evo Comfort+ model from Webasto is suitable for cars with up to 4 liters. This is the most popular option. There are varieties for gasoline and diesel engines. Power 5 kW. Power supply – 12V. Fuel consumption for 20 minutes of warming up is 0.17 liters. There is an option to warm up the interior.
Eberspächer heaters
This company also produces high-quality and economical heaters for all types of transport. Liquid heaters are branded Hydronic.
Heater Hydronic
Model 3 B4E is perfect for passenger cars with a capacity of up to 2 liters. Power – 4 kW, power supply – 12V. Fuel consumption – 0.57 l/hour. Consumption depends on the operating mode.
There are more powerful models for small cars, such as HYDRONIC B5W S. Power - 5 kW.
Heaters Teplostar
BINAR-5S-COMFORT
A popular model is BINAR-5S-COMFORT for small cars with a volume of up to 4 liters. There are petrol and diesel options. Power – 5 kW. Power supply – 12V. Gasoline consumption – 0.7 l/hour.
The Teplostar Diesel engine-heater 14TS-10-12-S model is a powerful heater with a 24V power supply and a power of 12 kW - 20 kW. Works on both diesel and gas. Suitable for buses, trucks and special equipment.
Models, their features
The “Start” line of preheaters includes the following series:
"Start"
Classic horizontal tank-type heaters with high power (2.5 and 3.0 kW). The movement of liquid in them is gravity. Designed for installation on trucks;
"Start-Turbo"
The only series of tank heaters equipped with a centrifugal pump providing forced circulation. They are mounted on the car in a vertical position, the terminals for connecting to the system are located perpendicularly. The series includes three sets - “Universal No. 1” (with a power of 1.0 kW, 1.5 kW and 2.5 kW.
The set contains components for a sequential installation method), “Universal No. 2” (heaters of the same power, but the set contains a variety of elements for installation, which allows you to make an insert in different ways) and “Universal No. 3” (the kit contains the same components, same as set No. 1, but the device itself is different - its power is 3 kW). These devices are suitable for use on both cars and trucks;
"Start-Classic"
Vertical gravity tank heaters. Models are available with two powers - 1.5 and 2.0 kW. They are intended for use on passenger car engines;
"Start M"
Gravity reservoir devices having a horizontal design. The power of the devices is 1.5 and 2.0 kW. They are intended for mid-size GAZ and ZIL trucks, but are often used by owners of passenger cars. One of the models is equipped with a bumper connector;
"Start M1" and "Start M2"
Low-power flow-type heaters. Models M1 (power 0.6 kW) are designed for installation on VAZ engines (the design of the cooling system of which uses a shortened supply pipe). And M2 heaters are designed for use with GAZ car engines. Their power is 0.7 kW;
"Start MP"
A series of low-power flow-through heaters (0.7 kW). Includes three models that differ in the diameters of the connection pins (26 mm, 32 mm and 39 mm). This series is suitable for use on cars, trucks and any other vehicles with a liquid cooling system (for example, snowmobiles);
Each heater model is equipped with everything necessary (adapters, tees, mounting brackets, clamps, rubber tubes) for installation work. There are also options when devices are sold without any additional components in the set.
To maintain the temperature regime, thermal switches are used in the design of the heaters, which eliminates the possibility of overheating of the heating element and its failure.
How to install a heater with a pump with your own hands?
When installing a 220V engine heater with a pump, you must follow safety precautions:
- It is not allowed to connect the main unit of 220 V heaters to a large circle of the cooling system. Such a connection will lead to heating of all the antifreeze, which is why heating will take a long time.
- Contact of the wire with moving units and components, as well as with the cylinder block, is not allowed. The cable should be brought out near the radiator grille, and the plug itself should be closed with a special plug to prevent the accumulation of moisture and dirt inside. After installation is completed, the network cable must be securely fastened.
- Do not turn on the engine heater if there is no coolant in the cooling system. Such use will result in pump failure.
- During installation, it is necessary to ensure tightness at the junction of the pipes. Leaking consumables can cause the motor to overheat.
- Wires should not be bent when laying, so as not to encounter the problem of breaking the electrical circuits.
- Installation of the electric heater should be performed after draining the antifreeze. If the quality of the coolant is low and traces of deposits are visible in it, it is necessary to change the consumables.
What will you need?
Before completing the task you need to prepare:
- set of wrenches;
- set of screwdrivers - with Phillips and flat tips;
- sealant;
- knife;
- an old bucket or basin where the antifreeze will be drained;
- a set of adapters (if they are required for connection to the pump fittings);
- new refrigerant (if antifreeze is changed).
Algorithm of actions
Guide for installing and connecting the heater:
- The car is driven into a garage with a pit or onto an overpass. The machine must stand on a flat surface; for this purpose, stops should be placed under the wheels. Then you need to lift the parking brake lever.
- The bracket is attached to the heater boiler.
- The heater sleeve is cut into two lengths of 19 and 49 cm, respectively. You need to connect a longer piece to the input, and a shorter piece to the output. The elements are fastened using clamps.
- Under the hood of the car, the air filter element is removed along with the air duct.
- The high-voltage cables are disconnected from the spark plugs and the distributor is dismantled. The block with cables is placed on the bracket included in the package. The module recess with the high-voltage device must be inserted through the gap between the engine and the gearbox bolt washers. After this, the unit must be fixed to the left of the motor using a standard bolt.
- Then a container is placed under the drain hole of the cooling system and the consumables are drained.
- After this, a fitting is installed in the drain hole (before this, the thread is treated with sealant). The mount is fixed to the boiler using a bolt and an immersion washer.
- A spring is installed on the outlet sleeve to prevent the system from bending. Then a clamp is placed into which the fitting is inserted. The connection point must be clamped.
- After this, the inlet pipe should be tried on the lower radiator line and the cut location should be marked. Using a knife, trimming is done, and then a tee is inserted into the hose. At this stage, the side outlet should be installed so that it faces the boiler inlet line. If the pipe is too long, it must be cut.
- Liquid is poured into the cooling system. It is necessary to fill in one liter more consumables, since the volume of the system increases after installing the heater.
- The air filter device with the blower is reinstalled, and high-voltage cables are connected to the spark plugs.
- The 220 V power cable is secured with clamps in the engine compartment so that it does not come into contact with moving components and mechanisms.
- The engine is starting. Within a few minutes, while the engine is running, it is necessary to check the tightness of all hoses and eliminate leaks, if any. If the coolant level drops after starting the engine, it must be replenished.
- The heating system is turned on for the first time. You need to make sure that antifreeze circulates through the pipes (the outlet hose should heat up after starting in a few minutes).
Parallel connection diagram for electric heaters
How to install Severs-M
Installation of Severs-M is carried out in the following order:
1. Cut pipes from a rubber sleeve, put them on the pipes of the device, secure with clamps.
2. Remove the air filter, unscrew the bolt. For VAZ cars, also remove the spark plug tips, disconnect and remove the high-voltage module.
3. Attach the bracket to the heater.
4. Remove the cylinder block plug and drain the fluid.
5. Place the heater fitting in place of the plug (on the sealant).
6. Fix the bracket with the heater.
7. Insert the spring into the sleeve, connect it to the fitting and secure with a clamp.
8. Pour in liquid.
9. Place the second sleeve on the adapter tee and secure with a clamp.
10. Fill the cooling system.
11. Secure the power cord.
12. Check the system for leaks and return the parts removed before installation.
13. Plug in the cord.
Read more about installing a heater on a car
Pay attention during operation!
- Integrity of insulation of electrical parts.
- Connect only to a three-wire single-phase network.
- Monitor the condition of the fluid and maintain the tightness of the system.
- Disconnect from the mains before starting the engine.
Advantages and disadvantages
The advantages of Longfey preheaters include:
- Small overall dimensions, which makes it easy to find a place for its installation;
- The presence of a pump ensures uniform heating of the antifreeze in the system due to forced circulation;
- Availability of overheating protection systems (when a certain temperature is reached, the device turns off);
- A wide selection of models allows you to choose a device for any car;
- Connecting the Longfey heater will not cause any difficulties and does not require modifications to the motor;
But they also have certain disadvantages that relate not only to the devices of this particular manufacturer, but to the design and operation features of all devices of this type:
- To connect, you need a 220 V socket, so such devices cannot be used if the car is located far from housing;
- Requires compliance with safety precautions when using;
- The breakdown is detected only during the process of starting the car (the device was turned on, hoping that it would work, but then it turns out that the engine is not warmed up);
But all the negative aspects do not become a reason to use this device in a car. But at the same time, for everything to work normally, the Longfey preheater needs to be installed correctly.
Heaters "Start"
Most often, car owners give preference to Russian-made devices, including Start heaters, manufactured in Tyumen.
Such decisions are due to the fact that the products are of fairly good quality, cope with the assigned tasks, the devices are inexpensive, and installing them on a car is not difficult.
The range of heaters is quite extensive. It includes models with different capacities, providing both forced and gravity circulation of coolant through the system during operation.
In general, the operating principle of preheaters is very simple. There is a housing with leads for connection to the cooling system pipes. Inside this housing there are heating elements - heating elements.
Installation of pre-heater
Before proceeding with installation, you must carefully study the diagram and design of the cooling system of your machine.
. Because this affects the installation method of the electric heater. In addition, much will depend on the modification of the device itself, but there are general installation rules.
Firstly, it is important to understand that the device must be connected to a single-phase network. Moreover, it is necessary to ground the contact
This is done using a circuit breaker that has protection against electric current. Some people also recommend using a shutdown system when installing the device. This device makes the process as safe as possible and reduces the risk of electric shock when performing work.
When installing an electric heater, it is necessary to inspect the cooling system. The device is almost always connected at the cylinders
, where a pipe with a diameter of 20 mm is provided. Place the device in a horizontal position. As a result, it should be lower than the radiator level. This must be done to prevent airing of the device. Let us clarify that, if necessary, the installation location of the electric heater can be changed, but this will require an additional hose (usually included with the device). After connecting the device, it must be securely fixed to the housing. Although, sometimes this can be quite difficult to implement.
In principle, installing this device is not too complicated, but if you have even minimal doubts about the correct execution of all actions on your own, it is advisable to contact a car service center
who will do all the work quickly and efficiently.