Tuning and auto gadgets / From Sergey Vasilenkov
- Types
Types presented on the Russian market: video
- How to make eyelashes for headlights from film: video
- Plastic option for Audi 80: video
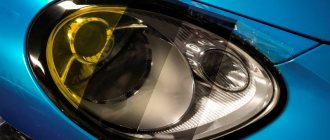
Probably every driver has seen cars driving around the city with cute eyelashes on their headlights. Today, eyelashes for headlights are sold in car dealerships, but you can make them yourself.
Why are eyelashes installed on car headlights?
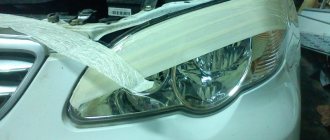
Eyelashes on headlights are narrow linings that are small in size. The cilia help make changes to the shape of the front lighting fixtures. So, rectangular headlights can become semicircular, and vice versa. In addition, the presence of cilia helps protect the surface of the headlight glass from mechanical damage caused by small stones.
Eyelashes on the headlights will give your car a unique elegance
If, in your opinion, installing eyelashes will not distinguish your car from a number of other cars, conduct a simple experiment. Park your car in the parking lot next to the same one, but with eyelashes. The difference will simply catch your eye. It would seem that the eyelashes are such a small thing, but the appearance of the car changes dramatically. And if the eyelashes are installed professionally, this detail will become an important point of the entire exterior.
What it is?
The idea of a modification almost always comes after accidentally encountering a car with such crafts. The appearance of the car changes for the better, especially if a beautiful lady is driving. The eyelashes that are installed on lighting devices are narrow linings with very small dimensions, but they can radically change the appearance of not only the optics, but also the entire car. If you still have doubts about the need for such alterations, just imagine your car next to the tuning model. The main condition for the manufacture and installation of these products on optics is in no way to harm the main function of the headlights, to illuminate the road ahead of the car well. One of the advantages of such products is their ease of installation and ease of removal if necessary.
Kinds
Manufacturers of automobile accessories offer three types of eyelashes for headlights, the differences of which lie in their purpose and characteristics.
- Protective. Their main task, as the name suggests, is protection from mechanical damage. To make protective eyelashes, transparent thermoplastic is used, onto which the eyelash pattern fits perfectly.
- Chrome plated. They are designed to create a harmonious design of the car's exterior. If the car already has chrome parts, then such eyelashes will serve as a good addition to them.
- Plastic - without exaggeration, they can be called the most common linings. As a rule, they are universal and affordable.
However, often the car owner does not like industrially manufactured linings either because of their appearance or because of poor quality. That’s why many people prefer to make eyelashes with their own hands. It costs no more than buying factory products.
Types presented on the Russian market: video
https://youtube.com/watch?v=ThQgiDYAQi0
Craftsmen use several methods to make eyelashes. Each of them has its own advantages and disadvantages. Therefore, each owner chooses the option that best suits his requirements and needs.
Adhesive tape
Today you can find any colors and textures of self-adhesive film to make eyelashes for headlights from it.
The easiest way to make eyelashes is to use “self-adhesive”. To work with the film, no special skills or tools are required, it is cheap, you don’t have to paint it, you can choose any color, you don’t need to remove the headlights, and the entire process of making eyelashes will take you no more than 40 minutes.
It would seem that these are continuous advantages, but they are also disadvantages at the same time. The film is inexpensive, but it looks cheap on the car, does not require painting - and does not exactly match the body color, it is easy to use - and therefore anyone can do the same.
In addition, the service life of the film on the headlights is limited: the edges of the “self-adhesive” after washing lift up and tear, dirt gets clogged into scratches from stones, and after only 3 months of driving on Russian roads, such tuning will not improve, but will spoil the appearance of the car. Keep in mind that 10 years ago, when stores were not yet overflowing with car accessories, tuning studios were developed only in the capital, and ordering tuning via the Internet was just becoming a reality, eyelashes made from film could cause admiration and a desire to “do the same.” Today it is difficult to surprise anyone with them.
Chevrolet car tuning element - stickers made of self-adhesive paper
Using vinyl and tinted film for manufacturing
This method is the simplest and fastest, and when used, it takes 5-10 minutes to make products. True, they will look worse than those that require a lot of time and a large amount of materials to produce.
Making eyelashes from film is quick and easy
If you narrow the headlights using a black film, then such eyelashes will look harmonious on cars of the same color, but not very well on cars of a different color. But this problem can be easily solved, since finding a film that harmoniously matches the color of the car today is not at all difficult.
Having opted for vinyl film used for car wrapping, the driver can give free rein to his imagination. After all, its color range, sold through car dealerships, is very wide. And eyelashes cut from carbon-fiber vinyl will look very original.
How to make eyelashes for headlights from film: video
Among other things, headlight light does not pass through the vinyl film, while the tint film does. And in this case, the material for making eyelashes can be picked up near workshops that specialize in wrapping cars with vinyl - they always have a lot of waste.
Before you start making eyelashes, you need to make a cast of them. For this purpose, the upper part of the surface of the headlights should be covered with masking tape. This must be done so that it does not reach the central part a little. After this, using a pencil or marker, a drawing of future eyelashes is applied to the tape. It should be taken into account that too wide eyelashes can significantly reduce the luminous flux of headlights. And they won’t look very stylish.
Next, the tape is cut along the drawn lines. After this, you need to move some distance away from the car and look at what the eyelashes look like from different angles. If necessary, necessary adjustments should be made.
If everything is satisfactory, then the tape is carefully removed and the non-adhesive side is applied to the tape glued to the second headlight. The outlines of the template are copied onto it and the second set of cilia is cut out. The tape removed from both headlights is pasted onto the film. To do this, select the side on which there is no transparent protection. Now you can cut eyelashes from the film with scissors.
The resulting products are applied with the adhesive side to the surface of the headlights, which is previously degreased with a solvent. If the shape of the headlights is too convex, then the film must be molded during the sticker process. A hair dryer is used for this purpose.
Angel eyes
Installing angel eyes in headlights is not easy. This will require dismantling the optics with complete disassembly and connection to the standard wiring. With such a serious intervention, it is better to replace the incandescent lamp with a modern bi-xenon lens, around which to make a backlight of diodes.
The fashion for the luminous eagle eye in optics was set by BMW, which invented this type of illumination back in the early 1990s. “Evil” headlights are valued among car enthusiasts, so conventional optics are often subject to similar modifications.
Making from scrap materials
The easiest way to make glowing rings is from plexiglass. To do this, you need to purchase 3-4 mm thick tubes, glue, LED lamps, a drill and wires. Before starting work, you should dismantle the headlights, disassemble them and measure the diameter of the reflector.
Manufacturing process:
- Cut out a stencil from cardboard.
- Using a hair dryer, bend the tube according to the template.
- Glue the edges with clear glue.
- The diodes are fixed on the reverse side in neatly drilled small recesses.
At first glance, it is very difficult to perform this work and improve the appearance of your vehicle. However, with step-by-step execution of actions, everything becomes logical and understandable.
When choosing parts, you should not save, because a burnt-out element will require complete disassembly of the headlight, dismantling the eyelash and re-soldering the light element. As protection, you can also install a resistor and a voltage regulator, which are sold in car stores.
Installation
Light tuning of headlights increases attractiveness, and the appearance visually becomes more expensive.
To install the peephole:
- Glue the finished plexiglass product to the reflector.
- Secure the wiring and connect it to the side lights.
- Glue the glass and install the headlight in place.
Tuned optics look better with the combined use of cilia and eyes. White or blue headlights look great during the day and at night.
Sheet plastic as a material for DIY manufacturing
Currently, a lot of plastic has appeared on sale, sold in sheets of different thicknesses. And it is this that can be used to make eyelashes for headlights. Just don’t buy heat-resistant plastic for this purpose, since it cannot be given the required shape by heating.
Plastic option for Audi 80: video
You can use sheet plastic with a thickness of no more than one and a half millimeters. It is attached to the headlight using double-sided tape, without heating. But, as experience shows, it is better to use plastic with a thickness of about 2.5 mm. It will not only be more reliable, but also more beautiful.
The preliminary work for making the template is the same as in the previous case. The only difference is that to cut out the eyelashes you will have to use an electric jigsaw rather than scissors. The cut blanks must be applied to the headlights to determine the need for changes.
Next, the edges are processed to a rounded state. For this purpose, you can use either a fine file or a grinder. The flat surface is treated with waterproof sandpaper No. 600. This is done so that the adhesion coefficient of the surface increases during subsequent treatment with a primer. The latter is an acrylic two-component primer.
But before priming and painting the plastic eyelashes, they should be formatted according to the shape of the headlights. A hair dryer is used for this. The surface of the plastic is heated to a plastic state, after which it is given the desired shape. This will increase the reliability of attaching the plastic eyelashes to the surface of the headlights using double-sided tape.
If you don’t have a hair dryer at hand, you can get by with a regular kettle. At the same time, it is even more convenient to work with it than with a hairdryer, since in this case both hands are free. The water in the kettle is brought to a boil, and a plastic part is brought to its spout, the surface of which is heated by the steam.
With little effort, the heated part can be given the required shape, after which the exposure to steam stops. In this case, it is necessary to keep the part in the given position until the plastic cools completely. It is recommended to bend the cilia in stages to achieve their ideal fit to the surface of the headlights. The finished product is secured using double-sided tape.
Optics preparation
Because the workpiece is prepared directly on the glass, the technological process begins with dismantling the optics. The optics are dismantled to simplify the technology of applying several layers of fiberglass to the surface of the headlight.
Workpiece execution algorithm:
The headlight surface is cleaned of all kinds of contaminants. The surface of the headlight glass is sealed with masking tape. Already sealed areas are checked for the presence of unfinished areas (a similar procedure is necessary to protect the glass itself from adhesion of the resin used, since it is practically impossible to remove the latter in a frozen state without special means). Then the procedure of applying the resin to the glass surface begins, and the glass cloth is carefully attached to the resin. Recommendation: to create additional strength, you need to fold the fabric in several layers, each of which is pre-dried before the next. Next, you need to wait about 3-6 hours for exposure, during which time the resin will dry out sufficiently. After final drying, the workpiece should be removed from the working surface of the headlight. For another headlight, blanks are produced using a similar technology.
Eyelashes for headlights made of epoxy resin and fiberglass
This option for making eyelashes is the most labor-intensive, but the quality of the product when used is at a very high level. At the same time, all the bends and design features are repeated down to the smallest detail. It is with the help of this method that eyelashes are obtained well for foreign-made cars, the headlights of which are heavily slicked, and their surface is curved in both planes. And covers for headlights with a corrugated surface can generally be made only in this way.
To make eyelashes, you will need the following tools and materials:
- fiberglass;
- epoxy resin, and if you don’t have it, you can use epoxy glue;
- household tape and masking tape;
- a brush with short and hard bristles;
- roller of small width;
- rubber gloves to protect the surface of the hands;
- respirator to protect the respiratory tract of a worker.
It is better to remove the headlights from the car before starting work. Firstly, it will be more convenient to work with them, and secondly, it eliminates the possibility of staining the surface of the hood or bumper with resin.
The surface of the headlight is covered with masking tape, onto the surface of which the contours of the eyelashes are applied.
The removed headlights are placed on a surface covered with oilcloth. The surface of the headlight is covered with household tape. Painting tape is glued over it. The latter should be applied in such a way that the joints of household tape are glued - this is done to eliminate the possibility of particles of epoxy resin or glue penetrating the headlight.
The contours of the eyelashes are drawn on the surface of the masking tape using a marker. This is necessary in order to determine the limit of gluing thin or thick fiberglass.
However, we must remember that thin fiberglass allows layers to be applied more accurately, especially in places where the glass is sharply curved. Making blanks using thin fiberglass will require more time.
Sequence of work:
- Fiberglass is cut into narrow strips. Their length should be slightly greater than the width of the headlight.
- Epoxy glue is diluted at the rate of 1 part hardener to 10 parts glue. Violation of the proportions can lead to the glue hardening too early or taking a very long time to harden. In this case, the strength characteristics will be violated.
- Next, put on rubber gloves and apply a thin layer of resin to the tape. In this case, the contour of the drawn overlays should overlap by approximately one centimeter.
- We lay thin fiberglass fabric on the resulting layer of resin. Its surface is rolled with a small roller until the epoxy resin shows through.
Resin and fiberglass must be applied in several layers - Another layer of epoxy glue is applied to the fiberglass with a brush, on top of which the fiberglass is again placed. In this case, the edge of the new layer should overlap the boundaries of the first by five millimeters. And again the surface must be rolled until the resin passes through the pores of the fabric. As a result of the roller treatment, all air bubbles should be completely removed from the space between the layers.
- The last layer of fiberglass is generously filled with epoxy resin. The total thickness of all layers must be at least 4 mm. The finished product is left for about a day to allow the epoxy resin to dry completely. The headlight should be positioned in such a way that the surface of future eyelashes is strictly horizontal. This will avoid smudges and unevenness.
- After the resin has completely dried, the covers are removed from the headlights. As a rule, this is not difficult to do - the surface of household tape is very slippery and masking tape comes off easily.
- Now you need to remove all the tape from the surface of the headlights and wash them with some solvent or gasoline.
- A pattern is applied to the eyelash blank with a marker, according to which it is cut using an electric jigsaw or grinder.
- The cut trims are tried on the headlights. If everything is normal, then the surface of the eyelashes is treated with sandpaper. First, rough sanding is used, and then finishing is done using fine sandpaper.
- The surface, treated to a perfectly smooth state, is primed and painted to match the color of the car body. In this case, as a rule, after applying the first layer of paint, small defects are revealed. They can be removed using finishing putty. The surface is again sanded, primed and painted. At least 3 layers of paint must be applied.
- Well-dried eyelashes are attached to the headlights using double-sided tape.
Preparing the optics
Since we will make the workpiece directly on the glass, we begin the process by dismantling the optics. This is necessary to simplify the process of applying layers of fiberglass to the headlights.
Sequencing:
- We clean the surface of the headlights from various types of contaminants.
- Seal the glass with masking tape.
- We check the sealed areas for unfinished areas (this procedure is necessary to ensure the glass is protected from sticking of the resin). It is impossible to remove hardened resin without the help of special means.
- Next, we proceed directly to applying a layer of resin to the surface, carefully attaching the fiberglass to the resin. Tip: to give extra strength, lay the filigree in several layers. Each layer must be allowed to dry before applying the next.
- After this, you just need to wait about three to six hours until the resin dries completely.
- After complete drying, the workpiece must be removed from the work surface.
- Using the same technology, blanks are made for the second headlight.
Then everything is extremely simple: you need to start designing the eyelashes. At this stage, you can give free rein to your imagination and bring your ideas to life. If your imagination refuses to help, then you can look for inspiration on the Internet - there are a huge number of stores selling similar decorative elements. You can borrow several original ideas from them.
Video instructions for installing eyelashes on car headlights
Making and installing eyelashes on car headlights with your own hands or using the help of specialists is a personal matter for each driver. But no matter which option for installing the eyelashes is chosen, we can say with confidence that this exterior detail will provide the car with beauty and originality.
How to paint a bumper from a spray can with your own hands: secrets of the master
DIY methods and technology for tinting headlights
What is the use of blackout?
According to many who have tried this design, such “military headlights” bring very little benefit. Most often, military headlight covers are installed on UAZ vehicles, but sometimes they can be seen on motorcycles and trucks. So, we list the main advantages of these devices:
- make night movements less noticeable;
- protect headlights from dirt, branches, stones and anything that can damage them;
- make the car less noticeable with the headlights off, especially in the forest (shiny headlights, especially against a dark background, can be seen very far);
- add cool to the look.
If the last 3 points are not in doubt, then the first one is worth focusing on. Early simplest version of blackout
Early simplest version of blackout
Indeed, blackout UAZ headlights will allow you to move more secretly at night. But the light passing through the narrow slit of the device will clearly not be enough. In addition, this light passes through the blue glass in the body of the structure, which makes it even dimmer and less noticeable from the outside. Therefore, you can move confidently with such light only in very familiar places. You can, of course, open the curtains of the structure, but still some of the light will be lost.
Even with the curtain open, some light is lost
Who might need to move secretly? Yes, from anyone who doesn’t want to be particularly “scorched”: treasure hunters, poachers and others. Of course, if the budget allows, then it is better to use a night vision device, thanks to which the likelihood of remaining undetected increases significantly. But, in any case, blackout or a night vision device will make you less noticeable only to the eyes and devices operating in the visible spectrum. There is no hiding from a thermal imager using these devices.
Old style blackout
This design has only one drawback, but a very significant one - very little light. You can also add additional weight and cost (a set can cost more than 1,500 rubles), but compared to the main disadvantage, these are trifles.
Motorcycle Ural with blackout
Conclusion
Yes, the blackout on the UAZ protects the headlights quite well and adds to the attractiveness of the car. But from a practical point of view, this is of little use for a civilian vehicle. The headlights can be protected by a power bumper with a guard and even an ordinary metal mesh, which has almost no effect on the luminous flux. And the quality of light for an SUV is a very important indicator, especially with frequent movements at night, so limiting the luminous flux by installing blackout on the headlights is only worthwhile in exceptional cases.
Blackout on UAZ
Kenguryatnik Lightbars (LED beams) Additional light for off-road use Power bumper Do you need a snorkel?
Fiberglass
For several reasons, this is the most difficult execution option: there is no ready-made material (the trim will have to be sculpted from scratch), the headlight must be dismantled, and painting is required. But the result is worth the effort: if you set out to make eyelashes from fiberglass, you will end up with a high-quality, durable product.
Easy way to make, paint and install
To make fiberglass eyelashes we need the following set of tools:
- crosshead screwdriver;
- masking tape;
- pencil;
- brush;
- epoxy resin;
- several sheets of fiberglass;
- primer;
- clean cotton rag;
- degreaser;
- putty;
- three narrow spatulas (3, 5 and 8 cm);
- grinding machine (grinder with grinding wheels or long and hard manual labor);
- acrylic paint;
- sandpaper;
- varnish
We dismantle the headlight and begin the process of installing the eyelashes.
- We cover the headlight with masking tape (to avoid accidental contact with resin, it is better to cover it completely, and not just the part on which the eyelash will be placed).
- We decide on the shape, make a stencil and cut out fiberglass fabric on it (from 2 to 5 layers for each eyelash; the quantity will depend on the quality of the fiberglass fabric and the volume of epoxy resin), with allowances for polishing the edges.
- We begin to create a blank: using a brush, place a thin layer of epoxy resin on the headlight, carefully apply a pre-cut sheet of fiberglass, press, smooth and leave to dry. This is a slow process, the layer can dry from 1 to 5 hours, depending on the temperature and humidity in the room.
- After complete drying, apply subsequent layers in the same way.
- Then we remove the workpiece, correct the shape with coarse sandpaper and carefully sand the edges, removing the most obvious roughness on the eyelash.
And then we work according to the standard scheme, which was described above. We degrease, apply putty, wait until it dries, and sand. Degrease, prime, sand. We degrease, paint and varnish, wait until it dries.
Photo gallery: proven method of making eyelashes
We install it on the headlight using double-sided tape or sealant. Let's enjoy the victory! A lot of time and effort was spent, but such eyelashes look great and will delight the eye for many years.
"Give coal"
Rolling Coal is a special nozzle for diesel engines that is especially popular among Americans. They help burn fuel faster. Why is this necessary? With such a nozzle, an impressive cloud of black smoke comes out of the exhaust port. This is so unecological that in the United States the tradition of “giving coal” has long been outlawed. For such a nozzle you can get an impressive fine. And the black smoke itself coming out of the exhaust is unlikely to make your car more stylish. Expensive cars today are, first of all, environmentally friendly vehicles that do not pollute the environment and do not pollute pedestrians with exhaust fumes.
A temple in a Siberian village is recognized as the most beautiful in Europe: mysticism and reality
Speed record: scientists have “taught” smart glass to quickly change its color
Capricorn and 2 other signs that remain carefree in any situation
Important design details
Before you paint the manufactured eyelashes yourself, you should think about the design of the blank itself, which will work in tandem with the headlights. After making shells from fiberglass and polyester resin, many people rush to cut the workpiece into pieces without thinking through their steps in advance. To avoid common mistakes, listen to a few useful tips:
- Check in advance how the eyelash will look on the surface of the car's head optics housing. To do this, always make templates, apply them, correct mistakes, and only use a sample that satisfies all parameters to make the eyelashes yourself;
- Use good, sharp pruning tools. If you work with dull knives, the edges will turn out uneven and a large number of burrs will form. You start correcting them, and in the end you can cut out unnecessary things, break the shape and get a completely different result than you originally expected;
- Putty, sandpaper and primer. These are extremely important stages that largely determine the appearance and service life of a hand-made eyelash. Be sure to wrap the sandpaper sheets around a wooden block with a smooth surface. By pressing the sandpaper with your hand, you risk ruining the workpiece, creating an uneven and uneven surface. This is due to the fact that your fingers press with different forces on the sandpaper. Therefore, the putty is removed in different layers;
- If irregularities appear, do not rush to skip them and move on according to plan. It is better to spend more time, but re-putty, sand and prime the surface;
- The primer plays a big role in the quality of application of paints and varnishes. Primer allows the paint to adhere better and provide a long-lasting visual effect. If you simply apply paint over fiberglass or unprimed putty, it will soon peel off, begin to bubble and fall off.
By following these recommendations, you will be able to achieve the desired result. Those who do not want to bother making eyelashes themselves can easily purchase them ready-made from various manufacturers. Considering the current assortment, it will not be difficult to find exactly those elements that will fully satisfy your taste and match the appearance of the vehicle itself.
