The relative simplicity of the Lada Granta’s design, including the liftback, allows for a number of preventive and repair work to be carried out outside the service center.
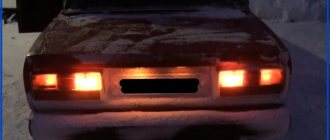
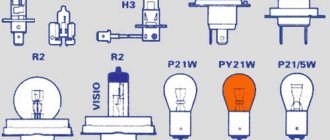
The rear lights include brake and side light bulbs (double-filament P21/5W), turn signal lamps (PY21W orange light), fog light (P21W) in the left lamp, and reverse light (P21W) in the right lamp.
The work is shown on the right lantern. We change the lamps in the left lamp in the same way
Location of lamps in the rear lights: 1 — fog light; 2 — direction indicator; 3 — brake signal and side light; 4 — reverse. Location of lamps in the rear lights: 1 — fog light; 2 — direction indicator; 3 — brake signal and side light; 4 - reverse
Necessary tool for flashlight replacement
So, how to remove the rear light on a liftback: for these purposes you will need time, tools, a platform (platform), and a set of new consumables.
- A set of automotive tools, in particular: a flat-tip screwdriver, an “8” socket, a socket wrench of the same size;
- Rags, liquid for removing rust and corrosion WD - 40;
- New optics;
- Lighting lamps if necessary.
Replacement algorithm
- We turn off the engine, squeeze the handbrake;
- Open the back door;
- Depending on the model year, the sequence of actions differs. In the first generation (until 2015), unfasten the casing flap and provide free access to the back of the optics. In the second generation, remove the plastic latch, remove the lamps, unscrew the three nuts.
We replace the reflector, lamps, and assemble the structure in the reverse order.
How to change lamps
The lighting system of the Lada Granta is simple and practical. To change headlight bulbs, you don't need any special tools. Just read our instructions and follow the recommendations.
Front optics
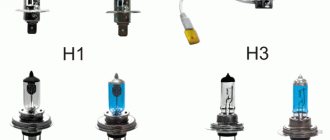
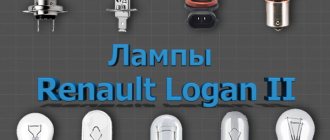
Lada Granta is equipped with H4 low and high beam lamps. To change the lamp you will need gloves, a long straight screwdriver and a flashlight.
When replacing a lamp, do not hold it by the cylinder. During operation, it becomes very hot and cools through the glass. If there are particles of fat from the fingers on the cylinder, the heat transfer of the lamp will be disrupted. It will burn out quickly.
First, remove the cover that covers the headlight. It is located behind the headlight under the hood. To remove it, you need to press your finger on the plastic pawl, which is located on top, and use a screwdriver to press the cover off the two guides.
After you have removed the cover, disconnect the connector block. Simply pull it away from the headlight. Next, remove the rubber sealing ring.
The lamp is secured with fixing brackets. You need to press them towards the headlight, remove them from the clamps and move them to the side. The lamp can be removed.
We reassemble in the reverse order: install the light bulb, snap the latches, install the O-ring, attach the connector block and close the lid.
When installing a new lamp, you need to align the guide beams on the lamp base with the grooves at the mounting location. It is impossible to install the lamp in any other position.
When assembling, check that the fixing brackets securely secure the lamp and both fit into the grooves. Install the O-ring carefully. It is important that dust does not get into the headlight, otherwise it will have to be changed after some time. Be careful when removing and installing the cover. The plastic pawl may break if you press too hard on it.
IMPORTANT: Wear gloves when changing lamps. If particles of fat from your fingers remain on the cylinder, this will greatly reduce their service life.
IMPORTANT: Changing turn signals is even easier. You need to find the socket, turn it counterclockwise and remove the light bulb. The new light bulb must be inserted into the grooves of the socket, pressed slightly and turned clockwise. All that remains is to install the socket with the light bulb in its regular place.
The fog light bulb is a little more difficult to replace. To gain access to it, you need to turn the steering wheel and unscrew the two screws that connect the bumper and the fender liner. After this, unclip the bumper from its mountings.
Bend the bumper 15-20 centimeters so that you can reach the headlight, and unscrew the lamp counterclockwise a quarter turn. Install everything in reverse order.
Rear optics
With the rear lights everything is elementary. Access to them from the trunk. There are plastic inserts with holes on the right and left. To gain access to all the bulbs, you need to remove these inserts. Place your finger into the hole, press the plastic latch and remove the insert. This gives you access to all the bulbs that are located in the rear lights. All that remains is to remove the required lamp and replace it with a new one. After replacement, replace the plastic insert.
Elements of tuning optical devices
Recently, installation of LEDs has become popular. There are many advantages with analogues: long service life, direction of the light beam, brightness, resistance to high plus and minus temperatures.
And the main trump card is cost, availability, and a wide range of color shades.
The installation process is somewhat different from the usual, as it is necessary:
- dismantle the standard illuminator (lamp);
- depressurize the lantern, remove the rubber seal;
- cover the seat with LED strip of the required length;
- connect the contact board;
- Reassemble the structure in reverse order.
Recently, it has become popular to install fog lights on the rear bumper. This improves visibility when passing backwards and prevents accidents. Replacing the rear fog light of a Lada Granta liftback is carried out by analogy.
The nuances of installing LED DRL lamps
If there are no baseless LED lamps for the Lada Grant, you can install ordinary base lamps. In this case, you will have to remove the base from the diode yourself, and fit the free antennae to the mounting holes.
After replacing the lamps, do not throw away the old halogen devices. The fact is that in order to comply with regulatory and technical requirements for daylight, after installing new lamps, you will need to visit a technical center. Otherwise, the next scheduled technical inspection will prohibit the operation of a car with such modified headlights.
Typical signs of a lighting system malfunction
- lack of indication on the dashboard when the turn signals, high/low beam lever, and brake light are activated;
- frequent indication of the above indicators;
- the high/low beam lever does not activate the lamps;
- insufficient brightness of lamps and flashlight reflector.
The above signs indicate damage, deformation, or a break in the electrical circuit of the lighting system. To troubleshoot problems, you will need comprehensive diagnostics, identification of the breakdown, and subsequent replacement of elements. You can do this either independently or by contacting a service center for help from specialists.
Causes of failure
There are several main reasons why low beam bulbs fail:
- the lamp itself burned out. If the light does not turn on, then this breakdown option is the first to come to mind. If you have halogen lighting sources installed, then one of the two filaments in them may come off, which will contribute to breakdown. To replace a broken bulb with a base, it will be enough to turn off the ignition, open the hood, and remove the protective box on both sides of the headlight. After this, take out the contact group, remove the retaining springs, and then the burnt-out product. To prevent it from burning immediately after installation in the headlight, it should be wiped with alcohol. You should not handle a new flask without gloves or napkins: there is always small amounts of grease or dirt on your hands, which can impair the performance of the product;
- The fuse has blown. It provides the necessary voltage to the electrical circuit. To fix it, you need to open the car fuse box and find the one you need using the pinout. If the jumper in the fuse has blown, you will be able to see it with the naked eye. Next, you need to remove the broken part and replace it with a new one. If you constantly encounter fuse failures, it is quite possible that your Lada has problems with the wiring itself. To eliminate them, it is recommended to contact specialists, since faulty electrical wiring can cause a fire;
- other non-standard reasons. Sometimes product breakdowns can be caused by, for example, broken headlight cleaners.
Analysis of reviews from Lada Granta liftback owners
- Grant-Eject (https://www.drive2.ru/l/6512513/): the sedan's lamps are different from those of the liftback. In the first modification they are combined, in the liftback they are separate.
- Diyk: taillights often sweat on sedans, the problem has been eliminated in the liftback;
- Silica Gel: to quickly remove moisture, attach a moisture absorber for shoes to double-sided tape. It doesn't last long, but it's effective. Improving the sealing of the rear lights is an alternative option.
- Grant-Eject: insufficient fixation contributed to the flashlight falling out during movement.
- LADA Granta 2012 (https://www.zr.ru/content/articles/832528-lampy-primenyaemye-v-avtomobile-lada-granta/): the car is reliable, unpretentious, subject to a moderate driving style. Over a period of five years of operation, breakdowns are typical and characteristic.
Which low beam lamp is suitable for the Granta (restyling)?
Suitable vehicle years: 2022, 2022, 2022.
Restyled cars produced since August 2018 are equipped with 60/55 H19 bulbs:
- 60/55 is the power of low beam (55) and high beam (60) in watts,
- H19 - base type.
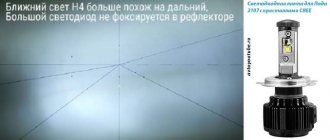
H19 is a development of H4 lamps. You can install an H4 bulb in the headlight, but before that you need to bend the “antennae” that sticks out at the bottom of the bulb.
Next we will look at lamps with the original base recommended by the manufacturer. While the choice is not very large, we hope that over time more options will appear.
Quick comparison
| Model | Peculiarities | Rating | Link |
| Philips LongLife EcoVision | inexpensive, extended service life | ★★★★✩ | Buy |
| Osram Original Line | good lighting area | ★★★★✩ | Buy |
Philips LongLife EcoVision H19
- high strength quartz glass,
- resistant to temperature changes and vibration,
- High internal pressure provides powerful light.
Country of origin: Poland, Germany.
What we like most: they are close in color to standard lamps, they should last longer than regular lamps.
Osram Original Line H19
- quality of the original spare part (OEM),
- improved visibility up to 130%.
Country of origin: Germany.
What we like most: inexpensive, good service life, country of origin.
Source
Check list
- Turn off the engine, squeeze the parking brake lever;
- Open the liftback cover;
- Remove the plastic protection / sound insulation layer. The choice depends on the model year. More details are described at the beginning of the article;
- Unscrew the lamps, three nuts;
- Replacement of Grant liftback taillight lamps, carry out related preventive maintenance;
- Reassemble the structure in reverse order.
Conclusion based on the results of the replacement The design and fixation of optical devices is not at all complicated. Every car owner can do the replacement; there is no need to contact a service center. Only as a last resort, when a global breakdown is identified or surgical intervention by a specialist is required. After reading the instructions provided, the owner knows exactly how to change the Granta liftback taillight with minimal time.
Types of lighting
Low beam bulbs differ in their level of energy consumption, brightness and other characteristics. Highlight:
- halogen models. They are classic for “Grants” and represent a modern type of incandescent lamps with a base. They increase the temperature of the filament to 3000 degrees, and the flask contains vapors of halogen gases. They have a low cost, but provide good visibility and an average operating period;
- xenon They are characterized by a bright white glow, similar in its characteristics to daylight. The flask of such products contains inert gases through which an electric discharge passes. They have minimal dimensions and a long service life;
- LED These products have not yet gained popularity as main lights, but diodes are widely used as a secondary light source due to their brightness and extremely long service life.
Step-by-step instructions for replacing lamps in the rear lights of a Lada Granta
1. Open the trunk and unfasten the pocket from the desired side.
The pocket is designed for easy replacement of lamps.
2. Next, grab the desired cartridge with your hand and turn it counterclockwise 45 degrees. After turning it, we take out the cartridge.
Arrangement of cartridges (top to bottom):
- brake light lamp
- turn signal lamp
- reverse lamp
3. Remove the old lamp and install a new one.
keys on the lamp , make sure they match when installing the lamp.
4. Install the socket with the new lamp in place.
It needs to be inserted and rotated 45 degrees clockwise.
5. Close the pocket and the job is done.
The process for replacing tail light bulbs is similar.
Parts and consumables:
- Lamp P21/5W – 2 pcs.
- Lamp P21W – 2 pcs.
- Lamp PY21W – 2 pcs.
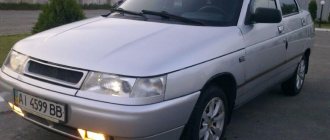
Is it worth replacing a working running light bulb?
But such lamps have more than enough disadvantages!
- Including dim light with a yellow tint, which does not have the best effect on visibility in front of the car.
All this forces people to change the running light bulbs in their cars almost immediately after purchase.
LED DRL lamp is more practical and brighter
In principle, replacement may also apply to new incandescent lamps if the old ones fail. But, nothing prevents you from using LED lamps. Pay attention only to the base, which must correspond to the connector that is supposed to be in the car.
