Good day to all!
Like many non-luxury grant drivers, after the purchase I learned with horror that the car only has one door switch, on the driver’s side. Of course, when installing the signaling, 3 more missing limit switches were installed. But who knew that they were already installed in the locks. Even the alarm installer was not in the know. AVTOVAZ simply regretted running the wires into the doors to connect them. At first I thought that the limit switches were even better in rapids, but winter put everything in place. In winter, the rubber band on it becomes stiff and the end switch “sticks” when pressed. But that's not all. I noticed that when the car is loaded (5 people in the cabin), when making sharp turns, sometimes the light in the cabin comes on, so the body plays and the door moves back a little, releasing the limit switch. As a result, almost immediately I wanted to convert everything to limit switches in the locks. But it took me a long time to get ready, the car is almost two years old and I just got around to it. But the work took less than two hours, I did it alone. For now I limited myself to the rear doors. The front ones are completely noisy, I don’t want to open them. YES and they work better.
Installation: As it turned out, the terminal blocks do not have terminals for limit switches, so in addition to the wires, you also need to install terminals. In the vastness of the drive I found that the terminals from the ISO connector of the radio are ideal for this task. Thanks bimulyk
for that.
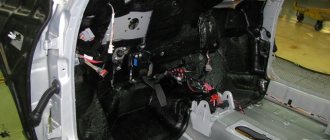
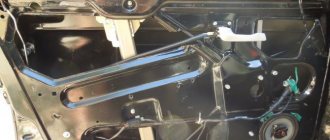
Next we need to remove the lock from the door! Maybe, of course, someone managed to do without it, but it didn’t work out for me. We unscrew the three bolts holding the lock and another one holding the glass guide, otherwise it will not allow you to remove the lock. Then remove the door handle and door lock button. We disconnect the rods from them and remove the lock.
The connector on the lock is secured by a bracket, remove it and disconnect the connector. Because of this bracket we had to remove the lock.
November 23, 2016 LadaOnline 42 276 11
With the onset of frost, some drivers face some problems. For example, the light in the cabin does not light up when the door is opened, the alarm system does not work correctly, etc. The cause of these malfunctions is the door limit switches. Let's look at several ways you can modify them yourself.
Question to AvtoVAZ: How to solve the incorrect operation of limit switches that become dull in the cold, what is the time frame for elimination?
Answer: According to test results at temperatures up to - 30°C, there are no changes in functioning. At temperatures down to -40°C, switching on may occur with a slight delay.
Lada Vesta, Granta and Kalina 2 cars use the same type of door switches. At sub-zero temperatures, their rubber boots (protective rubber caps 11190-3710206-00) freeze and lose their elasticity. As a result, the limit switch rod cannot come out of the housing and the car’s electronic systems believe that the door is closed. Here are some ways to solve the problem:
1. Remove the anthers from the door ends.
No rubber, no problem. But it is worth remembering that the rubber cap is designed to protect the end switch from moisture and dirt. On the other hand, you can remove the anthers only for a short time, while it is frosty outside, and during this period, keep them clean.
2. Replace the limit switch anthers with an analogue one.
It is proposed to install protective caps from another end switch, for example, Toprun (catalog number 104035756, price 50-100 rubles/piece). This end cap is a copy of the original one, but its anthers are made of a material that does not lose elasticity in cold weather. There is no point in changing the limit switches themselves; it is enough to change only the rubber caps.
3. Install the spring under the limit switch boot.
Another budget option for solving the problem, especially when you have springs about 18 mm long and 12-13 mm in diameter at hand. We install them under the rubber caps on the limit switch rod. Now the spring will not allow the boot to remain in a compressed position all the time.
Preparing the car before connecting
What controls the central locking? A special block to which the lock actuator wires fit. There are also two wires connected to it, connected to the driver's door microphone. More precisely, this wire is used alone in “Grant”, it has a brown sheath, and the second contact from the “micrik” is connected to ground.
The “micric” itself is located inside the actuator. So, the first piece of advice: after removing the left front door trim, you need to find the cable going from the actuator to the 7-pin connector.
Depending on the configuration, under the trim you will see the following:
- There are 6 wires suitable for the connector (from 2 microphones and a drive);
- The cords from the electric drive (pins “2/7”) are not connected, but there is still a brown wire connected to pin “1”;
- Only those wires that, according to the diagram, should be connected to contacts “4/6” are missing.
Connecting the signaling means that the wires from contacts “2/7” are still connected to the central locking control unit. The cords coming from the three actuators are always connected to the standard unit. You need to connect a fourth one, if this is not done by the factory. You may have to lay a two-wire cable from the door to the central lock control unit:
Replacing door switches on Lada Granta
Installing limit switches on LADA Granta doors is not a complicated process, and does not require any specific skills from you, however, you will need knowledge of how to remove the device and replace it with a new one. Use the step-by-step instructions and you can easily make the replacement. To carry out repair work, all you need is a 10 key. Follow all steps sequentially:
- Before starting the replacement, you must disconnect the wire from the negative terminal of the battery.
- Grasp the end switch and quite carefully remove it from its seat, in this case you will need to overcome the resistance of the latches that hold the device.
- Next, squeeze the block clamp directly on the limit switch and disconnect the wiring harness block from it.
- Remove the protective cap from the end switch.
- Install a pre-purchased new device; this can be done by performing the above described manipulations, only in reverse order.
Connecting the signaling to the central locking system
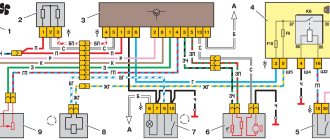
Now we get to the most interesting part. The contacts of the signaling relay must be connected to the gap in the brown wire (see diagram in Chapter 1). Moreover, this will be required regardless of the configuration. Oddly enough, we won’t need power cables at all. And the task now looks like this: you need a two-wire signal cable connected to the break in the brown cord.
The moral here is:
- If you were able to remove the central lock control unit, connect the cable to the break in the wire connected to pin “7” of the control unit;
- If you have removed the door trim, then pull the cable out of it (from the point where the brown cord breaks).
It is clear that the second side of the cable must reach the relay connector of your alarm.
Option for the “Lux” package
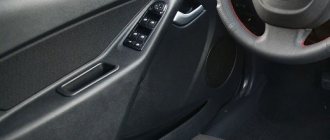
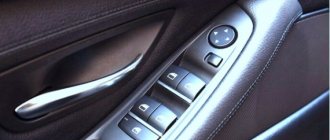
So, this means that there is a button on the armrest in the cabin that allows you to lock the locks. From one of the contacts of the button, to which a “plus” is applied when pressed, you need to stretch the cord to the signaling unit. Nothing else is required, and you can connect the alarm according to the following scheme:
According to reviews, this option is suitable if we are talking specifically about the “luxury” configuration. By the way, the resistor can be connected to the gap in the wire designated “blue” (the common contacts are then connected with a jumper).
It must be remembered that when working with any electrical equipment, you must first remove the negative terminal from the battery.
Each cord that is re-laid must not touch metal surfaces. Otherwise, in places of contact, the wire is protected with a tube that can withstand temperatures of 250 degrees. This is how you can protect yourself from unforeseen consequences.
Option for the “Norma” configuration
Let's say there is no button in the cabin that allows you to perform emergency closing. Then you need to connect the signaling to the central locking system according to the following scheme:
As you can see, unlike the first option, there are no resistors here, and positive voltage is not used at all. But in the luxury configuration the effect that is characteristic of this scheme will not be observed:
- We perform closing from the key fob - all locks are locked;
- We try to open the locks with the key fob - only the driver's lock unlocks.
If you are satisfied with this property, try to implement the scheme in practice. And other options, more advanced, look much more complicated.
Read what is said about installation safety in the previous chapter. Do not neglect the advice about disconnecting the negative terminal. We work only with signal circuits, so nothing will fail even if connected incorrectly. However, be careful not to confuse the locking and unlocking relays, which are located in the alarm unit. This unit is usually equipped with a 6-pin connector (for details, see the signaling manufacturer's instructions).
Problems with door switches
In winter, limit switches installed on car thresholds often stop responding to door openings, since their rubber boots lose their elasticity at sub-zero temperatures, which ultimately leads to the contacts opening.
In addition, there may be other problems associated with the correct functioning of the limit switches. Thus, many car owners complain about the unstable operation of the alarm system, the light that does not come on when the car door is opened, etc.
Some car owners have also noted cases of limit switches triggering independently when turning the car sharply, when the doors may move slightly away from the body. The cause of all the listed problems lies directly in the limit switches.
Many car owners decide to replace the limit switches located in the threshold with switches located in the door locks. This manipulation can eliminate the problems listed above; moreover, it can be easily carried out independently if you have additional plugs and wiring. Below we will talk about other ways to troubleshoot these problems.
Programming the duration of control pulses
Even if the alarm is connected correctly, it is not a fact that the owner will be able to control the locks from the key fob. The point is that it is necessary to correctly select the duration of the control pulse (for locking and for opening). There is no need to make it too large so as not to overheat the actuators.
See what exactly the manufacturer Starline offers. We can set the pulse duration to 0.7 s, which should be enough. The value “3.6” will be redundant at the same time.
The “Lux” package has the following property: after 15 minutes of inactivity, the electronics “fall asleep”. It may take an extra boost to wake her up. So, try to use the option that provides for a double pulse. The main thing is not to activate the “comfort” option, which uses a 30-second duration. To connect the signaling with “comfort”, you need to install an additional unit in Grants (AvtoVAZ does not produce it). We wish you success.
Finalization of the scheme
Work on modifying the door end elements can be delegated to service station specialists. In this case, the owner will be charged an installation fee. You can do everything yourself, then installing limit switches will require plumbing tools and a device for checking the electrical circuit:
- Tester.
- Soldering iron.
- Phillips screwdriver.
- The wire.
- Solder POS-40.
- Corrugated hose.
- Insulating tape.
- Limit switch.
The owner must decide on a further plan of action based on the features of the layout of his Lada Granta car. It can activate the button in the threshold or the door lock contacts.
Both options involve parallel connection of unused elements to the working terminals of the door on the driver's side. The switches for opening the doorway of a Lada car are powered using a two-wire circuit. To simplify the choice, we will consider both options.
Elimination of operational failures
Devices begin to fail at low air temperatures. On the Lada Granta the door switch is protected.
The cause of equipment failures is the protective caps.
The protective shell is made of rubber. The cap loses its plasticity in severe frosts, which prevents the contacts from opening. To prevent failures of limit switches in Lada, the following measures are used:
- Install the springs under the rubber cover. Spring parameters: diameter - 12 mm, length - 20 mm, wire thickness - about 1 mm. The elastic spring will not let you down even at minus 40°C.
- We remove the protective caps for the winter. You will get rid of the cause of the problem, but the switch remains defenseless against moisture and dirt.
- Lubricate rubber surfaces with silicone. Can help with mild frosts (minus 10°C).
- Treat with water-repellent liquid. This is a temporary measure. Temperature range - up to minus 50°C.
- We replace Lada brand products with imported analogues from DAEWOO NEXIA or CHEVROLET AVEO doors. When purchasing, you should take a factory sample to compare sizes. The housing is inserted into the standard hole and secured with a self-tapping screw.
Refinement of the Lada Granta alarm system will increase the degree of protection of the car, and interior lighting when opening the rear door will create comfort for passengers.
Posts 1 to 25 of 47
1 Topic by Mutsu 01/26/2015 19:24:28
- Mutsu
- Participant
- Inactive
- Messages: 32
- Thank you: 0
Topic: Door end switches, how to connect?
How and where can I purchase the remaining 3 terminals? and how to connect them?
2 Reply from max-xx 01/26/2015 19:27:20
- max-xx
- Moderator
- Inactive
- From: Moscow
- Messages: 2,886
- Thank you: 375
Re: Door end switches, how to connect?
What if you use the search? They sucked at it, they threw links to existential stories. And so in the store for giguars from Granta. And the answer is there too.
3 Reply from 71rus 01/26/2015 19:28:45
- 71rus
- Participant
- Inactive
- From: Korolev
- Messages: 442
- Thank you: 35
Re: Door end switches, how to connect?
The question is a little off topic, but I'll ask here. What do you need to add radio control for central locking? Those. So how did it turn out on Dream?
4 Reply from 7TT 26-01-2015 19:30:20 (26-01-2015 19:31:21 edited by 7TT)
- 7TT
- Participant
- Inactive
- From: Orenburg
- Messages: 690
- Thank you: 58
Re: Door end switches, how to connect?
The question is a little off topic, but I'll ask here. What do you need to add radio control for central locking? Those. So how did it turn out on Dream?
The central locking unit with communication with activators via the CAN bus is absolutely crap.
5 Reply from grafer 26-01-2015 19:34:24
- grafer
- Participant
- Inactive
- From: St. Petersburg
- Messages: 857
- Thank you: 102
Re: Door end switches, how to connect?
How and where can I purchase the remaining 3 terminals? and how to connect them?
2 71rus: I think not everything is so simple here, as well as with the comfort unit which is responsible for lighting and purifiers.
6 Reply from 71rus 01/26/2015 19:35:51
- 71rus
- Participant
- Inactive
- From: Korolev
- Messages: 442
- Thank you: 35
Re: Door end switches, how to connect?
The question is a little off topic, but I'll ask here. What do you need to add radio control for central locking? Those. So how did it turn out on Dream?
The central locking unit with communication with activators via the CAN bus is absolutely crap.
Clear. Thank you. I didn’t think such a thing would happen with the key. You can't open the locks. The main key was already bent while trying to open the car, but it seemed to return to the back as it was. However, only the driver's door and ignition turn normally. Neither the trunk nor the passenger door can be used with the key; the key cannot be inserted all the way.
7 Reply from vl116rus 01/26/2015 19:44:00
- vl116rus
- Participant
- Inactive
- From: Tatarstan Nizhnekamsk
- Messages: 802
- Thank you: 129
Re: Door end switches, how to connect?
Use a syringe to push liquid lubricant into the locks. When I put the key in for the first time, I understood everything. It was the same on Kalina.
8 Reply from mpk007 01/26/2015 19:51:53
- mpk007
- Participant
- Inactive
- From: Ekaterinburg
- Messages: 192
- Thank you: 38
Re: Door end switches, how to connect?
Neither the passenger door can be used with the key; the key cannot be inserted all the way.
You have a lock on your passenger door. All trusts have this.
9 Reply from 71rus 01/26/2015 19:55:53
- 71rus
- Participant
- Inactive
- From: Korolev
- Messages: 442
- Thank you: 35
Re: Door end switches, how to connect?
Neither the passenger door can be used with the key; the key cannot be inserted all the way.
You have a lock on your passenger door. All trusts have this.
Reviews
| № | Positive |
| 1. | Kirill: I knew about the problem of freezing tips initially when I bought the machine. I immediately bought silicone grease and lubricated it on the inside once a quarter. It's been a year now that I haven't had any problems. |
| 2. | Vasily: after the first winter the sensor jammed several times. I took the cap off, cleaned it, and lubed it. Works properly, no comments. What happened is also my fault, since I did not carry out preventive measures in a timely manner. |
| 3. | Konstantin: I bought Grant at a dealership six months ago, the activation sensor works properly, the light comes on without delay, and an indicator lights up on the dashboard. |
| 4. | Ignat: a year has passed since the purchase, I have not made any investments, there are no comments on the mechanisms. Once there was a malfunction of the sensor. Moisture got inside, after drying the defect was eliminated. |
| 5. | Sergey: I agree with the majority of positive reviews, the limit switch works properly, the workmanship is good. Every month I lubricate the rubber tip with silicone. |
| 6. | Vladimir: It’s been the second year since I bought the car, I haven’t made any investments other than scheduled maintenance. I heard about the “disease” of the sensors on Grant, but I can’t confirm it. |
| 7. | Ivan: once in the winter the limit switch jammed, I didn’t buy a new one, I cleaned the old one. It still works fine. |
| Negative | |
| 1. | Victor: I can’t speak positively about the activation sensor, since this is the second time in a year that I change it at a service station. The doors of the Lada Granta locked themselves twice. |
| 2. | Vyacheslav: after the winter the sensor jammed, the doors were locked, the keys remained in the cabin. I called a service station technician to open it. |
| 3. | Alexey: I can’t recommend factory door activation sensors, as their quality is poor. Comrades advised installing from Opel, they say that the diameter is identical. |
Conclusion Limit switches on a car should always be in good working order. Provided proper maintenance and lubrication, the service life is at least two years. It is necessary to regularly analyze the condition of the limit switches in order to notice and prevent malfunctions in time. You should also adhere to the operating instructions.
| Video – Granta Liftback – Refinement of door switches |
Video - Lada Granta - door switches freeze? 3 solutions to the problem.
Equipment Standard
— the limit switch is only at the driver’s door, there are plugs in other places.
The Norma package
is the same, the limit switch is only at the driver's door; the other doors have plugs, but it is possible to connect the limit switches of the locks of other doors by disassembling the door card. The
Luxury package
- Four limit switches in all doors, but a special algorithm for activating the limit switches - the driver's limit switch activates the interior lighting. and an indicator of open doors on the dashboard, the remaining limit switches activate only the interior lighting.
To install the alarm, it is necessary to install the missing limit switches.
