Replacing a brake drum on a viburnum
Welcome! When you press the brake pedal, friction occurs on the brake pads and the car stops.
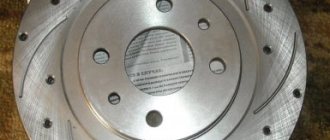
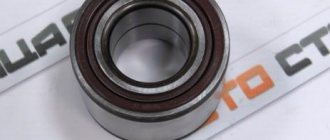
The brake drum on VAZs and budget foreign cars is installed only on the rear wheels. Despite its durable appearance and metal body, it sometimes breaks or wears down too much - there is a need to replace it. Note! You will need the following tools: a 7" wrench, a file, two mounting blades or pry bars instead, a rubber hammer, WD-40 fluid.
Drum location
On very old cars, for example IZH 2715 “1972–82”, there were drums at the front and rear. On our cars only from the rear. The photo shows what the drum looks like and its approximate location.
Time to replace the drum?
- any deformations;
- cracks;
- shape changes;
- scoring and deep marks on the working surface (indicated by arrows in the photo).
If such damage is detected, it is recommended to grind the entire working surface of the drum, and after grinding, be sure to go over it with a fine-grained abrasive stone or fine-grained sandpaper and sand the surface of the drum, achieving smoothness.
Note! After removing the drum and grooving, a ruler will help you determine the wear: measure the inner diameter of the drum (shown in the photo below). If the indicator is 201.5 mm or more, we urgently change the drum!
Replacing a brake drum on a VAZ 1117-VAZ 1119
Removal
Place the car at speed and remove the parking brake handle all the way down. With the handbrake raised, removing the drum from the car is much more problematic. Remove the wheel from the car (for more details, see the article: “Replacing wheels on modern cars”).
Take a rag soaked in water and clean the entire brake mechanism from excess dirt.
Note! We recommend using a rag or brush instead of a rag. Remember, under no circumstances should you wash off dirt with gasoline, diesel fuel or any solvent!
Now, using a small wrench or socket wrench, unscrew the two guide pins (indicated by the arrows in the picture below) and set them aside in a safe place (such as a small bucket or car). The main thing is not to lose them.
The arrows in the photo indicate the location where WD-40 was applied. This must be done around the entire circumference, because over time the brake mechanism rusts or sours, which means it will be almost impossible to remove the drum from the hub (indicated by the blue arrow). We recommend that you take such preventive measures to make repairs easier for yourself in the future.
With your bare hands, try to remove the drum from the car by tugging. If difficulties arise, take a rubber hammer (at least a regular one, just act extremely carefully) and move the drum: apply many blows to different places on the drum. Basically, hit closer to the edge and hit until you feel the drum begin to gradually come off the hub.
Note! If the above method does not help, gently tap the edges of the drum with a rubber mallet.
FakeHeader
Comments 37
But there are no negative consequences in undermining the bar?
No, but it’s better to do it only as a last resort, like mine.
Is it by any chance that you have this kind of garbage because of the handbrake cables? I also didn’t think about sharpening it... it turned out that one of the cables was rusty because it was bent on the beam and burst. Today I changed both the cables and the brakes completely. And everything is fine)
No, everything was fine with the handbrake cable)
What was the mileage?
approximately 50 thousand km.
Wow, my drums are oval, but so far it doesn’t hit the pedal much. Mileage 67 thousand. I thought I would change early.
For some it happens earlier, and for others it takes longer.
I got the same set, how did the drums perform?
Everything is fine so far, only the paint has peeled off.
thanks, well the paint isn't the worst thing
I got the same set, how did the drums perform?
As I understand from here www.drive2.ru/b/1370301 cast iron drums are not only not better, but worse than aluminum ones.
I wouldn’t blindly believe this article, especially since aluminum has a cast-iron insert...
The same bullshit hits the brake pedal but doesn't give way to the steering wheel.
that means you need to change the drums.
Why are cast iron drums better?
I didn’t delve into this issue myself, from my own observations I didn’t notice a difference in braking, I just needed to install something and decided to try cast iron ones. They are also heavier. As far as I know, they are stronger and do not behave like aluminum ones...
Hi all. I haven't looked here for a long time. The car serves properly, there was nothing to write about. I just filled up the car and drove off. I think there is no point in writing about how I washed the car, pumped up the tires or installed a new air freshener. I don't want to be like others.
Over the past few weeks, the squeaking sound of the rear brakes when braking has begun to bother me. I didn’t pay much attention to this, but just a couple of days ago a strong metallic grinding noise began and a feeling that the brake pad was being bitten. I very much doubted that the rear brake pads could wear out in 15 thousand km, but doubts about the quality of our automobile industry and the direct hands of the assemblers did not leave me. I was afraid that the wheel might slip at an inconvenient moment, I quietly got home and planned to go to the service.
At home, after calculating the budget and the likelihood of buying new brake pads, I decided to try to do everything myself, although I had never touched the rear brakes in my life. I started looking on the Internet for guides on how to disassemble a brake drum with ABS and, to my surprise, came across my own photos Replacing the front brake pads,
which someone successfully appropriated and wrote their own
Article
. I think the second part of this article about the rear pads is also from somewhere behind.
According to my already old tradition, I decided to post my guide for dummies like me. I went to the garage to figure out how everything worked there and where the metallic grinding noise was coming from.
The very first step is to find a level surface for repairs, since the car will be parked without brakes. Secure the front wheels by placing stops made of boards or bricks, always in front and behind, on both sides. Remove the car from the handbrake. Loosen the wheel nuts, jack it up, and remove the rear wheel. Here we see the brake drum.
Here we unscrew the two clamps counterclockwise while holding the brake drum with our hands.
Here you should pay attention to two more small threaded holes; when assembling, do not screw the clamps into these holes inadvertently. As they told me, they can be used to press the drum out of the hub
It is better to use long bolts, screw them in carefully without damaging the threads, and tap on the drum. The drum is removed with a rocking motion, you can tap it lightly, but on new cars it can be easily removed simply by hand. Next, there is a view of the insides of the brake drum itself. Here you can see an interesting disc with slots. This is the disc for the ABS sensor. Due to the sensor and this disk, the wheel rotation speed is recorded to control the ABS system.
The entire brake mechanism is hidden under the disc: the pads themselves, the brake cylinder, the ABS sensor, the tension springs and the lever with the handbrake cable. Please note that the pads have a special hole for the ABS sensor, so you need to buy special ones for replacement. Then I noticed the first trouble - the cylinder boot had slipped off, and the ABS sensor had become overgrown with a “beard” of fine metal chips. Since the sensor is inductive, metal chips can interfere with its normal operation. The pads themselves are fine and show minor wear.
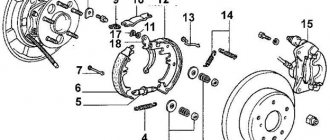
How the rear brakes of the Kalina work
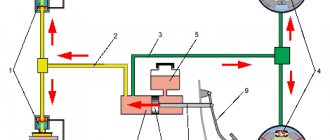
The rear brake assembly consists of:
- from brake drums;
- two-piston cylinder;
- pads;
- hand brake mechanism;
- “soldiers” holding pads;
- return springs;
- adjusting bolts with eccentrics.
Rear wheel brake
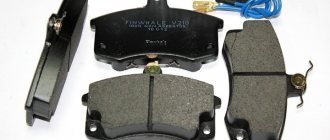
The size of the rear drums on Kalina is 256 mm. This is the outer diameter. But when purchasing a spare part, it is not necessary to know the exact parameters. It is enough to tell the seller the make and model of the car, as well as the year of manufacture. The same information must be provided when ordering parts online.
Difficulties in selecting parts
Before you begin replacement, you must select a suitable set of pads. There are many options for the Lada Priora on the market. Conventionally, they can be divided into two categories - parts equipped with ABS and those without this system. It is not difficult to understand what type your Lada Priora is - the diagram of cars with an anti-lock braking system includes an ABS sensor and a wire connected to it.
The basic principles of selection are common to the two categories. The product must be well packaged, have protective holograms and quality certificates. When purchasing a whole set with release springs, it is advisable to check them. We often came across sets from China where the spring brackets were turned in the wrong direction.
There is no need to look for how much the cheapest kit for a VAZ will cost. It is better to give preference to original parts or famous analogues. Even at a higher cost, the pads will provide excellent service life and excellent braking dynamics.
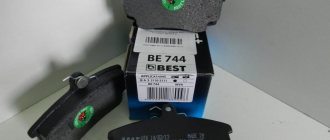
Selection for cars with ABS
Below is a list of pad sets with the best price-quality ratio.
| Part name and number | Minimum price, rub. |
| AT 2090-118BP | 400 |
| AutoReal AV18-350-2090 | 450 |
| Pilenga BSP1005N | 600 |
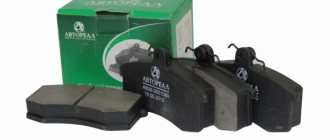
Selection for cars without ABS
If your Lada Priora is not equipped with an anti-lock braking system, then you should purchase special pads. The most popular sets are the following.
| Parts brand | Initial cost, rub. |
| Fortech FB-2102 | 500 |
| Pilenga BST1002N | 550 |
| Bosch 0986487219 | 800 |
How to remove the drum
You can remove the Lada Kalina brake drum yourself. The procedure takes only a few minutes. It is advisable to work in a garage. To do this you will need the following tools:
- jack;
- balloon key;
- socket wrench 7;
- flat screwdriver.
Hanging the car and removing the wheel
To remove the brake drum from the rear wheel of the Kalina:
- Put the car in gear and turn off the handbrake (pull its lever down): this will free the rear wheels.
- Use a wheel wrench to remove all wheel mounting bolts.
- Place a jack under the car. Then lift until the wheel is touching the ground.
- Place a safety stand under the vehicle.
- Unscrew all mounting bolts and remove the wheel.
How to assess the condition of the drum and the entire wheel brake mechanism
To check it is not necessary to contact a car service. It is not difficult to notice problems in the system.
Signs of a malfunction of the drum and other elements are:
- Grinding and creaking when braking, which often indicates dirty elements. In this case, you will need to remove the brake drum of the rear wheel of the Kalina for cleaning.
- Deterioration in braking quality.
- Dips in the brake pedal.
- The car pulls to the side when braking.
- Pedal travel is too free.
The drum has a relatively long service life: it can travel 100,000 km or more. But sometimes the element wears out earlier for various reasons. In this case, it needs to be changed. Experts do not advise saving on drums. Therefore, you need to buy only high-quality spare parts.
Brake pad replacement is required much more often. They are usually changed at least every 30,000 km. When carrying out maintenance of the brake system, it is recommended to adhere to the regulations established by the car manufacturer. But the wear time of parts varies individually. It depends on their quality and the driver’s accuracy, as well as driving style. You can diagnose and service the brakes yourself. However, if this causes difficulties, it is better to contact a service station.
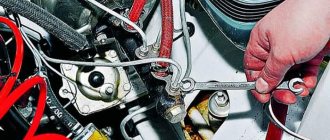
Do-it-yourself caliper repair - preliminary inspection
The return movement of the piston in this unit is ensured by a cuff. Firstly, it creates a tightness, and, secondly, it acts as a kind of spring. When the piston moves, it undergoes a slight deformation, but then returns to its previous state, slightly pressing it into the body. Determining the malfunction is quite simple - if you hang the wheel, it should rotate freely as soon as you press or release the brake pedal. There should be no signs of overheating on the discs themselves, otherwise you will need to repair the caliper yourself.
When conducting a visual inspection, we must make sure that there is no noticeable difference in the thickness of the outer and inner pads. The piston should move so that when pressed it easily sinks into its body. Its surface should not have noticeable traces of dirt or corrosion particles. You also need to conduct a superficial inspection of the boot and ensure its integrity.
Replacing brake drums Lada Kalina
You will need : remove the rear wheel and prepare a high hex head “7”, a hammer, a wooden block, mounting blades.
To remove the Kalina brake drum :
- Unscrew the two wheel guide pins using a 7mm hex socket.
- Try to remove the drum with your own hands.
- If that doesn't work, try knocking it off with a hammer through a wooden spacer.
After removing the drum, do not press the brake pedal, otherwise the pistons may come out of the cylinder completely.
To install the brake drums, you must first recess the pistons into the working cylinder. To do this, we press on the pads with two mounting blades, leaning against the shoulder of the brake shield.
For Kalina's brakes to start functioning, with the car standing, press the brake pedal 2-3 times to bring the pads to the drum.