Why are the calipers knocking on the Lada Vesta?
The front and rear calipers on the Lada Vesta rattle for the same reasons, so the “treatment” schemes are the same. There are three objective sources of caliper noise.
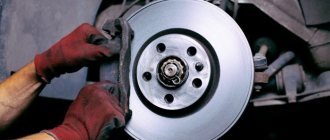
Pad wear
Owners monitor the degree of wear of the pads (friction linings) when they change the brake fluid or every 2-3 thousand km.
Pad wear. Photo source: https://pricep-vlg.ru/remont-svoimi-rukami/stuchit-support-chto-delat/
What affects the abrasion of an element:
- The quality of the material depends on the manufacturer.
- Driving style - frequent and sharp braking accelerates depreciation.
- Operating conditions - off-road, sand, water, mountain roads - bring the time to replace the pads closer.
- The serviceability of the brake system - when the car has serviceable working cylinders and caliper guides, the wear of the pads occurs evenly.
- Anti-lock braking system - with it, the pads wear out more slowly.
- Transmission type - in cars with automatic transmission, the pads wear out earlier, because stopping is possible only when you press the pedal. On the “mechanics” they often brake the engine - the part wears less.
- Pad rigidity. Soft linings wear out faster, but the disc remains intact. Hard ones are the opposite: the disc suffers, but the pads hold up. The hardness of the pads is selected according to the series: sport, comfort, classic.
- Transport congestion - transporting heavy luggage and towing trailers has a detrimental effect on the condition of the friction layer.
How to determine the degree of depreciation:
- In move. If at low speed, hitting a speed bump, or driving on a dirt road, a knocking sound is heard, and disappears when braking, this indicates serious wear of the Vesta caliper. But similar symptoms plus beating in the pedal occur when the brake pads wear out or the disc is deformed - here replacing the calipers will not solve the knocking problem. When the pads are worn out, a characteristic squeaking pedal also appears.
- Visually. Remove the wheel and inspect the assembly. If the linings are worn out, replace the spare part.
According to the maintenance schedule, brake pads on Lada Vesta are diagnosed after 10-15 thousand km on the speedometer.
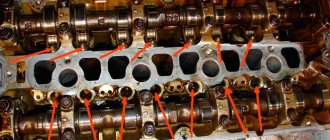
Blame the guides
An important element of the brake system - the caliper guides in the Lada Vesta - can also cause the part to knock.
Caliper guides in Lada Vesta. Photo source: https://krsk.au.ru/14177557-napravljajuschie-supporta-lada-vesta-largus/
There are two problems with the guides:
- Wear. The spare part is completely replaced.
- The nest (landing site) has developed. Then they buy repair rubber bands. Put on the pin, they stop the knocking of the unit.
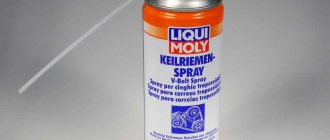
Sometimes the noise of the part is eliminated with lubricant: the caliper guides with rubber rings on the Lada Vesta are removed from the socket, a layer of heat-resistant copper paste for highly loaded surfaces is applied (Wurth SU 800, HUSKEY 341 Copper Anti-Seize).
Fastenings have come loose
A malfunction occurs when the bolts are loosely tightened at the service station. Fasteners also become loose due to vibration of the car on bad roads.
It is enough to tighten the fastenings, thereby eliminating the knocking of the calipers on Vesta.
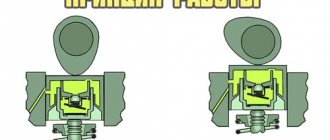
How to independently eliminate knocking calipers on Vesta
Short guides are located on one side of the part. Because of this, the caliper body is mobile and begins to rattle on road irregularities.
Lubrication of brake caliper guides. Photo source: https://www.drive2.ru/l/479015710731796983
What to do to eliminate the knocking:
- Plastic clamps are used. They tighten the body of the assembly with its bracket. The method is primitive: the plastic breaks quickly.
- They use a spring from the “classics”. One end is hooked to the bracket, the other to the body. This limits the movement of the part and the knocking noise disappears.
- Bend the plate that holds the pads in their proper places. The edge is folded and tucked behind the body of the assembly.
- Install the pressure springs into the holes on the brake pads. The moving part is pressed from the reverse side.
The last method is the most effective. But such springs are not produced for the Lada Vesta, so car owners select analogues from other modifications. The price of a set of 4 pieces is from 500 rubles.
Knock of calipers and unpleasant sound
If you knock on the wheel, you may hear a knock from the caliper. On my car they don't knock, at least not yet. There are also complaints about an unpleasant sound heard from the disc brakes at the rear. My car has it too. The sound is like a piercing, drawn-out howl.
It is not always audible. If you were driving around the city, stopped, drove back and began to slow down. At this moment an unpleasant sound is heard. It is unclear where this sound comes from. There is no noise when moving forward or braking.
This affects the image of the car. When choosing a car, a client at a car dealership for a test drive may refuse to purchase after hearing the unpleasant sound of the brakes. Of course, this does not affect the speed; the problem can be eliminated by replacing the brake pads. But then the question arises for AvtoVAZ: “Why should Vesta owners change the pads on a new car?”
Moreover, replacement has to be done with non-original pads. If you install factory ones, this will not change the situation.
On budget foreign cars, owners try to replace them with original spare parts after the pads wear out. If they install non-original ones, it is only to save money. We are buying a new car. And in order not to listen to unpleasant squeaks and squeaks, we are forced to replace the parts with non-original ones!
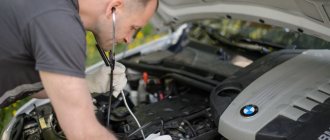
Description of the problem
Friends, I had a problem familiar to all motorists. About six months after purchasing a new car, its calipers suddenly began to rattle. This circumstance became an annoying obsession, because purchasing a car at a car dealership meant eliminating technical faults.
I took the car to Uncle Vanya, because the official caliper knock is not covered by the warranty. Garage Kulibin dug into the suspension with the wheel removed and issued a verdict - wear of the caliper guides. He says I know how to help, I cleaned out all the factory grease and sprayed some kind of aerosol. I left satisfied and joyful.
But my happiness was short-lived, literally the next day, not only did the rattling return. The calipers began to knock more loudly. Realizing that Uncle Vanya was not rummaging around in the garage, I decided to solve the problem myself.
Bleeding brake fluid
Installing and removing a brake caliper on a VAZ (Lada Vesta), in addition to the work listed, includes the procedure for pumping fluid. After assembling all the elements, remove the special cap from the fitting to drain the liquid when pumping. Next, you will need one more person to work.
The assistant will need to press the brake several times and then hold the pedal. Then put a preferably transparent hose on the fitting and immerse it in any suitable clean container, unscrew the fitting and tighten it only after the liquid flow stops. Once air is no longer detected in the liquid, stop the procedure.
Next, repeat the process with the rear wheel positioned diagonally. Do similar work with the other two wheels. Be sure to fill the reservoir with liquid as needed, ensuring it is not empty below the minimum mark.
Owners of cars of different brands encounter extraneous noise from brake calipers, and LADA is no exception. Most often, drivers of Grant/Kalina, Largus and Vesta encounter this problem. The malfunction is less common on Priora and XRAY. Let's consider what can be done in this case.
To make sure that extraneous noise while driving comes specifically from the brake mechanisms, you need to rock the caliper from side to side (you can do this without removing the wheel):
Front wheel brake diagram:
1 – wheel cylinder; 2 – fitting for bleeding the brake drive; 3 – sealing ring; 4 – piston; 5 – protective cap; 6 – retaining ring; 7 – caliper; 8 – pad guide; 9 – brake pads; 10 – protective cover; 11 – guide pin; 12 – guide pin fastening bolt; 13 – brake hose; 14 – bolt securing the cylinder to the caliper.
The sounds may resemble metallic knocking, rumble, clanging, strumming, etc. The first step is to contact your dealer with the problem. As far as we know, there are no AvtoVAZ regulations in this case. If the official representative refuses, you can try to get rid of the knocking of the calipers yourself using one of the suggested methods:
1. Fill the guide pins with refractory grease (it’s called “Grease for calipers”).
2. Replace the caliper guide pins with new ones.
3. Make a small groove in the guide pins (using a lathe), onto which we put a ring made of oil-gasoline-resistant and heat-resistant rubber.
4. Turn out new guides (using a lathe), which will be slightly larger in diameter than the old ones.
5. Replace the brake pads. It is better to choose ones that have a special rubberized coating on their outer side (survey for Vesta, Largus, Granta/Kalina/Priora).
6. Tighten the brake pad guide using a plastic clamp or spring (can be done without removing the wheel).
7. Fold the top part of the noise reduction plate (number 4) down. This will get rid of the rattling of the calipers on Vesta:
This method is also shown in the video:
Information letter No. 19-18: When contacting owners of Lada Vesta cars, the effect of “noise from the brakes of the front wheels” emitted when driving on roads with broken surfaces is functional and cannot be eliminated under the warranty obligations of AvtoVAZ PJSC.
Have you encountered rattling noise from the calipers on your LADA? Did the official dealer help in this situation or did you have to fix it yourself? Let us remind you that knocking noises in the front part of the car can come from the suspension (for example, on Vesta from the anti-roll bar) or from the engine mount.
Replacing the brake caliper
Reagents and dirt from the road cause wear of the part: scratches appear from excessive friction, and the friction coating wears out. While the vehicle is moving, a knocking sound appears under the bottom. This is a signal that it is time to inspect the system and replace the caliper.
To do this, buy an assembled unit or components.
What calipers can be installed on Lada Vesta
If Vesta has 300x24 mm wheels and a 16-inch wheel, then you can install STT Performance 4-piston calipers. These are aluminum products weighing 3.5 kg. Comes complete with guide, pressure plate, bolts and washers for the standard brake hose.
In online stores under article number 8450006843 you can buy a front right caliper assembly. The left one is designated by catalog number 8450006844. Price - from 10,751 rubles. for each set.
Brake calipers for Lada Vesta. Photo source: https://www.drive2.ru/l/475951921580998817/?m=476002773993784091
A set of guides with four anthers and bolts costs 680 rubles.
Is the caliper really knocking?
In fact, there are many elements in the car that can knock. These are the same engine valves and the notorious hydraulic compensators, the knocking of which we recently talked about. But the calipers also knock. Moreover, this phenomenon is quite common.
For some cars, such symptoms are quite common and their appearance is purely a matter of time.
The first step is to determine whether the calipers are actually knocking. Fortunately, there is no need to go to a car service center and spend money on expensive diagnostics. You can do it on your own. The knocking noise is most noticeable when the car is moving at low speed. It is worth intentionally driving through easy obstacles. The easiest option is to drive over a speed bump or drive onto the ground. And as soon as you press the brake, the knocking will disappear.
One of the disadvantages of the defect in question is the fact that it is not covered by warranty defects. Roughly speaking, if the car is under warranty, you will have to repair the calipers at your own expense.
What to do if the calipers are knocking
When faced with the problem of caliper knocking, you must first carry out diagnostics and determine the cause of the malfunction.
Heavy pad wear
The first thing you need to check if you suspect a knocking caliper is the pads. They can be diagnosed in two ways:
- In move. If, while driving, the car began to brake worse, with the same pressure on the pedal, and characteristic squeaks appeared when braking, this indicates severe wear of the pads. This is also indicated by the pedal beating when braking;
- Visually. After examining the pads, you need to determine whether the lining on them has worn down to metal or not yet. If worn out or the situation is close to this, the pads need to be replaced.
It should be noted that the frequency of pad replacement varies for each vehicle. Most often it varies from 10 to 15 thousand kilometers.
If the pads are heavily worn, the driver may hear a sound similar to a caliper knock when driving. The danger is that the pads can wear down to the point of wear, which will lead to serious problems, for example, the brake disc will start to wear down. Worn pads can also lead to squeezing out and jamming of the brake cylinder.
Problems with guides
Caliper guides are an important element of the brake system. If they are worn out (or the sockets where they are installed are worn out), this problem should be corrected. You can do this in the following ways:
- Wear of guides. If it is the guides that are worn out, then this problem can be eliminated by directly replacing them;
- Wear of guide seats. In a situation where the guide socket is worn out, it is recommended to use special rubber bands. On sale you can find rubber bands that are put on the pins, which should eliminate the knocking of the guides.
Please note: Sometimes the situation with caliper knocking due to problems with the guides can be solved by lubricating them. It is necessary to purchase a special lubricant for the caliper and apply it thickly to the guide, having first pulled it out of its seat
Depending on the situation, such a solution can eliminate the problem for several hundred or thousand kilometers.
There is also a “collective farm” option for solving the problem of caliper knocking due to the guides. Additional holes are drilled in the caliper and brake cylinder block, and the parts are tightened using a spacer spring.
The caliper mount is unscrewed
The rarest of the problems under consideration, which can also lead to caliper knocking. The caliper mount may become unscrewed due to constant driving on poor quality roads or due to the inattention of a service center technician who did not secure the caliper properly during repairs or diagnostics of the brake system. Accordingly, in case of such a problem, it is enough to tighten the bolts securely to eliminate it.
Source okeydrive.ru
Malfunctions in the brake system often manifest themselves by knocking pads. The appearance of this symptom cannot be ignored.
Extraneous sound not only disrupts the driving comfort of the car, but can also indicate a serious decrease in safety due to deterioration in braking efficiency.
ATTENTION! A completely simple way to reduce fuel consumption has been found! Don't believe me? An auto mechanic with 15 years of experience also didn’t believe it until he tried it. And now he saves 35,000 rubles a year on gasoline! Read more". Therefore, when knocking pads occur, it is necessary to identify the malfunction and eliminate it as soon as possible.
Therefore, when knocking pads occur, it is necessary to identify the malfunction and eliminate it as soon as possible.
Knocking and rattling of calipers, how to eliminate them
Many people are faced with a fairly common problem: caliper rattling. The main symptom is a metallic rattle, which disappears if you lightly press the brake and mainly appears on cobblestones or similar roads and is also clearly audible when you get into holes. The sound itself can be either sonorous or more dull. The main reason is the broken holes for the guides due to untimely maintenance. Although once a year it is necessary to check the presence of grease on the caliper guides, as well as the condition of the rubber boots.
How to eliminate knocking calipers
If the knocking has just appeared recently, an inspection of the calipers may help, that is, lubricating the guides with high-quality lubricant and checking the boots.
It is important to use high-quality lubricant special for guides. It is not recommended to use copper, ceramic and hub grease
These types of lubricants will jam the caliper guides under certain conditions. The optimal lubricant for guides is SLIPKOTE 211 DBC or similar. If the necessary lubricant is not available, as a last resort, use blue lubricant for the hubs, up to 170 degrees; without sudden braking, such lubricant will work normally. In principle, there were no problems with it on the Starex bead; the anthers did not swell.
However, even on broken calipers, after lubrication, the knocking will disappear for a while.
The knocking sound of the caliper can also appear from wear of the pads; as the pads wear, the distance between the pads and the brake disc increases and the caliper begins to seem to dangle. So after replacing the pads with Starex, one of the calipers went completely quiet. But it also depends on how far the brake cylinders are moved back, perhaps differently on different cars, thereby leaving a different distance between the pads and the brake disc when the brake pedal is not pressed. The same applies to the brake disc. So check the pads and brake disc wear, replace if necessary and the rattling may go away.
If all else fails and the holes for the guides are sufficiently broken, only re-grooving for new guides will help.
There are also other options, more “collective farm” ones. Below are photos taken from various forums.
Installing a spring bracket. For some models, such brackets are produced almost commercially. For installation you need to drill two holes.
You can simply install a spring that will tighten the two elements of the caliper.
If one spring is not enough, install two.
Or one big one.
Some service stations offer the installation of fluoroplastic rings on the guides, although this is not safe. Some car models have factory guides already with a rubber ring (for the same Starex) which are provided only for the lower guide.
And finally, check the guides at least once a year, with good lubrication and intact boots, there will be no problems with them, although potholes on the roads do their job.
Inspection of calipers
In 40 percent of cases, the front caliper rattles due to dry lubricant. Many car owners do not know that this part requires periodic maintenance. How often should you do it? Experts give the answer - lubrication is carried out every time the pads are replaced. The service life of the latter can range from 20 to 60 thousand kilometers, depending on the location (front or rear), as well as the driver’s driving style.
How to perform an audit? First you need to find a quality lubricant. It must be specialized - specifically for guides. Reviews do not recommend using grease for hubs, as well as copper and ceramic analogues. They dry out quickly and are not suitable for use in this location. A popular manufacturer of specialized lubricants for calipers is Liquid Moly. Typically this product is sold in vacuum bags. One is enough for two guides. The lubricant does not lose its properties at temperatures up to 200 degrees Celsius.
After purchasing the material, you can start working. So, first, using a wheel wrench, we tear off the wheel bolts. Next, install the jack and lift part of the body up. We remove the wheel completely and move on to the calipers themselves. On the reverse side there are two “14” bolts.
We unscrew them using a socket or spanner. We also inspect the condition of the anthers. If they are damaged, then new lubricant will not help solve the problem. It is laid only if the caliper guide anthers are sealed. The seat and guide pin must first be cleaned. Next, squeeze the lubricant from the bag onto the surface. The element is then assembled in reverse order.
Note! If the piston boot is damaged, it must be replaced immediately. Otherwise, the rear calipers and the front ones will rattle constantly
The same work must be done on the adjacent brake mechanism. In order not to run to the store when you discover a damaged boot, it is recommended to purchase a repair kit in advance (in extreme cases, it will remain “in reserve”).
Causes of knocking noises
Since you can independently determine the knocking noise from the caliper when testing the suspension on uneven surfaces, you can also safely tackle the problem with your own hands.
There is nothing scary or difficult about this. This happens on a variety of machines, including:
- Toyota Corolla;
- Gazelle;
- Lada Largus;
- Ford Focus;
- VAZ 2110;
- Mercedes Sprinter;
- Renault Logan;
- VAZ 2114;
- Lada Vesta;
- Chevrolet Aveo (every 30 thousand km);
- Hyundai Solaris, etc.
The reason usually lies in one of 3 reasons.
This includes poor fixation of the element, wear on the guides, as well as wear on the brake pads. In the latter case, the pads themselves will actually knock, although the symptoms manifest themselves identically. In any case, you will have to go there and take appropriate measures.
Now we will consider each reason separately.
The pads are worn out
The first thing that should be checked when such symptoms occur is the pads.
There are two simple diagnostic methods that you can do yourself.
- While driving. If you feel that the car brakes worse with the same pressure on the pedal, plus there is a creaking noise when braking, the pads are probably seriously worn out. This also includes such a symptom as beating in the pedal;
- Visual method. You will have to get to the pads by removing the wheel and examine their condition visually. Worn linings indicate a problem. Even if they are not completely erased, it is better to treat the node immediately.
On every car, the pads must be replaced after a certain period. Usually this is 10-15 thousand kilometers.
If the pad is worn out, the driver will observe a sound reminiscent of a knocking sound from the caliper. Under no circumstances should the pads be allowed to wear excessively, otherwise this could result in damage to the brake disc. Also, such pads can squeeze out and cause jamming of the car brake cylinder.
Having dealt with the wear of the pads in the calipers, we move on.
The culprits are the guides
There is a rather important component in the brake system, called caliper guides. When they wear out, it is necessary to take measures to replace the components.
In fact, there may be 2 problems here.
- The guides themselves are worn out. If these elements are worn out, then there is no need to repair or restore anything. You just need to purchase new guides and install them in place of the old ones. Based on the video instructions, this will be quite easy to do;
- The sockets are worn out. The guides have sockets that also wear out over time. Special repair rubber bands will help you here. These rubber bands are put on the pin, thereby the guides stop causing knocking.
What you shouldn’t do is use the so-called collective farm method. It consists of drilling additional holes in the brake system cylinder block, as well as in the caliper itself, after which the elements are tightened. For this, a spacer spring is used.
In some cases, knocking noise due to the guides can be eliminated with lubricant. It is applied in a thick layer, after first removing it from the nest.
Sometimes lubricant helps to get rid of extraneous noise for a long period. For some, the sound appears again after 200-500 kilometers, for others it lasts several thousand kilometers.
Caliper mount
The rarest malfunction is considered to be a loose caliper mount. But since this also happens, this problem definitely needs to be addressed.
I'm not even talking about the mistakes of the craftsmen who installed the part and did not tighten it properly. The fastening may become loose for a fairly trivial but common reason. This is the low quality of roads. Constant vibrations lead to loose connections.
The problem is easily solved. You just need to tighten the bolts and that's it.
Finally, I suggest you consider another of our recent materials, in which we answered the question of why the clutch slips. I think this will be useful and interesting for many to know.
That's all I have
Thanks everyone for your attention
Subscribe, leave comments, ask questions on the topic and don’t forget to invite your friends to join us!
Brakes (discs, pads, sensors) Lada Vesta
Products from the Dustershop77 range on the topic of the article:
| Name | Manufacturer | Price | Availability | Add to cart |
| 410607115R | Front brake pads original 440603905R / 410605961R / 410607115R / 410600379R for 280mm disc | Original | 4500 / 3900 rub. Discount: 3700 rub. | 2 |
| 410608481R | Front brake pads Duster, Vesta original 410608481R for disc 260-269mm | Original | 3000 / 2300 rub. Discount: 2100 rub. | 2 |
| DC441-GDB3332 | Front brake pads 1.6 and 2.0, TRW GDB3332 (410608481R for 260-269mm disc) | Analogue | 3000 / 2500 rub. Discount: 2200 rub. | 2 |
| DC1399 | Hex key for replacing pads | Analogue | 200 / 150 rub. Discount: 100 rub. | 6 |
| DC444-23973.175.1 | Front brake pads for disc 260-269mm ZIMMERMANN 23973.175.1 (410608481R) | Analogue | 4000 / 3500 rub. Discount: 3100 rub. | 1 |
| DC510-7701205518 | Set of springs for rear brake pads Duster 4x2 original 7701205518 | Original | 3000 / 2700 rub. Discount: 2500 rub. | 1 |
| DC1149-8200276361 | Renault brake pedal sensor original 8200276361 | Original | 700 / 550 rub. Discount: 500 rub. | 2 |
| DC396-MR0276361 | Brake pedal sensor MANOVER MR0276361 (8200276361) | Analogue | 500 / 400 rub. Discount: 350 rub. | 1 |
| DC627-ASAM32116 | Brake master cylinder with ESP ASAM 32116 (460119952R) | ASAM | 2500 / 2200 rub. Discount: 1800 rub. | 1 |
| DC1657-479703074R | ABS ring Lada Vesta rear original 479703074R | 2000 / 1600 rub. Discount: 1400 rub. | 2 | |
| DC912-QZ-120-0410 | Front pad mounting kit (plates) (D259mm ventilated) Quartz QZ-120-0410 (kit) | Analogue | 1300 / 1000 rub. Discount: 700 rub. | 2 |
| DC1651-24165 | Front brake discs Lada Vesta, XRAY FEBI (260mm - 2 pcs.) | Analogue | 4900 / 3600 rub. Discount: 3300 rub. | 1 |
| DC1655-11196350208900 | Rear pads Lada Vesta (for disc brakes) original 11196350208900 | Original | 2800 / 2500 rub. Discount: 2200 rub. | 1 |
| DC1652-8450031131 | Rear brake disc Lada Vesta, XRAY original LADA 8450031131 (260mm - 1 piece) | Original | 2700 / 2300 rub. Discount: 2000 rub. | 2 |
| DC1656-440609415R | Rear pads Lada Vesta (for drum brakes) original 440609415R | Original | 2900 / 3200 rub. Discount: 2800 rub. | 1 |
| DC1656-BS-5717 | Rear pads Lada Vesta (for drum brakes) LYNX BS-5717 | Analogue | 1900 / 1500 rub. Discount: 1200 rub. | 1 |
| DC1650-8450031577 | Front brake disc Lada Vesta, XRAY original LADA 8450031577 (260mm - 1 pc.) | Original | 2900 / 2500 rub. Discount: 2400 rub. | 2 |
| DC1689 | ABS ring Lada Vesta rear analogue 479703074R | 1500 / 1000 rub. Discount: 800 rub. | ||
| NF0010851 / 410608481R | Front brake pads NF0010851 Duster, Vesta analogue 410608481R for disc 260-269mm | 750 Discount: 750 rub. | ||
| 000050BSX / 440603905R | Front brake pads Duster (2.0 doors) Stellox 000050BSX non-original, analogue 440603905R for 280mm disc | STELLOX | 1200 Discount: 1200 rub. |
Sergey 06/23/2020 at 09:52 pm#Reply
you can't do that. With this plate you clamp the caliper, which should move horizontally when you press the brake, pressing the outer pad. As a result, you will have one pad slowing down because the outer one is clamped by the plate. RESULT: THE CALIPER WILL NOT RATTLE, BUT THE BRAKE WILL BE BRAKED BY ONE SHOE THIS IS DANGEROUS.
On Vesta the front brakes squeak and knock. Replacement of pads and inspection
video content
Rating: 4.5; Votes: 2 Front brake pads Lada Vesta, Largus 16V ABS, Renault Duster 1, 6 VALEO 601641. Replacement of front brake pads on Lada Vesta. Servicing the front calipers and guides, checking the pad springs, lubricating the pad ears and explaining the reason for the metallic knocking noise from the brakes on the Lada Vesta. Why do the brakes on the Lada Vesta squeak? Patient Lada Vesta 1, 6 2500 km. By the way, a similar replacement for Duster 1, 6 and even Renault Capture with the same brake system. Date: 2019-12-01
← The stove whistles and does not work. We remove and disassemble it ourselves, saving 5,000 rubles.
We found a serious problem with the new Lada Vesta. Pendant from Megan? →
Related videos
Camry 4x4 hand built. Part 4. First difficulties.
• Ildar Auto selection
HAVE YOU ASSEMBLED ALL THE BODY ELEMENTS ON STRAPS - WILL THEY COLLAPSE WHEN DRIVING?
• Garage 54
WILL A VACUUM CLEANER Instead of a TURBINE WORK?
• Garage 54
Ken Block: about gymkhana, participation in Top Gear and career as a racing driver
• Auto RU
Lexus RX. Why love him! Instead of a VW Touareg or BMW X5?
• InfoCar: car test drives
How to crash a child's car.
• Attic
Comments and feedback:
Viktor Kruglov Hello, the factory ones were thrown out at 4000 km, they eat the disc like a lathe, I installed the kareya ones softer and the Belarusian ones were loose when braking, the mileage is 88,000 km of the Lada Largus car from the interior, the disc is in good condition, perhaps at 100 thousand I’ll replace it along with the factory timing belt, the K4M engine has a good copper lubricant I use it myself, but I had to add grease to the guides, wash off the factory one, put a good one, and so on every season, good luck to everyone on the roads.
Andrey Ivanov You guys are really great. A month ago I had a REHO LOGAN, now I bought a Lada Vesta St. Cross and I really want them to talk about my car. You are professionals whom I can’t find in my city.
Alexandr Sh Good detailed video, but replacing the TRV with Valio is someone’s whim, or the inscription on the vest really matters; ) PS I have nothing against Valio, but I still give preference to TRV.
Viktor Giniyatulin Hello everyone, please tell me I have a question. I have a Stepway 2014 first generation automatic, sometimes the D and P sign disappears on the panel. When I’m driving and standing, it doesn’t seem to affect the ride. This is fine?
Dima Chernov 165. 300 vesta 2 years in a taxi. The pads creaked once, I removed the compressed plate that was made for heat transfer and voila. The creaking is gone. And I have not experienced and do not experience any knocking from the calipers.
Dmitry Kotlyarov After completing the work, you need to press the brake pedal several times, selecting the gap that appeared after pressing the brake piston into the working brake cylinder.
Ruslan Khairetdinov Please tell me there is dust flying from the linings, I drive a Largus, they have white alloy wheels, they constantly turn black, recommend some linings that don’t have so much dust
Valery Konstantinov And unscrew the disk securing screw and lightly anoint it, I’ve been smearing everything with graphite for 20 years and everything turns out well, and I also remove the chamfers with the Bulgarian shoulders
Alexey A. Thank you, everything was great and professionally done. Now, if possible, remove the replacement rear brake pads for largus and duster. Pasha, well done as always
ivanivanish80 You cannot turn the wheels on a lift. The steering rack boot rests on the subframe, there is a risk of tearing. Design feature(
Problems with pads
To identify the reason why the brakes rattle, you should check the pads. A visual inspection may reveal that:
- counterfeit products;
- consumables are completely worn out;
- unsuitable pads are installed, for example, from another vehicle.
The most common noise in the caliper is fake. The main causes of knocking are shown in the table below.
Table - Origin of knocking noise from counterfeit pads
| Reason for knocking | Note |
| Delamination of friction material and support lining | Occurs when the manufacturer uses an adhesive mixture with poor adhesion. |
| Friction lining melting | Friction material particles stick to the disc, causing vibration and knocking as it rotates. |
| Baseplate geometry mismatch | There is a loose fit and uneven distribution of braking forces |
| Incorrect pad dimensions | There is a possibility of play in the seat |
Fake pads after 2500 km If problems arise with the pads, they need to be replaced.
In some cases, it is possible to modify the consumable, for example, if the geometry or dimensions differ from the required ones. In this case, car owners are advised to remove excess parts of the friction material using a file. This should only be done as a last resort, since tampering with the braking system reduces road safety and violates the law.
Lada Vesta replacement stabilizer bushings
You may know that many cars contain stabilizer bars (beams) in their design - either on the front axle or on both.
On Vesta, stabilizers (beams) of lateral stability are installed by the factory only at the front.
The stabilizer is designed to combat lateral rolls (for example, during a turn), preventing a possible rollover. With such a beam, the car has greater stability on the road, and you are less likely to lose reliable grip on the road.
The stabilizer kit includes the following elements:
- Barbell
- Mounting bracket (clamp)
- Bushing (cushion)
- Rack
- Mounting bolt
The stabilizer bar for Vesta is made of spring steel, which is installed on the subframe using brackets and bushings. The rod is also attached to the front suspension shock absorbers with appropriate struts.
During the lateral tilt of the machine, the stabilizer links move (one moves up, the other moves down), resulting in an even distribution of the load between the chassis parts.
In this case, the stabilizer bushings play a very important role - they allow the bar to twist around its axis during load, ensuring stabilization of the car’s position on the road.
The bushings are replaced if they are worn out. The results of wear can be:
- Extraneous sounds from the front suspension.
- Creaking occurs when driving on uneven roads or after driving through puddles.
- Reduced controllability in the speed range from 60 to 90 km/h.
The causes of wear are the aggressive action of the environment (road dirt, reagents) or poor manufacturing quality of the bushings.
When should you change bushings?
Routine work to replace these elements, according to AvtoVAZ recommendations, should be carried out after 25-30 thousand kilometers.
In practice, they often have to be changed more often . At the slightest suspicion, it is necessary to inspect the bushings for cracking or destruction of the rubber. If the bushings do become unusable, you cannot put off replacing them, because the technical condition of the suspension directly affects both the quality of driving and traffic safety.
Factory bushings are made of rubber. If they wear out, we recommend installing new polyurethane products, since they are not subject to such intense wear, have increased resistance to the negative effects of aggressive environments (water, acids, oils, gasoline, reagents, etc.), and do not deform under high loads , and also do not lose their plastic properties over a wide temperature range.
Looking for the root of the problem
So, what causes such a characteristic ringing? The reason lies in insufficient pressure of the pads to the discs. As a result, a gap appears between them. On bumps, the pads vibrate and involuntarily come into contact with the surface of the disc.
This is what causes the haunting sound. What is noteworthy is that from the street it looks more like a ringing sound. And dull blows are felt inside. Sometimes this indicates a problem with the shock absorbers or ball joint. But don’t rush things and sort out the suspension. Perhaps your brake calipers are just rattling.
The caliper is knocking - what to do: how to eliminate the rattling noise with your own hands
Hi all! It is unlikely that anyone will argue with the fact that proper operation of the braking system is the key to the safety of every driver. Therefore, today we will continue this topic by talking about why the caliper is knocking, what to do in this situation and who is causing the noise.
Surely everyone knows that you should always monitor the degree of wear of the brake discs. We also talked to you about grooving brake drums, and also studied the nuances of grooving brake discs yourself. I don’t encourage you to do this yourself, but you must know the features and tasks of such procedures.
The caliper refers to the braking system of a vehicle. It comes in both front and rear. But in both cases, his treatment is carried out approximately according to the same scheme. And the reasons for the knocking are identical.
Removing and checking the front brake disc
We carry out work to prepare the car as described above.
Remove the front wheel and clean the front wheel brake.
Using a 18mm socket, unscrew and remove the bolts securing the front brake guide to the steering knuckle, remove the front brake assembly 1, Figure 4, and hang it from the suspension spring.
Checking the technical condition of the front brake disc
The brake disc cannot be ground. If there are deep scratches, the disc must be replaced. If the disk thickness is less than 19.8 mm, the disk must be replaced.
If you replace a brake disc on one side, you need to replace the brake disc on the other side as well.
When replacing brake discs, you need to replace the brake pads.
Using a Torx T40 socket, unscrew and remove two screws 3 securing the brake disc to the front wheel hub and remove the brake disc 2.
Brake disc installation
Reinstall the brake disc and secure it to the hub with two screws. The tightening torque of the screws is 12 - 16 Nm (1.2 - 1.6 kgf.m).
Install the front brake assembly onto the steering knuckle and secure it with new mounting bolts. Bolt tightening torque 91 - 120 Nm (9.1 - 12.0) kgf.m.
Install the front wheel.
Press the brake pedal 2-3 times, check, and if necessary, bring the level of brake fluid in the hydraulic brake reservoir to normal.
We check the effectiveness of the service brake system.
Removing and installing calipers
To remove, replace or repair, you must prepare a caliper repair kit and the following tools and mechanisms:
- jack;
- set of wrenches;
- pullers;
- heads;
- flat screwdriver;
- pliers;
- a new set or part that we are replacing.
Sequencing:
- Place the car on a level platform. It will be more convenient to place the vehicle above the inspection channel (pit).
- Provide yourself with safety measures by activating the parking brake lever.
- Secure the front wheels with wheel chocks to prevent the machine from rolling away without permission.
Removing the front brake calipers
- Place the jack under the part of the car you are going to work on.
- Make sure the lift is installed correctly and will not slip.
- Raise the car until the wheel is suspended, 5-7 cm from the ground.
- Disassemble it and remove it by rolling it to the side.
- Remove the two bolts that hold the mechanism closed, then open the caliper.
- Remove the bracket, unscrew the bolts and remove the bracket.
- After unscrewing the screws, remove the brake disc, make sure it is in good condition and assess the degree of wear.
- You can remove the part using a rubber hammer by knocking it down.
- Clean off all dirt and generously lubricate the hub with copper grease.
- If the caliper mirror has no visible damage: clean the grooves; degrease, lubricate and secure with new rubber bands.
Removing rear brake calipers
- Before you begin removing the mechanism on the rear wheel, you must disengage the parking brake.
- Before installing the wheel, clean the surface of the disc with a special cleaner to remove any remaining oil and brake fluid.
- Before removing the rear wheel disc mechanism, remove the cotter pin, disconnect the drive cable and plug the union connection.
- If it has spring pad holders installed, note their location on the assembly, then remove. Remove the piston boot secured by the spring ring by prying it off with a screwdriver.
- Place a wooden block between the piston parts for protection. The piston is pushed out by applying compressed air to the hose fitting. Air pressure is minimal.
- Wash all removed parts with a special cleaning fluid.
- Wet the new piston cup with brake fluid and put it in place.
- Push the lubricated piston through the new boot into the landing groove and insert it into the cylinder. It should go in with little resistance.
- Reinstall the snap ring.
- Lubricate the bolts with special silicone grease, place them in the housing, installing protective cases.
- Install the brake caliper in the reverse order, replacing the copper sealing washers (gaskets).
- Place the O-ring inside, after lubricating it with a special lubricant.
- Bleed the circuit to check the system is working properly. Reinstall the wheels.
- Remove the car from the jack and tighten the wheel nuts.
- Check the operation of the entire system.
Problems when paying with bank cards
Sometimes difficulties may arise when paying with Visa/MasterCard bank cards. The most common of them:
- There is a restriction on the card for paying for online purchases
- A plastic card is not intended for making payments online.
- The plastic card is not activated for making payments online.
- There are not enough funds on the plastic card.
In order to solve these problems, you need to call or write to the technical support of the bank where you are served. Bank specialists will help you resolve them and make payments.
That's basically it. The entire process of paying for a book in PDF format on car repair on our website takes 1-2 minutes.
If you still have any questions, you can ask them using the feedback form, or write us an email at
Procedure
- First, we purchase suitable pads. The set of front consumables consists of 4 pieces (2 pieces on each side).
- We control the brake circuit fluid level in the corresponding reservoir (under the hood) using the marks on its body. If the level reaches the maximum level, then it will need to be taken with a syringe, since after installing the new pads there will be a natural (due to the greater thickness of the pads) rise.
- We loosen the tightening torques of the bolts of the front wheel from which the replacement is supposed to begin.
- We hang this part of the car with any available device designed for this purpose. We remove the wheel. Don't forget about safety supports (if a jack is used).
- We take a screwdriver, which we insert between the pad and the disc, and with a pressing force we move it towards the cylinder. The rod is hidden in the cylinder, which provides free space for removing the pads.
- Now we loosen the tightening torque of the caliper bracket, and then move it up.
- We remove the old pads.
- We inspect the springs of the clamping mechanism for their deformation and breakage. If this fact is obvious, then we change it.
- We check the integrity of the rubber covers on the caliper guides. We lubricate the guides themselves with a special compound. This will prevent them from souring, and the bracket will move freely during the exit or entry of the piston.
- We carefully clean the seats for new pads.
- The linings on “fresh” pads are thicker than on old products, so the piston must be recessed to the full extent of its stroke. This will provide enough space for the correct installation of consumables.
- After installation, perform the assembly process in reverse order.
Replacement of front brake pads is completed. We repeat the entire list of these manipulations on the other side of the LADA Largus.
If there is a need to replace the rear pads, then the principle of operation is similar, with the exception of some nuances.
This is interesting: Removing and installing the mudguard of the front bumper of Lada Largus
Independent actions
Before you eliminate the knocking noise from Vesta calipers with your own hands, you need to make sure that it comes from them. To do this, you need to rock the mechanism from side to side. In this case, it is not necessary to remove the wheel, although if you have alloy wheels with many spokes, you will have to jack up the car and remove the wheel.
This situation is clearly shown in the video.
If your fears are confirmed, you can try to resolve the issue in the following ways.
Replacing brake pads
Replacing Vesta brake pads is not complicated and can be easily done independently. When purchasing a new set, it is recommended to choose those that are equipped with a rubberized pad on the reverse side.
Pads with a rubberized lining can eliminate knocking.
Guide lubrication
To do this, you need to unscrew the guide pins from the calipers and generously lubricate them with grease.
Lubrication also helps sometimes.
Replacing guides
If lubrication of the guide pins does not help, it is recommended to replace them.
New fingers instead of old ones.
Production of new guides
In this case, you will have to contact a turner. He will be able to turn out new “fingers” on a machine, the diameter of which will be larger than the standard ones.
Recess groove
You can also order modifications to the factory guides at a turning workshop. It consists of making small indentations in the fingers at the edge. Subsequently, cuffs made of rubber with heat-resistant, as well as gasoline and oil-resistant characteristics must be placed in these grooves.
Guide pins with rubber inserts.
Plate
To eliminate noise, you can bend the plate (noise reduction) downwards. This option is demonstrated in the video
Caliper guide clamp
To do this, you need to arm yourself with a spring or a plastic clamp, and then tighten the guide, pressing it against the caliper. You can also use both options at the same time. To do this, you always need to remove the wheel.
These are quite simple and effective tips for getting rid of knocking and rattling of Lada Vesta calipers. Most operations can be performed independently, but to carry out some you will have to hire a turner.