How to check the fuel fluid level?
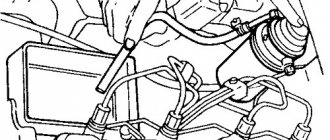
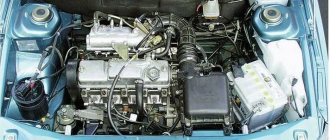
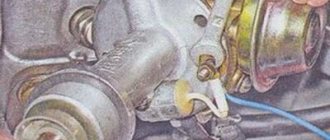
By looking under the hood, where a special tank is located, you can check the level. The tank is made of translucent plastic, so it is easy to determine by the minimum and maximum value marks whether the brake fluid has left or remains in the original amount. In case of topping up, it is better to familiarize yourself with the car's instructions in detail: in some brands that have ABS, bleeding of the brakes is required.
If you do lose brake fluid, you should first understand the reasons. Under no circumstances should you continue driving.
How to fix a leak?
It is not recommended to repair the brake system without special knowledge. But if you are confident enough, you can fix some problems yourself. It is easy to replace faulty hoses or tubes, change seals and cuffs of brake cylinders. The most important thing is not to forget that after any repair of the brakes, you must “bleed” them. Under no circumstances should you drive a car with unpumped brakes.
Read also: Tonic for brown hair
The tank is cracked - what to do first?
Some motorists mistakenly begin to dismantle the entire brake assembly. Calmness and a visual inspection are the first step towards a successful repair. Wet marks and smudges indicate a decrease in the level of the substance. If a crack is detected, experienced car owners advise replacing the tank immediately - sealing it will not help. What to do if an incident happens on the route?
First aid when a crack is detected
The reasons why brake fluid leaves the reservoir can be different. This may occur as a result of the machine hitting an obstacle. The car service is far away - what should I do? Repairing a crack in the path is only possible to continue moving. Upon arrival at your destination, you will have to purchase a new tank. Glue doesn't help in most cases. Craftsmen recommend using a regular 40-watt soldering iron, slightly extending the rod and slightly loosening the top screw. A piece of plastic tape similar to the body of the tank is cut off. It is unsoldered and used as a patch. First you need to go over the crack with a soldering iron, then use a strip of prepared plastic.
Replacing the tank on a VAZ-2109
The algorithm for replacing the tank is simple. The car must be washed outside and in the engine compartment. This should be done manually, avoiding moisture getting on the pads, starter, and sensors.
Then you need to jack up the car and clean the threaded connections that you will have to deal with. By visual inspection, you can recognize where the brake fluid goes. The reasons for this trouble will also in most cases become clear.
By unscrewing the nuts and disconnecting the cover wires, a person gains access to the tank, which must be removed.
Important advice from experienced car owners! To loosen hose clamps, it is better to unscrew the bolts using pliers.
Checking brake lines and hoses
If after checking your brake master cylinder, caliper and wheel cylinders you have not found the source of the leak, it's time to check your brake lines and hoses.
For this part of your troubleshooting section, you will need to jack up the car to follow each line. The lines connect the brake master cylinder to the hydraulic modulator (if equipped) and run to each wheel, where small brake lines connect to the calipers on the brake rotors and the wheel cylinders on the rear brake drums.
- Lift one tire at a time to check. Use a floor jack and support the vehicle with a jack if necessary.
- Using a flashlight, follow each line, paying attention to wet surfaces and signs of damage. Use your fingers to confirm fluid leaks around lines or hoses.
- If you find moisture, make sure it is coming from inside the line. If necessary, wipe the lines with a clean rag. Pay special attention to where the lines connect to the brake hoses on the wheel assemblies.
- Check the brake hoses for dark spots and damage.
Once you've found the source of the problem, you need to decide whether to take your car to the shop or try to fix the problem yourself at home.
In any case, do not drive the car until the problem is resolved.
If you only need to fill the system with fluid, you may also need to bleed all the lines if the reservoir was empty to begin with - air has likely gotten into the system. You can do this with a brake bleeding kit.
The brake master cylinder, wheel cylinders, and brake hoses are the most common sources of system leaks. If you need to replace any of these components and you have some experience in car repairs, you may be able to do the work at home, depending on your specific car model. Follow the instructions in your vehicle's repair manual carefully. You'll spend about $100 for the master cylinder, $10 to $100 or more for the wheel cylinder (depending on the make and model of the car), and $10 to $20 for each brake hose that needs replacing.
Additionally, you can purchase a brake bleeding kit to make your job easier. When replacing the master cylinder, it is necessary to bleed the device before installation. Additionally, you need to prime the system and bleed the brake lines - this is done every time you disconnect a component for service, such as a brake caliper, master cylinder, wheel cylinder, or hose/line.
Clutch hose repair method
Experts say one of the common reasons why clutch brake fluid has leaked is a damaged hose through which fluid circulates from the reservoir to the clutch.
Effective replacement tips:
- You need to remove the tank itself by removing the clamp from below.
- You should purchase a new hose, preferably red.
- You need to pull out the damaged hose carefully so as not to accidentally break off the plastic fitting.
It is important not to allow fluid to leak onto the fender or paint. After removing the tank, you should rinse it with water; it is also recommended to replace the clamps. We install the hose and tighten it without much effort. Don't forget to tighten the nuts as well.
Experts say that the hose often wears out. It must be checked periodically and, if damage is detected, replaced with a new one.
Brake cylinder leak
A common cause of brake fluid loss is a leaking cylinder. The occurrence of a problem is judged by the stain left under the vehicle. Finding out the reason is easy.
- You will have to remove the wheel and carefully inspect the brake disc.
- The calipers should be checked for leaks.
If you have a brake drum system, there is an urgent need to remove the drums. The problem involves wear of the rubber seals. Especially often, such troubles await residents of regions with severe frosts.
Conclusion
Remember, checking your brake fluid levels and condition every week or month will help you catch potential problems before they turn into costly repairs and dangerous situations on the road. Typically, brake fluid should be about 1/4 inch (6 mm) below the top of the reservoir or between the MAX and MIN marks on the container. If necessary, consult your vehicle's owner's manual.
A brake fluid leak can occur almost anywhere in the system. Using this guide will help you find the problem faster so that you can resolve the issue as soon as possible. And it will even help you save money on repairs in some cases.
About the consequences
There can be many answers to the question of where the brake fluid goes from the reservoir. It can go into the vacuum muffler. This indicates a high percentage of wear on the master cylinder piston cuff. For simple rubber there is nothing terrible about this. Another issue is the accumulation of the product in the form of a dangling layer. This will result in an increase in resistance at high diaphragm speeds. There is an opinion that such a situation simply kills the diaphragm. By changing the cuff, movement will become safe. Sometimes you have to install a repair kit while disassembling the vacuum unit.
Some motorists ask whether brake fluid can leak into the engine. Experts give a negative answer. She can only get there if she confuses the canisters with liquid.
Symptoms of defects in the master brake cylinder
Rubber seals on the brake master cylinder cause leaks. They cause penetration of the vacuum booster. In such a situation, replacing the cylinder will help. If a malfunction occurs with the cylinder, the brakes fail completely or do not work correctly. The main challenge for this part is the aging of the brake pads. Diagnostics involves an initial warning to the driver using indicators on the dashboard and checking the pressure in the system. What does the motorist see as a result of the problems that have arisen?
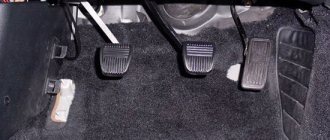
- Pressing the pedal, the owner of the steel horse feels its slow stop. The point here is the loss of tightness of the pistons or wear of the cuffs.
- A short pedal stroke means a high concentration of brake fluid; it has nowhere to go due to a clogged hole or a swollen rubber seal.
- There is a failure of the pedal: the matter is in the liquid rushing into the expansion tank.
The brake fluid suddenly went away. Verdict – it’s flowing, but where?
Any hydraulic system with moving parts includes rubber seals, and the brake system is no exception. Cuffs allow you to dock various parts, mate moving parts with stationary ones, without giving liquid any chance of leaking. At the same time, the cuffs are the weak link of any unit. It becomes even weaker from low-quality brake fluid, long-term parking and low-quality materials used in its production.
However, there are also unusual situations when the brake line cracks or defects are found in the master brake cylinder. Returning to the standard places of leaks, it should be noted that it is worth looking at all the places where rubber seals are used and the diagram will help us with this:
- Vacuum brake booster (VUT) – master cylinder (GTC).
- The reservoir is the main brake cylinder.
- Each of the cylinder-piston wheel pairs.
Another location of the leak can be determined by the pattern of movement of the brake pedal:
Read also: Jumping change of legs on a stand
- Soft, goes to the floor - wheel calipers.
- Hard – leaks in the area of the brake master cylinder or reservoir.
Statistics show that leaks are most often observed in the area where the GTZ is attached to the CWF. The layout of the engine compartment often does not allow easy inspection of this unit. However, external examination does not always give results. The insidiousness of this place is that the internal seal of the GTZ rod can weaken, causing the liquid to go inside the VUT, and everything outside is dry. In this regard, take note of a couple of recommendations:
- The inside of the vacuum booster must be dry. Run a rope through the hole connecting the vacuum reservoir to the intake manifold - it should be dry.
- There should be no foreign odors inside the VUT. Through the same hole, check for a brake smell.
When it flows in the area of the wheels, the drips are clearly visible from the inside of the casing located on the hub.
Secrets of bleeding brakes
To complete the repair process, the brake system needs to be bled. You can do the work yourself or contact the service.
- Fill the reservoir with brake fluid up to the max mark.
- The wheel brake fittings need cleaning.
- Take a separate container and a hose attached to the fitting.
The assistant sitting behind the wheel must press the gas pedal evenly and firmly three times. When pressing the fourth time, the pedal does not need to be released. At this time, you need to unscrew the fitting and look at the outlet of the fuel injection fluid. Bubbles in the stream will indicate air in the system. After the air is released, the fitting is wrapped, and the process is repeated on another set of wheels. Observing all pumping rules, it is impossible to be completely sure of the reliability of the result. Experienced car enthusiasts recommend not to neglect the services of service stations.
When making repairs yourself, experts advise tilting the car slightly towards the wheel in question. The air will rise upward and reach the threaded valve sooner. Lightly tapping the caliper optimizes the process. In addition to the above-mentioned bleeding technique, there is a technique for adding brake fluid to the supply reservoir. This is difficult to do and only experienced vehicle owners can do it. This procedure is not feasible for machines with return pressure control valves.
If handled incorrectly, there is a high risk of causing new breakdowns and having the opposite effect - the appearance of air in the brake system in even larger quantities. Professionals will come to the rescue; they will complete the work competently within the optimal time frame.
What can you use instead of brake fluid?
Some drivers carry a small can of brake fluid with them at all times. Drivers of the old school often get carried away with this kind of thing. At that time, the machines were not particularly reliable, and a breakdown could happen at any time.
If you don’t have the required liquid at hand, you can replace it with the following means.
- Antifreeze or antifreeze. Such mixtures are easily available (you can drain a little from the radiator), and their composition is excellent as a substitute for the factory mixture.
- Power steering fluid. It is also good for pouring into the brake line, but draining the composition will be difficult.
- Alcohols. Pure alcohol does not freeze, but you need to be extremely careful when working with brakes on alcohol - the liquid boils easily.
- Water. Ideally, distilled. This liquid is used only as a last resort, when there is simply no other option. Despite its availability, adding water to the system has two critical disadvantages. The system may freeze in the cold. Metal surfaces are easily oxidized when exposed to H2O.
