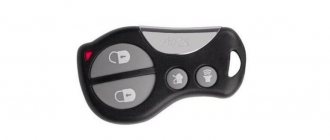
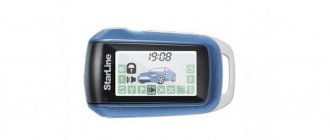
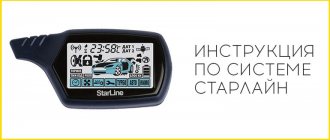
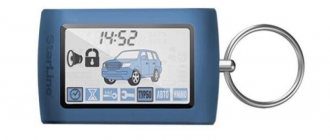
The Starline B9 alarm system was produced in three different versions - two of them belong to the TWAGE family, and the third belongs to the Dialog generation. When operating these systems, you cannot notice the difference, although the algorithms stitched into the main unit are different. This has led to incompatibility of key fobs: remote controls in a black case are suitable for the first generation alarm systems, but not for the newer ones. By the way, we were talking about remote controls with a display. Well, the Dialog generation key fobs, if we talk about the B9 model, are compatible with other dialogue systems, such as the A91. They are not interchangeable with keychains from the TWAGE generation.
Equipment
The Starline B9 alarm set consists of a number of devices that make up the anti-theft system. It includes:
- central processor as part of the main unit;
- double-sided key fob equipped with an LCD display;
- AAA battery for one and a half volts to power the key fob;
- an additional key fob of the same type as the first one, but without a display;
- communication model of the control panel with additional key fobs and the system, equipped with an antenna;
- leather case for storing the key fob;
- electrical wiring for connecting parts of the system;
- wire equipped with a Valet button;
- shock sensor;
- sensor for measuring engine temperature;
- Limit type hood switch;
- LED indicating the status of the device;
- immobilizer crawler;
- instructions;
- warranty service coupon.
The manufacturer no longer produces the B9 alarm series in any modification. It was replaced by a more modern modification A91. But the equipment of the latter is so similar that when making repairs that require replacing certain elements, they use parts from a beginner. How to program the Starline A8 key fob.
TWAGE and Dialog: looking for differences
All signals belonging to the Starline B9 TWAGE family are completely interchangeable. Although, you need to remember that when installing a “blue” block instead of a “black” one, you will have to purchase a remote control with a display. In fact, three generations of B9 systems are compatible in terms of connectors, not to mention the radio connector. But we were able to discover one difference in the options: when recording key fobs, you need to press different key combinations.
Procedure for recording key fobs, comparison
There are no differences in the programmable options themselves.
You can open the instructions that came with TWAGE alarms and see a simplified table of settings. The decoding is given in the text, and the meaning will be the same as for the “Dialog” systems:
Customizable security functions
All settings responsible for autorun are essentially the same. They are given in another table, but you can compare different instructions - there will be no differences between the “autorun tables”!
During setup, you cannot view values that have already been set. That is, when replacing an old alarm system, you cannot simply take and write off the numbers from it. Let's hope that notes about the settings were made during installation - the last two pages of the instructions are reserved for this. Signals “with dialogue” are arranged in the same way: they can be programmed, but the data cannot be read.
Description of functions
Car enthusiasts choose the Starline B9 because of its ability to provide a sufficient level of protection for several areas of the vehicle at once:
- electrical circuits of internal combustion engines;
- hood, luggage compartment and doors;
- hand brake lever;
- car interior.
The security device relay is responsible for protecting the circuits, but in addition, the ignition circuit is additionally protected - the system reacts to the appearance of voltage in the ignition switch. As for the doors, hood and trunk, their protection is ensured by limit switches, which can be purchased additionally. Thanks to the operation of the standard switch when the handbrake is released, it is also protected. And the interior is controlled by a customizable shock sensor.
Manufacturers do not limit vehicle owners to the standard equipment options, allowing additional installation of auxiliary units:
- M21;
- M31.
The first of them provides the ability to control the system from a smartphone, thanks to which distance ceases to be an obstacle to setting up security functions. As for the second block, in addition to mobile control of the device, it makes it possible to control the position of the machine based on data from GPS and GLONASS satellites, as well as mobile communication towers.
In general, the functions of Starline B9 are traditionally divided into anti-theft and service. The first include:
- activation of the alarm mode based on sensor signals;
- notifying the car owner using a signal from both sirens and on the key fob;
- immobilizer mode in case of need to immobilize the vehicle;
- two-stage shutdown that can be programmed;
- deactivation of the device based on a special programmed secret code;
- blocking the operation of motor circuits;
- storing trigger conditions in memory;
- silent activation of security mode
- programmable silent alarm operation - alarm signals are given by headlights and lamps on the key fob.
With some additional features, the vehicle owner can achieve enhanced protection. Namely, using:
- floating control code, which is protected from reading by code grabbers;
- returning to the last settings before the power outage immediately after power supply is restored;
- limited number of consecutive operations based on information from sensors;
- disabling alarms of any type without deactivating the anti-theft system itself.
As for service functions, the main ones include:
- the ability to maintain the security mode when the engine is turned on;
- control the system without a remote control;
- automatic resumption of security mode after an accidental temporary shutdown;
- control from a long distance not only by sensors, but also by door locks;
- the ability to lock and unlock doors using the ignition switch;
- the ability to install two-stage door opening;
- the presence of additional channels that make it possible to control auxiliary equipment;
- vehicle detection function in a parking lot;
- protection of buttons on remote controls from accidental pressing;
- the ability to configure both a turbo timer and auto engine start;
- indication of the reasons for the activation of the alarm signal by pictograms;
- the presence of special sound signals for various reasons for triggering;
- indication of faults during arming.
Starting the engine with the Starline alarm
Among the functions of remote control of internal combustion engines, it is worth highlighting:
- starting and stopping it from the control panel;
- extending the operating mode remotely;
- the ability to configure start by temperature or time, as well as by alarm;
- control over the operation of the motor based on signals from the speed sensor, also based on information about the operation of the internal electrical network;
- disabling the starter in automatic mode;
- indication of the motor operating status on the LCD display of the key fob using pictograms.
Thanks to such diverse functionality at a reasonable price, the Starline B9 alarm system has not yet lost the appreciation of consumers.
Typical faults B9
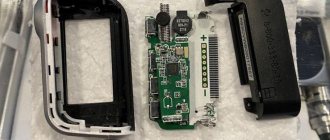
1. Damage to the control panel. The most common complaint from Starline b9 owners is the breakdown of the key fob buttons, without which operation of the system becomes impossible. You can solve the problem by disassembling the remote control and wiping the contacts with alcohol. If the keys have fallen inward, they can be replaced at a service center.
Related link:
Car alarms Starline A62, A64, A66 - a reliable protection system without autostart
2. Alarm malfunctions, poor communication signal. The B9 alarm system does not cope well with radio interference, which is especially abundant in a big city. Unfortunately, it is impossible to correct this shortcoming. The car owner can only ensure that the vehicle is in the area of strong radio interference as little as possible.
Key fob buttons
The Starline B9 alarm system is controlled using programming or through control panels. There are two such remote controls in total - the main one and the additional one. Only the first of them is equipped with a liquid crystal display. At the same time, both have three buttons.
There are several types of keystrokes with which I control the system:
- pressing call on one key for a short time, not exceeding half a second;
- long press on one button, which lasts until a melodic sound signal plays;
- double pressing one key with an interval between each single key of no more than half a second;
- sequential pressing of two buttons - one long press and one short press with an interval of no more than half a second between them.
Each of the keys or their combinations has its own purpose, without knowing which the control will not be effective. So, button number 1 is used for:
- activating the security system with the engine off and one short press;
- door locking when the engine is on with a single short press;
- arming without sounding siren when pressed twice;
- adjusting the shock sensor and its software settings by pressing twice.
Key number 2 is used for:
- disabling the car's security mode when the engine is not running and a single short-term exposure;
- opening the doors with the engine running and the key inserted into the ignition;
- silent disarming with short-term double exposure;
- control additional functions by sequential pressing;
- activation of anti-robbery mode;
- disabling a working siren with a single press.
Key number 3 is used to activate the following additional features of the gadget:
- displaying temperature indicators in the cabin on the key fob's LCD display with a single short press;
- checking the general condition of the system under the same influence;
- search for a car in a parking lot by briefly pressing twice;
- displaying the internal combustion engine temperature readings under the same influence;
- turning on an auxiliary communication channel;
- selecting parameters highlighted on the key fob display with a cursor, including turbo timer, automatic arming, etc.;
- viewing the time set on the alarm clock;
- control the silent mode of operation of the control panel;
- activating the energy saving mode.
There are some peculiarities in the operation of the additional key fob keys - they have limited functionality. In particular:
- the first button allows you to turn on the system when pressed briefly;
- the second is to disable the vehicle’s security mode;
- the third is to activate the anti-robbery mode with prolonged exposure to it.
The Starline B9 anti-theft alarm model includes a Valet service button on a special wire located inside the cabin. Using the Valet key, you can reset all settings to factory settings, and also control the gadget without accessing the remote control.
Specifications
Main characteristics of the Starline B9 alarm system:
- carrier frequency - 433.92 MHz;
- radius of signal transmission from the remote control - up to 600 m;
- supply voltage (DC): 9-18 V;
- temperature range of use: from -40° to 85°C;
- current consumption (in security mode) - no more than 15 mA.
The equipment is equipped with a microprocessor control unit that supports interactive coding of control signals. By using the original code, protection is provided against interception and selection of the key by an attacker. When the power is turned off, the central unit remembers the current state. When the power circuits are activated, the device automatically returns to its original position.
DIY installation of StarLine B9
When installing it yourself, you should adhere to a number of general rules, which are the same for the owner of a 1999 Toyota Vitz as for the owner of a UAZ Bukhanka, Lada Kalina or Toyota Chaser. These rules look like this:
- any work is performed only with the battery disconnected;
- the main unit of the anti-theft system must be placed deep in the dashboard to reduce the length of the connection wiring;
- Do not allow moisture to get into the main unit under any circumstances;
- the distance between the heating system and the main unit should be as large as possible, otherwise this will lead to distortion of the temperature sensor readings;
- the antenna is placed on the windshield of the car, maintaining a distance of at least five centimeters from metal parts of the body;
- the siren is placed under the hood so that it is protected as much as possible from both moisture and overheating;
- shock sensors are installed inside the cabin;
- The engine temperature sensor is installed on the crankcase of the latter;
- operation indicators are mounted on the facings of the front pillars or dashboard;
- the service button is installed so that access to it is hassle-free, but the location is inconspicuous;
- for their correct operation, a gap of at least 3 millimeters is left between the limit switches;
- The greatest possible distance should be maintained between signal system wires and potential sources of radio wave interference.
The sequence of steps for installing the device for all vehicle models also looks the same.
- The first step is to install the main unit.
- After which they begin to install the receiver antenna and shock sensors inside the cabin. Having finished this, place a siren and an internal combustion engine temperature sensor under the hood.
- The Valet key is installed and connected, after which limit switches are installed and the relay is connected, as well as the ears to the ignition switch.
- After pinout, all parts are connected to each other using the included wiring harnesses.
- When the installation is complete, test turn on the engine and configure the software parameters, in particular autostart.
The Starline B9 installation map for different car models may differ slightly. There are some peculiarities in connecting the alarm system to the Toyota Corolla Fielder 2004 or Toyota Axio compared to the Matiz or Lada Granta.
Learn more about remotes and compatibility
Let's see what all the signals considered here look like:
Three different generations of B9
Now about the keychains:
- The remote control with a display in a blue housing is suitable for one car alarm (in a blue housing).
- The remote control without a display, but with three buttons, is suitable for first and second generation alarms.
- The remote control with a display in a black case from the Dialog kit is only suitable for dialogue signals: A91, B9 Dialog. The same applies to remote controls with two buttons and without a display.
Finding a remote control suitable for the B9 TWAGE system is now almost impossible, if we talk about generation “1”. These alarms have been discontinued since September 2006.
The antenna module for the first and second generation systems was produced identically. But the design of these modules was changed with the transition to the “Dialogue” family. Be careful.
Setting up the Starline B9 alarm system
The parameters are configured through the service mode, activated by the Valet button or on the control panel. All settings are made after choosing the engine - diesel or gasoline. To activate this mode, perform the following steps:
- press the third button of the key fob or Valet the number of times required according to the instructions;
- turn the ignition key and wait for the sound signal produced by the siren and remote control to appear;
- select the required function using the service key, for example, key lock;
- confirm the choice as indicated in the instructions for a particular case;
- select one or another parameter in the same way, using the cursor if necessary.
In some cases, it is necessary to return to factory settings, for which Valet is used:
- press the indicated button 9 times;
- turn the ignition key and wait for the siren to sound ten times;
- press the service key again and wait for the sound signal;
- press button number one on the key fob.
As a result, all settings will return to their original settings and the car owner will be able to reconfigure the system at his discretion.
It is worth remembering that configuration errors lead to incorrect operation of security functions, which can be not only inconvenient, but also dangerous. The main problem is that such errors do not manifest themselves immediately.
Time
The main alarm control panel is equipped with a built-in clock. To set the correct time, you need to press the third key on it and hold it in this state until first one long, and then one short and two more short beeps sound. Immediately after this, the button must be released and the time indicator will flash.
To make the clock reading larger, I use the first key, and to make it smaller, I use the second. To make changes quickly, hold the button until the desired value appears on the display.
To set the minute value, press the third key for half a second, using the same buttons as in the previous case to increase or decrease the value. The same rule applies to quickly scrolling through numbers.
The installation mode is exited either by long pressing the third button, or by leaving the key fob so that it returns to its normal state automatically.
Shock sensor
To turn the sensor on and off by level an unlimited number of times during one security cycle, use key number one on the control panel.
It is pressed twice. Such double clicks carry out sequential adjustment of the sensor. After the first, the first level is turned off, and after the second, the second. The third press turns both levels back on, after which the cycle repeats ad infinitum.
Setting the time on the Starline key fob
Each time a certain level of shutdown or connection is highlighted with special signals. In the first case, the side headlights flash twice and the key fob makes a melodic sound. The second press is already accompanied by three flashes and three beeps from the remote control. Well, when turned on, the dimensions react with only one flash, after which a single sound sounds.
Engine temperature sensor
One of the features of the Starline B9 alarm system is the ability to automatically start the engine based on the readings of the temperature sensor. The motor starts working as soon as the air temperature drops below one of the values: hi -5, -10, -18 or -25 degrees Celsius. Accordingly, it can be turned off as soon as the thermometer readings increase. At the same time, the car owner can also set the restart interval, which, however, cannot be less than one hour (more frequent starts have a bad effect on the resistance of the internal combustion engine).
To configure the sensor, you must first enter the temperature autostart setting function. This is done using the cursor, which is hovered over the corresponding icon. When you press it, the car will react with a single flash of dimensions, and the key fob will respond with a melodic sound.
After this, the display will show the sensor temperature value at which the motor will turn on. To change it, you need to press the first button to increase the value and the second to decrease it. The LED indicator will react with a triple flash.
To turn off the sensor, you must again go to the menu for controlling the autostart function by temperature using the cursor and press the second button. The car will react with two flashes of the side headlights, and the remote control will make a melodic sound. This is the shutdown signal.
How to increase the warm-up time on Starline B9
To do this quickly, the car owner presses the first and third keys on the key fob in sequence. In this case, the first one is pressed until a sound signal appears on the remote control. One such sequential impact leads to an extension of the internal combustion engine operation by five minutes. The fact that the manipulation has been successfully carried out will be indicated by a single siren signal, a melodic sound from the key fob and a flash of headlights.
Each time you extend it, the LCD display of the main remote control will show the total time remaining until the motor stops. It is allowed to extend the warm-up by no more than half an hour.
How to increase the starter cranking time on StarLine B9
You can select different times to delay the start of work only for diesel engines. The choice is provided between indicators of 4, 6 or 10 seconds. Owners of gasoline internal combustion engines will have to come to terms with the programmed value of 2 seconds.
As for the starter cranking time, it is also set when the alarm is turned on. If voltage control is provided, the car owner can choose between indicators for the first scroll of 0.8, 1.2 or 1.8 seconds. For tachometer control, a fixed value of 3.6 seconds is set. The time of each subsequent attempt is automatically increased by 0.2 seconds.
How to turn the siren on and off
The siren sounds automatically when the alarm sensors are triggered. If the car owner wants to turn off the sound of the alarm device without disarming the car, he needs to press button number two on the key fob.
How to open the trunk
Remote opening and locking of the trunk is carried out through the first channel, indicated by a black and yellow wire.
This channel is turned on by successively pressing the third and first keys. In this case, the first of them is pressed until a sound signal appears, and the second is pressed for half a second. A sign of success will be a triple flash of headlights and three beeps from the key fob. The channel operates regardless of the security mode state and the duration of its operation is programmed separately. If the channel duration is set to seven tenths of a second, it is used to remotely open and close the trunk. When you press the above buttons while the security mode is on, an icon of an open trunk and disabled sensors will appear on the key fob display. If the car was not armed, then only the first of the icons will appear.
If the trunk was opened while the security mode was on, it will work in full force again within 5 seconds after closing the trunk lid, which will be accompanied by a melodic sound signal on the key fob.
Emergency disarming
The procedure for emergency disabling the security mode depends on whether a personal code has been set. If the latter is not programmed, then the first thing to do is open the vehicle door with the key. Depending on whether the security mode was activated with a key fob or without it, the car will signal with a siren or four flashes of side headlights. After this, immediately turn on the ignition and press the Valet button three times within 20 seconds. At the end, turn off the ignition and wait for the double siren signal.
If the automatic activation of the security mode was previously activated, then after turning off the ignition it is turned on again for half a minute and turned off again.
With a programmed personal code of one, two or three values, the nature of the necessary manipulations changes somewhat. In this case, at the very beginning they do everything the same as in the previous case, but at the second stage the service key is pressed not three times, but a number of times that is equal to the first number of the set code. Then the ignition is turned off and turned back on. This procedure is suitable if the code is unambiguous.
If the code is two-digit or three-digit, then after turning on the ignition, press the service button a number of times equal to the second number and repeat the same steps as in the first case. If necessary, the manipulation is repeated by entering the third number. A sign that all actions have been completed correctly and the alarm has turned off will be the double flashing of the headlights.
How to reset to factory settings
To reset the settings to those preset by the manufacturer, a number of fairly simple manipulations are performed. To reset the program, the car owner must:
- turn off the ignition in the vehicle;
- press the service button located in the passenger compartment nine times;
- turn the ignition back on and wait until nine beeps sound, indicating the success of the manipulation;
- press the same button again and wait for the signal;
- press the first button on the control panel and wait for a melodic sound from it, confirming that the settings have been reset to factory settings;
- turn on the ignition and wait for the system to exit automatically - this will be indicated by a five-fold flash of headlights and a sound signal from the key fob.
Immediately after the reset, the system can be reprogrammed again.
How to disconnect StarLine B9 from power supply
Before disconnecting from the power supply, StarLine B9 is deactivated by double pressing the Valet button with the ignition on. After this, carefully disconnect from the batteries.
Owner reviews
Positive and negative opinions of drivers who used the B9 were taken from the sites https://mobilradio.ru/, www.autoelectric.ru, www.autoradioservice.ru
| Positive | Negative |
| A very decent alarm for the money. I took the twage version. Good range, even through metal walls, for example, if it is in a garage. Feedback is also a cool thing, you always know if something is wrong with the car. As a fisherman who often leaves his car in a deserted place, this is very convenient for me. | I would never buy it a second time! I only ruined my nerves with this alarm. It glitches all the time. Autostart does not turn on, or turns on when she wants. The key fob doesn't work properly. Once I got stuck at a car wash and couldn’t get into the car, the second time at the dacha. I had to unplug the unit to turn it off. I don’t recommend this product to anyone, it’s better not to mess with it! |
| The Sinhalese turned out to be very tenacious. It has been on an SUV for more than 5 years. It fell into both water and mud. The keychain fell several times from a decent height. And nothing, it works. A reliable system, albeit a simple one. | Despite the presence of a hologram, the alarm resembles a Chinese counterfeit. The diagram is kind of clumsy, it’s unclear why everything should be connected like that when everything can be done much simpler. The keychain is very flimsy, the case cracked after a slight fall. |
| I don’t know why some people write negative reviews, the starline b9 worked great for me for about 4 years. Always opens and closes clearly the first time. It doesn’t work in vain, well, maybe it happened a couple of times. I believe that professionals should install such systems, and those who do it themselves create unnecessary problems for themselves. I installed it at the station, and everything works without problems! | I had one like this a couple of years ago. It doesn't work well, it's constantly buggy. It often works, and for some reason at night. I used this alarm for 3 days and returned it back. It’s good that at least the service department agreed to dismantle it. |
| Simple, reliable and inexpensive alarm system. It has everything you need, and if someone wants to steal a specific car, they will do it anyway, with any security. I am especially pleased with the engine warming up; for our climate this is simply a godsend! I did the repair only once, and even then it was minor - I re-soldered the contacts on the antenna unit. | I have it on the Volga. I installed it a long time ago. Overall, it’s not a bad model, but it’s already outdated; there’s no point in installing it on new cars. Firstly, the theft protection is weak, and secondly, it cannot be connected via a digital bus. |
| I chose the B6 Starline because it has a turbo timer and has auto start. I’ve been using it for 3 years, no serious problems have arisen, with the exception of replacing the key fob, since the buttons on it began to stick over time. | I bought it for a Ten for myself and a Toyota for my wife. Cars in our yard began to be robbed frequently, so we decided to install alarms. What can I say about this model? If we get lucky. It started to glitch for me literally after a month or two. It works fine for my wife, sometimes she says it doesn’t work the first time. Installed by the same person, a proven master. |
Related link:
Review of car alarms Pandora DX50, DX 50B, DX 50S
Repair of StarLine B9 unit
Like any technical device, the B9 alarm system can fail. Among the most common problems is blackout. In this case, the alarm simply does not respond to commands. The solution is to replace the batteries.
The key fob screen is vulnerable and often suffers from mechanical damage. Only replacing the display can solve this problem. If the car owner is faced with the fact that the remote control does not open or close the doors, then the likely reason is poor antenna reception. If the antenna receives poorly, then it must be moved to a place where there is no interference.
Errors in the SH 1 SP shock sensor are also common - it triggers for no reason. To eliminate this, you need either proper configuration or mounting the gadget in a more stable place.
Also, from time to time, car owners are faced with the fact that they start on their own without turning them on or start and stall without a key. Most often, the reason lies in damp wiring and to prevent this, it is necessary to protect the most vulnerable places.
How to set the time on the Starline A93 key fob
Connection diagram for Starline B9. How to install an alarm yourself
The security system is connected according to the diagrams presented in the alarm instructions. For experienced car enthusiasts, the connection diagram for the Starline b9 car alarm is quite simple. For those who have never encountered the installation of such equipment, the manufacturer recommends turning to professionals.
How to add navigation?
All modern Starline anti-theft systems support the ability to add navigation by connecting a GSM/GPS module.
The most budget option for implementing this function is to install the M32 device from Starline with a CAN digital interface. It is possible to connect modules and other models. The main microprocessor unit is equipped with a special three-pin connector, which is designed for connecting devices. Twage car alarms will not be able to work with M21 and M31 modules if they use D6 software or a newer version.
To find out the unit's firmware number, you can use a special command - 09. It is sent via SMS message and is described in the service manual. Twage systems will not be able to work with M32 modules; in this case, the software version does not matter. The GPS unit is ready for use after connecting power and grounding, this is a white connector, and installing a SIM card inside. After this, a call is made to the module number and basic setup is performed.
The main differences between different module models:
- the M20 device is not equipped with a navigator and microphone, there is no possibility of additional connection of these elements;
- the M30 model has a microphone and navigator;
- the M21 device does not have a navigator and microphone, but the consumer can purchase and install these devices additionally;
- The M31 model has both a navigator and a microphone, as well as an engine auto-start module.
User Artem Kasyanenko spoke about the operating features of GPS modules.
general information
Starline is a car alarm with intelligent start and two-way communication. It comes with a compact key fob equipped with a user-friendly LCD display. The warning range reaches 1.2 km. Tamper protection is ensured by using the SLP radio control dialogue code.
The process of remotely starting an engine of any type is carried out by a special b6 processor. The system is installed on cars with gasoline, diesel and turbocharged engines. The type of gearbox is also not a limitation for using the Starline intelligent system. The presence of 60 programmable functions simplifies the use of the device.
Download Starline operating instructions in PDF format
| Manuals in Russian for operation and installation of alarm systems | ||||||
| Operating instructions for Starline A94 | ||||||
| Operating instructions for Starline A93 | ||||||
| Operating instructions for Starline A92 | ||||||
| Operating instructions for Starline A91 | ||||||
| Operating instructions StarLine E90, E91 Dialog | ||||||
| Operating instructions StarLine Twage A9 | ||||||
| Operating instructions for StarLine Twage B9 | ||||||
| Operating instructions StarLine A61 |
