Any car will work properly if it is regularly and properly maintained. Working at a service station, I often come across the fact that Gazelle drivers, for some reason, do not consider it necessary to provide the car with consumables such as engine oil or transmission fluid.
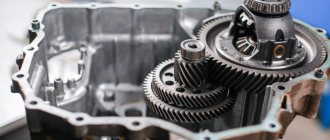
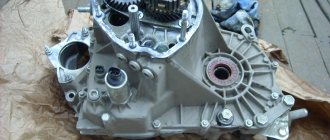
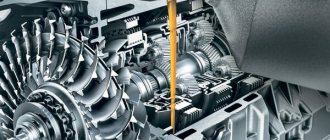
The most they do is periodically add lubricant to the system, believing that for a “workhorse” this will do. Such actions are fundamentally wrong, since it is also necessary to fill the Gazelle’s gearbox with oil.
There are other problems that arise for owners of such vehicles. Often, the car enthusiast simply does not know what kind of oil to pour into the Gazelle box and how much such fluid is required. This point is very important, since the slightest overfilling or underfilling of the substance can lead to problems with the performance of the car.
General instructions for replacing TM
If you know which TM is right for you, then we suggest you familiarize yourself with the step-by-step instructions for changing the TM.
What will you need?
Before you begin the work process, you should prepare everything you might need, namely:
Let's move on to replacing the fluid
Pouring oil into the gearbox
Before changing the oil in the Gazelle box, it is recommended to warm up the car by driving several kilometers. The liquid will warm up and become more fluid, then drive the car onto an overpass or pit.
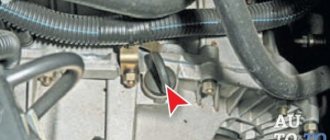
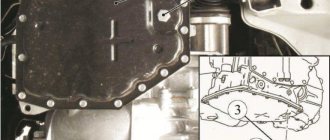
First you need to clean the gearbox breather from dust and dirt using rags moistened with acetone. Then climb under the bottom and look for the unit on which the drain plug should be located. Use a 12mm hex to unscrew this bolt, having previously prepared a container for draining the transmission fluid and placing it under the drain hole. The oil from the Gazelle gearbox will drain for about 20 minutes, so be patient.
If the old oil is dark or there are metal shavings in it, we recommend flushing the unit. Tighten the drain plug after cleaning off any dirt. Find the filler plug on the side and use a hexagon to unscrew it.
Using an oil syringe, pour about a liter of fluid into the transmission. You can use motor or motor, and also add about 300 ml of kerosene or diesel fuel.
Tighten the filler plug and support the front wheels. Start the engine and change gears for a few minutes. Next, go under the bottom and unscrew the drain bolt again, substituting a suitable container for waste.
Wait 15 minutes for the washing liquid to drain completely. Clean the plug again and screw it into place with a hexagon. Unscrew the filler plug and use the same syringe to fill in new gear oil for the Gazelle gearbox. Fill with liquid until then. Until it starts to pour out of the hole, a total of at least 1.2 liters will enter.
Tighten the filler plug and go on a short trip to check the unit for leaks. After that, crawl under the bottom again and look for any leaks. Now you know what kind of oil to pour into the Gazelle gearbox and how much it is needed.
Malfunctions of the rear axle of the VAZ 2101 and their symptoms
The complexity of the rear axle design does not in any way affect its performance or service life. If all the parts are selected accurately, the unit systematically undergoes appropriate maintenance, and the car has not been involved in traffic accidents, it may not declare itself at all. But it also happens the other way around. If you do not pay due attention to the bridge and ignore possible signs of its malfunction, problems will definitely appear.
Signs of failure of the “penny” rear axle
The most likely symptoms that your vehicle's axle is faulty are:
- oil leak from the gearbox or axle shafts;
- lack of transmission of torque from the “cardan” to the wheels;
- increased noise level in the lower rear part of the car;
- noticeable vibration when moving;
- uncharacteristic noise (hum, crackling) when accelerating the car, as well as when braking the engine;
- knocking, crackling from the side of the bridge when entering a turn;
- crunch at the beginning of movement.
Oil leak
Let's start with the simplest thing - lubricant leaks. This is probably the most common problem that owners of “kopecks” face. A timely detected leak does not pose any threat to the unit, however, if the oil level reaches a critical minimum, rapid wear of the main gears, axle shafts and stellites is inevitable.
When oil leaks, gear wear accelerates.
Lubricant from the rear axle of the “penny” may leak from under:
- a breather, which serves as a kind of pressure valve;
- oil filler plugs;
- drain plug;
- shank oil seal;
- gearbox flange gaskets;
- axle seals.
Lack of transmission of torque from the driveshaft to the wheels
Unfortunately, such a malfunction is also not uncommon. Most often it occurs due to low quality parts or manufacturing defects. The breakdown is characterized by the lack of reaction of one or both rear wheels when the “universal shaft” rotates normally. If you have to face such a situation, you can safely prepare to replace the axle shaft. Most likely, it simply burst.
Increased noise level in the bridge area
Strong noise from the bridge while driving may indicate such malfunctions as:
- loosening of the fastening of the wheel rims to the axle shafts;
- wear of axle shaft splines;
- failure of semi-axial bearings.
Vibration
Vibration in the rear of the vehicle while driving can be caused by deformation of the shaft of one or both axle shafts. Similar symptoms also occur due to deformation of the beam.
Noise when accelerating or braking
A hum or crackling sound that occurs when accelerating a car, as well as during engine braking, is usually a sign of:
- insufficient amount of lubrication in the gearbox;
- wear of the mechanism bearings or improper tightening;
- failure of semi-axial bearings;
- exhaustion or incorrect adjustment of the distance between the main gear gears.
Knocking or rattling noise when turning
Extraneous sounds in the area of the rear axle during cornering may occur due to:
- occurrence of chips and scuffs on the surface of the satellite axis;
- wear or damage to satellites;
- increasing the distance between gears due to their wear.
Crunching sound at the start of movement
A crunching sound when starting the car may indicate:
- wear of the satellite axis mounting sockets;
- shank play;
- change in the gap in the connection between the drive gear and the flange.
Oil selection
The gearbox oil purchased for replacement must be of proper quality.
Factors to consider when choosing oil:
- instructions from the manufacturer regarding the characteristics of the lubricant for the gearbox of a specific vehicle modification;
- operating conditions of the vehicle;
- The volume of oil purchased must exceed what is poured into the box by at least 0.5-1 liter. This excess will be needed for possible addition of fluid during operation.
The climatic conditions in which the vehicle is operated plays a serious role when choosing a lubricant, since the degree of viscosity of the selected material depends on this.
In some cases, the manufacturer does not bother with recommendations regarding certain lubricant characteristics, but only indicates which standard the transmission fluid must meet. Most often this is SAE 75W.
The following oils can be recommended from proven products:
- Castrol 75W140;
- Mannol 75W80;
- TNK Magnum Trans Gipoid Super 75W90.
This is not a complete list, however, you will be quite satisfied with any of the listed products.
The characteristics of transmission fluid meeting the SAE 75W standard are improved thanks to mineral additives. Due to the fact that a change in the viscosity of such a lubricant occurs when the temperature drops to -45˚ C, it can be used even in the coldest regions.
Rear axle VAZ 2106. Device. Gear ratio
The standard structure of the rear axle, which is equipped with the VAZ 2106, consists of a traverse and a gearbox. It is to the first that the latter is attached. It contains the main gear, which has a drive pair of gears, as well as a differential.
Rear axle VAZ 2106. Diagram
Explanation of the VAZ 2106 rear axle diagram:
- Wheel brake drum mounting bolt;
- Guide pin;
- Axle bearing oil deflector;
- Brake drum;
- Cast iron brake drum ring;
- Rear axle wheel cylinder;
- Fitting for bleeding the brake drive;
- Axle bearing;
- Bearing lock ring;
- Rear axle beam flange;
- Axle shaft seal;
- Suspension spring support cup;
- Rear axle beam;
- Upper suspension rod mounting bracket;
- axle guide;
- Differential bearing nut;
- Differential box bearing;
- Differential box bearing cover;
- Breather;
- Differential satellite;
- Main drive driven gear;
- Left axle shaft;
- Axle gear;
- Rear axle gear housing;
- Drive gear adjusting ring;
- Bearing spacer;
- Drive gear bearing;
- Drive gear oil seal;
- Oil seal deflector;
- Flange-fork universal joint;
- Screw;
- Oil deflector;
- Main gear drive gear;
- Axle of satellites;
- Axle gear support washer;
- Differential box;
- Right axle shaft;
- Brackets for fastening suspension parts;
- Axle bearing thrust plate;
- Rear brake shield;
- Rear brake pad;
- Friction lining;
- Axle shaft flange.
Malfunctions of the rear axle gearbox:
- during its operation, loud noises are heard;
- the external temperature regime of the housing increases;
- This part is constantly jamming.
In these cases, it is recommended to completely replace the components and checking the oil fluid level is indispensable. That is, you will need to buy an oil seal, bearings, and an axle shaft. However, you can immediately purchase a used rear axle.
At the same time, despite the strength characteristics of the fastening, it, due to its design features, does not have a complex structure. Therefore, even a driver who has minimal knowledge of locksmithing can handle it.
Video review on how to determine what is buzzing:
In some cases, repair work is carried out. Here, experienced mechanics must take into account one nuance - the gear ratio. Size is also of great importance. The key factor is the cost of repairs.
The gear ratio is the ratio of the number of teeth of the driven gear and the drive gear, one of the main parameters of any transmission.
The gear ratios of the VAZ classics vary and are equal:
- 3.9 — gear ratio in the “six” VAZ 2106;
- 4.1 - in the “troika” VAZ 2103;
- 4.3 - in the “kopeck” VAZ 2101.
Upgrade options
The cooling system for the ZMZ 406 injector provides for the possibility of some modification and modernization. A number of the following activities can be carried out:
- Force the fan to turn on with a simultaneous indication that supplies voltage from the fan.
- Replace the connector for connecting the terminal block for the fan.
- Install a gazelle electric pump for pumping through the stove.
- Set the electric pump to turn on automatically along with the fan.
This way you can ensure that the overall temperature during operation of the ZMZ 406 engine will not rise above 95 degrees. Manually turning on the fan (especially in front of the expected plug) will provide a very huge reserve of heat capacity. This way the cooling system will not overheat. It is also important to avoid shorting the wiring with melting of the insulation - this guarantees the connection of the fan itself via the terminal block.
Why does the 405 Gazelle engine get hot?
pump, thermostat, fan switch sensor, air in the system. choose according to your taste
What region are you from and firstly, wash the radiator, secondly, check the relay sensor and carrson, thirdly, check the pump, fourthly, when delivering the muzzle, look at the slope of 45 degrees, does the cap relieve pressure, but there is no such thing on gas, this is usually a disease of the VAZ, but it also happens fifth if the car on propane or methane, check the cylinder head gasket and the caps on the oil scraper valves and of course you can’t go more than 120 on gas, otherwise it will burn out not only the gasket, but also the cylinder head itself along with the valves, in general, everything seems to be all right, and there you have a euro metallized gasket that should be in general for gas, this is normal from gas valves and gaskets burn all the time and overheating and the main thing is that the pistons are 405 size because they are 3 mm larger than 402 current, there is forced cooling on the pump, and here the oil is cooled at high pressure in the engine and at high speed, prepare to replace the gasket and check the pump
Source
description of the cooling system on the Volga GAZ 31105 car
download photo to mobile phone
description of the car Volga GAZ 31105 maintenance and repair manual
section 5
cooling system of the ZMZ 406 engine of the Volga GAZ 31105 car. Diagram of the cooling system of the Volga GAZ 31105 car 1 - drain valve of the engine cylinder block; 2 — heater radiator; 3 — heater valve; 4 - engine; 5 — throttle assembly; 6 — thermostat; 7 — temperature indicator sensor; 8 — coolant overheat warning lamp sensor; 9 — electric fan; 10 — sensor for turning on the electric fan; 11 — engine radiator; 12 — expansion tank plug; 13 — expansion tank; 14 — radiator drain plug; 15 — coolant pump; 16 — main thermostat valve; 17 — thermostat bypass valve;
A - thermostat is closed; B - thermostat open
| The cooling system is liquid, closed type, with forced circulation. The cooling system of the Volga GAZ 31105 car consists of a pump, engine radiator, fan, thermostat, expansion tank, cooling jacket (ducts in the block and channels in the cylinder head of the ZMZ 406 engine), connecting hoses and tubes, as well as a radiator and heater tap. The coolant pump is a centrifugal type, installed in the front part of the cylinder block and driven from the crankshaft pulley by a poly-V-belt. The pump provides a constant flow of coolant to the engine. The thermal regime of the ZMZ 406 engine is set by the parameters of the thermostat and the radiator fan switching sensor. The distribution of liquid flows is controlled by a thermostat with two valves; main and bypass. On a cold engine, the main valve is closed, and all the coolant circulates in a small circle - through the cooling jacket of the block and cylinder head, bypassing the engine radiator and immediately returning to the pump. This speeds up warming up of a cold engine. At a temperature of 80-84°C, the main thermostat valve begins to open, allowing part of the liquid to pass through a large circle, and the thermostat bypass valve closes. | At a temperature of 94°C, the main thermostat valve is fully open, and the bypass valve is closed and all liquid circulates through the cooling jacket, then through the main thermostat valve and the engine radiator, forming a large circulation circle. The coolant, passing through the radiator, is cooled, giving off some of the heat to the surrounding air. The radiator is a tubular-tape radiator with side plastic tanks. The tanks are connected to the radiator frame through rubber sealing gaskets by pressing the support plates along the flanges of the tanks. On the plates of the radiator frame there are brackets for attaching the radiator to the body of the GAZ 31105 car, as well as for attaching the fan casing to the radiator. The fan has a six-bladed plastic impeller. Driven by an electric motor. The electric motor is turned on at the command of a sensor installed in the left radiator tank at a coolant temperature of 92 °C. The heater radiator is included in the small circle of the cooling system. The amount of coolant passing through the heater core is independent of the thermostat and is controlled only by the heater valve. Since 2005, a heater valve with a pneumatic drive has been installed on Volga GAZ 31105 cars (see “Heating and ventilation system”). | The expansion tank is plastic, mounted on brackets above the vacuum brake booster. The expansion tank is connected by steam removal hoses to the branch pipe of the left radiator tank (at the top) and to the fitting in the thermostat housing cover, as well as the filling hose to the pump through a tee installed in the lower radiator hose. There is a MAX mark on the expansion tank, indicating the upper level of coolant in the expansion tank. The expansion tank is closed with a screw plug. The tightness of the system is ensured by valves in the expansion tank plug. The exhaust valve maintains excess pressure in the system when the engine is hot (due to this, the boiling point of the liquid increases to 115°C and its evaporation losses are reduced). The intake valve opens when the pressure in the cooling system decreases (on a cooling engine). The cooling system is filled with 10.5 liters of antifreeze liquid “Tosol”. To drain the coolant, there is a drain hole in the lower part of the right radiator tank, closed with a screw plug, and a drain valve is provided on the left side of the cylinder block. |
car brands When using site materials, an active link to car-exotic.com is required! car-exotic.com
Modifications of the UMZ engine ;”!:
Unit “421600” is the basic power unit of the series. There are negative aspects, but the engine is popular and in demand among owners of Gazelle cars. The base itself has a number of distinctive features that affect the set of auxiliary equipment. Thus, engines “4216.100402” and “42161.1000” are supplied with the old mount, the second motor is used on Economy class cars. For engines with brackets for a hydraulic-based power steering wheel, the marking looks like “...1000402.10”. The modification with new fasteners is marked “...1000402.20”.
About level control
The lubrication level of the unit is checked after every 20 thousand km. This must be done even when no visible leaks are detected. If the lubricant level drops for some reason, transmission oil is added to the gearbox housing.
The operating instructions for GAZelle cars do not indicate a specific volume of lubricant to add to the gearbox, since depending on the modification of the car, the amount of oil can be in the range of 1.2-1.6 liters. Therefore, we recommend purchasing liquid in a 2-liter canister; any excess will be useful for refilling.
Before you start checking the fluid level, you need to thoroughly clean the breather, its cover and the nearby surface of the gearbox housing, after which you should turn the plug several times. The amount of lubricant is located at the lower edge of the filler hole, so cleaning it from dirt is extremely necessary.
Let's take a closer look at the process of monitoring the oil level in the gearbox of a GAZelle car:
- You only need to check the quantity when the gearbox is warm. To do this, it will be enough to drive 10–15 kilometers.
- The machine should be installed on an overpass or inspection hole; even a slight tilt in the horizontal plane is unacceptable.
- It is necessary to allow the lubricant to drain from the walls to the bottom of the crankcase. During this time, use a rag to thoroughly wipe the filler hole cover, which is also a control hole.
- You need to unscrew the plug and observe the hole. If a thin stream of lubricant flows through it, this is not evidence of a normal oil level. Next, you need to add fluid to the gearbox using a syringe and check again.
- Stopping the flow of lubricant after topping up will indicate a normal fluid level in the system.
- You can now tighten the plug and continue operating the vehicle.
Important! You only need to add lubricant to the car’s gearbox of the same type that was previously filled.
It is unacceptable to operate the car with a low oil level in the gearbox of the Gazelle Next and other models. Since insufficient volume can cause air pockets, which will affect the amount of lubricating fluid supplied to the gears and bearings of the gearbox.
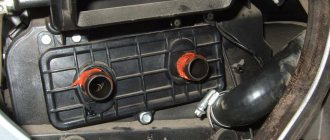
Drain and filler plugs

