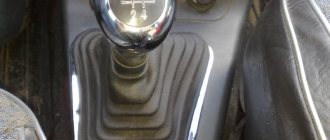
The time has come for another replacement of something, and this “something” this time was the pendulum arm. There was a factory lever on bushings, which traveled almost 90,000 km and over 10 years of operation began to wear out. At first I didn’t notice anything, the car steered normally until recently, it didn’t “run” along the road, but recently I began to hear a “knock-knock” when turning the steering wheel, the knock was especially audible when the car was stationary and at the same time you could rock the steering wheel from side to side. Having driven the car into the pit, I asked my father to see where the knocking was coming from, because at first he himself had sinned on the steering ends and rods. Father immediately pointed his finger at the pendulum arm, since the latter was a little loose. Since the “diagnostics” were carried out in the evening, there was no point in going for a spare part, and I just tightened the lever nut a little. After this, the steering wheel became “heavier” and the lever began to creak. Then I somehow forgot something and skated like that for a couple more weeks. The other day I bought a replacement, a pendulum arm on rolling bearings. Now about the replacement. I expected to replace this lever in two hours, but that was not the case) Everything turned out to be much more interesting!) So, first I needed to open access to the lever, because everything up to the box was closed. I did not remove all the protection, only the last sheet under the box.
Here it is, the culprit of the tight and creaky steering wheel.
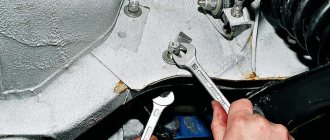
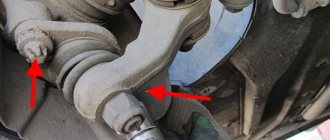
After removing the protection, an awesome problem arose - it was necessary to remove the rods from the pendulum, which were installed 10 years ago at the manufacturer. Everything was complicated by the fact that I didn’t have a 22 mm spanner or socket wrench to tighten the lug nuts, plus it was difficult to access them - the pendulum “looks” exactly into the transverse beam between the side members, which made it extremely difficult to get to these nuts open-end wrench.
I decided to take a slightly different route. I first tried to unscrew the fastening of the pendulum arm so that I could tilt the whole structure down a little, so that I could twist the rods. Again, not everything is so simple - the top bolt is God knows where (neither from above nor from below you can’t get it with a wrench) + the nuts on the outside of the spar under the fender liner were turning (my father said that they were welded on his old seven, which should have been make the task easier). To unscrew the upper bolt of the arm, I used a 17mm socket with an adapter from the kit, by which I held the head with a 13mm wrench; under the fender liner, I unscrewed the nut with a 17mm socket, without removing the fender liner (I was too lazy), simply unscrewing one of the screws and bending the fender liner to the side. There were no problems with the bottom bolt.
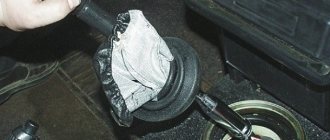
While I was fiddling with the lever, I filled the nuts of the rod ends with penetrating lubricant (like WD-shki, only half the price) in order to “revive” them at least a little.
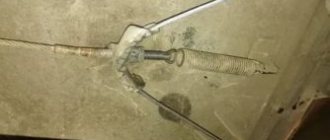
I prepared a puller left over from my father’s seven.
And then the MOST INTERESTING began! I haven’t heard so much swearing from myself for a long time: D At first I behaved calmly: well, the key came off, okay, I’ll try again on the other side, etc. But when, on the next attempt to move the nut from its place, the key came off, licking the edges of the nut and hitting I had my hand on the beam and the back of my head on the edge of the pit, I was blown up!))) Indeed, they rightly say that a mat in the garage works wonders and that without these spells you simply can’t unscrew anything, so while I was cursing at all these elements of the steering mechanism, barbarically , first unscrewed one nut with a gas wrench, and then with some Soviet rusty wrench for 22-24 and the second!:D Then I squeezed out both ends with a puller.
Swing arm location
The steering pendulum of the VAZ 2107 is located at the bottom of the engine compartment. You can see it by opening the hood and looking deep down. But optimal visibility and ease of repair are provided from the inspection hole or when using a lift.
The bipod coming from the pendulum controls the rotation of the front wheels of the car when the steering gear rotates.
Note: sometimes “lever” is used instead of the term “bipod”, but only the first definition is correct.
How to identify a faulty pendulum
Ford Focus Sedan Sold Logbook Rear suspension arm transverse crescent curve replacement
The easiest way to determine if the lever is faulty is to listen for knocking noises while driving on rough roads. You shouldn’t deliberately drive into a hole or run over a bump, so you can pull over to the side of the road and experiment
But this is not the only way to determine the malfunction of such an important part as the pendulum
The second way to determine whether the VAZ 2107 pendulum arm is faulty is the presence of large play in the steering wheel. This can be determined quite simply by turning the steering wheel in one direction and the other. But the most common case of pendulum failure is the presence of load when turning the steering wheel. But these factors do not always indicate that the pendulum lever is the culprit. Malfunctions with such symptoms may include loosening of the bolts or overtightening of the adjusting nut. Therefore, before you start replacing the device, you should definitely make sure that it is broken. This can be done after dismantling it. The first sign of a part malfunction is the presence of defects on its component elements, so to determine the failure you will need to disassemble the mechanism.
Location of the pendulum on the VAZ 2107
This product is located on a VAZ 2107 car from below the engine compartment. You can see the pendulum when you open the hood and look at the bottom of the car on the passenger side. It is most convenient to dismantle or examine the device from below from an inspection hole or on an overpass.
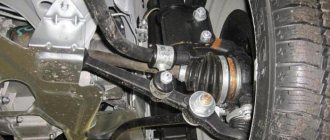
A bipod extends from the pendulum, which controls the rotation of the front wheels of the VAZ 2107. The photo below shows a view of the pendulum arm on the VAZ 2107.
Removing the pendulum arm of the VAZ 2107
To work you will need two 17mm wrenches and a standard set of keys.
The procedure is as follows:
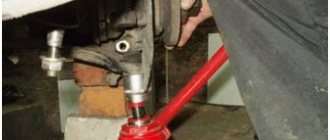
- disconnect the two steering rod ball joints from the VAZ 2107 pendulum;
- using a pair of wrenches, unscrew the connections of the pendulum arm (to do this, you need to sequentially hold the fastening bolt from turning with one key, and unscrew the nut with the second);
Note: There are washers under the mounting nuts and bolts. You should remember their location and number on each of the bolts in order to put them in place during assembly. Otherwise, the pendulum mechanism may become distorted.
- remove the bolts and remove the pendulum lever from the “seven”.
Elimination
The fight against backlash should begin by checking and tightening all threaded connections. Often the reason is here
Particular attention should be paid to the nut securing the column to the gearbox. With frequent trips on dirt roads and worn-out asphalt, this fastener regularly becomes loose.
If you do not respond to the problem in a timely manner, you risk getting more serious steering problems. The nut may unscrew entirely, leading to complete failure of the steering. This also leads to increased wear of all parts of the mechanism.
Read more: The fuel pump on the UAZ Bukhanka does not work
Adjusting the gearbox also helps combat backlash. To do this you will have to look under the hood. There you will see a gearbox. There is an adjustment screw on it. To get to it, you will have to remove the plug. The screw is protected from turning with a 19mm locknut. It is slightly loosened with an open-end wrench. After this, adjustment is made with a screwdriver. The task is to reduce the backlash. If you can’t do this, then it’s time to change the gearbox. It's easier to do the job with two people.
Repair of the VAZ 2107 pendulum
After removing the unit, you can not replace it, but repair it. Repair of the VAZ 2107 pendulum is carried out as follows:
- place the pendulum in a vice and clamp tightly;
- Using pliers, remove the cotter pin, which prevents the nut from unscrewing spontaneously;
- Unscrew the adjusting nut using a wrench;
- remove the washer located under the adjusting nut;
- Using a screwdriver, remove the large diameter washer located on the axis of the pendulum arm;
- remove one of the bushings and the sealing ring;
- remove the bracket from the pendulum axis;
- the second o-ring is removed;
- remove the second bushing by prying it with a screwdriver;
- check the condition of the parts (bushings, washers, sealing rings, lever axle).
Note: The presence of defects in the lever is unacceptable. It should not be deformed. The lever axis should not have noticeable wear.
Reassembling the pendulum arm parts is done in the reverse order. Before assembly, it is necessary to lubricate the lever axis and the hole under it with “Lithol” or other grease.
After assembly, it is necessary to adjust the tightening of the lever nut so that the bipod rotates with a force of 1-2 kg*s. This can be checked with a torque wrench.
Functions and purpose
The steering gearbox is installed on the driver's side, and the steering pendulum mechanism is connected to the bipod on the passenger's side. They are connected to each other by a steering rod and serve as support points. The driver controls them by acting on the steering rod. The pendulum body is made of cast iron or aluminum and has the shape of a cylinder with holes for attaching it to the spar or to the frame. In the center, an axle is inserted through a hole, which is threaded through the body and makes the handle more movable, and also serves as a support for the steering rod. The other end of the bipod moves like a pendulum and therefore has this name.
Replacing the swing arm
If repair is not possible, you can install a new swingarm and secure it. The procedure is the reverse of removing the pendulum from the car body.
During serial production and mass use of the “seven”, vast operating experience was accumulated. The most typical malfunctions of the VAZ 2107 car and methods for eliminating them are described in sufficient detail in the technical literature. For the convenience of car owners, the most common causes of failures are systematized and tabulated.
This information is relevant for owners of VAZ 2107 cars, who for the most part service their cars themselves. It should be especially noted that there are several modifications of this model, differing mainly in engine design. Since 2006, cars have been equipped with injection systems. Accordingly, they have different types of failures than cars with a carburetor.
Pendulum price and where to buy
No idle speed for VAZ 2107 carburetor reasons. idle speed of vaz 2107 carb disappeared
If you are sure that the pendulum is broken, then you can purchase it at any auto parts store for Russian cars such as VAZ, however, the part may not always be in stock, in this case the store employees may offer to bring it to order, which usually takes 2-4 workers day.
The price of a part primarily depends on the materials used in the manufacture of the part; it is also important at which plant the part was manufactured; reviews of the manufacturer can be obtained from the manager of the auto parts store. Of course, it is better to find out more detailed information about the spare part you are purchasing from the specialists of the auto parts store, they will tell you everything in detail and recommend the necessary part.
Basic engine malfunctions
VAZ 2107 cars are equipped with three main types of power units with a displacement of 1.5, 1.6 and 1.7 liters. The second engine is equipped with a distributed injection system, which differs significantly from carburetor engines. During long-term operation, parts and components of the unit are subject to wear, which can cause the following malfunctions:
- Failure of the power supply system: fuel pump, low or high pressure pipelines.
- Clogging of the main fuel or air jet, damage to the starter membranes or other mechanisms.
- Failure of the ignition system: high-voltage wires, spark plugs, distributor or other mechanisms.
- Oil pump failure, filter clogged.
- Extreme wear of parts of the cylinder-piston group, crankshaft or camshaft liners, timing belt.
Diagnosis of injector or ECU malfunctions is carried out using a special tester, which is available at specialized service stations. Repair and restoration work on the engine is classified as complex and requires high qualifications and special skills.
Article: 2101-3003080, additional articles: 095943
Order code: 014452
- You may need
- show more
- Buy analogues
- Passenger cars / VAZ / VAZ-21021 drawing
- » href=»/catalog/vaz-3/legkovye_avtomobili-30/vaz_2102-4/privod_rulevoiy-164/#part8095″>Lever with bracket Front axle / Steering drive
- Passenger cars / VAZ / VAZ-21041 drawing
- » href=»/catalog/vaz-3/legkovye_avtomobili-30/vaz_2104-5/privod_rulevoiy-129/#part14931″>Lever with bracket Front axle / Steering drive
- Passenger cars / VAZ / VAZ-21061 drawing
- » href=»/catalog/vaz-3/legkovye_avtomobili-30/vaz_2106-7/privod_rulevoiy-141/#part21305″>Lever with bracket Front axle / Steering drive
- Passenger cars / VAZ / VAZ-21011 drawing
- » href=»/catalog/vaz-3/legkovye_avtomobili-30/vaz_2101-3/privod_rulevoiy-164/#part3611″>Lever with bracket Front axle / Steering drive
- Passenger cars / VAZ / VAZ-21031 drawing
- » href=»/catalog/vaz-3/legkovye_avtomobili-30/vaz_2103-106/privod_rulevoiy-130/#part11672″>Lever with bracket Front axle / Steering drive
- Passenger cars / VAZ / VAZ-21051 drawing
- » href=»/catalog/vaz-3/legkovye_avtomobili-30/vaz_2105-6/privod_rulevoiy-129/#part18037″>Lever with bracket Front axle / Steering drive
- Passenger cars / VAZ / VAZ-21072 drawings
- » href=»/catalog/vaz-3/legkovye_avtomobili-30/vaz_2107-8/privod_rulevoiy-179/#part25530″>Lever with bracket Front axle / Steering drive
- » href=»/catalog/vaz-3/legkovye_avtomobili-30/vaz_2107-8/privod_rulevoiy-178/#part25500″>Lever with bracket Front axle / Steering drive
Today, the next article in the series “Crystal VAZs or typical breakdowns of domestic cars” is dedicated to the “classics”: VAZ-2101, 2103, 2104, 2104, 2105, 2106 and 2107. These cars have been driving along our roads for decades and, despite Despite all the shortcomings that we will talk about, their popularity is still high.
Transmission - causes of failures
The VAZ 2107 is equipped with a four- or five-speed gearbox with mechanical shifting and a diaphragm single-plate clutch. The most common causes of transmission breakdowns:
- Wear of the sealing elements of the hydraulic drive and the formation of wear in the cylinder.
- Breakage of the release bearing, destruction of the diaphragm spring, drive or driven disk.
- Leakage of transmission oil from the gearbox, breakdown of bearings, shafts, gears, synchronizers and other parts.
- Breakdown of the gear shift unit.
The causes of a transmission malfunction are identified by indirect signs: the appearance of extraneous noise and vibration while the vehicle is moving. There may be difficulties when engaging certain gears, jerks and jolts. Repair of the clutch, drive, gearbox and other transmission mechanisms involves the need to dismantle these components, disassemble and check all parts for compliance with the parameters.
STEERING COLUMN REPAIR
Due to constant friction in the steering mechanism, elements wear out, which indicates the need not only for adjustment of the unit, but also for possible repairs.
HOW TO REMOVE THE GEARBOX
To dismantle the steering column on the “seven”, you will need the following tools:
- a set of keys;
- knob;
- heads;
- steering rod puller.
After preparing everything you need, perform the following step-by-step actions:
- The car is placed on a lift or inspection hole.
- Clean the steering rod fingers from dirt.
- The rods are disconnected from the gearbox bipod, for which the cotter pins are removed, the nuts are unscrewed and the pin is squeezed out of the steering gear bipod using a puller.
- The steering column is connected to the steering wheel using an intermediate shaft. Unscrew the fastener of the latter from the gearbox shaft.
- The gearbox is fastened to the body with three bolts. Unscrew the 3 fastening nuts, remove the fasteners and dismantle the steering mechanism from the car. To make it easier to remove the assembly, it is better to turn the bipod all the way into the column body.
VIDEO: REPLACING A STEERING COLUMN USING THE EXAMPLE OF A VAZ 2106
HOW TO DISASSEMBLE THE GEARBOX
When the mechanism is removed from the vehicle, you can begin to disassemble it.
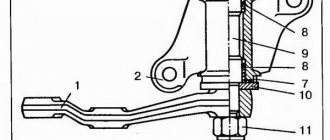
Parts of the steering gear housing: 1 - housing; 2 - bipod; 3 — lower crankcase cover; 4 — adjusting shims; 5 — outer ring of the worm shaft bearing; 6 — separator with balls; 7 — bipod shaft; 8 - adjusting screw; 9 — adjusting plate; 10 — lock washer; 11 - worm shaft; 12 — upper crankcase cover; 13 - sealing gasket; 14 — bipod shaft sleeve; 15 — worm shaft seal; 16 — bipod shaft seal
Tools you need to prepare:
- standard set of keys;
- head at 30;
- bipod puller;
- vice.
The work is carried out in the following order:
- Unscrew the bipod nut and use a puller to press the rod off the shaft.
- Unscrew the oil filler plug, drain the lubricant from the crankcase, then unscrew the adjusting nut and remove the lock washer.
- The top cover is secured with 4 bolts - unscrew them.
- Remove the adjustment screw from the engagement of the bipod shaft, then remove the cover.
- Remove the thrust shaft with the roller from the gearbox.
- Unscrew the fasteners of the worm mechanism cover and dismantle it along with the adjusting shims.
- Use a hammer to lightly strike the worm shaft and knock it and the bearing out of the steering column housing. The end surface of the worm shaft has special grooves for the bearing.
- Remove the worm shaft oil seal by prying it off with a screwdriver. In the same way, remove the bipod shaft seal.
- Using the adapter, knock out the outer race of the second bearing.
After disassembling the steering gear, it is troubleshooting. All elements are pre-cleaned by washing in diesel fuel. Each part is carefully inspected for damage, scuffing, and wear.
Particular attention is paid to the rubbing surfaces of the worm shaft and roller. The bearings must rotate without jamming. There should be no damage or signs of wear on the outer races, separators and balls. The gear housing itself should not have cracks
All parts that show visible wear must be replaced.
ASSEMBLY AND INSTALLATION OF THE GEARBOX
When the faulty elements have been replaced, you can begin assembling the unit. The parts that are installed inside the crankcase are lubricated with transmission oil. Assembly is performed in the following order:
- Using a hammer and a socket or other suitable device, press the inner bearing race into the steering assembly housing.
- A separator with balls, as well as a worm shaft, are placed in the cage. The outer bearing separator is placed on it and the outer race is pressed into place.
- Mount the cover with gaskets and press in the oil seals of the worm shaft and bipod. A small amount of lubricant is first applied to the working edges of the cuffs.
- Place the worm shaft in the mechanism body. Using adjusting shims, the rotation torque is set from 2 to 5 kgf*cm.
- Install the short rod shaft.
- At the end of the work, lubricant is poured into the steering column and the plug is screwed in.
Installation of the unit on the machine is carried out in the reverse order.
Body, front and rear suspension
The VAZ 2107 model belongs to the so-called classic series. During operation, paintwork is exposed to moisture and damage from stones. Exposed metal causes corrosion processes that not only spoil the appearance of the car, but also significantly weaken it. This is especially true for elements of the supporting frame: side members, sills and body pillars.
The main malfunctions of the front suspension: destruction of ball joints, silent blocks, failure of shock absorbers. Failures of this kind are accompanied by a knocking sound at the bottom of the car while driving. In the rear suspension of the VAZ 2107, rubber-metal bushings mainly fail. This causes the car to move away from a given trajectory, especially when making turns and on uneven roads.
FakeHeader
Comments 31
On needle bearings it would probably last forever
good, I also ordered a Miasovsky pendulum for my Nivasik
Listen, tell me, will it be easier to turn the steering wheel or not with a bearing? I want to install it for myself, if it makes sense and which one is better to take?
depending on the condition of your bushing pendulum and gearbox. Of course it spins easier compared to stock; a friend’s car just felt like the steering wheel was spinning with a smaller diameter. There was a Gusev pendulum - I broke off his ear, then I put the car in a green box and it still drives.
Gusevsky bullshit + just reinforced. I installed it, first of all it tightens my pants and when I turn to the right there is a hum, and secondly it gets loose and there is a knocking sound. I want to change it to a bushing or normal bearing. How to drive an AutoReal vehicle?
The man is still skating. With taxiing - it floats a little at speed, for him. After the Corolla, I felt the same way too.
A friend once had a pendulum installed on tapered roller bearings; I don’t remember the manufacturer, but it looked so good. And I changed the bearings in the pendulum, my relatives spent about 5 years (at that time Dad drove this car), and these Chinese ones cost 15 UAH. (
60 rubles) the couple has also been around for more than 5 years (
80 thousand km) they run, they don’t even have any play yet)) So in total the shaft, housing and bipod have been running for more than 10 years))
Well, it looks like I got a crunch again today (I’ll take a look tomorrow
Has anyone installed a pendulum lever on rolling bearings assembled SITEK 2101-2107?
In the design of the steering linkage pendulum there are plastic bushings
No. 2101-30003094 replaced by rolling bearings No. 6-80202 AS-17
(sliding friction is converted into rolling friction). Bearings No. 6-
80202 AS-17, lubricated with special grease S-17, closed on both sides
sealed covers will work for the entire life of the vehicle
without losing their quality properties. Design changes made
allow you to reduce the effort when turning the steering wheel by 30% (from 300N
up to 170-190N), increase the reliability of the unit and its service life. In this
The pendulum design eliminates grease - the mechanism does not require lubrication
during installation and during operation.
Damn, I can’t when they call the word “grease trap”, it hurts my ears. I’m already used to a simple “oil can”
an oil can is an oil can, and a grease fitting is a grease can)
some people still call them grease fittings
well yes, you're probably right
Has anyone installed a pendulum lever on rolling bearings assembled SITEK 2101-2107?
In the design of the steering linkage pendulum there are plastic bushings
No. 2101-30003094 replaced by rolling bearings No. 6-80202 AS-17
(sliding friction is converted into rolling friction). Bearings No. 6-
80202 AS-17, lubricated with special grease S-17, closed on both sides
sealed covers will work for the entire life of the vehicle
without losing their quality properties. Design changes made
allow you to reduce the effort when turning the steering wheel by 30% (from 300N
up to 170-190N), increase the reliability of the unit and its service life. In this
The pendulum design eliminates grease - the mechanism does not require lubrication
during installation and during operation.
If I knew, I’d hit it) but it’s the same thing over and over again, you just have to have time to lubricate it.
Has anyone installed a pendulum lever on rolling bearings assembled SITEK 2101-2107?
In the design of the steering linkage pendulum there are plastic bushings
No. 2101-30003094 replaced by rolling bearings No. 6-80202 AS-17
(sliding friction is converted into rolling friction). Bearings No. 6-
80202 AS-17, lubricated with special grease S-17, closed on both sides
sealed covers will work for the entire life of the vehicle
without losing their quality properties. Design changes made
allow you to reduce the effort when turning the steering wheel by 30% (from 300N
Steering and braking system
The VAZ 2107 model car has good handling. The worm-type steering mechanism is quite reliable; wear appears mainly in the ball ends of the rods. Delaying repairs can lead to their breakage and loss of control of the car while driving. Wear of the pendulum bushings is accompanied by knocking and an increase in backlash to unacceptable values.
The VAZ 2107 has a dual-circuit hydraulic brake system with a vacuum brake booster. The most common breakdowns:
- Wear of brake pads, drums and discs beyond the maximum level.
- Leakage of brake fluid as a result of wear of the sealing rings and the appearance of cavities in the master brake cylinder.
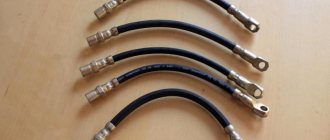
- The appearance of fistulas in brake hoses.
- Jamming of pistons in the cylinders of the actuator.
It should be remembered that traffic rules prohibit driving a car with faulty steering mechanisms or operating circuits of the brake system. If damage of this kind is detected, you should call a tow truck to deliver the car to the parking lot and repair.
Steering linkage malfunctions
The elements of the steering linkage are simple, there is nothing to break here. Well, perhaps you hit a curb at high speed, for example, and bent some pieces of iron. Or the car sat idle in the open air for an eternity. Deformation and corrosion are all “faults”.
If you manage to bend the iron, there is only one way out - buy a set of steering rods and replace the trapezoid. Fully.
If you haven’t run into anything, everything is in order with the steering mechanism, but the handling is clearly in trouble, pay attention to the trapezoid ball joints. In theory, ball joints are designed in such a way that they should last forever (in general, depending on the condition of the roads and operating conditions, the tips last 15-100 thousand km)
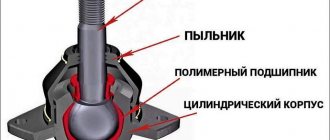
To prevent metal from rubbing against metal, anti-friction polymer liners are provided between the pin and the joint body, and the pin itself is spring-loaded for free movement
In theory, ball bearings are designed in such a way that they should last forever (in general, depending on the condition of the roads and operating conditions, the tips last 15-100 thousand km). To prevent metal from rubbing against metal, anti-friction polymer inserts are provided between the pin and the joint body, and the pin itself is spring-loaded for free movement.
Ball end
However, ball ones have weak points. These are anthers and fixing nuts.
Nuts weaken with age or as a result of an impact. Over time, the weakened fastening becomes completely loose, and the rod jumps out of its seat.
Anthers also suffer from impacts or difficult operating conditions. Through a torn boot, moisture and dirt enter the joint, the metal elements corrode, water washes out the lubricant, and the dirt acts as an abrasive, and the ball joint no longer performs its functions, the joints of the rods become motionless, and the car loses controllability and maneuverability.
What's Inside a Worn Ball Joint?
Electrical equipment main causes of malfunctions
The on-board network of the VAZ 2107 is powered from the battery, and after starting the engine from the generator. The most common causes of electrical equipment failures:
- Failure of the voltage regulator, significant wear of the brush assembly and slip rings, and the generator drive belt.
- Undercharging a battery for a long time causes sulfation and destruction of the plates, which leads to a decrease in its capacity.
- A breakdown of the solenoid relay or damage to the stator or rotor winding makes it difficult to start the engine.
Any malfunctions of the VAZ 2107 car are diagnosed by employees of service stations or independently. The method of restoring the functionality of systems and mechanisms usually involves replacing failed parts. Experienced car enthusiasts can fix most breakdowns on their own using illustrated repair manuals.
Steering column repair
Due to constant friction in the steering mechanism, elements wear out, which indicates the need not only for adjustment of the unit, but also for possible repairs.
How to remove the gearbox
To dismantle the steering column on the “seven”, you will need the following tools:
- a set of keys;
- knob;
- heads;
- steering rod puller.
After preparing everything you need, perform the following step-by-step actions:
- The car is placed on a lift or inspection hole.
- Clean the steering rod fingers from dirt.
- The rods are disconnected from the gearbox bipod, for which the cotter pins are removed, the nuts are unscrewed and the pin is squeezed out of the steering gear bipod using a puller.
- The steering column is connected to the steering wheel using an intermediate shaft. Unscrew the fastener of the latter from the gearbox shaft.
- The gearbox is fastened to the body with three bolts. Unscrew the 3 fastening nuts, remove the fasteners and dismantle the steering mechanism from the car. To make it easier to remove the assembly, it is better to turn the bipod all the way into the column body.
Video: replacing the steering column using the example of a VAZ 2106
How to disassemble the gearbox
When the mechanism is removed from the vehicle, you can begin to disassemble it.
Parts of the steering gear housing: 1 - housing; 2 - bipod; 3 — lower crankcase cover; 4 — adjusting shims; 5 — outer ring of the worm shaft bearing; 6 — separator with balls; 7 — bipod shaft; 8 - adjusting screw; 9 — adjusting plate; 10 — lock washer; 11 - worm shaft; 12 — upper crankcase cover; 13 - sealing gasket; 14 — bipod shaft sleeve; 15 — worm shaft seal; 16 — bipod shaft seal
Tools you need to prepare:
- standard set of keys;
- head at 30;
- bipod puller;
- vice.
The work is carried out in the following order:
- Unscrew the bipod nut and use a puller to press the rod off the shaft.
- Unscrew the oil filler plug, drain the lubricant from the crankcase, then unscrew the adjusting nut and remove the lock washer.
- The top cover is secured with 4 bolts - unscrew them.
- Remove the adjustment screw from the engagement of the bipod shaft, then remove the cover.
- Remove the thrust shaft with the roller from the gearbox.
- Unscrew the fasteners of the worm mechanism cover and dismantle it along with the adjusting shims.
- Use a hammer to lightly strike the worm shaft and knock it and the bearing out of the steering column housing. The end surface of the worm shaft has special grooves for the bearing.
- Remove the worm shaft oil seal by prying it off with a screwdriver. In the same way, remove the bipod shaft seal.
- Using the adapter, knock out the outer race of the second bearing.
After disassembling the steering gear, it is troubleshooting. All elements are pre-cleaned by washing in diesel fuel. Each part is carefully inspected for damage, scuffing, and wear.
Particular attention is paid to the rubbing surfaces of the worm shaft and roller. The bearings must rotate without jamming
There should be no damage or signs of wear on the outer races, separators and balls. The gearbox housing itself should not have cracks. All parts that show visible wear must be replaced.
Assembly and installation of the gearbox
When the faulty elements have been replaced, you can begin assembling the unit. The parts that are installed inside the crankcase are lubricated with transmission oil. Assembly is performed in the following order:
- Using a hammer and a socket or other suitable device, press the inner bearing race into the steering assembly housing.
- A separator with balls, as well as a worm shaft, are placed in the cage. The outer bearing separator is placed on it and the outer race is pressed into place.
- Mount the cover with gaskets and press in the oil seals of the worm shaft and bipod. A small amount of lubricant is first applied to the working edges of the cuffs.
- Place the worm shaft in the mechanism body. Using adjusting shims, the rotation torque is set from 2 to 5 kgf*cm.
- Install the short rod shaft.
- At the end of the work, lubricant is poured into the steering column and the plug is screwed in.
Installation of the unit on the machine is carried out in the reverse order.
Delivery by transport company (cash on delivery, no prepayment)
Advantages:
- the cost of delivery of heavy and large-sized orders is much cheaper than that of Russian Post;
- There are practically no restrictions on the weight and dimensions of cargo;
- There is a wooden crate service - this is an additional guarantee of the integrity of the order.
Disadvantages: unfortunately, there are branches only in cities.
The estimated cost of delivery for an order up to 30 kg is 450 rubles.
List of transport companies with which we cooperate:
- TC "PEK" (cash on delivery service available);
- TC "Business Lines";
- TC "Energia";
- TC "KASHALOT" (KIT) (cash on delivery service available);
- TC "SDEK" (cash on delivery service available);
- TC "DPD";
- TC "ZhelDorExpedition";
- TC "VOZOVOZ";
- TC "Baikal-Service".