Experienced car owners claim that this is one of the best car protection systems today.
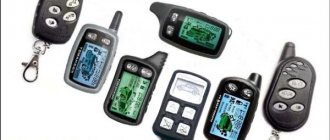
Tomahawk system capabilities
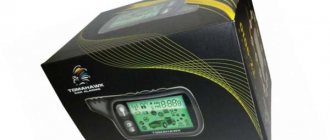
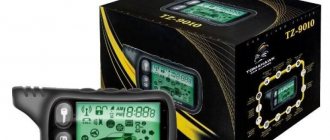
The company produces several versions of indicator key fobs, but the basic model is TZ-9010. Main features:
- remote start of the car engine for any period of time. This function is programmed in advance. This allows, for example, to warm up the car in advance during cold periods;
- auto system self-diagnosis;
- function to call the owner when any sensors are triggered;
- the presence of an anti-scanner and anti-grabber to protect against software hacking.
In more advanced versions, the remote control allows you to control the power sensor and perform remote (at a distance) autostart (if there is a built-in immobilizer). Also in advanced models, the range of the key fob is increased to 1.2 kilometers. It is possible to open the trunk of a car from a distance, as well as block the engine.
The latest version is capable of searching for the owner's lost car within range and has an indication of impacts on the car.
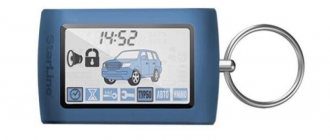
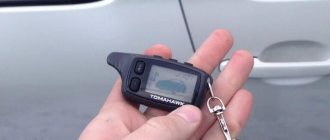
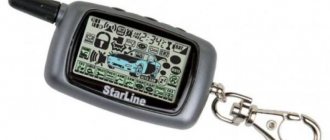
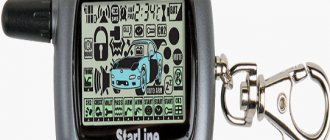
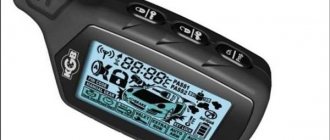
Main functions of the Tomahawk 9010 key fob
List of functions that the car security system key fob has:
- Displays the current time.
- Auto start sign. Carrying out automatic start of the power unit based on the temperature sensor indicators.
- Immobilizer. This function is performed by the main key fob, providing additional protection to the vehicle by blocking engine operation in the event of unauthorized starting. The lock is not removed even if there is mechanical intervention in the electrical system and the anti-theft system is turned off.
- Display of temperature sensor indicators on the main key fob.
- Display backlight, activated by pressing any button on the remote control.
- Remote adjustment of shock sensor sensitivity.
- Turning on the security mode when the engine is running. This option is useful for a driver who is forced to leave the car for a short period of time.
- Comfort function. Allows you to delay activation of the security mode for 30 seconds.
- "Jack" function. Switches the security system into service mode, temporarily disabling all alarm options. The option can be used before servicing the vehicle to eliminate the need to hand over the control panel to unauthorized persons.
- Anti-Hijack mode. Blocks the engine in case of robbery and car theft.
- Panic mode. Used to attract the attention of others to the car and scare away potential intruders from it. Upon command from the key fob, the lighting devices connected to the alarm system, as well as the alarm siren, are activated.
- Silent security mode. It can turn off the car's siren and lights, but continues to transmit burglary alerts to the main alarm panel.
- Automatic door locking after the vehicle starts moving.
- Vibration mode. The function allows you to turn off the sound alerts of the key fob and turn on the vibration mode.
- Lock keys from accidental pressing.
Starting the engine from a distance
Press button “2” once. The dimensions should blink three times, and the “16” icon will appear on the screen. The engine will run as long as pre-programmed, and then turn off. If you need to urgently increase the engine operating time, you can simultaneously press buttons “1” + “2”. The time will increase by 5 minutes.
However, to start the engine from a distance, a number of conditions must be met:
- the ignition must be turned off;
- the hood must be closed;
- the car must be put on the handbrake;
- The gearshift lever must be in neutral position.
If at least one condition is not met, the engine will not start and the siren will beep 4 times.
Setup instructions
Setting up the remote control includes:
- linking the communicator to the car;
- setting up basic functions;
- preparing an alarm for remote engine start;
- entering the programming menu;
- reset.
How to store a key fob in the Tomahawk 9010 memory?
The new communicator needs to be programmed like this:
- To flash or register a new remote control, you need to turn on the ignition system; you do not need to start the engine.
- The next step is to press the Override alarm service button. The location of the key is usually hidden, so you need to look for it under the dashboard. The button must be pressed until the siren plays several sound signals indicating entry into the firmware menu.
- The service button is released, and keys 3 and 4 are pressed on the device. The siren should emit several sound signals upon successful setup. Similarly, you need to record other key fobs on the alarm system of this model.
- To exit the programming menu, you do not need to take any action with the remote control for 6 seconds.
It is important to know
If, when programming a new communicator, the car owner did not link the old remote control to the control unit, information about it will be deleted from the module’s memory.
Programming key fob pager functions
| Buttons used | Executed Options | Description |
| Activating the display backlight | Automatic shutdown after 5 seconds. | |
| Enabling the remote control power saving mode | The communicator receiver automatically turns off 2 minutes after disabling the security mode | |
| Enabling sound and vibration modes | — | |
| Hold | Entering the menu for setting clock, timer and alarm settings | — |
| Clock setting mode | ||
| 1 time | Setting the minutes of the clock | The button is used to advance hours or minutes, and held down to scroll quickly. The key is used to convert hours or minutes back. Similarly, you need to hold it down for faster scrolling. |
| 2 times | Entering the alarm clock settings menu | |
| 3 times | Activating the submenu for setting alarm minutes | |
| 4 times | Mode for activating or disabling the alarm function | |
| 5 times | Setting the Timer Clock Settings | |
| 6 times | By pressing the button on the timer six times you can set the minutes | |
| 7 times | Mode for activating or disabling the timer function | |
| Entering the alarm settings menu | — | |
| 1 time | Setting a timer for 10 minutes | — |
| 2 times | Setting the timer for 20 minutes | — |
| 3 times | Setting a timer for 30 minutes | — |
| 4 times | Setting the timer for 60 minutes | — |
| 5 times | Setting the timer for 90 minutes | — |
| 6 times | Setting the timer for 120 minutes | — |
Programming mode
To enter the settings menu, follow these steps:
- The ignition is activated in the car, but the engine does not need to be started.
- The emergency service button is pressed six times.
- The car's ignition is turned off. Upon successful entry into the settings and programming menu, the siren will emit six beeps.
Programming table
| Number of clicks on the Override button | Option Description | K1 | K2 | K3 | K4 |
| 1 | Setting the time before the motor stops after a remote start, min. | 5 | 10 | 15 | 20 |
| 2 | Changing the temperature setting in the car interior for remote warming up | -5 | -10 | -20 | -30 |
| 3 | Cranking time of the starter device for autostart, ms | 800 | 1200 | 1800 | 3000 |
| 4 | Monitoring the functioning of the motor using signals | According to the voltage in the car's electrical network | According to the engine fluid pressure controller | By tachometer | |
| 5 | Switching time of the second additional channel | 0,8 | 10 | 30 | Constant |
| 6 | Siren sound duration | 100 | 10 | 15 | 20 |
| 7 | IGN2 contact for activating and disabling door locks during remote start | The contact is on, the locks do not lock during autostart | The contact is turned off, the door locks do not close | The contact is on, the door locks are closed when autostarting | Contact disabled, door locks automatically |
| 8 | Delay in turning the starter mechanism before starting the engine for diesel and gasoline cars | 2 | 10 | 10 | 10 |
| 9 | Duration of the central locking and locking signal | Opening and closing signal is 0.8s | Opening and closing signal is 3.6s | Signal for unlocking - 0.8 s, for locking - 2 pulses of 0.8 s | The closing signal is 30 s, the opening signal is 0.8 s |
| 10 | Two-stage door opening or setting up a third additional channel/immobilizer | Third additional channel, immobilizer disabled | Two-stage door opening with motor lock disabled | Third additional channel, immobilizer enabled | Two-stage door opening with motor lock enabled |
| 11 | Safe driving option | Disabled | The door locks do not close and open automatically when the ignition is turned on and off. | The doors lock automatically 10 seconds after the ignition is activated and open after it is turned off. | The doors lock automatically 30 seconds after the ignition is activated and open after it is turned off. |
| 12 | Automatic arming | Disabled | Activated without locking the door locks | Enabled with doors closed | |
| 13 | Accounting for lighting delays in the car interior | 1 | 15 | 30 | 45 |
| 14 | Time to activate interior lights/windows up | Lighting activation for 20 seconds after protection is turned off | Turning on the interior lights for 30 seconds after disabling security | Locking windows for 20 seconds after activating the security mode | Closing windows 30 s after protection is turned on |
| 15 | Interior temperature units or engine locking method | Celsius, normally open interlocking | Fahrenheit, normally closed interlocking | Celsius, normally closed interlocking | Fahrenheit, normally open interlocking |
| 16 | Turbo timer | Disabled | 1 minute | 2 minutes | 3 minutes |
How to reset?
To reprogram and disable all functions, follow these steps:
- The car owner enters the reprogramming menu; to do this, the service mode button is pressed ten times.
- The vehicle's ignition system is turned off. The siren should emit a short beep, after which the Override button is pressed once.
- On the key fob you need to press the first button.
- The ignition system is turned on and off. If the settings are successfully reset, the alarm will flash five lights.
Heating at a given temperature
The system has a temperature sensor (located under the hood). It is he who will be responsible for the temperature level when warming up the car.
You can turn on the heating by simultaneously pressing buttons “2” and “3”. When turned on, the lights will blink once and the siren will sound once. When warming up, the screen will display 1 2 temp start.
Pressing this button combination again will turn off the heating.
What to do if the key fob doesn't work?
Reasons why the alarm does not respond to button presses, as well as ways to eliminate them:
- Incorrectly installed battery in the rear compartment. If the polarity is reversed, then the device will not need to be repaired - you just need to change the location of the battery.
- The power supply in the communicator has run out. With this problem, the quality of the transmitted signal decreases and commands may be executed only once. Troubleshooting involves replacing the battery.
- The internal components of the remote control are oxidized or clogged. The case of the communicator on the Tomahawk 9010 is water-permeable and not sealed, so moisture or dust can get inside. To fix the problem, you need to disassemble the remote control and clean it using cotton swabs or napkins. If this does not help, then you will need to test all contacts and connections on the circuit with a tester; all damaged elements must be re-soldered.
- If the remote control is unstable after being dropped, you need to make sure that its case and internal parts are intact. As a result of an impact on Tomahawk 9010 key fobs, quartz is most often damaged. You will need to disassemble the device, visually verify the integrity of the board and test the communicator contacts with a multimeter. If the quartz is disconnected, then its contact joints must be re-soldered and glued to the circuit using thermal paste.
- The remote control keys began to stick. If, after pressing the button, it does not return to its original position, then the “click” can be regarded by the control unit as prolonged. The problem is that the keys become dirty, so they need to be wiped externally with an alcohol solution or a toothbrush. In case of serious contamination, the housing is disassembled, and it would also be useful to ring the chain. If the button is damaged, it must be replaced with a new one.
- A malfunction of the remote control may be due to electromagnetic interference in the area where the vehicle is located. This often happens near large industrial enterprises, security and military facilities, transformer substations, airports, etc.
Basic autostart malfunctions, causes and solutions
When autostart stops working after normal operation, you can do the following:
- Change the batteries in the key fob, most likely this is the cause.
- Then the communicator is disassembled and repaired if necessary. Damaged buttons are replaced, swollen capacitors are resoldered. If the remote control has been dropped into water, you need to remove the board from it and dry it in a warm and dry place.
- The vehicle may be located in an area with significant radio interference.
- Sometimes the security system malfunctions and you need to configure autostart again.
- The remote control is faulty or the batteries in the key fob are low. First of all, you need to make sure that the batteries are working and replace them if they fail.
- Damage to conductors or oxidation of contact elements on one of the car alarm structural devices. It is necessary to check all components of the anti-theft system, in particular their conductors. If the insulation on the cable has worn off, it must be replaced; oxidized contacts must be cleaned or resoldered. When replacing, use wires with the same cross-section. To prevent rapid wear of electrical circuits, it is recommended to additionally wrap them with electrical tape.
- Temperature controller failure. With this problem, the engine will not be able to start based only on air temperature; in other cases, the start will be successful. It is necessary to check the sensor and its wires; if the cable is damaged, the electrical circuit is replaced with a new one. A possible reason may be drops of moisture getting on the connector, then drying the pad will resolve the problem.
- If the above steps do not help, you should contact a specialist to reprogram the system.
If Tomahawk autostart does not work initially, the following reasons may exist:
- In the X5 model, the settings for the key fob pager were made incorrectly. You can reconfigure them yourself.
- An error was made during the installation process. Incorrect installation of the control unit or other structural elements of the anti-theft system. In addition to the microprocessor module, the temperature sensor and the autostart relay could have been installed incorrectly. If one of the components is incorrectly connected, autorun will not work at all or will begin to function incorrectly. It is necessary to diagnose the correct installation of all parts and reconnect them if necessary.
- Conflict between the standard immobilizer and the anti-theft system blocker. To solve the problem, you will need to additionally install an immo bypass module.
Loading …
Specifications
Technical parameters of Tomahawk security systems:
- remote control frequency - 868 MHz;
- operating range of remote controls with a screen - up to 1300 m (signal reception);
- current consumption (in operating mode) - up to 25 mA;
- supply voltage - from 9 to 26 V (depending on the model).
Equipment
The Tomahawk alarm kit includes the following components:
- head unit;
- set of remote controls;
- shock sensor with sensitivity adjustment;
- signal receiver with additional antenna;
- temperature sensor;
- buttons for activating settings and “anti-robbery” mode;
- set of switching harnesses;
- documentation for installation and operation.
The first Tomahawk devices were equipped with a special relay to block the engine. The set included additional switches designed for installation under hoods. The list of included parts depended on the modification and production date of the complex.
Advantages and disadvantages
Advantages of equipment supplied under the Tomahawk brand:
- low cost;
- Remote controls with a screen are provided;
- simple setup algorithm;
- automatic start function (except for budget models).
Disadvantages of Tomahawk alarms noted by owners:
- low quality of plastic used for the manufacture of remote control housings;
- FM modulation is used to encode the control signal;
- There are no original spare parts for discontinued equipment;
- the operating range of remote controls in the city does not exceed 40-50 m;
- There are fakes on the market that look similar to the original products.
Problems with autostart
Possible reasons that may affect autorun operation:
- The limit switch mounted on the hood shorts to ground. It is necessary to check the integrity of the device and replace it if necessary. If the trigger fails, its rod may “stick” in the lowered position. You will also need to check the wires and make sure their integrity; if the electrical circuits are damaged, they are replaced. The reason may be oxidation of the contact on the sensor; to eliminate the problem, the conductors are cleaned.
- There is no output in the conductors connected to the ignition switch. It is necessary to reconnect the cables in accordance with the installation and connection diagram.
- A “conflict” has arisen in the operation of the standard engine immobilizer and alarm immobilizer. If your car uses a keyless security system, you can leave the key in the car to troubleshoot the problem. However, this is the least safe option and may result in the vehicle being stolen. In order to eliminate the malfunction, it is necessary to install an immobilizer bypass.
- There is no power supplied to the ignition switch; one of the fuses has failed. Each element is subject to diagnosis and replacement in case of breakdown or burnout. Only fuses of the correct rating must be used.
- The ignition switch or starter mechanism is faulty. With such a problem, diagnostics of all electrical circuit contacts connected to these devices is required. The contact pad with the cylinder in the ignition switch may have worn out; this element must be replaced.
- Failure of the temperature controller responsible for starting the motor. The contacts on the sensor could have oxidized, causing it to not work. A detailed check of the conductors with replacement of damaged electrical circuits is required. It is recommended to additionally wrap the cables with electrical tape to prevent rapid wear and damage. A failed sensor cannot be repaired and will have to be replaced.
- Incorrect installation of the anti-theft system. Errors made during installation and connection will lead to current leakage, which will ultimately cause the battery to discharge. The device will need to be charged to resolve the problem. You need to make sure that the wires from the alarm are not frayed or worn out.
- Faulty mounting block with fuses. The elements themselves may be in working condition, but as a result of exposure to high loads, the contact path could burn out. To eliminate the malfunction, you will need to disassemble the module and replace the working platforms.
- Failure or incorrect operation of the microprocessor module. It is almost impossible to calculate software malfunctions without special equipment and knowledge. To determine the cause, you need to contact a specialist. The control unit may not operate as a result of oxidation or clogged contacts on the main connector. To fix the problem, you will need to clean the pad.
How to install?
Installation of the “signaling” in a garage is done as follows:
- The control module is installed inside the car. It is necessary to choose the most hidden location for installation. Some installers place the module under the dash near the hood release lever. But a more reliable place is behind the glove compartment or control panel, if there is free space there. For installation, you will need to dismantle the dashboard and remove part of the interior trim. The central module must be securely fixed using self-tapping screws so that it does not vibrate while driving.
- The signal transceiver must be installed as high as possible in the car interior, for example, near the windshield. This way the transmission of impulses will be most effective. There should be no metal objects or wire harnesses near the antenna.
- The siren with speaker is installed in a hidden place under the hood. If a stand-alone device is used, it is necessary to provide access to the hole for installing the service key in advance. The siren must be installed so that its horn is directed downward, this will eliminate the possibility of moisture ingress. At the same stage, you should think about how the wires will be connected. It is advisable to choose the location for their connection in the cabin to prevent possible oxidation of the contacts in the future.
- The luggage compartment and hood limit switches are installed so that they are not exposed to moisture. When the trunk and hood are locked, an attacker should not have access to the limit switches.
- The shock controller is installed inside the car. It is best to place it in the central part of the body so that the sensor records the physical impact on the car from all sides. The device is secured using self-tapping screws or glue. You can install the sensor in the partition separating the passenger compartment and the engine compartment.
- If you plan to use the option of remote start of the internal combustion engine, then you need to install a temperature controller in advance. The device is installed in the cooling system line. The controller must be placed away from the intake manifold.
- All high-current wires intended for connecting emergency signals, power, central locking and other elements should be protected using safety devices.
1. Control module connection diagram
2. Connection diagram of the plug for remote starting of the internal combustion engine
3. Diagram of connecting the system to the lock
4. Connection diagram of the contacts of the sensitivity controller and the Valet key
Connecting the plug
To enable the remote engine start option, you must correctly connect the six-pin plug:
- The yellow-black contact must be connected to the starter device. The 12 Volt output pulse is connected to the solenoid relay. The contact should be connected to an electrical circuit in which voltage appears when the key is turned to the starter position. This output is considered the main one, since it ensures the start of the power unit. The contact is connected in the area after the motor blocking relay.
- The blue output is for activating auxiliary equipment. It must be connected to the lock contact, where there is voltage when the ACC mode is activated.
- The thinner red contact represents the power supply circuit for the “signal”. It must be directly connected to the battery, the circuit is protected by a 10 Amp fuse.
- The thick red output represents the remote start circuit. It connects directly to the battery through a 30 Amp fuse device.
- The yellow contact is intended for connection to the ignition switch. It must be connected to an electrical circuit where there is twelve-volt voltage when the key is turned to the ignition on position. In this case, no current should be lost in this section of the wiring when the key is switched to starter mode.
- The green contact is connected to a similar section of the circuit as the output described above.
Ignition switch wire designations
Look at the diagram shown in the figure.
Terminal block with two starter contacts
The above does not mean that both cords can be connected together and connected using the circuits discussed here. The diagrams indicate one wire (ST1) that makes up the starter power circuit. This option is suitable:
- For all domestic cars without exception;
- For new foreign cars;
- For foreign cars up to 90-91 years of manufacture.
This is the paradox - the “ST2” cord is not provided in the new, as well as in the oldest models.
Diagram for TZ-9030
Here's how to connect the Tomahawk TZ-9030 main unit to the ignition switch to use autostart. Of course, after installation, you need to do programming, which is discussed below. If the use of a lineman is required, connect it to the terminal of the main alarm connector (black and red cord). The power connector, in turn, has the following wiring.
Instructions for equipment TZ-9030
If we talk about the Tomahawk TW-9010 model, the purpose of the IGN3 pin will be different from what is being considered here.
In "Chapter 1" the designations were listed: IGN1, IGN2, ACC, starter wire (ST). The “IGN3” cord has been added here, but it replaces the ACC wire. The “blue” cord coming out of the alarm terminal block must be connected to the ACC contact, otherwise the autostart will not work. At the same time, if you make changes to the settings, the IGN3 pin can be connected to the ST2 pin. True, it is not clear how to “emulate” the ACC wire then.
A “T” connection is used when connecting to all wires except the starter. And the “ST” cord needs to be cut to connect the resulting ends with the black and yellow wires. The cable that goes to the alarm from the lock is a signal cable (thin).
Diagram for TW-9010
A non-standard method of switching starter current is typical for the following alarm model: Tomahawk TW-9010. Voltage is supplied here from the 6-pin power terminal block when autostart is performed. The rest of the time, the starter wire conducts current, even if the car alarm does not work or does not work correctly. A blocking relay is included in the gap in the standard wiring. Whether it can be removed from the scheme is unknown. It is better, therefore, to stick to the recommended option.
Current loop without blocking
Note that the Tomahawk TW-9010 and TZ-9030 alarms can control the immobilizer bypass. The lineman’s “negative” cord is connected to the black-red cable (figure at the beginning of the chapter). The latter is designed to be connected to the “IGN3” pin, but in most cars this option is not used.
The ground potential on the black-red cord appears before the starter starts, which is exactly what is required for the lineman to work. In general, everything looks strange: in alarms with auto-start, they often provide a separate output intended only for connecting a lineman.
Note, Daily (1,2,4,12 hour) autostart, Remote status polling
Page 10
- Image
- Text
(see programming table).
To disable this function, press the and buttons.
The parking lights will flash 2 times, the system will emit 2 “CHIRPS”,
confirming that the function is disabled. The ^ icon will disappear on the display of the key fob pager and a melody will sound.
Note:
Automatic engine warming up at a given temperature
performed no more than 6 times in 2 hours.
The temperature for automatic engine warm-up can be
set to -5°С, -10°С, -20°С, -30°С (see programming table).
15. Daily (1,2,4,12-hour) autostart
To activate this function, you must simultaneously press and
hold down the and buttons. The siren will emit 1 “CHIRP” to confirm
activation of the function. The icon ^ will appear on the display of the key fob pager
a melody will sound.
After activating this function, starting from the next day, the system
will automatically start the engine daily at the time this function has been activated.
To disable the daily autorun function, you must
press buttons
and Shch. The parking lights will flash 2 times, the system
will emit 2 “CHIRPS” confirming that the function is disabled. On display
key fob pager, the ^ icon will disappear and a melody will sound.
To activate 1, 2, 4, 12 hour start you need
activate the daily autorun function, and then within 5 seconds. After activating it, press the corresponding button on the key fob:
in - for hourly start,
M) - to start the engine at intervals of 2 hours,
16 - to start the engine at intervals of 4 hours,
- to start the engine at intervals of 12 hours.
16. Remote status polling
To perform remote polling of the vehicle status, you must
press the button
||B
. The parking lights will flash 3 times to confirm
transmitting data to the key fob pager receiver: internal temperatures
interior, security status, etc.
TOMAHAWK TW-901 o
10
Comments
Hello, I have a problem with the signaling, not a single button on the remote control works and the turn signals flash three times with a pause
Alexander 02/24/2021 08:19 GMT
Why do you need valet mode?
Bair 04/05/2021 21:16 GMT
I can't arm the alarm sound
Bakhytzhan 04/17/2021 19:06 GMT
Select → I found instructions for my car alarm here! #manualza
- Click →
From the instructions for a Chinese fire extinguisher: - Do not spray near an open fire!
Manualza!manualza.ru
Still not with us?
Video: linking the Tomahawk TZ-9020 alarm key fob using the example of a VAZ 2112 car
The video from the RACCOON AND PANDA channel demonstrates how to register the Tomahawk TZ-9020 alarm key fob yourself.
Do you have any questions? Specialists and readers of the AUTODVIG website will help you ask a question
Was this article helpful?
Thank you for your opinion!
The article was useful. Please share the information with your friends.
Yes (50.00%)
No (50.00%)
X
Please write what is wrong and leave recommendations on the article
Cancel reply
Rate this article: ( 4 votes, average: 4.50 out of 5)
Discuss the article:
Emergency activation and deactivation of the alarm system
If the car does not respond to the key fob, you can use the emergency activation and alarm disabling function.
Emergency alarm activation
To activate an emergency alarm, you must:
- turn on the ignition, but do not start the engine;
- press the Override button eight times;
- turn off the ignition.
The car will react with a single flash of the parking lights and a single sound of the siren. After 20 seconds, the system will automatically turn on the security mode.
If, 20 seconds after the emergency activation of the alarm, any of the security zones are triggered, the car will notify the user of this by flashing the parking lights four times and sounding the siren four times. After this, the user will have 20 seconds to disarm it. If this is not done, the system will activate the alarm mode.
Emergency alarm shutdown
To make an emergency shutdown of the alarm without a key fob, you must:
- turn on the ignition (do not start the engine);
- press the Override button four times;
- turn off the ignition.
The parking lights will flash twice and the siren will sound twice.
REFERENCE. The key fob pager will continue to function even after the user has made an emergency activation or emergency shutdown of the alarm system