The Tomahawk 9010 warm-up instructions contain comprehensive information about the functions and the procedure for their activation and calibration. The option is in demand among users of northern regions, where starting a car after a long period of inactivity in the cold is problematic. The user manual helps you set up autorun.
Here are the options explained:
- hourly warm-up;
- temperature trigger;
- activation of the ignition from the remote control;
- daily car factory.
A complete set of add-ons is controlled from a spare or main key fob and allows you to comfortably use all the technologies integrated into the head alarm module.
Also on the pages of the brochure there is information about possible system breakdowns and methods for eliminating them.
Find out everything about the Tomahawk TZ-9010.
Setting up and preparing for autorun
To properly arm the vehicle in automatic engine start mode, the plant has provided a certain sequence of actions. Moreover, for each type of machine, the procedure is different, which raises the question of how to set it on a manual or automatic machine for 100% operation of the mechanism.
Factory calibrations are already programmed into the device’s processor. This shows the required heating of the air inside the cabin (start by temperature), the frequency of activation when starting the engine by time (1 hour at stock). Settings can be changed in the programming menu.
Physical training is performed as follows:
- set the gear lever to neutral position;
- raise the handbrake all the way;
- remove the key from the ignition;
- quickly leave the car.
After this, you will need to dial a standard combination from the remote control.
Functions
Functions of 9010 series security systems:
- confirmation of command execution with sound and light indication;
- support for automatic start on vehicles with manual or automatic transmission;
- car security with siren turned off;
- bypassing faulty protection zones while informing the driver;
- remote shutdown of the shock sensor is provided;
- support for anti-robbery and panic modes;
- compatibility with standard locking control units;
- mode for calling the driver from the passenger compartment;
- the owner can look at the remote control display to see the current time;
- recording of the state into memory is provided when the power is turned off.
Advantages and disadvantages
Equipment advantages:
- low cost;
- ease of switching;
- automatic warm-up function;
- presence of a display on the remote control.
Disadvantages of the 9010 series alarm noted in owner reviews:
- easy interception and decoding of signals transmitted by remote controls;
- there are cases of incorrect operation due to design flaws;
- numerous false alarms (cannot be corrected by adjusting the shock sensor).
Autostart Tomahawk 9010: button combination, remote engine start from key fob
Most regions of Russia experience severe frosts in winter. In such conditions, after a long period of inactivity, starting the engine is problematic. The automatic start option allows the driver to leave the car in the parking lot and not worry about the need to warm up in the morning. By adjusting the modes, you can achieve the desired starting frequency and heating time of the power plant.
Typically, the module is configured from the assembly line to turn on hourly and operate for 5 minutes. In practice, the conditions are relevant if the temperature in the box or in the parking lot is less than -25 degrees Celsius. In more comfortable conditions, frequent frequency is not needed and the user is given the opportunity to determine the interval and time independently.
The factory instructions indicate how to enable autostart from the key fob when using an automatic transmission or manual transmission.
How to install an alarm?
When installing an alarm, you must follow the following rules:
- all installation work is carried out with the car de-energized (with the wires removed from the battery terminals);
- alarm units must be located discreetly;
- Over button >
The Tomahawk TW-9010 alarm antenna should be located away from the electronic components. The length of the system connecting harnesses should be minimal.
Installation steps
The step-by-step installation procedure is as follows:
- The electronic alarm unit is located inside the car. Due to its size, the optimal location is the instrument panel.
- The antenna should be installed at the highest possible height inside the vehicle. It should not touch the body. Typically, users install the antenna along the top edge of the windshield. If the glass has a sun strip, it is not recommended to place the device on it. This is due to the shielding effect of the protective coating.
- Install the siren in the engine compartment. The installation location must be inaccessible through the holes at the bottom. When using a stand-alone device, ensure clear access to the keyhole. It is recommended to immediately install the siren wiring into the cabin, which will provide protection against oxidation.
- Circuits with high current values connected to the electronic unit (power supply, control of external lighting or door locks) must be protected by fuse links with the appropriate rating.
- Install the limit switches of the engine compartment and trunk lids. It is recommended to periodically clean the devices from dirt and lubricate them. This is especially true for wiring that becomes covered with oxides and ceases to provide signal transmission.
- The shock sensor should be installed inside the car. The sensor is attached to a metal body element using self-tapping screws or tape. Installation on plastic panels is not recommended, as it does not ensure correct operation of the device.
- After installing the main modules, they should be connected with wiring harnesses. To supply positive power, wires going to the ignition switch are used. As an alternative, it is possible to use a separate conductor going directly to the battery terminal. With this type of installation, an additional 3 Ampere fuse is installed in the conductor. The negative signal is taken from the car body from the standard ground nut. It is not recommended to screw the negative wire with a self-tapping screw, since such a connection does not provide contact. All “signaling” wiring connections into the standard electrical network must be soldered and insulated. In this case, it is prohibited to use acid-based fluxes, as they lead to destruction of the wiring.
- Connect the power supply to the on-board network after installing all the harnesses and test the operation of the alarm.
- Configure the shock sensor. To do this, its sensitivity is set to a minimum level and the response threshold is checked by lightly striking the body with the palm of the hand.
- Configure system parameters using the key fob and service button.
The Tomahawk TW-9010 main unit is shown in a video shot by paladinMgn.
Wiring connection
A detailed description of the wire connections is available in the instruction manual.
When installing Tomahawk TW-9010, the wiring is connected to the connectors of the unit:
- power connector with six remote start pins;
- block with six contacts for connecting the central locking;
- main connector of the electronic unit (18 pins);
- shock sensor block (four pins);
- five-pin antenna connector;
- two connectors for a setting button and an operating mode indicator (two pins each).
Harness connection diagram
When installing the electronic unit on it, you must use a jumper to select the type of gearbox. If the jumper is installed, the system can work with an automatic transmission; if removed, it can work with a manual transmission.
Below are photos of diagrams for connecting the system harnesses to the on-board network.
When connecting the antenna module and the lock drive, the diagrams below must be used.
Remote engine shutdown with Tomahawk TW 9010
If the car starts automatically according to the preliminary settings. The user has the ability to disable the option from the remote control. This is usually necessary for unscheduled trips or when the motorist simply forgot to deactivate the extension in the spring.
The factory instructions for remotely disarming a car imply a simple sequence of actions.
- Press the lock/key button on the key fob for 2-3 seconds.
- The car will blink its side lights 4 times.
- The keychain will make a specific trill.
If everything is done correctly, the car engine will stall and will not be reactivated.
Emergency activation and deactivation of the alarm system
If the car does not respond to the key fob, you can use the emergency activation and alarm disabling function.
Emergency alarm activation
To activate an emergency alarm, you must:
- turn on the ignition, but do not start the engine;
- press the Override button eight times;
- turn off the ignition.
The car will react with a single flash of the parking lights and a single sound of the siren. After 20 seconds, the system will automatically turn on the security mode.
If, 20 seconds after the emergency activation of the alarm, any of the security zones are triggered, the car will notify the user of this by flashing the parking lights four times and sounding the siren four times. After this, the user will have 20 seconds to disarm it. If this is not done, the system will activate the alarm mode.
How to set the watch on a key fob
The Tomahawk TW 9010 main remote control (with LCD display) has the ability to set the time. An important option is required in order to correctly program the key fob to start by time. If the clock is not set correctly, the car may start during the day or when it is not required.
To set the time on the pager, there is a section of the factory instructions.
- After turning on the screen backlight, press the “F” key.
- After 3-4 seconds the clock display will start blinking.
- To scroll forward, you need to press the button with a picture of an open cargo compartment. Reducing values is done by holding down the key with the speaker.
- You can switch to minutes by pressing “F” again.
To exit the menu, you need to leave the key fob alone for 10 seconds. After idle time, the device will automatically switch to the main screen.
Find out where the Override button is on your Tomahawk 9010 alarm system.
Key fob programming
Up to four key fobs can be registered in the Tomahawk 9010 system. When programming new key fobs, the data on the old key fobs will be erased. Therefore, within each programming session, the user will have to register all valid key fobs.
To register a new key fob in the system, you must:
- turn on the ignition, but do not start the engine;
- press and hold the Override button;
- after four siren sounds, release the Override button;
- press and hold buttons No. 1 “Trunk” and No. 2 “Silent security” on the pager until one beep is heard;
- Repeat the last step with the remaining key fobs (after registering the first key fob, one beep will sound, after registering the second - two beeps, after the third - three, after the fourth - four).
New key fobs are registered. 6 seconds after registration is completed, the system will exit the programming mode.
ATTENTION! The interval between registration of key fobs should not exceed 6 s. Otherwise, the alarm will exit the programming mode.
How to warm up Tomahawk 9010 using time, timer
A separate option for setting the warm-up by the clock allows you to set the required interval at which the engine will start on its own. The option is critically needed in cold climates. If the car is parked for a long time, the power plant can cool down greatly, which makes it impossible to promptly leave the parking spot. Some users cannot start for 2-3 hours after spending the night.
Warming up by the hour can be adjusted. The computer contains thresholds for every 1, 2, 4, 12 hours. In this case, the car will perform the procedure daily until the driver forcibly disables the mode. In parallel, on the on-board network, the timer will be updated each time.
You can read about how to set up a timed start in the factory manual. The necessary sequence of actions and the required preparatory work are indicated here.
Setting the start timer
Now you need to figure out how to set a specific time at which the car will work. To do this, you need to hold down several buttons at the same time:
- timer for 10 minutes – hold the mute button and press “F”;
- timer for 20 minutes - hold the mute button and press “F” twice;
- work for 30 minutes - hold down the button with the sound deactivated and press “F” three times;
- work for 1 hour – hold down the sound deactivation button and press “F” four times;
- similarly, to set the timer for 1.5 and 2 hours - hold the mute button and press “F” 5 and 6 times, respectively.
As a rule, when installing an alarm system in the cabin, professionals will do everything for you and you should not worry about the fact that you will need to install any functions yourself. If you don’t understand how to set the heating on the Tomahawk, then ask a specialist at the salon about it. Usually, when installing a “reliable guard” for your iron horse, you are given special instructions that contain commands for connecting a particular function.
Tomahawk 9010: instructions for autostart by temperature
The next option has a similar principle. The only difference is the method of activating the program. The computer in mode focuses on the degrees inside the car. Motorists rarely use the extension due to the mode’s irrelevance. The engine warms up much faster than the cabin, which leads to increased fuel consumption.
Thanks to the module software, you can configure the ignition activation threshold and the number of degrees.
How to set the warm-up according to the engine temperature is indicated in the factory instructions. Here you will find all the necessary information about the procedure.
Setting the sensitivity of the shock sensor
Adjustment is required if the shock sensor is not configured correctly and the alarm reacts to thunderstorms, passing cars, or does not even respond to strong impacts on the car.
We configure the sensor as follows:
- tighten its adjusting screws (to increase sensitivity, turn it clockwise; to decrease it, turn it counterclockwise);
- we lock the car and put it in security mode;
- We try to lightly hit the body.
If the sensitivity is too low or too high, open the car and adjust the sensitivity again using the adjusting screws. Thus, we adapt the alarm to our requirements.
ATTENTION! You can find out where the shock sensor is located from the specialist who installed the alarm on your car.
Tomahawk TW-9010: additional temperature sensor
Initially, the Tomahawk 9010 system activates autostart based on interior temperature, and does not provide for installation on the power plant.
Some buyers move the module under the hood, which is quite effective if the sensor is correctly calibrated. The best location for the unit is the cooling system pipe. The element most accurately reflects the state of the internal combustion engine.
You can also perform the transfer yourself using another procedure:
- cut the cable in the antenna module (usually with a blue stripe);
- put a line from the new sensor into the gap;
- lay the line into the engine compartment;
- attach the sensor to the engine or cooling system elements.
Also, some users connect the sensor to the hood lock sensor limit switch. Both options are equally effective.
Find out how to reset settings on the Tomahawk 9010 alarm system.
Video: how to start a car with the Tomahawk remote control
Find out how to disable the Valet mode on the Tomahawk alarm system.
Author of the material: Dumchenkov Mikhail
Did you like the material? Share with your friends:
Have questions about car repairs? Ask them in the consultation section, to do this, click on the link below.
auto mechanic
- New cars 2020
- New cars 2021
- Test drives
- Jeeps
- Crossovers
- Repair and maintenance Engine
- Chassis
- Electrical equipment
- Alarms
- Cigarette lighters
- Car Reviews
- Photo and video galleries
- News
- Tires
- Celebrity cars
© 2022 Daciaclubmd.ru. If you do not agree with any provision of this Disclaimer, do not use this Site. Please read Disclaimer and Privacy Policy before use.
Copying materials is permitted only with an active hyperlink to our website.
Source
How much does a temperature sensor cost?
During operation of the alarm system, damage or failure of the antenna module may occur. The price of a standard sensor is determined by this block. Due to the fact that the sensor is located inside the block and is a single unit with the body panels.
The approximate spread of price tags in different cities of Russia differs. This is due to local characteristics and the complexity of delivery.
| Where? | Price, r |
| Moscow | 950 |
| Saint Petersburg | 1050 |
| Rostov | 950 |
| Samara | 920 |
| Yaroslavl | 900 |
| Ekaterinburg | 830 |
| Chelyabinsk | 980 |
The cost of the additional Tomahawk TV 9010 sensor is difficult to present in one table. The final price depends on the design and type of part.
Panic mode
This function is part of the standard firmware of the head module and is intended to provide the main psychological effect when attempting to steal or break into a car. The operating principle is based on the production of light and sound signals when the shock sensor is triggered.
When the sensor warning zone is activated, the machine emits 6 chirps and a similar number of flashes in size. Usually this is enough to deter vandals or petty robbers. The main effect is activated for 25 seconds when the active zone of the sensor is triggered and is accompanied by an alarm. In this case, the corresponding icon is displayed on the display of the main key fob, indicating the cause of the panic.
If the alarm is falsely triggered, the user just needs to press the button on the remote control with the image of a closed lock. Manipulation will turn off the siren, but the security will not be removed.
To prevent false activation, the user must follow the recommendations for the place where the car is parked, where it is not advisable to leave the car:
- roadway with active traffic;
- places where people, pedestrians or children gather;
- areas where large animals (dogs, etc.) can reach the car.
How to check the temperature in the cabin?
You can find out the state of the air inside the car without additional modifications or manipulations. The antenna module transmits basic information about the system, and can be activated by holding down the key with the open trunk lid icon. If everything is done correctly, the car will blink its side lights three times and the key fob display will reflect the current state of the system.
To obtain correct information about the temperature of the internal space of the machine, the factory recommends installing the transmitter in places inaccessible to direct sunlight or hot air flows from the climate control system/heater.
Reset to factory settings
A factory reset can be performed using the built-in button. To do this proceed as follows:
- turn on the ignition;
- Press the Override button 10 times in a row;
- turn off the ignition - the alarm sounds 10 trills;
- press the Override button once - the alarm emits one trill;
- press button “5” (lock);
- turn on the ignition - the side lights flash 5 times.
When resetting the alarm to factory settings, all manipulations must be performed promptly and without delay.
How to view the engine temperature on the Tomahawk 9010 key fob: auto warm-up
Checking the engine temperature on the standard system is impossible due to the lack of a measuring sensor. When trying to see information, the user can only see data about the interior on the screen.
However, such a procedure is possible. This will require preliminary preparation and modification of the standard system.
- Break the cable of wires to the on-board antenna.
- Connect the contact from the new sensor to the blue cable.
- Route the line to the motor.
- Install the sensor on the cylinder head or cooling system pipe. Be careful when doing this - the sensitive interior can be easily damaged.
- Press the key on the key fob with a picture of an open hood. The screen will display the current engine temperature.
Also, some users add a secondary element to the engine compartment lid lock limit switch. This method is rarely practiced, due to the increased likelihood of a false alarm.
Important! When installing a motor sensor, it is impossible to see the temperature inside the cabin - the system is not designed to work with two units at the same time.
Review of Tomahawk alarm models.
The company's catalog presents more than 10 alarm models with a different set of functions from budget to premium. But all of them can be combined into three main groups:
- Availability of basic one-way communication option.
Arming and disarming a vehicle. Suitable for cars in the budget segment.
Cost from 1800 rub.
Range: TOMAHAWK CL-550, CL-700.
- Car alarms with two-way communication.
In addition to basic functions, these alarms allow the owner to receive information about his car from a distance. In case of damage or an attempt to steal, the security system will sound a loud sound signal, and the key fob will receive a message with the reason for the alarm and information about the car at the moment.
Cost from 2300 rub.
Range: TOMAHAWK 7.1 and 7.2
- Car alarms with auto start.
Security systems in demand among Russian car owners. With our cold winters and high summer temperatures in the south, this is especially true. An additional function in such alarms is to start the engine remotely. Range 1300 meters.
Cost from 5000 rub.
Assortment: TOMAHAWK X5, Z5, 9010, 9020, etc.
How to set a timer on Tomahawk TW 9010
The turbo timer in the security system is an important element for turbocharged cars. The design features of the block do not allow it to be stopped instantly after heavy loads. Heated bearings and mechanisms can be damaged, which will lead to the need for unscheduled repairs.
Setting a timer is useful to be able to automatically turn off the engine after the turbine has cooled down. In this case, you can set the delay to 1, 3 or 6 minutes.
The option is turned on by pressing the Override service key 16 times. To activate the key fob mode, a standard sequence of actions is performed.
- Place the gear lever in neutral position.
- Raise the handbrake all the way.
- Turn off the ignition and quickly get out of the car. In this case, the motor should continue to work.
- Press the arming key (closed lock).
If everything is done correctly, the car will automatically turn off the power unit after the programmed timer ends.
For cars with atmospheric settings, you do not need to activate the add-on.
USER GUIDE
Main functions of the system
- 5-button programmable 2-sided key fob with LCD screen
- LCD backlight
- Vibrate mode
- Antiscanner
- Anti-grabber
- Programmable key fobs (up to 4 pcs.)
- Visual and audio confirmation of functions performed
- Arming with siren turned off
- Protected remote engine start/stop
- Possibility of installation on vehicles with automatic or manual transmission
- Possibility of installation on vehicles with gasoline or diesel engines
- Temperature control in the car interior
- Additional temperature sensor
- Automatic engine warming up at a given temperature
- Daily (1, 2, 4, 12 hours) automatic engine start
- Bypass of faulty zone with visual and audio confirmation
- Dual zone shock sensor
- Remote shutdown of shock sensor
- Protection against false positives
- Self-diagnosis
- 3 additional channels
- Anti-HiJack mode
- Panic Mode
- Valet mode
- Security of doors, hood, trunk
- Indication of the battery charge of the key fob pager
- Battery saving mode for key fob pager
- Driver call function
- Search for a car
- Radio frequency 433.92Mhz
- Clock, alarm clock, timer built into the keychain pager
- System status indication by LED indicator
- Built-in central locking relay
- Status memory
- Two-step disarming
- Two-step opening of the central lock
- Motor lock
- Automatic control of the pager coverage area
- Turbo timer
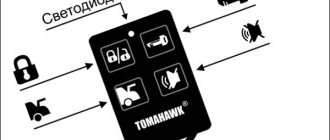
Remote control key fobs
LCD functions
.
| — indication of a closed central lock. | -indication of an open central lock. |
| — indication of open door(s). | — open hood indication. |
| — open trunk indication. | — indication of flashing parking lights. |
| — indication of the operation of the receiver and transmitter of the key fob pager. | — indication of being in the coverage area. |
| — indication of economical power mode. | — “driver call” indication. |
| — indication of the engine warm-up mode at a given temperature. | — indication of the daily autorun mode. |
| — indication of a weak blow. | — indication of a strong blow. |
| — indication of shutdown of the shock sensor. | — indication of the “Anti-hijack” mode. |
| — indication of vibration mode. | — indication of the “Valet” mode |
| — indication of the disabled hand brake. | — indication of a running engine. |
| — battery level indication. | — indication of the activated timer. |
| — indication of the turned on alarm clock. | - watch. |
| — temperature units (C or F) |
..
Arming
In order to put the vehicle into security mode, you must press the button once. The parking lights will flash 1 time, the siren will emit 1 “CHIRP”, confirming entry into the security mode, the doors will close. The icons and will appear on the display of the keychain pager.
If the siren emits 3 “CHIRPS”, this means that the system has detected and disabled a faulty security zone (the door is open, the hood is open, the trunk is not on, the handbrake is not on). The system will automatically arm this zone as soon as it is corrected (the door, hood, trunk will be closed, the handbrake will be on).
Arming with siren turned off
In order to put the vehicle in security mode with the siren sounds turned off (all messages and confirmations are sent by the system only to the key fob pager), you must press the button once. The parking lights will flash once, confirming entry into security mode, and the doors will close. The icons and will appear on the display of the keychain pager.
You can also turn this mode on and off while the vehicle is in security mode.
Auto-arming and auto-rearming into security mode
If the auto-arming function is activated, then: with the ignition off, after closing all the doors of the car, the system will notify the owner with 1 long “CHIRP”, and after 10 seconds. will turn on the security mode (see programming table).
The auto-rearrange function is always activated if, after disarming, none of the doors in the vehicle were opened for 30 seconds. the system will automatically turn on the security mode.
Immobilizer mode
The immobilizer mode is activated automatically after 30 seconds. after turning off the ignition (see programming table). The LED indicator is constantly on in this mode. In this mode, starting the engine using the ignition key is impossible.
To exit the immobilizer mode, press the button. 1 time or turn off the ignition and press the button. OVERRIDE 1 time.
Disarming
In order to disarm the vehicle, you must press the button once. The parking lights will flash 2 times, the siren will emit 2 “CHIRPS” (if the system is not in security mode with the siren turned off), confirming that the vehicle has been disarmed, the doors will open, and the interior lighting will turn on (if connected). The icon will appear on the display of the key fob pager.
Opening/closing doors with the engine running
If the car's engine is started using the ignition key, then using the button you can open and close the doors. The icons and are displayed on the keychain pager display, respectively.
Two-step door opening or 3rd channel
These functions are not available at the same time! Use the programming table to select one.
- The two-step door opening function is selected. Press the button to disarm and open the driver's door. Pressing and holding this button again opens the remaining doors of the car
- The auxiliary channel function is selected. Press and hold the button to activate an additional channel
ATTENTION!
These features require additional wiring during installation.
11.Turbo timer
For vehicles with a turbocharged engine, the Tomahawk TW-9010 has a turbo timer function. If this function is activated, the engine, after turning off the ignition, continues to run for 1.3 or 6 minutes. (see programming table).
Remote engine start
Click the button. The parking lights will flash 3 times and the siren will sound 3 CHIRPS. The following icons will appear on the keychain pager display:
- - attempt to start the engine
- - if it was not possible to start the engine for any reason
- — the engine is started (accompanied by the melody of the key fob pager)
The engine will run for the pre-programmed time (see programming table) before automatically shutting off. The operating time of the motor can be increased by simultaneously pressing the and buttons, 5 minutes after each press, up to a maximum of 20 minutes. The display of the key fob pager shows the time remaining until the engine is turned off.
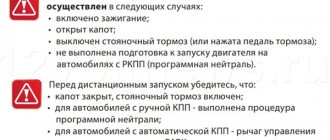
ATTENTION!
Remote engine starting cannot be carried out if:
- The gear lever is not in the neutral position
- Ignition on
- Hood open
- The vehicle does not have the handbrake on
In any of these cases, when attempting to remotely start, the siren will emit 4 “CHIRPS”.
Remote engine shutdown
If the vehicle was started using a remote engine start, you can turn it off by pressing the button. The parking lights will flash 2 times and the siren will sound 2 CHIRPS. The icon will disappear on the display of the keychain pager and a melody will sound.
Warming up the engine at a given temperature in the cabin
The Tomahawk TW-9010 system provides an additional temperature sensor for installation under the hood of the vehicle (see diagram No. 10). If this sensor is installed, the car is started and warmed up according to the readings of this sensor, otherwise, according to the readings of the temperature sensor inside the cabin.
In order to activate this function, you must simultaneously press and hold the and buttons. The parking lights will flash 1 time and the siren will emit 1 “CHIRP” to confirm the function has been activated. The display of the keychain pager will display an icon and the set temperature to turn on the heating (programmable, see the programming table), accompanied by a melody. When the temperature in the cabin reaches the temperature set to enable automatic heating, the engine will start for the previously programmed time (see programming table).
To disable this function, press the and buttons. The parking lights will flash 2 times and the system will emit 2 “CHIRPS” to confirm that the function has been disabled. The icon will disappear on the display of the keychain pager and a melody will sound.
Note:
Automatic warming up of the engine at a given temperature is performed no more than 6 times in 2 hours.
The temperature for automatic engine warm-up can be set to -5°C, -10°C, -20°C, -30°C (see programming table).
Daily autostart
To activate this function, you must simultaneously press and hold the and buttons. The parking lights will flash once to confirm that the function has been activated. An icon will appear on the display of the keychain pager and a melody will sound.
After activating this function, starting from the next day, the system will automatically start the engine every day at the time when this function was activated.
To disable the daily autorun function, press the and buttons. The parking lights will flash 2 times to confirm that the function has been disabled. The icon will disappear on the display of the keychain pager and a melody will sound.
To activate the 1, 2, 4, 12-hour start, you must activate the daily autostart function, and then within 5 seconds. After activating it, press the corresponding button on the key fob:
- for hourly starting, - for starting the engine at intervals of 2 hours, - for starting the engine at intervals of 4 hours, - for starting the engine at intervals of 12 hours.
Remote status polling
To perform a remote poll of the vehicle status, you must press the button. The parking lights will flash 3 times, confirming the transmission of data to the key fob pager receiver: temperature inside the cabin, security status, etc.
Remote trunk release
To open the trunk remotely, press and hold the button. The parking lights will flash 3 times to confirm that the trunk has been lifted off. An icon will appear on the display of the key fob pager.
ATTENTION!
This feature requires additional connection during installation.
2nd additional channel
To activate this function, you must press and hold the button. The parking lights will flash 1 time and the siren will emit 1 “CHIRP” to confirm the function has been activated.
ATTENTION!
This feature requires additional connection during installation.
Vehicle search
To activate this function, you must press the and buttons at the same time. The parking lights will flash 6 times, the siren will emit 6 “CHIRPS” indicating the location of the vehicle.
Remote shutdown of shock sensor
To activate this function, when arming the vehicle, you must press the and buttons at the same time. The parking lights will flash 1 time, the siren will emit 1 “CHIRP”, confirming that the vehicle has been armed. An icon will appear on the display of the key fob pager, indicating that the shock sensor is disabled.
Alarm Modes
When the warning zone of the shock sensor is triggered (weak shock), the parking lights flash 6 times, the siren emits 3 “CHIRPS”. An icon will appear on the display of the keychain pager and a melody will sound.
When the main zone of the shock sensor is triggered (strong shock), the system will turn on the alarm mode for 25 seconds. An icon will appear on the keychain pager display and an alarm will sound.
When any other zone is triggered, the system will turn on the alarm mode for 30 seconds. An icon corresponding to the triggered security zone will appear on the display of the key fob pager, and an alarm will sound.
ATTENTION!
To turn off the alarm, press the button. This will turn off the alarm mode, but the vehicle will remain protected.
Panic mode
To enable this mode, you must press the and buttons at the same time; the vehicle’s engine must not be started. The parking lights will flash 3 times and the siren will sound 3 “CHIRPS”, drawing attention to your vehicle.
Anti-hijack mode
To enable this mode, you must press and hold the and buttons at the same time. The system will turn on the alarm mode for 30 seconds, the engine starter will be blocked. An icon will appear on the keychain pager display and an alarm will sound.
To disable this mode, press the button.
This mode can also be activated using the Anti-hijack button. Press the “Anti-hijack” button (the vehicle’s engine must be running). The parking lights will flash for 30 seconds, after which the system will turn on the alarm mode and the engine starter will be blocked. This mode will not be disabled until the button is pressed. You can also exit this mode by holding the “Anti-hijack” button for 5 seconds.
…
Valet mode
To enable this mode, you must press and hold the , , and buttons simultaneously. The parking lights will flash 4 times, the siren will emit 4 “CHIRPS”, confirming the activation of the “Valet” mode. An icon will appear on the display of the keychain pager and a melody will sound.
In this mode, none of the system functions is available, except for the central locking function.
To disable this mode, press the , , and buttons simultaneously again. The parking lights will flash 4 times and the siren will emit 4 “CHIRPS” to confirm that Valet mode has been disabled. The icon will disappear on the display of the keychain pager and a melody will sound.
….
Driver call
To activate this function, you must press the call button located on the transmitter antenna. An icon will appear on the display of the keychain pager and a melody will sound.
Functions performed by the “Override” button
Some functions of TOMAHAWK TW-9010 can be activated without the help of control key fobs. In order to enter the function activation mode with the “Override” button, you must:
- Turn off the ignition
- By pressing the “Override” button, select the required function: “Valet” mode - 3 times
- Daily autostart -4 times
- Automatic heating at a given temperature in the cabin - 5 times
- “Valet” mode – 3 “CHIRPS” and flashes
1 “CHIRP” and flash - the function is enabled 2 “CHIRPS” and flashes - the function is disabled
NOTE:
If the daily autostart function has been activated, the engine will start immediately after the ignition is turned off. Use the remote control key fob to turn off the engine.
Emergency arming/disarming
Emergency arming:
- Turn on the ignition (the engine must not be running)
- Press the Override button 8 times
- Turn off the ignition
The parking lights will flash 1 time and the siren will emit 1 “CHIRP” to confirm the function has been activated. After 20 seconds, the system will turn on the security mode.
NOTE:
If, 20 seconds after emergency arming, any of the security zones is activated, the system will notify you about this with 3 flashes of parking lights and 3 “CHIRPS” of the siren, giving you 20 seconds to emergency disarm the vehicle. If the system is not disarmed, the system will turn on the alarm mode.
Emergency disarming:
- Turn on the ignition (the engine must not be running)
- Press the Override button 4 times
- Turn off the ignition
The parking lights will flash 2 times and the siren will emit 2 “CHIRPS” to confirm the function has been activated.
NOTE:
Remote control key fobs continue to function after emergency arming or disarming.
Preparation of remote start for vehicles with manual transmission
In order to enable remote starting of vehicles with a manual transmission, the gearshift lever must be in the neutral position.
Before turning off the vehicle engine, perform the following procedures:
- Activate the vehicle's handbrake (the engine must be running)
- Press the button, the icon will appear on the display of the key fob pager, and a melody will sound.
- Remove the key from the ignition (the engine should continue to run)
- Open the door, get out of the car and close the door
Complete steps 3 and 4 within 30 seconds
If all steps are completed correctly, the system will automatically turn off the engine; if not, the remote start option will be disabled.
Programming additional key fobs
TOMAHAWK TW-9010 allows you to store up to 4 remote control key fobs in its memory. To record key fobs, follow these steps:
- Turn on the ignition (the engine must not be running)
- Press and hold the Override button
- Wait for 4 “CHIRPS” of the siren, confirming entry into the key fob programming mode
- Release the Override button
- Press and hold the and buttons until you hear the “CHIRPS” of the siren, confirming that the new key fob has been memorized (1 “CHIRPS” for the first key fob, 2 “CHIRPS” for the second, 3 “CHIRPS” for the 3rd and 4 “CHIRPS” for the fourth
- The system will automatically exit the key fob programming mode if it does not receive signals from the key fobs for 6 seconds
ATTENTION!
All key fobs that have not passed the programming procedure will be erased from memory.
LED indicator operating modes
The system displays its status using an LED indicator if the vehicle's ignition is turned off.
| System status | Number of flashes |
| Remote start mode | Constantly on |
| The vehicle is disarmed | Switched off |
| Vehicle in security mode | 1 flash |
| Daily autorun mode | 2 flashes |
| Automatic heating mode at a given temperature | 3 flashes |
| Daily auto-start mode and auto-warm-up mode at a given temperature | 4 flashes |
| Valet mode | 5 flashes |
…..
Replacing the key fob pager battery
If the battery charge indicator of the key fob pager looks like this, it means that the battery charge is low and it needs to be replaced quickly.
- Open the battery cover of the key fob pager
- Remove the old battery
- Click the button
- Insert new battery
- Close the battery cover of the key fob pager
- Click the button
Battery type - AAA. Alkaline batteries are recommended.
Programming mode
To enter programming mode, follow these steps:
- Turn on the ignition (the engine must not be running)
- Press the Override button 6 times
- Turn off the ignition (confirmation of entry into programming mode - 6 “CHIRPS” of the siren)
Use the Override button to select the desired function. Each press moves to the next function.
The system will indicate the selected function by “CHIRPS” of the siren:
Short "CHIRP" - 1 Long "CHIRP" - 5
EXAMPLE:
14 presses of the “Override” button - 2 long “CHIRPS” and 4 short ones - function 14 is selected.
See the programming table for numbers and descriptions of functions.
Programming key fob pager functions
| Buttons used | Functions performed | Notes |
| Turn on the backlight | Automatically turns off after 5 seconds | |
| + | Enabling Power Saving Mode | The key fob pager receiver automatically turns off 2 minutes after the vehicle is disarmed. |
| + | Switching sound/vibration modes | |
| hold | Setting mode for clock, alarm clock, timer | Convert hours/minutes forward. Hold to scroll quickly. Convert hours/minutes back. Hold to scroll quickly. |
| Clock Setting Mode - Clock | ||
| 1 time | Hour setting mode - minutes | |
| 2 times | Alarm setting mode - clock | |
| 3 times | Alarm setting mode - minutes | |
| 4 times | Alarm setting mode - on/off | |
| 5 times | Timer setting mode - clock | |
| 6 times | Timer setting mode - minutes | |
| 7 times | Timer setting mode - on/off | |
| + | Alarm setting mode | |
| + 1 time | Setting the timer for 10 minutes | |
| + 2 times | Setting the timer for 20 minutes | |
| + 3 times | Setting the timer for 30 minutes | |
| + 4 times | Setting the timer for 60 minutes | |
| + 5 times | Setting the timer to 90 minutes | |
| + 6 times | Setting the timer to 120 minutes |
.
Programming table
| Number of presses of the Override button | Confirmation | Function description | 1 CHIRP | 2 CHIRPS | 3 CHIRPS | 4 CHIRPS |
| 1 time | 1 K "CHIRP" | Time before engine shutdown after remote start (min) | 5 | 10 | 15 | 20 |
| 2 times | 2 K "CHIRPA" | Set temperature in the cabin for automatic heating (°C) | -5 | -10 | -20 | -30 |
| 3 times | 3 K "CHIRPA" | Starter operating time for remote starting (ms) | 800 | 1200 | 1800 | 3000 |
| 4 times | 4 K "CHIRPA" | Control of motor operation by signal: | Ver.1 | Var.2 | Var.Z | |
| 5 times | 1D "CHIRP" | Activation time of the 2nd additional channel (s) | 0,8 | 10 | 30 | constant |
| 6 times | 1 D + 1K “CHIRP” | Siren pulse duration time (ms) | 100 | 10 | 15 | 20 |
| 7 times | 1 D + 2 K “CHIRPA” | Wire IGN 2 (on/off (/Closing doors with remote start | Ver.1 | Var.2 | Var.3 | Var.4 |
| 8 times | 1 D + 3 K “CHIRPA” | Starter delay before starting the engine for diesel or gasoline engines (s) | 2 | 10 | 10 | 10 |
| 9 times | 1 D + 4 K “CHIRPA” | Pulse length for opening/closing central locking (s) | Ver.1 | Var.2 | Var.3 | Var.4 |
| 10 times | 2 D "CHIRPA" | Two-step door opening or 3rd additional. channel/immobilizer | Ver.1 | Var.2 | Var.3 | Var.4 |
| 11 times | 2 D + 1 K “CHIRP” | Safe driving function | Off | Ver.1 | Var.2 | Var.3 |
| 12 times | 2 D + 2 K “CHIRPA” | Automatic arming | Ver.1 | Var.2 | Var.3 | |
| 13 times | 2 D + 3 K “CHIRPA” | Accounting for interior lighting delay (s) | 1 | 15 | 30 | 45 |
| 14 times | 2 D + 4 K “CHIRPA” | Time to turn on interior lighting (s)/windows up (s) | Ver.1 | Var.2 | Var.3 | Var.4 |
| 15 times | 3D "CHIRPA" | Interior temperature units / lock type (black and white wire) | Ver.1 | Var.2 | Var.3 | Var.4 |
| 16 times | 3 D + 1 K “CHIRP” | Turbo timer | Off | 1 min. | 3 min. | 6 min. |
NOTE:
Confirmation of the selected function is carried out by the system using the siren's "CHIRPs": D - long "CHIRP", K - short "CHIRP".
Confirmation of the selected function setting is carried out by the system using the siren's "CHIRPS": - 1 "CHIRP", - 2 "CHIRPS", - 3 "CHIRPS", - 4 "CHIRPS"
…….
ATTENTION!
Factory settings for programmable functions are underlined.
Description of programmable functions
- Time allotted for engine operation after remote start: 5/10/15/20 min.
- Temperature in the cabin at which automatic engine heating is activated (if the function is activated): -5/-10/-20/-30°C.
- Starter operating time when remote start function is activated: 800/1200/1800/3000 ms
The time indicated is the time of the first remote start attempt. If the first startup attempt was unsuccessful, the system will increase the time of each of the next 3 attempts by 200 ms.ATTENTION!
Program the 3000 ms time only if the tachometer wire (gray-black) is connected.
- Options for controlling motor operation:
Option 1 - based on the voltage of the vehicle’s on-board network. Option 2 - by oil pressure sensor. Option 3 - by tachometer.ATTENTION!
If you choose the 3rd option for monitoring engine operation, you must carry out the idle speed programming procedure:
- Turn off all electrical consumers in the vehicle (such as air conditioning, radio, amplifier)
- Turn off the ignition. The siren will emit 9 “CHIRPS”, the LED will give 9 flashes
- Start the engine using the ignition key and wait until the LED lights up
- After the engine speed reaches 500-1500 per minute and the engine has warmed up sufficiently, proceed to the next step.
- Press and hold the OVERRIDE button 1 time. If the procedure was successful, the system will issue 1 “CHIRP”, otherwise the system will notify you with 4 “CHIRPs” about the need to repeat the procedure
Turn on the ignition and press the button. OVERRIDE 9 times
Option 1 - IGN 2 on, locks do not close automatically during remote start; Option 2 - IGN 2 off, locks do not close automatically when started remotely; Option 3 - IGN 2 on, locks close automatically with remote start; Option 4 - IGN 2 off, locks close automatically when started remotely;
Option 1 - Closing pulse - 0.8 s, opening - 0.8 s Option 2 - Closing pulse - 3.6 s, opening - 3.6 s Option 3 - Closing pulse - 0.8 s, 2 opening pulses - 0.8 s Option 4 - Closing pulse - 30 s, opening pulse - 0.8 s
Option 1 - 3rd additional channel, immobilizer off. Option 2 - 2-step door opening, immobilizer off. Option 3 - 3rd additional channel, immobilizer on. Option 4 - 2-step door opening, immobilizer on.
Option 1 - The doors do not lock and unlock automatically immediately after turning the ignition on and off, respectively. Option 2 - The doors are locked automatically 10 seconds after the ignition is turned on and unlocked immediately after the ignition is turned off. Option 3 - The doors are locked automatically 30 seconds after the ignition is turned on and unlocked immediately after the ignition is turned off.
Option 1 - Disabled Option 2 - Enabled without closing the doors Option 3 - Enabled with the doors closed
Option 1 - Turn on the interior lighting for 20 seconds. after disarming Option 2 - Turn on the interior lighting for 30 seconds. after disarming Option 3 - Closing windows for 20 seconds. after arming the vehicle. Option 4 - Closing windows for 30 seconds. after arming the vehicle
Option 1 - Units of measurement °C, additional interlocking normally open Option 2 - Units of measurement °F, additional interlocking normally closed Option 3 - Units of measurement °C, additional interlocking normally closed Option 4 - Units of measurement °F, additional interlocking normally open
How to extend or reduce warm-up time on Tomahawk 9010
When using the Tomahawk 9010 security system, the question periodically arises of how to add or change the warm-up time. This is often due to the incompatibility of the factory settings with the actual operating conditions of the vehicle.
The proprietary software supports the ability to increase or decrease parameters. This is done through the service mode.
- Press the Overide key. The system will produce one short chirp.
- Setting a 5-minute delay is done by pressing the closed lock on the key fob.
- For 10 min. you need to press the key on the remote control.
- A delay of a quarter of an hour is set on the “open trunk” icon.
- For 20 m you need to press on the crossed out speaker.
After setting the desired position, it is recommended to leave the module alone for 10 seconds. After inactivity, the Tomahawk TW 9010 will automatically return to normal operation.
Software options
As mentioned above, the programming tables for the two signals are the same. The table is, for example, in the operating manual for the following system - Tomahawk tw 9010:
Customizable functions, complete list
There are 7 options responsible for autostart here: 1 to 4, as well as 7, 15 and 16. Let’s decipher the settings of the fourth option:
- Motor voltage control - the “gray-black” cord from connector X3 remains unconnected;
- Connecting the control cord to the oil pressure lamp;
- Engine control using tachometer signals.
The choice of settings option depends on the connection method. There are reviews that say that it is better to use the third option, and then there will be no problems with autostart.
Activation of "software neutral"
It was said above that in cars with a manual transmission, the handbrake limit switch is connected to the signaling system. You also need to configure the type of “box”: cut the gearbox selection loop if you have a manual transmission. After which, the engine will not start automatically if the “neutral” is not activated:
- Once you have stopped, apply the handbrake;
- On any of the key fobs, press the “Engine Start” button;
- Having removed the ignition key, get out of the car;
- Close all doors.
The instructions say that the interval between steps 2 and 4 should not exceed 30 seconds.
Remote start keys
It’s easy to find reviews where owners recommend leaving the loop when installing an alarm on any car. This will remove the need to use the “neutral”, but will lead to very undesirable consequences.
Starting the engine and tuning features
Even in the absence of key fobs, you can disable or enable daily autostart. The same applies to automatic warm-up. The remaining parameters related to autorun are configured in programming mode (see table). Using key fobs, however, it is easy to enable the hourly engine start:
- By pressing keys 3-4 this option is activated;
- The autorun mode is selected according to the table (see below).
Disable the option by pressing the same keys.
Selecting an automatic start option
The system estimates the temperature value in one of two ways:
- If an external sensor (thermistor) is connected, its readings are taken into account;
- In the absence of external sensors, the temperature in the cabin is estimated.
When you press the “trunk” button, the display shows one value. And this is the temperature in the cabin. Which is true even if the resistor is connected correctly.
Refinement of the system - installation of a thermistor
The Tomahawk tz 9010 car alarm will begin to perceive the readings of the temperature sensor as soon as the latter is connected correctly:
Adding a thermistor to the circuit
The required sensors are not included with the alarm, but they can be purchased separately. The modification is carried out as follows:
- Connect the thermistor;
- Close the hood (the limit switch opens);
- Temperature-based autostart can be used.
All of the above applies to systems of the “early” family, that is, tw-9010.
As you can see, in order to use an external resistor, you do not need to issue commands from the key fobs. The resistance value will depend on the temperature:
- Room: 10 kOhm;
- -10 C: 42 kOhm;
- -20 C: 68 kOhm.
Reviews were used to build the list. Happy setup!
How to increase starter cranking time
In some situations, after long-term operation or severe cold weather, the initial cranking time of the starter may not be enough. The piston group begins to rotate, but the pick-up does not work. For such situations, the manufacturer has provided the possibility of increasing the starter operating time.
Enter the program by pressing Override three times.
The system allows the driver to set three modes:
- 800 ms – press the closed lock;
- 1200 ms – press the key on the key fob;
- 1800 ms – activated via the trunk open button;
- 3000 ms – you will need to click on the crossed out speaker.
In this case, the factory position is set exactly to 800 ms. It is assumed that the device will be operated in warm weather and with a working battery. Failures are logically explained by wear of the battery and freezing of oil in the crankcase compartment.
You can watch the calibration procedure in more detail in the video.
Restoring the alarm system
When your car stops working remotely, you may find yourself unable to use the car with the alarm on, even if you have a manual key. To avoid a dead clicker, you should always have an extra battery on hand and listen for signs of a weak battery, as this can lead to your car locking up. If replacing the battery does not solve this problem, you may need Tomahawk car alarm repair.
What you will need:
- screwdriver;
- new battery;
- lubricant
Instructions
- Check the back of the device to determine which battery cover is present. If it cannot be removed without effort, then use a screwdriver to unscrew the bolts. Remove the battery and replace it with a new one.
- Check how the Tomahawk car alarm key fob works. If it doesn't work, remove the battery. Open the unit with a screwdriver if it has a battery compartment cover.
- Look at the tiny circuit boards whose connections carry pins. If the metal pattern is unclear and has gray and black areas, it is too dirty to work properly.
- Soak a cotton swab with lubricant. Wipe the boards gently until the dirt is removed. Let them dry.
- Replace the battery and close the unit. Most likely, if the reason was contamination, the device will continue to work.
- Have you followed the steps above and the alarm still doesn't work? This means that the reason is much more complex and can be caused by failures in the system. In this case, it is better to repair Tomahawk car alarms by experienced electronics engineers.
The video shows the Tomahawk car alarm range test:
Tomahawk car alarms have a full range of features that are easy to use. Many models serve as a complete vehicle security system. They are comprehensive alarms that will sound when any irregularities occur. Professional installations are designed using the latest advances and technologies, and the Tomahawk car alarm key fob is manufactured with design and performance in mind. Thanks to the wide selection, you can choose either a budget option or opt for luxury equipment. However, simplified systems do not reduce the safety of your vehicle. On the contrary, you will be able to completely control the situation related to your car.
Tomahawk 9010: autostart programming table
It contains a complete description of the options configured using the service mode. Here is information about the sequence of actions and calibration of each option separately:
- duration of operation of the power unit after turning off the ignition and rotation of the strater;
- setting the temperature inside the car;
- motor control signals;
- activation of 2 additional modes;
- howler pulse duration;
- door control;
- engine start delay;
- duration of the central lock control pulse;
- safe driving;
- automatic activation of security;
- setting up interior lighting;
- setting for an hour warm-up;
- turbo timer control.
There is also information on how to program an alarm for a car factory or remote engine start. You can learn more about enabling functions from the table itself.
Connection diagrams
………
Technical data.
| Rated supply voltage | +12V |
| Current consumption when switched off ignition | 15mA |
| Allowable current: | |
| 6 PIN remote start power connector | |
| There is a red thick wire in the power circuit (limited by a fuse) | 30A |
| There is a red thin wire in the power circuit (limited by a fuse) | 10A |
| Output IGN 1, "+" (yellow wire) | 30A |
| Output IGN 2, "+" (green wire) | 30A |
| Output IGN 3, “-” (black-red wire) | 300mA |
| Starter wire, "+" (black and yellow wire) | 30A |
| Central locking connector 6 PIN | |
| In the contact circuit of the central locking control relay (limit with a fuse) | 20A |
| Main connector 18 PIN | |
| Interlock relay contacts | 40A |
| Service output of blocking relay, “-” (Black-yellow wire) | 300mA |
| Siren power output, “+” (gray wire) | 2A |
| Additional channel output 1, “-” (yellow-black wire) | 300mA |
| Additional channel output 2, “-” (yellow-red wire) | 300mA |
| Additional channel output 3, “-” (yellow-blue wire) | 300mA |
| Power outputs for parking lights, “+” (green-black and green-yellow wires, limited by fuses) | 7.5A |
| Output to interior lighting, “-” (blue wire) | 300mA |
| Temporary exposures: | |
| Service output, “-” (black and yellow wire) | always in security mode |
| Additional channel output 1, "-" (yellow-black wire) | 1 sec. |
| Additional channel output 2, “-” (programmable) (yellow-red wire) | 0.8 sec. 10 sec. 30 sec. fast. |
| Additional channel output 3, “-” (programmable) (yellow-blue wire) | 0.8 sec. 10 sec. 30 sec. fast. |
| Central locking control pulse duration (programmable) | 0.8 sec. 3.6 sec. 30 sec. |
How to disable autostart on Tomahawk 9010 from key fob
The autostart system is a necessary addition for comfortable vehicle operation. The activation of the mode is programmed in advance. How to remove the car factory at negative degrees or timed installation is described in the instructions. To do this, you must simultaneously press the combination of the key and the open cargo compartment. If the actions are performed correctly, the car will blink its dimensions twice, and the key fob will emit two chirps.
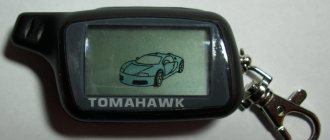
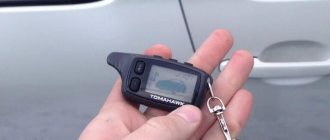
Key fob characteristics
Tomahawk car alarms (modern versions, such as the popular x5, tz-9020 or tw-9010, 9030) usually come with two key fobs:
- the main one, with two-way communication, is a key fob with a liquid crystal display, which allows the car owner to receive security alerts and control the security system from a distance; it usually has five buttons;
- additional, with one-way communication - this key fob does not have a display, it has only four buttons and an LED indicator.
The key fob of this brand is distinguished by a good stable connection with the object, on a flat surface the range reaches 1200 meters, in the city the range is reduced to 100 meters, the signal is broadcast at a frequency of 868 Mhz or 434 Mhz frequency.
Photo of Tomahawk key fob tw-9020, 9030 (main, additional and antenna)
Using the key fob of most alarm systems, you can perform the following basic functions:
- arranging/disarming a car;
- closing and opening doors with the engine running;
- opening the trunk lock at a distance, including separately from the doors;
- automatic engine start (including delayed by timer or set temperature)
- immobilizer control;
- searching for a car in a large parking lot;
- turning on siren and anti-robbery modes;
- monitoring all systems of a protected vehicle from a distance (temperature, battery charge, gasoline level, etc.);
- viewing the history of system alerts;
- adjusting the sensitivity level of motion and shock sensors;
- programming car alarm functions;
- remote activation of service mode.
These options are described in detail in the instructions for use for any key fob.
How to disable warm-up on Tomahawk 9010
The Tomahawk 9010 alarm system is equipped with the ability to independently warm up the internal combustion engine over time. Depending on the buyer’s wishes, the required operation intervals and operating duration can be set.
How to remove the car from the hourly warm-up when the timer starts, the factory instructions will answer.
According to the user manual, turning off occurs by pressing the key and the speaker. After deactivation, the car will emit two flashes with its headlights or turn signals, and the key fob will signal with a melodic trill.
How to connect an alarm without auto start
The absence of an automatic engine start function greatly simplifies the installation procedure of the anti-theft system. To connect, the user will need contact elements for the door position as well as the ignition switch.
Preparing the device
To prepare the system, perform the following steps:
- An additional relay and a safety device are installed in the ignition circuit.
- A microprocessor alarm control module is installed.
- The shock controller and transceiver are being installed.
- Pulses from the ignition switch and door positions are connected to the Tomahawk 9010 control module. The light signaling power lines are connected in parallel to the siren.
Working with ignition
If an ignition system blocking relay is used, then when connecting you need to use the electrical diagram:
Engine starting circuit using a blocking relay
Low current circuits and main connector
The installation of low-current power lines of the Tomahawk 9010 anti-theft system is carried out as follows:
- The power in the car turns off; to do this, you need to de-energize the battery.
- The main elements are connected to the microprocessor device. Available in the form of a transceiver with an antenna adapter, an LED, and a sensitivity controller.
- The contact elements of the hood and door sensors are connected to the main block of the control unit.
- The electrical circuits of the engine fluid temperature and pressure controller are connected to the instrument cluster. The contacts of the corresponding sensors are used for connection.
- After the connection is completed, all circuits are checked using the tester.
Tomahawk 9010: autostart does not work, the starter does not turn
The reliable design of the Tomahawk 9010 car alarm sometimes experiences failures caused by internal or external breakdowns. Usually this is due to simple reasons.
- The battery is worn out. To automatically start the power plant, more energy is required than in normal mode. The problem can be resolved by recharging the battery or replacing it with a new one.
- Autorun programming is broken. Usually small errors in the calibration procedure or an incorrect activation algorithm cause this. Corrected by carefully following the instructions. In this case, the machine does not set the alarm or refuses to perform the assigned tasks.
- Mechanical damage to modules. Faulty units cannot transmit pulses.
- Starter rotation time is too short. Oil freezing may require the unit to operate longer than in summer. To fix this, you can increase the amount of time in service mode.
Tomahawk TW 9010 does not start from the key fob: SP error
The electrical diagram and operating principle of the unit can help you understand why the automatic engine start option does not work. If the start with the key is successful, there is a loss of voltage in the circuit and you should check the main batteries:
- Battery charge and condition. An empty or worn battery can cause severe voltage drop.
- It is also recommended to check the power supply of the alarm itself. The fuse on the power core often oxidizes, which causes poor contact.
If the startup from the remote control is not initially programmed, a full system reset to factory settings may help. During prolonged operation of the unit, it is not uncommon for internal operating system errors to appear.
Starts and stalls
Some users complain that the car starts with the key fob and stalls after a minute or less. Usually the malfunction is caused by the low sensitivity of the sensors inside the Tomahawk TW 9010 alarm head unit. In 90% of cases, the problem occurs in winter, when negative temperatures make adjustments to the launch parameters.
To eliminate the malfunction, experienced motorists recommend reinstalling the launch limit controllers on the tachometer. This will help bypass the loss of energy at the starter and the lag in the oil pressure indicator.
You should not completely ignore the breakdown. A minor malfunction may hide a serious problem.
Why is temperature triggering disabled?
Correctly setting the warm-up temperature is an important part of calibrating the entire system. If the sequence of actions is violated, the module may not operate correctly or fail completely. External factors can also cause the defect:
- incorrect setting of the starter cranking time;
- broken sensor settings;
- Incorrect operation or connection of the temperature sensor.
You can fix the problem by fully diagnosing the electrical circuit of the Tomahawk TV 9010 sensor. In case of software failures, an absolute reset of the settings helps.
Why does autostart disappear?
Some users complain that in winter the engine does not start with the anti-theft system. The fact that auto-warming stopped working can be argued by three factors.
- Battery drain. The lack of starting currents affects the possibility of remote operation of the system. The car starts normally with the key.
- The frequency of automatic startup of the unit is too infrequent. In severe frosts, the oil in the crankcase freezes quickly. This circumstance prevents the normal operation of the unit.
- As a consequence of point No. 2, the starter cranking time is too short.
Car alarm turns on the ignition, but does not start
Similar reasons lie behind the fact that the Tomahawk TW 9010 activates the ignition, but does not turn the starter. Usually the problems are purely mechanical in nature:
- the power supply is faulty or worn out;
- the retractor relay or other starter components do not operate;
- The contact on the wire connection has oxidized or the fuses are damaged.
There is also a software failure. In this case, just reset the settings and everything will return to normal.
The warning light went off while warming up
When actively using the Tomahawk TW 9010, it happens that the unit begins to glitch or act up for no apparent reason. Motorists identify three problems from the general stream.
- When trying to start, the starter turns too little and the car does not start. Extending autostart in service mode completely eliminates the problem.
- During normal starting, the car quickly stalls and does not have time to warm up properly. There is an abnormal change in temperature at which the relay turns off.
- The opposite situation occurs when “braking” occurs in severe frosts. It is enough to increase the activation temperature of the switch (for example, from -30 to -15) and everything falls into place.
After resetting the settings, autostart stopped working
If the device malfunctions after updating it or resetting the settings to the factory state, you must carefully study the instructions. Without knowing the car model and how to connect the security system, it is impossible to accurately answer the question. However, the reasons that the power plant does not start in 70% of cases are the following factors:
- it is required to hammer in new calibrations for Tomahawk TW 9010;
- The starter cranking time is insufficient;
- the system needs firmware updating of equipment powered from an additional channel (gasoline pump, etc.).
In some cases, programming autostart using the tachometer helps. If in winter the limit switch is connected to the oil pressure sensor, the installation may also not work correctly.
Ignition switch wire designations
Look at the diagram shown in the figure.
The above does not mean that both cords can be connected together and connected using the circuits discussed here. The diagrams indicate one wire (ST1) that makes up the starter power circuit. This option is suitable:
- For all domestic cars without exception;
- For new foreign cars;
- For foreign cars up to 90-91 years of manufacture.
This is the paradox - the “ST2” cord is not provided in the new, as well as in the oldest models.
Diagram for TZ-9030
Here's how to connect the Tomahawk TZ-9030 main unit to the ignition switch to use autostart. Of course, after installation, you need to do programming, which is discussed below. If the use of a lineman is required, connect it to the terminal of the main alarm connector (black and red cord). The power connector, in turn, has the following wiring.
If we talk about the Tomahawk TW-9010 model, the purpose of the IGN3 pin will be different from what is being considered here.
In "Chapter 1" the designations were listed: IGN1, IGN2, ACC, starter wire (ST). The “IGN3” cord has been added here, but it replaces the ACC wire. The “blue” cord coming out of the alarm terminal block must be connected to the ACC contact, otherwise the autostart will not work. At the same time, if you make changes to the settings, the IGN3 pin can be connected to the ST2 pin. True, it is not clear how to “emulate” the ACC wire then.
A “T” connection is used when connecting to all wires except the starter. And the “ST” cord needs to be cut to connect the resulting ends with the black and yellow wires. The cable that goes to the alarm from the lock is a signal cable (thin).
Diagram for TW-9010
A non-standard method of switching starter current is typical for the following alarm model: Tomahawk TW-9010. Voltage is supplied here from the 6-pin power terminal block when autostart is performed. The rest of the time, the starter wire conducts current, even if the car alarm does not work or does not work correctly. A blocking relay is included in the gap in the standard wiring. Whether it can be removed from the scheme is unknown. It is better, therefore, to stick to the recommended option.
Owner reviews
Motorists' opinions about the product. Miroslav.
Tell me how to increase or change the warm-up time? In winter the car does not want to warm up properly and after 2-3 repetitions it does not start at all. Where is this mode located?
Novel.
If the autostart without a key does not work in cold weather, only the complete instructions for the Tomahawk 9010 alarm system with autostart will help you understand where the dog is buried. I suffered with the alarm for more than two days, I could not understand what was wrong. It turns out that if you set the warm-up time every hour, the car simply does not have time to freeze (before this it stood for 2 hours).
Andrey.
I recently figured out how to set the start at a temperature of minus 20. I received the alarm already included with the car, and there were no instructions. Now we are sitting and redoing what the installers installed here.
Auto engine start
By temperature
When installing the Tomahawk 9010 alarm system, an additional temperature sensor is hung under the hood. When autostarting the engine based on temperature, the system is guided by the readings of this sensor, and if an external sensor is not installed, then by the air temperature in the cabin.
To activate automatic engine start based on temperature, you must:
- simultaneously press buttons No. 4 (key) and No. 1 (trunk) - the parking lights will flash once, the siren will emit one beep;
- the melodic trill of the key fob will sound and two new objects will appear on its display: an icon depicting a fan and a warm-up temperature set by software;
- if the system is based on an external temperature sensor, the engine will start when the temperature drops below the programmed mark;
- If the system is based on the air temperature in the cabin, the engine will automatically start when the air warms up to the set temperature.
To disable this function, press buttons No. 4 (key) and No. 1 (trunk). The car will react with a double flash of parking lights and a double siren signal. The key fob will play a melodic trill again and the fan icon will disappear from its display.
ATTENTION! Automatic engine heating at a given temperature can be performed no more than six times within two hours
By time
To activate timed engine autostart, you must hold down buttons No. 4 (key) and No. 2 (silent security) - the car will honk, the pager will emit a melodic trill and an icon with a clock will appear on its display. From now on, the Tomahawk 9010 will start the vehicle engine every day at the same time when this function was activated.
To disable the daily autostart function by time, you must again press the buttons “4” (key) and “2” (silent security). The parking lights will flash twice and the system will confirm deactivation of the function with two beeps. The clock icon will disappear on the key fob display and a melodic trill will sound.
How to make a switch key?
The Tomahawk TW 9010 factory kit contains only two key fobs with a built-in antenna. There is no space for a key on the case. This circumstance does not suit some users, which forces them to redo the pager themselves. The upgrade procedure looks like this.
Buy a new transmitter housing with a turnkey socket. Disassemble the old case, using extreme caution - thin latches may break off or damage the internal circuitry of the module. Assemble the internal components of the signaling system onto the new housing in the reverse order. Disassemble the handle of the standard key and transfer the core to the mount in the new key fob.
After installing the battery, the remote control can be used as usual.
This procedure requires care and precision. It is easy to damage the sensitive elements of the module. This provokes some motorists to buy ready-made key fobs with a key mount and simply rewrite them into the system.
Monitoring engine operation via generator
In most configurations of Tomahawk security systems, there is the ability to control the start of the start using the generator operation sensor. The principle of the method is based on the fact that when the power plant is started, a voltage drop occurs. When the internal combustion engine is fully started, the generator begins to generate electricity and the circuit indicators are equalized. At the same time, the automation is activated and the starter is de-energized.
The technique is one of the most reliable and simple to implement. The standard sensor cuts in parallel into the on-board circuit line and reads its condition.
Possible faults
If autostart on the Tomahawk becomes impossible, you should consider possible malfunctions or take into account incorrect key fob settings. Sometimes the system simply malfunctions or does not respond to clicks at all.
The car stops starting, the ignition indicator does not light up, and the light signal from the headlights does not appear. Sometimes another problem occurs: the key fob is fully operational, but the engine does not autostart. There are also situations when, when the function starts, the ignition is turned on followed by a click, but without starting the power unit.
If autorun does not work, it may be due to the following problems:
- Problems with the ignition wiring.
- Start blocking with standard immobilizer.
- No power supply from fuse.
- Damage to the temperature sensor that provides automatic start.
- Incorrect installation of the system or incorrect configuration of functions.
- Problems in the control unit, when the tracks burn out during power surges.
- The sensor jumps out of the housing. A similar problem occurs when installation rules are not followed. If parts are not securely fastened, they will become deformed with intensive use.
If you are planning to purchase an expensive alarm system, you need to make sure that you can set it up yourself. Otherwise, failures and malfunctions may occur during system operation.
Automatic start of the car can be done from the key fob of the anti-theft system by pressing the desired combination of buttons. In order to set up Tomahawk 9030 autostart, thoroughly study the instruction manual. To enter the setup menu for this function, follow the steps.
- The ignition must be turned off.
- Press the Override key six times.
- The last step is to turn on the ignition. The siren will sound 6 times.
You can configure the following automatic car engine start functions:
- IGN 3 output mode: does not work when the starter is turned on, does not turn off when the starter is turned on, operates all the time the starter is turned on, works until the starter is turned on;
- monitoring the operation of the vehicle’s power unit and starter;
- gearbox type: automatic, manual;
- engines: diesel or gasoline;
- turbo timer operating time: off, running 1 min., 3 min., 6 min.;
- warming up the car: 5, 10, 15, 20 minutes;
- periodic autostart after 1 hour, 2, 4, 24 hours;
- protection during automatic engine start;
- operation of the dimensions and turn signals during autostart: blinking, constantly on, off;
- closing the doors after warming up.
Tomahawk 9030 alarm installation diagram:
Possible problems and their solutions
Frequency modulation is used to encode control signals for the Tomahawk 9010 complex. The transmission of signals is affected by electromagnetic interference from transformer stations or relay installations. If it is impossible to control the remote control, an emergency shutdown or arming is performed. The instructions for use recommend re-entering the remote control codes into the complex’s memory.
When the battery is low, a warning icon appears on the screen. After removing the old battery and installing a new source, it is recommended to briefly press the key marked with the silhouette of a car. The procedure allows you to discharge and charge the capacitors of the signal transmitter.
If “floating” defects appear, it is recommended to inspect the blocks and connecting cables. If insulation breaks are detected, it is necessary to replace sections of the wiring or protect the metal conductors with insulating tape. If damaged electronic elements are found, it is necessary to replace parts or install a new unit. Since production of equipment has been discontinued, purchasing new components is difficult. In this case, it is necessary to install a new security system on the car.
How to start and turn off a car using a key fob (main and additional)
ATTENTION! A completely simple way to reduce fuel consumption has been found! Don't believe me? An auto mechanic with 15 years of experience also didn’t believe it until he tried it. And now he saves 35,000 rubles a year on gasoline! Read more"
The TZ-9010 version is the basic modification for Tomahawk.
Basic actions available using the Tomahawk TZ-9010 car alarm:
- remote starting of the car engine by programming the switching functions for a certain time. This is especially important in the winter, when it is necessary to warm up the car in advance before traveling;
- start of self-diagnosis of systems;
- calling the owner of the car if the system sensors are triggered.
To remotely start the car engine from the Tomahawk TZ-9010 key fob, you need to press button 2 (see figure).
The success of this action is confirmed by:
- the vehicle's side headlights should blink three times;
- The siren should “respond” three times with a sound alert;
- The key fob display will show the corresponding identification about starting/not starting the engine.
After the car engine starts, it can work for the time interval programmed by the system, then automatically turn off.
The engine operating time can be extended by five minutes by simultaneously pressing keys “1” and “2”.
To start a car engine remotely, the following conditions must be met:
- ignition switched off;
- hood closed;
- Gearbox in neutral position;
- The car is on the handbrake.
Warm up every day
The Tomahawk autorun function is installed and configured by the user forcibly. To do this, you need to enter the programming menu, where you select the appropriate item. If there is a need for more frequent warm-up (in severe frosts, so that the engine does not have time to freeze), after activating the function, enter the corresponding combination on the key fob and select an interval of 1, 2, 4 or 12 hours.
Note! The presence of gaps and their duration may vary in different models.
Next, you need to figure out how to make the engine start on its own:
- perform pre-launch preparations;
- On the key fob, simultaneously hold down the key and the crossed out speaker.
If everything is done correctly, the dial will appear on the remote control display and a characteristic signal will sound – the command has been accepted. After which, the car will start on its own at the specified time every day.