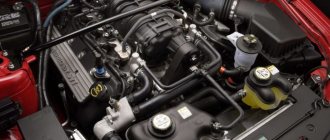
The operating principle of internal combustion engines is based on the combustion of a mixture of hydrocarbon fuel and atmospheric air in a closed volume. Due to the thermal expansion of this volume, useful work is performed. If the supply of a combustible mixture and the removal of spent products are technically organized processes, then the penetration of exhaust gases into the mechanical part of the engine is a by-product, for the removal of which there is a crankcase ventilation system.
These excess gases are also called crankcase gases, but why they need to be removed and how crankcase ventilation works, we’ll try to figure it out further.
Components of the ventilation system
The crankcase ventilation configuration depends on the type of internal combustion engine installed on the vehicle. Despite this, the system includes the following elements:
- air pipe;
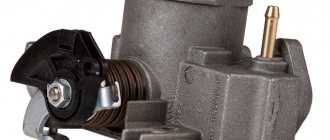
- a ventilation valve that performs the function of suctioning gases. The intensity of its functioning increases with increasing vacuum force inside the intake manifold;
- oil separator
Crankcase ventilation can be roughly divided into 2 large functional parts. These include:
- Small branch. Performs the function of selecting crankcase gases that accumulate under the valve cover.
- Big branch. Exhaust gases are removed from under the cover.
Both branches function harmoniously and are completely dependent on each other.
Ventilation cleaning procedure
Cleaning the crankcase ventilation is carried out as follows:
- open the hood and disconnect the ABC terminals (this is necessary to ensure that the reading work is completed safely);
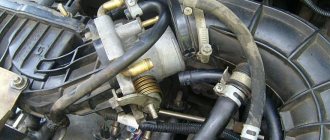
- carefully remove the pipe that goes to the air collector;
- now you need to unscrew the self-tapping screw, and then remove the casing from the throttle valve (the self-tapping screw will be visible after removing the pipe, so unscrewing it will not be difficult);
- disconnect the injectors, and then move the cable where the connectors are located to the side;
- unscrew the bolts, fasteners that hold the dipstick and the upper part of the bracket responsible for finding the intake manifold;
- remove the tube located in the oil dipstick from the engine - this must be done strictly from the “up” position;
- Now you should remove the ramp cover, which covers the injectors and their connectors (to avoid difficulties, the manipulation is carried out with a sharp movement).
The first part of the “procedure” is completed.
Now let's move on to the second one:
- disconnect the fuel line from the ramp (it is important to note that its connection is different on different brands of cars);
- make the damper clamp a little weaker, and then carefully remove it;
- in the same way you need to remove the pipe from the fitting (since the fitting is plastic, this is done extremely carefully);
- disconnect all XX connectors;
- remove the throttle cable from the damper, which will interfere with cleaning;
- We disconnect the bayonet connection from the “trunk” pulled out from the engine;
- remove the lid from the wells intended for candles;
- remove the valve hose, then unscrew the 4 bolts located on the top of the manifold;
- Now you should slightly loosen, but not completely remove the lower bolts (there are 5 of them), and then remove the manifold;
- slightly disconnect the clamps, and then remove the ventilation hoses from the oil separator box;
- Unscrew the remaining bolts, and then disconnect the engine block and the oil separator.
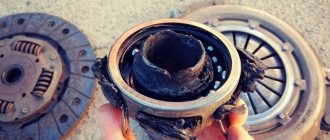
That's it - the preparatory stage of work is completely completed. Now you can begin removing the putty, as well as cleaning and washing the oil separator cavity. It should be washed until the resins are completely gone from its base.
If the contamination is too strong, it is necessary to completely replace the oil separator, since it is quite difficult to wash it. In addition, a poorly cleaned part can provoke the rapid growth of new contamination.
After cleaning, we check the hoses located on the flame arrester and crankcase ventilation. If the throttle valve is dirty, it should also be washed.
Principle of operation
When a mixture of fuel and air is burned, a sharp and strong increase in its volume occurs.
This creates high pressure in the internal combustion chamber, which forces the piston to its bottom dead center. The movement of the piston drives the engine crankshaft. Some of the gases formed in this case, penetrating through the gap between the rings and the cylindrical mirror, enters the cavity under the crankcase cover. Here they mix with oil vapors, which leads to the formation of pressure.
The pressure has an aggressive effect on the crankshaft O-rings, as well as on the gasket located between the pan cover and the oil dipstick channel.
The expansion stroke is periodically repeated in each of the cylinders. This leads to the injection of a repeated portion of gases. If the crankcase ventilation is insufficient, exhaust gases accumulate and the crankshaft seals are gradually squeezed out.
If you do not clean the crankcase ventilation system, it is possible that gases will push out the oil dipstick and oil will leak out of the crankcase. In addition, the following elements accumulate in the crankcase:
- a small part of the fuel that did not have time to burn;
- small soot particles;
- moisture.
All elements are mixed with engine oil that has fallen into the pan. As a result, over time the oil oxidizes, clogging it and reducing its service life.
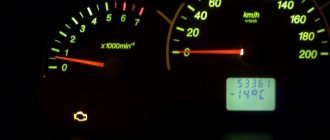
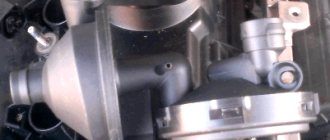
PCV Valve Check
Diagnostic auto scanner Rokodil ScanX
You can check PCV valves using physical and software methods . In the second case, you will need an assistant, a diagnostic scanner or OBD II adapter, and a special application for a PC or mobile device. One of the best options is the Rokodil ScanX , since it is compatible with all brands of cars, view the performance of all sensors and systems, and provides error tips.
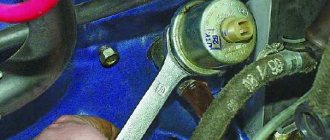
For physical diagnostics, carried out by checking the response of the KVKG to external influences from instruments, you only need an open-end wrench to remove the valve.
A preliminary check of the PCV valve is possible by blowing with your mouth. When air passes freely from the outlet side, the part is definitely not working. If the KVKG is purged only from the entrance side, this indirectly indicates that it is in order. You can definitely verify that the part is working properly using one of the following methods.
In some cars, particularly new BMW models, the PCV valve is non-removable and non-removable. to check it physically without destroying the case . In this case, you can check either using computer diagnostics or replacing it with a known-good unit.
To check the operation of the crankcase gas valve, follow this procedure:
Do-it-yourself check of the VKG valve Toyota Vitz: video
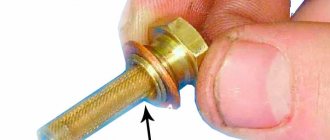
- Remove the valve from the hole in the valve cover, first removing the hose from the outlet pipe.
- Inspect the inlet for contamination and remove it if necessary.
- Blow out the valve with your mouth from the outlet side: no air should pass through a working CVCG.
- Reattach the ventilation hose to the outlet.
- Start and warm up the engine.
- Close the valve inlet tightly with your finger. In a working part, this action is accompanied by a click and a vacuum is felt - the finger will “stick” to the hole.
The crankcase ventilation valve is checked programmatically using the throttle position at idle.
Checking the PCV valve using computer diagnostics using the example of a Chevrolet Lacetti:
Professional check of the PCV valve on a Chevrolet Lacetti with computer diagnostics: video
- Unscrew the valve with a 24-mm open-end wrench, having first removed the hose from the outlet pipe.
- Place the hose onto the outlet fitting.
- Connect the scanner or OBD II adapter to the diagnostic connector in the passenger compartment.
- Run the diagnostic program and display the throttle position readings (actual throttle position).
- Start and warm up the engine. In this case, the value of the actual position of the remote sensing should be within 35–40 steps.
- Plug the valve inlet with tape or have a helper plug it with your finger. The parameter should increase by approximately five 5 steps.
- Remove the vent hose from the PCV valve outlet. If the KVKG is working properly, the reading of the actual throttle position will drop to 5 steps. This indicates that the valve was restricting the passage of gases into the intake at idle.
The process of removing crankcase gases
The removal of exhaust crankcase gases has some differences between carburetor and injection type engines. Regardless of this, the entire procedure follows a standard scheme:
- Exhaust gases are sucked from the engine crankcase.
- In the oil separator, gases are purified from impurities of oil vapors and other combustion products.
- Purified gases move to the intake manifold through the air pipes.
- Crankcase gases mix with the fuel mixture and burn in the engine cylinders.
It is possible that a small amount of gas is getting into the oil pan. As a result, the process of selecting crankcase gases is disrupted.
Cost of the KG ventilation valve
The cost of KVKG can be completely different; the price largely depends on the car model and the engine itself. For example, an original valve for an M54 (BMW) internal combustion engine costs about 2200-2400 rubles; this device is also suitable for M52 series engines and is installed on E39 5-series cars, X3, X5, BMW Compact. For Ford cars (Duratec HE engines), a ventilation valve can be purchased at an average price of 1300-1800 rubles, the cost depends on the seller - custom parts are cheaper if the parts are not needed urgently.
Possible system malfunctions
Unfortunately, in the first stages it is almost impossible to identify problems associated with clogging of the SWR.
They can only be identified after the system is almost completely clogged. This could cause the engine to malfunction or force oil out of the gaskets between the oil pan and the valve cover. In this case, thorough cleaning of the crankcase ventilation is necessary.
Even when using very high quality piston rings, it is impossible to ensure maximum sealing of the piston. This will invariably lead to gradual clogging of the crankcase space with combustion products of the fuel mixture, as well as its slight compression.
In order to ensure the normal functioning of the crankcase ventilation system, it is necessary to ensure an air supply to the crankcase space. Otherwise, a large vacuum will form in the crankcase.
This leads to loss of valve mobility and their jamming in a certain position. Crankcase gases include particles of soot and carbon deposits. If the engine is in poor condition, a large number of particles accumulate. They gradually accumulate not only on the valve itself, but also on the calibration holes and ventilation pipes.
In winter, when steam moves through the crankcase ventilation system, it can gradually accumulate in its narrow places, turning into ice. This process is known as freezing. If a large amount of ice accumulates, the dipstick may squeeze or force oil out from under the crankcase cover.
If the combustion products of the fuel mixture can accumulate over a long period, the freezing process develops very rapidly. To avoid the development of this problem, engine developers use heating systems in the ventilation system.
The operating instructions for the vehicle must indicate that it is necessary to periodically clean the crankcase gases, which should be carried out in parallel with changing the engine oil.
Methods for removing blockages and cleaning ventilation
If the above symptoms appear, first of all, check the oil separator and valve elements, as well as all parts located there, for various secondary deposits from combustion products. Even if, in your opinion, everything is in order there and there seems to be no need to clean it, then in any case, at least clean the oil separator from the oil located there, this is especially true for a diesel engine.
Cleaning the crankcase ventilation is a periodic preventive work, somewhat dirty and oily, but which even a non-specialist can carry out.
While it is quite clear how to check the oil separator, simply examining the appearance of the ventilation valve will not be enough. The valve is considered to be working when the valve moves well and there are no mechanical deposits on its reverse side, otherwise it is faulty.
Keep in mind that after cleaning and washing the damper rod, it is only wiped dry and in no case lubricated.
If you have any questions, leave them in the comments below the article. We or our visitors will be happy to answer them
How to assemble an engine step by step
In order for the car to work properly, it is important to assemble the engine correctly.
To do this, please read the assembly instructions:
We replace all unsuitable seals and oil separator rings, and then coat them with oil.- We attach the oil separator to the engine block, and then tighten it with bolts. The bottom bolt is tightened by hand, not with a screwdriver. It is important to remember that the seals may come off during fastening.
- We put the hoses on the oil separator, not forgetting to secure them with new clamps. Then we lay them so that they are without kinks.
- We tighten the clamps on the fittings.
- Now you need to secure 5 bolts - if necessary, the gaskets on the manifold are replaced.
- We insert all the valves back, and then tighten them with bolts. Now you need to carefully slide the manifold onto the lower bolts and then tighten them.
- The next step is to assemble the fuel line. The probe tubes are installed in place and the bracket is screwed on.
- We connect the pipes, and then check all the fasteners. Then we connect the injectors and the XX system.