Many motorists are familiar with the situation when the fuel tank cap refuses to open. Such a small thing, which few car owners pay attention to, can cause serious inconvenience if it is impossible to open it, especially if this happened right at a gas station, while the car has an empty gas tank. At such moments, some motorists manage to achieve their goal in various ways, showing incredible ingenuity, while others, on the contrary, may panic, especially if the service is far away.
The gas tank flap often does not open in cold weather, but trouble also happens in warm weather. Despite all the working order of the mechanisms that drive the vehicle, the car will go nowhere until it is refueled, so if such a problem arises, you will have to take measures to eliminate it. Depending on the reason that provoked the situation, different ways to resolve the issue are used.
Detailed classification of gas tank caps
The motorist must understand that the cap is not just an element that blocks access to the tank. In a modern car, it also performs a number of other functions: it stabilizes the pressure inside the fuel tank, isolates gasoline or diesel fuel from the negative influence of the external environment, etc.
The fuel tank cap is an important functional element of the car.
The design of the element depends directly on the shape of the neck of the fuel tank. To the greatest extent, everything is determined by the diameter of the thread and the type (it can be external and internal). The depth of entry of the lid into the neck, volume, etc. also matters.
The cover material is always selected taking fire safety into account. This is especially important for cars equipped with gasoline systems. This type of fuel tends to explode under excessive pressure and is more sensitive to the effects of vapors.
Structurally, covers are divided into several types:
- The first option is the simplest. The lid is equipped with a single function - isolating the fuel liquid from the atmosphere.
- The second option is a complex system equipped with valves. The latter ensure stability of pressure inside the tank.
- Lids with lock. In addition to their basic functions, they protect the fuel tank from unauthorized entry.
- Models with memory. Such covers are specially designed for forgetful motorists; they are connected to the tank neck or hatch with a chain.
The cover with a plastic holder or chain is specially designed for forgetful car owners
In addition, covers are classified according to the type of locking mechanism:
- bayonet type, which close by changing the angle;
- threaded;
- shut-off, like on metal cans.
Bayonet and threaded caps are most often used. The first ones are easier to close and open, but they are rarely installed on passenger cars, mostly for tractors and trucks.
Threaded caps can be either internal or external threaded. The difference is in the location of the main and counter threads on the neck of the tank or the cylindrical surface of the lid.
Covers are also divided according to ventilation parameters:
- Valveless models are installed in fuel tanks that have autonomous systems for stabilizing pressure and capturing fuel vapors.
- Single-valve lids are equipped with tanks in which only a fuel vapor recovery system is used, but there is no separate stabilization system.
- Finally, lids with two valves are installed on tanks without autonomous systems. Their purpose is to stabilize the pressure when the gasoline level drops and to release fuel vapors.
Single-valve lids are most common these days. This is due to the design features of modern car models, equipped only with an autonomous fuel vapor recovery system.
Covers are also classified according to the type of theft protection:
- Standard options that do not have any protection.
- Models with a padlock suspended on special brackets.
- Lids with a conventional lock, the cylinder of which is vertically built-in.
- Code caps.
- Models with a lock that can be opened with the ignition key of a specific vehicle.
Standard covers have become more common because they are easy to install. However, recently there has been a demand for lids with combination locks. The padlock is practically out of use today. And covers with a lock that can be opened with the ignition key are found on some top foreign cars.
Fuel tank caps can also be classified according to the presence of additional components:
- with chain or plastic connector;
- with a special grooved handle for easy opening.
And finally, they can be metal or plastic, universal or designed for one car model.
How to open different lid models
Fuel tank caps can open in different ways. As a rule, this is easy to do on domestic cars, but on foreign cars it is much more difficult. To open the code hatches, you have to set the required ratio of numbers. In a word, as many models as there are so many ways of opening.
- A hatch that opens by pressing the corresponding button in the cabin. It is located either on the driver's side door or on the armrest.
The gas cap control button is located on the driver's door
- A cover that can be opened using a standard remote control for the central locking system. In this case, the hatch wiring is paralleled with the door locks.
- A version of the hatch that opens with a lever with a picture of a gas station. The lever, like the button, is located on the threshold of the driver's door.
- Simple lids open by lightly pressing them until they click. Then, holding the notch, you need to pull the hatch towards you.
The lid with a recess opens by pulling towards you
What not to do
First, let's go back a little to the previous section. You need to be very careful when heating the hatch with a hairdryer, as high heat can damage the paintwork.
When working with exhaust fumes, try to keep the hose away from your nose and eyes to avoid inhaling the exhaust.
Car fuel filler flaps on most cars are quite delicate, and they are easier to damage than it seems. This is also true for the following cars:
- Volkswagen Polo Sedan;
- Skoda Rapid;
- Nissan Teana;
- Renault Duster;
- Volkswagen Tiguan;
- Toyota Avensis;
- Volkswagen Passat;
- Lada Priora;
- Ford Focus;
- BMW X5;
- Skoda Octavia A5, etc.
Often on the same forums and thematic sites there are recommendations that contradict common sense.
No, if you deliberately want to damage your own car, feel free to use these methods. If you want to cope with freezing safely and without consequences, categorically refuse these methods.
I can highlight 2 most common mistakes. But first about WD40. A universal remedy used everywhere. In our case, it is a useless liquid. The effectiveness against freezing is zero.
And here's what you absolutely shouldn't do:
- Break out the hatch using physical force. The first thing the driver thinks of is to do just that. Some people pull with their hand, others insert a thin screwdriver into the gap and use leverage. Why shouldn't you do this? For starters, it's easy to damage the paintwork. But plus there is still a chance of breaking the hatch hinges, which are often made of plastic;
- Using boiling water. When freezing, this should absolutely not be done. Pouring boiling water over an icy hatch will probably cause problems with the paintwork. Especially when it’s below -15 degrees outside. Plus the water can penetrate even deeper. It is unlikely that you will then want to fight rust or remove water from the gas tank while simultaneously changing the hatch.
That's sorted out. If you have the idea of pulling out the door or pouring boiling water on it, remember the possible consequences.
Think before you act. Often the opposite happens.
Common faults
When the vehicle is actively used, the fuel tank cap deteriorates. In any case, there is no need to panic, almost all problems are easily fixed, and sometimes the cover can be easily replaced with a new one. The list of the most common malfunctions includes:
- freezing of the mechanism;
- plastic pin stuck;
- damage to the lock cylinder, etc.
Cover freezing
Freezing of the lid often happens during the cold season. The owner drives into a gas station to fill up and cannot open the tank. The hatch mechanism that maintains normal unlocking freezes. At low temperatures, the plastic pin hardens and is no longer recessed inside.
Freezing of the gas tank cap occurs as a result of the difference in air temperature outside and inside
Of course, this is not the fault of the automaker. The designers initially took care of the cover material at the development stage. In most cases, it is frost-resistant, but while driving the interior becomes very hot, hot air vapor circulates throughout the entire interior of the car, including the lid mechanism. The latter “presses” frost on the reverse side at low temperatures.
Thus, condensation forms on the lid. The pin is closest to the cold air. Moisture turns into ice, the hatch opening mechanism hardens, and the lid does not work well.
What to do? Obviously, the solution suggests itself. It is necessary to warm up the frozen parts, this will lead to the thawing of the mechanisms and their performance.
Experienced motorists recommend injecting VD-40 liquid into the mechanism with the onset of cold weather. After processing, you need to open and close the lid 2-3 times. This will prevent freezing.
To open the hatch cover in cold weather, just spray hot water from a thermos on it. The ice will instantly thaw and the mechanism will open.
Pin jam
If the lid does not open during the warm season, this is most likely due to the plastic pin being locked. Many modern hatches are controlled from the interior using an automatic lever. The latter can “walk” with difficulty and remain motionless when lifted. In such a situation, the cover will not react to the driver’s manipulations, since it is in the closed position, held by its pin, which is released when the central lock is opened.
The problem is solved with the help of an assistant. You can ask the passenger to hold the lever from the passenger compartment, and press the hatch from the outside. As soon as the lid opens a little, the motorist must react and pick up the hatch. If there is no assistant, the lever can be fixed in one position with a driver's mat or other object. To avoid damaging the car's paint, it is recommended to wrap the screwdriver in a cloth.
If the gas tank does not open, you can carefully pry it off with a knife or screwdriver
Under the trim in the luggage compartment on some cars there is an electric drive designed for emergency opening of the gas tank in the event of a malfunction. It is usually closed by a lid. To open the hatch, you need to insert your index finger into the rectangular hole, feel for the pin and slide it in the opposite direction.
Thread breakage
If the lid is threaded, it is less prone to breakage. However, if this happens, it cannot be unscrewed; the tank can only be opened by disassembling or breaking it. There is simply no other alternative extraction method.
Owners of cars with such a cap are advised not to allow the fuel tank to become completely empty in case they have to drive to the nearest service station.
Useful tips
Anticipating cold weather, it is better to take care in advance to prevent the problem of freezing of elements, leading to the impossibility of opening the hatch. Treating the hinges and locking mechanism with silicone grease will help prevent condensation from affecting the parts. It is better to treat rubber seals after each car wash; seasonality does not matter. In emergency cases, silicone grease will be replaced by a few drops of motor oil, which forms a protective film on the surfaces.
What should not be done when the hatch does not give in is to use brute force on the fragile structure, since this can quickly increase the scale of the disaster.
There are car models in which the gas tank flap does not open when the engine is started and the key is in the ignition. Under such circumstances, you need to turn off the engine and remove the key to open the lid.
In any case, it is initially necessary to figure out what exactly is the matter, what elements interfere with the correct operation of the mechanism and, already knowing the culprit in person, take appropriate measures to eliminate the problem of opening the hatch.
How to remove the fuel filler flap
Quite often, the gas filler door is removed and shown to a colorist to select paint colors. For example, if the car body has to be repainted or updated. It is held on by guides. To remove it, you need to open it slightly, pull it slightly towards you and move it carefully towards the front of the car. In this way, it is possible to remove the hatch legs from engagement with the guides.
The hatch guides hold the gas tank cap.
Heat the key with a lighter and carefully try to open it
To increase security, many owners of modern cars install a lock inside the hatch cover. During winter temperature changes, the moisture accumulated in the castle can freeze.
In the absence of special automotive chemicals, you can use improvised means. For example, use a lighter to heat the key and try to insert it into the lock.
Cover repair
If the cover is subject to adjustment, it is removed and repaired. Most often, the hatch and the drive cable that controls the lid from the passenger compartment are replaced.
Replacing the hatch
The cover hatch was described in detail above. It is supported on guides, which can easily be broken if careless. For example, on a Volvo car, the guides often break in these places.
The antennae of the hatch break in these places
You can make homemade fasteners by re-drilling the holes with a thin rod, as shown in the photo.
Drill holes with a thin drill bit
And then screw in the bolts, cut off their heads, and bend them. The result will be perfect new mounts.
We bend the bolt and get the perfect fastening
Replacing the cable
To get to the cable, you need to open the car trunk, lift the trim from the side of the compartment (from the tank side), remove the plastic door sill moldings, under which the cable is routed.
We remove the plastic moldings to get to the cable
Next you need to do this:
- Under the rear seat trim there is a lever that is responsible for opening the lid. You can also see the bolt here. It should be unscrewed.
The cable mechanism bolt must be unscrewed
- Then pull the mechanism along with the cable towards you.
The mechanism with the cable must be pulled towards you
- Change the cable by removing it from the mechanism and install a new one.
Hot air
A fairly effective way to warm a frozen lid is hot air. It must be used carefully, observing safety rules as much as possible.
It is important to be careful during this procedure, since vehicle exhaust poses a serious danger to human life and health.
Volkswagen Passat B6 club
We put some nano-lubricant into a syringe, I use a metal conditioner and alternately, without turning off the power, we lubricate the motor shaft on one side and the other, allowing the grease to flow into the bushings
Then we lubricate the lithium Volkswagen Jetta gas cap won't open the worm of the locking mechanism, drip it onto the hexagon of the motor and insert it into the worm, put everything assembled in place: Pay special attention to the spring bracket for fixing the rotation of the locking rod Full size Don't forget to put the latch spring!
Close the lid and latch it. We assemble in reverse order. How to open the hood of a Volkswagen Jetta Most often, it is not possible to open the hood of a Volkswagen Jetta due to a broken cable. This problem can be solved in several ways, depending on the location of its break: If the cable is frayed closer to the passenger compartment, find the broken end of the cable, grab it with pliers and pull; If the cable breaks under the hood, in this case you will need a Volkswagen Jetta; the gas tank cap does not open; access to the hood lock.
To do this, remove the radiator grille, feel for the cable using a metal wire and open the hood of the car. Autopsy of a Volkswagen Jetta If a problem of any level of complexity arises, do not rush to solve it yourself.
Most often, such actions not only do not give the expected result, but also lead to damage to the car. Our company provides services for emergency opening of all brands of cars around the clock.
We work throughout Moscow and the Moscow region. To call a specialist, contact our manager in any convenient way - by phone number or through the Volkswagen Jetta fuel tank cap won't open application on the website. The master will arrive in 15 minutes. Rating 5. I applied the gel for supermoment.
As a result, the hatch is blocked, the structure does not fall apart even when pressing hard on the hatch. In order to remove the 2l battery, we turn on the hidden functions of the Ford Focus. Renault Megane II owner's story - breakdown.
How to remove the gas tank flap on a Volkswagen Polo sedan - let's look at the essence
I decided to somehow refuel, it’s about -5 degrees outside, I paid, I go up to the car, I’m trying to open the hatch of the Volkswagen Jetta, the gas tank cap won’t open and it doesn’t want to open... pull. Czech Skodas also have a similar operating system for the gas tank hatch. The culprit of all small problems is the unfortunate drive blocking the gas tank flap. How to remove the rear light on x-t31 while waiting for replacement. Simply turn it off manually and the life of the car owner will become even easier.
But the joke may lie elsewhere. How to remove the gas tank flap on a Volkswagen Polo. How to remove the rear seat on a Renault Logan?
Even though they stuff them with various winter packages. Not always right. The first time everything was fine, I opened the hatch the first time and filled it up.
And yesterday the Volkswagen Jetta gas tank cap does not open for refueling and I could not open the hatch humanly, nothing happened at all when the Volkswagen Jetta gas tank cap does not open to this cap. I've already locked and unlocked the car 5 times and pressed the hatch differently this way and that - nothing helped, I had to take out a screwdriver and just forcefully pry the hatch into the crack and open it. Surprisingly, with such a barbaric method nothing was broken, the lock remained alive. I couldn’t find any particular information on the Internet on how to treat it.
I took it myself, took off the cover, somehow unscrewed the rubber base itself, which is held at the neck of the gas tank, and took out this part, in which a motor, springs and a couple of plastic mechanisms are hidden. I took the whole thing apart, sprayed it with WD, and the lock began to move smoothly like a clock. I collected and put all this equipment back. Opens and closes well the first time. Apparently, it was assembled incorrectly or the motor stopped working altogether. For now I left everything as is.
Frozen cable
There are also gas tank locks that are unlocked using a lever in the cabin. It is usually located to the left of the driver's seat on the floor or under the dashboard, next to the hood release lever. Such systems are often used on Japanese and Korean cars of all classes, including the KIA Soul, as well as on some premium crossovers, for example, Nissan.
From the lever in the cabin under the floor there is a long cable, through which a metal lock is driven, returned back by a spring. This cable is subject to temperature changes. In case of minor damage, water gets inside and can freeze, stopping the operation of the device. In addition, after washing, the metal latch that blocks the fuel tank door easily freezes.
It can only be unlocked if a large amount of anti-freeze chemical is spilled on it. Moreover, this operation can be difficult to carry out, since the constipation is located on the side and a stream of alcohol simply does not reach it. If the cable is frozen, which often happens on cars older than 10 years, then you won’t be able to get by with a spill. You will have to warm up the entire car, since it is not always possible to get to the place of microdamage. Although very often such a cable defrosts by itself from the heat coming from the passenger compartment. It is enough to warm it up well during the trip.
It is best to prepare in advance for cold weather. If, according to forecasts, a thaw should give way to frost, then you can stock up on silicone grease in advance and generously lubricate the mechanisms behind the tank neck hatch with it while the weather is still warm. The lubricant will prevent water from entering and wetting the locks, thereby reducing the risk of freezing.
Selecting paint
Most often, the hatch is removed to select paint. This is the most optimal method if local body painting is necessary. Many people try to select a color for their car based on the number indicated on the nameplate. But it should be borne in mind that different cars produced at the same factory and painted the same color may have different shades. As a result, your repair will be visible to the naked eye. That is why experienced car enthusiasts recommend removing the hatch and using it to select paint. There are 2 methods of searching for paint:
Introduction
There may be several reasons why the gas tank flap may not open; most often, the lid simply does not want to open after washing or in the cold season. Car owners who do not have much experience can easily get confused in such a situation, because there may be too little fuel in the car and there is simply no way to even get to the nearest service center. In such a situation, it is important not to get upset, but to actually apply a number of simple tricks. Let's look at some useful recommendations that have helped more than one hundred drivers.
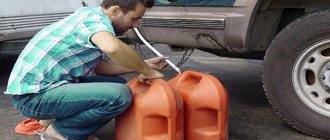
Repairing a gas tank using a bolt and a rubber gasket, step by step
First of all, using available means, expand the punch hole of the gas tank to a diameter corresponding to the bolt. Next, place a washer with a rubber gasket on its narrow part. After this, the entire structure must be inserted into the hole through the neck. A cuff with a washer is mounted on the outside and tightened with a nut.
The result of repairing a gas tank using a rubber gasket and a bolt
It is important that the rubber is petrol resistant. Not every car owner carries such material in the trunk
As a replacement, you can take a camera from any truck. This patch is considered quite durable. If installed correctly, you can wait a while before going to a service station. This method is often used by truckers who spend most of their time on the road. A good patch can last more than five years.
Most common problems
Depending on the reason why the gas tank flap does not open, there are different methods to solve the problem. You can cope with the task on your own; no special skills are required for this, but it is important to know what caused the trouble in order to, based on this, determine what actions should be taken.
The hatch opening mechanism is frozen
In winter, at sub-zero temperatures, freezing of the gas tank cap, or rather the unlocking mechanism, is not uncommon. This is due to the fault of condensation formed due to the temperature difference in the cabin and outside, and subsequently freezing as the temperature drops.
Every motorist should know how to safely open the gas tank cap, since some barbaric methods can cause damage to the hatch hinges or bodywork. In this case, you cannot use force; local heating will help to defrost the hatch unlocking mechanism effectively and without unpleasant consequences. Taking the car to a warm garage or service station, which will solve the problem in a matter of minutes, is not always possible, so this method is not suitable for anyone. If you have a hair dryer and a power source at hand, you can use the device to warm up the hatch. You must act with caution, since the power of the hair dryer is quite high and there is a risk of damaging the paintwork. Another method involves using exhaust gases for good, which requires a hose that is directed from the pipe to the hatch. To defrost the mechanism under such conditions, up to five minutes is enough.
Car owners often use the universal WD-40 fluid (almost every driver has it and can use it for business purposes or not), and they treat the plastic pin of the mechanism with it using a syringe squeezed through an elastic band. After thawing, the lid is opened and closed several times. There are also specialized products designed for defrosting; they are abundant on the auto chemical market, so in harsh climates it is better to get a liquid and carry it in the car.
Plastic pin stuck
It also happens that the problem occurs in the warm season, then we are talking about the jamming of the plastic pin that holds the lid and is released when the central lock is opened. Often the hatch control is accessible from inside the car using a lever; it can get stuck, but the hatch remains in the closed position.
Car gas tank flap control
If you have an assistant, you can use him to correct the situation by asking him to hold the lever in the cabin. In this case, you should press the lid from the outside, and as soon as it opens slightly, pick it up and open it (using a screwdriver, it is better to wrap it in a soft rag to avoid damaging the paintwork). In the absence of a second person, the lever will have to be secured using improvised objects; it must be secured in the open position. After opening, the mechanism and rubber seals are treated with WD-40 or silicone grease.
When it is warm outside and the possibility of freezing is excluded, the problem may also be a broken cable, which is directly involved in opening the hatch. To assess the situation, remove part of the trim, you can also open the door by pulling the cable from the inside, and some car models are equipped with an electric emergency opening drive. If repairs are necessary, there is nothing left to do but remove the gas tank cap from the hinge, for which you need to open it slightly, pull it towards you a little, and then push it forward to the side so that the fasteners come out of contact with the guides.
The problem is with the gas cap screwing into the neck.
A lid with a thread is rarely subject to malfunctions, but is still not immune from this. If it happens that the gas tank flap of this type does not open properly, the breakdown requires immediate repair.
When the cap that screws into the neck stops working, that is, unscrewing, it is better that the motorist has enough fuel to get to the service station. In this case, opening the gas tank flap in a gentle way is impossible; the cap will have to be either broken out or disassembled. There are minimal options here and you won’t be able to remove it safely. If possible, the car owner should not wait until the tank is completely drained so that there is enough fuel to go to the service center if a problem arises.
Opening the lid without a key
The hatch, which is locked with a key, is blocked without it, preventing unauthorized persons from profiting from the fuel. However, it happens that the car owner himself loses access to the treasured door and cannot refuel.
If the key to the fuel tank cap, which previously opened the hatch, malfunctions or is lost, a Phillips screwdriver and a self-tapping screw will come to the rescue. The design of the locking lid involves an external movable and an internal fixed part; they rotate relative to each other without opening. At the same time, the key acts as a lock for the element, thereby ensuring the opening of the hatch. As a result of its breakdown or absence, the car owner can no longer use the cover as before and drastic measures cannot be avoided.
How to open the gas tank without a key:
- To connect the parts of the structure, a self-tapping screw is screwed into the cover approximately 75-80% in depth. To make the task easier, you can first drill a hole in the place where you intend to screw it in;
- Now both parts are connected, which means the lock is unlocked, and the plug can be easily unscrewed by hand.
After breaking in, the locking mechanism is faulty, but nothing prevents you from using the lid further without using a key; if necessary, it can be replaced at any time.
How to open a coded gas tank cap if you forgot the code
Code covers that protect against tampering by outsiders have a complex design; their operating principle is similar to those that can be locked with a key. There is no complete guarantee of protection against unauthorized access, since if you wish, you can select the code in a few minutes. The design includes a movable part with numbers and a fixed part. The driver fixes the moving part in the desired position (in accordance with the code values) and opens the cover. It happens that drivers forget the numbers that unlock the lock, in which case they will have to tinker a little to open it.
The lock code can be changed by disassembling the mechanisms and simple manipulations with rearranging parts:
- Use a screwdriver to remove the retaining ring and remove part of the cover;
- we take out the springs and the lock of the elements that create the code (matrices);
- remove the matrices and open the lid;
- when all the dies are removed, a new code can be created by turning the moving part;
- We reassemble the structure in reverse order.
If the lid breaks, you can use the same radical method as in the case of the locking mechanism.
Prices for autopsy
What is better Hyundai Solaris or Volkswagen Polo
Opening the trunk, hood, gas tank
Transmission locks
How to open the hood in a Polo?
The reason why the hood does not open in a car of this model, in most cases, is a broken cable. The cable can break either at the base near the handle in the cabin or in the center - deep in the engine compartment.
In the first case, it is easier to get out of the situation - you can reach the end of the cable from the interior with any device with a hook-shaped end (for example, you can make it from a knitting needle). In the second case, you will have to act like this:
- Remove the left wheel, radiator grille or engine protective pan from the bottom of the car;
- Through the resulting opening, insert a knitting needle or any other metal rod with a hook-shaped end into the engine compartment;
- Feel for the end of the cable, pull sharply - the hood lid will rise.
How to unlock the trunk?
Opening the trunk can be difficult for various reasons - a broken lock, faulty wiring. Regardless of the reason, the autopsy will have to be performed from the inside.
First you need to recline the rear seat backs, regardless of what type of body the car has - hatchback or sedan. Climb into the trunk from the inside and remove part of the trim in the area where the lock is located, removing the fastening clips. Then remove the plastic plug on the inside of the luggage locking mechanism - a hole will appear. You need to insert a screwdriver into this hole and make a few turns. All you have to do is go to the trunk from the outside and lift it with your hand.
It happens that the trunk does not open when the air temperature is below freezing. The reason is the transformation of condensate accumulated in the lock cylinder into ice. You can solve the problem by using a defrosting spray or heating the mechanism with a hairdryer.
How to open the Polo door?
The most common reason for not being able to get into the car is the keys being forgotten inside. It is impractical to break glass in such a situation - you will not only have to spend money on restoring the car window, but also remove fragments from the door structure. You can open it like this:
- Using a screwdriver, bend the upper corner of the driver's door from the body (it is better to wrap the bending point and the shaft of the screwdriver with electrical tape or tape so as not to scratch the paintwork);
- Take a rigid metal rod with a diameter of about 6 mm, bend one of the ends into the shape of the letter L;
- Carefully insert the resulting device into the interior through the opening formed in the place where the door structure is folded;
- Pry the inside lock handle and open the door.
How to open the gas tank in Polo?
If you cannot open the gas tank of your car, most likely the locking tab of the lock has rusted, which has led to it jamming. You can get out of the situation like this:
- In the trunk of the car, remove part of the trim in the area where the hatch is located;
- Stick your hand into the resulting opening;
- Feel for the locking tab and move it with your hand - the gas tank cap will open.
To avoid such complex manipulations in the future, all rusted elements must be cleaned and treated with a water-repellent agent with anti-corrosion properties.
Remember: if you are not confident in your own abilities or it is not possible to open the car using non-destructive methods, it is better to call a specialist. With many years of experience and professional tools and equipment at his disposal, he will open cars of any make and model. All work will be done quickly and accurately. The locking mechanisms will remain in working order, the body and paintwork will not be damaged.
Need to open a Volkswagen Polo? Call, the master will arrive within 20 minutes!
LOCKSERVICE service is a company that will help you as quickly as possible if problems arise with locks in Volkswagen Polo cars. We will quickly and professionally solve any problems with the locking system. Our specialists know how to open a Volkswagen Polo without a key. Our help may be needed in various difficult situations:
- The doors locked spontaneously, the keys remained in the cabin;
- The battery is dead;
- The lock cylinders are faulty or dirty;
- Locks froze in the cold due to moisture that accumulated on the seals;
- The key is lost or broken;
- The alarm went off from the inside and the driver was locked inside the car;
- The car stalled in a traffic jam, the central locking was blocked;
- The key fob is discharged, the car does not open;
- The lock in the glove compartment is broken;
- The trunk does not open;
- The key broke in half in the door keyhole;
- The gas tank cap does not come off;
- The lock of the tank filler cap is broken.
Selecting paint
Most often, the hatch is removed to select paint. This is the most optimal method if local body painting is necessary. Many people try to select a color for their car based on the number indicated on the nameplate. But it should be borne in mind that different cars produced at the same factory and painted the same color may have different shades. As a result, your repair will be visible to the naked eye.
That is why experienced car enthusiasts recommend removing the hatch and using it to select paint. There are 2 methods of searching for paint:
- If you want to choose the paint yourself, the easiest way is to do it from a catalog. To do this, you need to take the hatch and visually compare it with similar samples. Select the most suitable color sample. This method is not very reliable. The risk of error is quite high. Therefore, before painting, apply color to any metal plate, and after drying, compare how suitable the chosen color is;
- Increasingly, specialized computer equipment is being used to select colors. To do this, it is best to contact specialized centers. The process involves scanning the coating and selecting a color based on the base.
Article on the topic “How to find out the paint number of a car by VIN code.”
Conclusion
. The gas tank flap can be removed in a very tricky way, but at the same time, there is very little information about this work. Therefore, the question of how to remove the gas tank flap is not uncommon. It must be remembered that this procedure differs for almost all car models.
Lada Kalina
Removing the hatch from the gas tank on this model is quite problematic. It is fixed quite cleverly:
- First, unscrew the nut securing the tank lid leash. To do this you will need a key for 7;
- Next, the lid itself is pulled out;
BMW e34
. On this model, the hatch is secured with a hinge. The fastener is made in the form of a plastic frame with reed fasteners. In this case, 2 fastenings are located at the top and 1 at the bottom. First, use a screwdriver to press out the upper fasteners. After which the loop is removed from the car along with the hatch.
Skoda Octavia. On this car, the hatch can be removed extremely easily. First, unscrew the tank cap. To prevent any objects from getting into it, the filler neck is plugged with something. Next, use a screwdriver to press the seal away from the neck. Having freed it from the seal, simply pull out the entire hatch structure. Installation is performed in reverse order.
Kia Spectra. To carry out the work you will need a minimum number of tools, only 2 screwdrivers. One is spline and the other is cross. First, use a slotted screwdriver to remove the plug cable clamp. After that, use a Phillips screwdriver to unscrew the loop; it is secured with 2 screws.
Daewoo Lanos
. On this model, the hatch is secured with two screws. There shouldn't be any problems dismantling it. When reinstalling, the most difficult thing is to tighten the first screw.
Comments:
How to open a frozen gas tank door.
how to make a sunroof on a car with your own hands what to do if the lock of the gas tank flap is frozen If you turn the sound to zero on the standard radio, the song stops, the radio becomes paused. Then, when the volume is increased, playback starts from the same place. By pressing and holding the MENU button on the standard radio, service information appears on the screen. By turning on the ignition, but without starting the car, you can press the mileage reset button and find out the number of kilometers until the next service or the number of days. To inflate the wheels there is no need to remove the cap, it has a valve and you can inflate directly through it.
When you open the driver's door, you hear the sound of some kind of electric motor for a few seconds - this is the gas pump creating the necessary pressure to pre-pump fuel. In order to change or tilt the wipers to the service position, you must turn off the ignition, do not remove the key, press the lever down once - the wipers will take a vertical position.
The main thing is not to forget to lower the blades onto the glass after replacement.
Lada Kalina
Removing the hatch from the gas tank on this model is quite problematic. It is fixed quite cleverly:
BMW e34 . On this model, the hatch is secured with a hinge. The fastener is made in the form of a plastic frame with reed fasteners. In this case, 2 fastenings are located at the top and 1 at the bottom. First, use a screwdriver to press out the upper fasteners. After which the loop is removed from the car along with the hatch. Skoda Octavia. On this car, the hatch can be removed extremely easily. First, unscrew the tank cap. To prevent any objects from getting into it, the filler neck is plugged with something. Next, use a screwdriver to press the seal away from the neck. Having freed it from the seal, simply pull out the entire hatch structure. Installation is performed in reverse order. Kia Spectra. To carry out the work you will need a minimum number of tools, only 2 screwdrivers. One is spline and the other is cross. First, use a slotted screwdriver to remove the plug cable clamp. After that, use a Phillips screwdriver to unscrew the loop; it is secured with 2 screws. Daewoo Lanos . On this model, the hatch is secured with two screws. There shouldn't be any problems dismantling it. When reinstalling, the most difficult thing is to tighten the first screw.
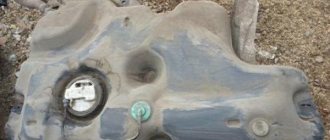
4.4.7. Volkswagen Polo. Supply system. Removing the fuel tank.
The fuel tank is removed for washing or replacement. We carry out the work on an inspection ditch or overpass. Remove the fuel tank complete with the filler pipe. We carry out operations with the tank no more than half full. Relieve the fuel pressure in the power system and disconnect the tip of the outlet tube from the fuel filter fitting (see “Replacing the fuel filter”). Inside the car, disconnect the wiring harness block from the connector of the fuel module cover (see “Removing the fuel module, replacing the strainer”).
Having opened the fuel tank filler flap, unscrew the cap.
Using a Torx T-20 wrench, unscrew the screw securing the filler neck seal...
...and remove the seal with the drain hose.
Remove the right rear wheel arch liner (see “Removing the rear wheel wheel arch liners”). We dismantle the rear suspension beam (see “Removing the rear suspension beam”).
Using a 10mm socket, unscrew the two bolts securing the filler pipe to the right side of the body. The rear bolt also secures the ground wire tip.
Disconnect the tube tips from the canister fittings of the fuel vapor recovery system (see “Removing the fuel vapor recovery system canister”).
By pressing the latch of the tip of the tube for supplying fuel vapor to the canister purge valve, disconnect the tip from the tube connecting to the adsorber.
Two clamps holding the fuel tank to the bottom of the body are secured with bolts (two bolts per clamp).
Location of the fuel tank clamp bolts.
We place an adjustable stop under the fuel tank through a wooden spacer.
Using a 13mm socket, unscrew the four bolts securing the tank clamps...
...and, lowering it on the stop, remove the tank assembly with the filler pipe, fuel filter and pipes.
Install the fuel tank in reverse order. Tighten the clamp fastening bolts to a torque of 25 Nm.
Installing a lock on the tank flap VAZ 2101-2107
You can install a lock like a mailbox, but these locks can be opened with almost any powerful screwdriver or wrench. Personally, when I lost my key and came to a car service for advice. The master broke the internal insert in 15 seconds and opened the hatch.
Some car owners install an electric lock and place a button directly in the passenger compartment to open the tank hatch. Let's imagine that an attacker wants to drain gasoline and sees that there are no locks, but the hatch does not open as usual. Most likely he will try to pry off the hatch with a screwdriver or crowbar. As a result, you will receive a scratched and bent rear wing element, the cost of which will cost much more than the cost of gasoline. Agree, this is not a very bright prospect.
There is a way to install an alarm sensor on the gas tank flap. In principle, it’s a pretty effective way to protect your gasoline from being drained. However, if thieves are constantly operating in your area, then in the end, the alarm going off every night can infuriate all the neighbors of your house and ruin your relationship with them.
Personally, my choice in solving this issue fell on a metal glass, which I installed in the neck of the tank. After that, for more than a year, no one tried to drain the gasoline from my seven, although earlier in a week I could come to an empty tank up to 3-4 times in a row. In addition, I took several photographs of the already installed glass in the neck of the VAZ 2107 tank.
After watching a bunch of videos on YouTube on the Internet and reading quite a few articles, I realized that many craftsmen make this glass either from an old stabilizer bar or from a metal pipe of different diameters. Personally, I made my glass from 2 plumbing pipes.
You can see the diagram in the figure. I will explain my choice of this design by the following factors. First I made a regular 150 mm glass from a pipe. When I first poured gasoline from the pistol, I encountered a problem that the fuel under high pressure did not have time to escape and the pistol was constantly firing.
The use of a longer glass, as well as an increase in the diameter and number of holes, would improve the passage of fuel. However, in this case it is necessary to always not add a decent amount of fuel. In my case, I often go to the country and the distance between gas stations is quite long, especially in rural areas.
It is for this reason that I radically changed the design of the glass and additionally welded a tube of a smaller diameter to the bottom, where I placed a pair of wires at the ends to make it impossible to insert hoses of any diameter. In this case, when filling, the fuel goes out with a bang and does not have time to fill the glass even with strong fuel pressure. The design of the glass does not allow it to damage its weak points at the place where the wire is welded using either a crowbar or another tool and, accordingly, to get to the desired fuel.
They installed a code cap on the gas tank, did not write down the code and forgot what to do.
There are quite a lot of options, there are options with saving the lid, there are options without saving.
Of course, these methods are used almost perfectly by petty criminals who siphon gasoline, but an ordinary user sometimes needs to open such caps if they have forgotten the code.
One of them is to buy this cooling spray,
They puffed and unscrewed the code cover, the lock mechanism would simply freeze and the cover would unscrew without any problems.
The same actions, but without a spray, can be done in winter: pour water on the lid, the water freezes and calmly unscrew the lid.
The most difficult way is to select a code combination, it will take a lot of time, but you can find it.
Another option is to jam the lid skewed, insert a certain metal plate under the lid (something wooden under the plate so as not to crush the metal), press on the plate, the lid will become skewed, unscrew it counterclockwise (constantly press down on the plate).
Another option is to screw in the self-tapping screw under the numbers by dialing the code, press the dial, press it inward, screw in the self-tapping screw and unscrew the lid.
You can simply knock out the lid like a champagne cork, put a lever under the lid and sharply press down.
In general, coded caps are not reliable, they open “at once”, it is better to buy a cap for the gas tank, with a key lock.
It’s even better (if gasoline is often drained) to install an alarm on the gas tank door, or a lock on the door.
The most drastic option is to transfer the gas tank from one side to the other.
We can only advise you to try to change the code - it is written in the instructions..
: ..alas, I’m not an expert in opening gas tank caps - so I can’t say...: : I can only advise you to try to change the code - it’s written in the instructions..:
Analogs
In warehouses: 113 pcs.
Characteristics
| Order code | 001426 |
| Articles | 2101-1103010 |
| Catalog group | Engine, ..Engine power system |
| Width, m | 0.08 |
| Height, m | 0.03 |
| Length, m | 0.08 |
| Weight, kg | 0.2 |
Options
| Delivery time upon order | 12 |
Shipping territory
Other partner warehouses and stores
+7 (ext. 7576 or 7585) [email protected] Shipments only for legal entities by pre-order
Mon-Fri: from 9:00 to 18:00, Sat, Sun: closed
Repairman actions
All work is carried out carefully and consistently:
- Drilled lid in this place, and the self-tapping screw is screwed in. This is necessary in order to connect both parts of the lid.
- After screwing in the self-tapping screw to 75–80 percent of the depth, both parts of the cover are connected, and it can be unscrewed with your fingers.
The cap now be unscrewed and screwed in without using a key. You can leave this matter like this and wait a while before replacing it. Lid
with a self-tapping screw it will perform its functions for a long time, but without a key.