Chevrolet Cruze (Chevrolet Cruze) - debuted on the global car market in 2008, in Russia its implementation began in 2009. Localized versions of the car were produced in 2009, 2010, 2011, 2012, 2013, in 2014 the car was restyled, in this form the car continues to be produced in 2015, 2016, 2022, 2022, 2019 (but since 2015 outside Russia because General Motors decides to leave the Russian car market).
This article discusses fuse and relay diagrams for a sedan, hatchback and station wagon with an engine capacity of 1.6, 1.8 and 2.0 liters.
In this article you will find information about where the fuse and relay blocks are located with their diagrams, descriptions and purposes. Let us especially highlight which fuses are responsible for the cigarette lighter and washer.
Where are the fuses and block located on the Chevrolet Cruze?
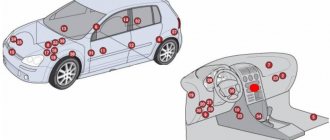
The Chevrolet Cruze fuse and relay box is scattered in two places.
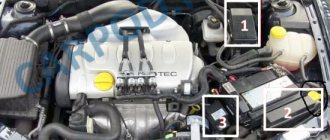
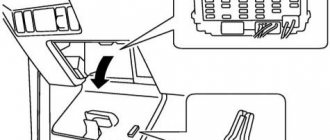
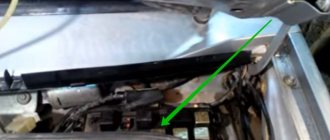
Relay and fuse box under the hood
It is located on the right, between the pillar and the neck of the windshield washer reservoir. It is held in place by three side clips.
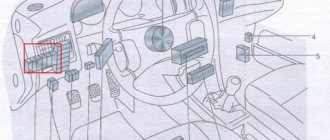
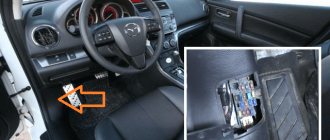
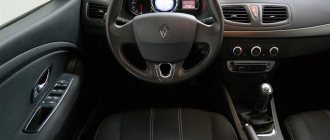
Fuse box in the passenger compartment
Located to the left of the steering column, under the storage compartment. To gain access to this Cruz mounting block, you will have to remove the lid of this box. Quite a strange and inconvenient decision (editor's note).
Fuse burned out
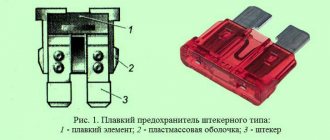
Each section of the electrical network is protected by a special fusible element. At permissible current values, there is a risk of wire burnout. For protection, the fuse burns out. This is one of the most common causes of car cigarette lighter failure. In the event of such a malfunction, it is necessary to replace the cigarette lighter fuse located in the Chevrolet Cruze mounting block.
The location of the block is shown in the photo. It is located on the front panel, to the left of the steering column, under the decorative cover. To get to it, you need to press the button and pull the panel up. The block contains relays and fuses, and a layout diagram is located on the back cover.
Fuse F6, rated 20 amperes, is responsible for the cigarette lighter. To remove the element, you will need tweezers or small pliers. It is prohibited to install a fuse designed for a higher current strength than specified by the manufacturer. Otherwise, it is fraught with a short circuit, cable damage, and fire.
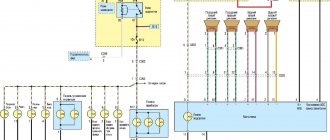
Chevrolet Cruze relay and fuse diagram under the hood
Relay
| Number on the diagram | What is he responsible for? |
| R1 | Air conditioning compressor drive clutch |
| R2 | Starter traction relay |
| R3 | Engine cooling fan (K7) |
| R4 | Front wiper mode (speed) relay |
| R5 | Front wiper relay |
| R6 | Not used |
| R7 | Engine control system main relay |
| R8 | Fuel pump relay |
| R9 | Engine cooling fan (K2) |
| R10 | Engine cooling fan (short circuit) |
| R11 | Not used |
| R12 | Engine cooling fan (short circuit) |
| R13 | Engine cooling fan (K1) |
| R14 | Not used |
| R15 | Ignition relay |
| R16 | Pre-heating system (diesel) |
| R17 | Heated exterior mirrors |
Circuit breakers
| Number | What protects | Amperage, in A |
| 1 | Transmission control unit | 15 |
| 2 | The engine control unit | 15 |
| 3 | Not used | — |
| 4 | Canister air solenoid valve | 10 |
| 5 | Ignition fuse | 15 |
| 7 | Not used | — |
| 8 | Fuel injection system | 15 |
| 9 | Fuel injection system, ignition system | 15 |
| 10 | The engine control unit | 15 |
| 11 | Oxygen concentration sensor | 10 |
| 13 | Canister solenoid valve | 7,5 |
| 14 | Not used | |
| 15 | Rear window wiper | 20 |
| 16 | Ignition, cabin air quality sensor (air conditioning system) | 7,5 |
| 17 | Ignition, airbag | 5 |
| 18 | Throttle position sensor | 10 |
| 19 | Not used | |
| 20 | Fuel pump fuse (fuel pump for gasoline engines) | 20 |
| 22, 23, 29 | Not used | |
| 30 | ABS fuse | 15 |
| 31 | Body Control Module | 20 |
| 32 | Same | 20 |
| 33 | Front seat heating fuse | 30 |
| 34 | Sunroof (optional) | 25 |
| 35 | Audio system | I 30 |
| 36 | Not used | |
| 37 | Right high and low beam headlight fuse | 10 |
| 38 | Left high and low beam headlight fuse | 10 |
| 39,4 | Not used | — |
| 46 | Cooling fan | 10 |
| 47 | Oxygen concentration sensor | 10 |
| 48 | Fog light fuse (FTF) | 15 |
| 49,5 | Not used | — |
| 51 | Sound signal | 15 |
| 52 | Instrument panel fuse | 15 |
| 53 | Electrochromic mirror | 10 |
| 54 | Light switch, light control | 5 |
| 55 | Mirror folding fuse | 7,5 |
| 56 | Windshield washer | 15 |
| 57 | Steering column lock | 15 |
| 58 | Not used | — |
| 60 | Mirror defroster fuse | 7,5 |
| 61 | Mirror defroster fuse | 7,5 |
| 62 | Air condition | 10 |
| 63 | Rear window sensor | 7,5 |
| 64 | Air quality sensor | 5 |
| 65 | Rear fog lights | 7,5 |
| 66 | Rear window washer | 15 |
| 67 | Fuel supply control unit | 20 |
| 68 | Not used | — |
| 69 | Battery voltage sensor | 5 |
| 70 | Rain sensor fuse | 5 |
| 71 | Not used | — |
Fuse links
| Number | What protects | Amperage, in A |
| 6 | Windshield wiper | 30 |
| 12 | Starter traction relay | 30 |
| 21 | Rear power windows | 30 |
| 22 | Not used | — |
| 24 | Front electric windows | 30 |
| 25 | Electronically controlled vacuum pump | 20 |
| 26 | ABS | 40 |
| 27 | Electronic key control system | 30 |
| 28 | Heated rear window | 40 |
| 41 | Not used | — |
| 42 | Engine cooling fan | 40/30/20 |
| 43,44 | Not used | — |
| 45 | Engine cooling fan | 40 |
| 59 | Diesel fuel heater | 30 |
Chevrolet Cruze High Power Fuse Box
The fuse box is located on the battery cover:
Numbering and decoding of protected circuits:
| 1 | 100 | Fuse Box - Instrument Panel |
| 2 | 100 | Fuse Box - Instrument Panel |
| 3 | 80 | Electric Power Steering (EPS) (NJ1) |
| 4 | — | Not used |
| 5 | 250 | Fuse Box - Additional Battery |
| 6 | 250/ 500 | Starter motor |
Chevrolet Cruze fuse diagram in the cabin
| Number | What protects | Amperage, in A |
| 1 | Infotainment system, hands-free telephone | 10 |
| 2 | Not used | — |
| 3 | Body Control Module | 25 |
| 4 | Infotainment system | 20 |
| 5 | Information display, parking assist | 7,5 |
| 6 | Cigarette lighter fuse | 20 |
| 7 | Plug socket | 20 |
| 8 | Body Control Module | 30 |
| 9 | Body Control Module | 30 |
| 14 | Diagnostic connector | 5 |
| 15 | Airbag | 10 |
| 16 | Central locking, rear tailgate | 10 |
| 17 | Air conditioner | 15 |
| 18 | Not used | — |
| 19 | Gear shift lever | 5 |
| 20 | Not used | — |
| 21 | Devices | 15 |
| 22 | Ignition, electronic key control system | 2 |
| 23 | Body Control Module | 20 |
| 24 | Body Control Module | 20 |
| 25 | Steering column lock | 20 |
| 26 | Not used (or rear power socket optional) | — |
| 10 (fuse link) | Body Control Module | 30 |
| 11 (fuse link) | Electric fan for heating and air conditioning system | 40 |
| 12 | — | — |
| 13 (fuse link) | Heated seats | 25 |
→ Choose the best MTPL from all insurance companies on Sravni.ru! You can save up to 3,000 ₽
→ Map for motorists Tinkoff Drive! Bonuses: 10% on purchases at any gas station, 5% for car services (wash, car service, parking). From 0 ₽ per month - cost of service.
How to use it correctly
The design of the system is simple - the Chevrolet Cruze cigarette lighter consists of two main parts. The first is a socket where three wires are connected (a pair of positive, one negative), and the second is a rod connected to the connector. Inside the latter is a thin metal thread. After turning on the Chevrolet Cruze cigarette lighter, the contacts close and the coil begins to heat up. After 15-20 seconds, the temperature reaches its maximum, and then the sensor is triggered, snapping the cigarette lighter rod into its original position.
Three cables are connected to the device on the Chevrolet Cruze.
- The main plus. Connected to the positive terminal of the battery through a fuse. Guarantees heating of the coil itself. Typically red.
- Plus. The positive cable is responsible for the operation of the backlight. Usually yellow or white.
- Black cord. The negative is connected to the body of the device, and the other end goes to the car body (ground).
Usually the device breaks down due to a violation of the car's operating rules and the fuse trips. To avoid untimely replacement, you should properly maintain the Chevrolet Cruze cigarette lighter and follow the advice.
- Do not connect powerful devices to the car cigarette lighter socket, otherwise the fuse will burn out. The maximum power of installed devices should not exceed 240 Watts. The formula for calculating the data is P=I*A. Here I is the voltage of the electrical circuit (12 Volts), and A is the maximum amperage for a given section (20 amperes).
- Do not replace the Chevrolet Cruze fuse with an element designed for a higher current strength than that recommended by the manufacturer (20 amperes). Failure to comply with the rule will result in a short circuit, overheating of the wires, damage to the insulation or fire. The fuse will need to be replaced again.
- It is advisable to periodically check contact areas and remove plaque using sandpaper or needle files.
Video about the benefits of an additional cigarette lighter
Some trim levels have two connectors, including for rear row passengers.
The market sells an armrest from the LTZ configuration, which can be installed instead of the standard one. All you need to do is remove the old part and install the new one. You can install an additional cigarette lighter anywhere. You will need:
- drill with a bit of suitable diameter;
- spare wires;
- soldering iron with solder;
- insulating tape;
- spare parts.
Today you can buy different types of cigarette lighters on the market. It is better to choose original production parts. Their article number is 13502522 for the front row and 96984264 for the rear. The price of the device ranges between 500 – 1100 rubles. The part must be perfectly packaged, have holograms and certificates of conformity. A detailed video on how to replace the cigarette lighter, fuse, and install an additional connector on a Chevrolet Cruze is posted below.
Causes of breakdowns
There are a number of factors that affect the performance of a part on a Chevrolet Cruze. The most common types of breakdowns.
- Faulty fuse. Each section of the automotive circuit is designed for a certain current strength. The maximum fuse rating is 20 amps. When connecting too powerful devices or due to a short circuit, this parameter may exceed the acceptable limits. To protect the wiring from damage, the fuse blows. It is necessary to change the element to restore the operation of the device.
- Short circuit. A constantly blown fuse hints that the system is shorting. To find the short one you will need a tester. It is necessary to ring all the cords going to the Chevrolet Cruze cigarette lighter, check the battery voltage with the ignition off and on. If the change is more than 0.5 volts, then the system is faulty and the fuse will need to be replaced.
- Broken wires. Due to great age, the cables may fray or solder joints may fall off, which will affect the operation of the fuse. Initially, it is worth inspecting the cords. There should be no creases or breaks on them. Damaged insulation is also excluded, otherwise the fuse will burn out. Fallen cables should be soldered with a soldering iron and tin. Damaged wiring should be insulated, and broken cables should be replaced with intact ones of suitable cross-section. For this current strength, a cord with a diameter of 1.5 - 2 square meters is suitable. mm.
- Overheating of nichrome thread. The spiral located inside the cigarette lighter can burn out due to frequent heating, which opens the circuit and trips the fuse. Restoring the cigarette lighter does not make sense - it is better to remove the old Chevrolet Cruze device and replace it with a working one.
- Light bulb failure. The device has an additional light filter so that you can find the cigarette lighter connector at night. The backlight lamp may also burn out and the fuse will trip. You will need to disassemble the cigarette lighter and replace the light bulb with a working element.
- Loose connector. The constant connection of electronic devices unlocks the locking tabs inside the chuck. This is bad for the contact and can lead to a short circuit and blown fuse. If the car cigarette lighter does not function correctly, you need to bend the clamps using a thin screwdriver, after removing the fuse or disconnecting the negative terminal.
- Presence of plaque. Due to moisture and age, oxides or rust may appear on the contacts of the device, which leads to poor conductivity of the device. This problem is easily repaired - you need to clean the contact areas using a file or sandpaper, reaching the metal base and ensuring reliable contact.
