Hello, dear friends! Today we will talk to you about such a topic as tinting rear lights. To be more precise, I will tell you what methods can be used to perform such a procedure, how legal it is and whether you should be afraid of fines.
In fact, this procedure did not become popular in 2017 and certainly not in 2022. But now I’m increasingly hearing questions about whether it’s legal to do it yourself.
Some argue that tinting is completely prohibited. And those who try to tint the optics with red film will immediately receive a huge fine or even lose their license for a whole year.
It is necessary to dispel some common myths and tell everything as it is. Let's talk both about the potential fine and about ways that allow you to tint the rear lights of your own car with your own hands without unnecessary problems.
Let's turn to GOST
You probably know that there are rules and laws regarding tinting car windows. Just recently I talked about removable tinting, and we also discussed the issue of curtains for a car. I advise you to refresh your memory and read the materials again.
In addition, I would suggest that you familiarize yourself with removable tinting on a rigid base, the link to which will be here, and removable silicone tinting with a link here.
Now let's talk specifically about the rear lights. There are no requirements for their tinting. There are only regulations for the operation of automotive lighting equipment. Regarding the rear optics, it states that only yellow, red and orange light can be used. All others are prohibited.
There is one correction here. To illuminate the reversing lamp in the Russian Federation, only white light is used, as well as to illuminate the license plate.
These are the only official rules regarding this matter. That’s why you need to rely on them when you decide to tint the rear optics. If any color other than those listed is used, when recording this fact, law enforcement officers will classify this as an offense. Therefore, you will be issued a fine.
Potential penalties
If there is tinting on the rear optics that does not correspond to the characteristics prescribed in the Code of Administrative Offenses, then the driver of the vehicle will be fined.
Only here there are important nuances. The thing is that in the current legislation there are no specific clauses that relate specifically to rear optics. Just don’t think that it’s now legal to tint your headlights any color you like.
Here, traffic police officers will rely on Article 12.5 Part 1 of the Administrative Code. That is, they will charge you with a violation due to vehicle malfunctions in accordance with the requirements for permitting a vehicle to operate. If your taillights are in poor condition, get ready to receive a fine of 500 rubles.
Drivers note that traffic police officers rarely issue fines for such violations. And if you tint the optics without changing the color of the instruments, then there will be no problems at all.
Even though there is practically no threat of a fine in this situation, it is still necessary to remind you about the methods of paying fines. A link to interesting and useful material about this will be here.
Installation of LED DRLs
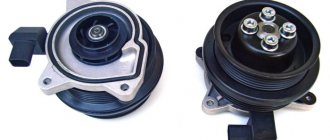
LEDs for replacing daytime running light bulbs must comply with GOST. They provide excellent light during daylight hours, and if connected correctly, light up when the ignition is turned on.
The connection is made through a five-pin relay; plastic corrugations can be used to insulate the wires. Each LED block will have a black and a red wire coming from it. It is advisable to connect the black one to the windshield wiper fuse F11 (20), and the red one to the left side light fuse F14(5).
The use of LED DRLs instead of factory ones after the first week will change the Priora owner’s view of his own car. Such a small part can cost about 500 rubles for two lights, but its appearance on the road will be noticeable to everyone.
Tinting Priora windows is done not only to give the car a respectable appearance. This operation also has purely practical significance. Firstly, it limits the curious view of what is happening in the cabin, which, by the way, irritates the traffic police, and, secondly, it slightly weakens the effect of direct sunlight, allowing you to maintain at least a little coolness in the summer. Well, the stylishness of the car is a separate topic. And here the question arises about tinting the remaining windows of the car. In particular, the headlights.
Tinting methods
I quite often see how the rear optics are tinted on domestic cars like Lada Priora, Grant, Vesta, Kalina, more classic VAZ 2114, 2110, etc.
But tinting also looks good on foreign cars such as Mazda 3, Hyundai Solaris, Ford Focus. The question here is rather what material to use and how well the work itself is done.
Since we have already decided whether such tinting is allowed, we can move on to the topic of creating such a tuning element. It is definitely not prohibited, although it is carried out within certain restrictions. St. Petersburg, Moscow and many other cities offer a wide list of tuning studios where you can tint your optics.
Before you make a decision, think about how exactly you will do it. Be sure to look at the photos of the finished options and evaluate the proposed methods. There are three methods in total.
- Varnish. The use of varnish is quite common, although it is not considered ideal. It has its nuances and shortcomings;
- Liquid rubber. A relatively new method, characterized by an exquisite visual effect after application. In my personal ranking, liquid rubber takes second place;
- Special films. Everyone recognizes that film tinting is the most profitable, spectacular and effective. Even if the price is slightly higher compared to varnish.
Now we will consider each method separately to bring some clarity.
Until films became widespread, everyone used varnish. But even in our time there are car enthusiasts who prefer this option.
To tint the taillights, you need to buy a can of special varnish. It is applied in several layers after the previous one has dried. The number of layers determines the degree of darkening of the headlights.
If you want to do this with a spray can yourself, you will need:
- thoroughly clean the surface to be treated;
- cover the paint layer of the car around the lights with paper or polyethylene;
- or dismantle the optics completely so that the paint does not get on other parts of the body;
- apply the first layer and wait until completely dry;
- apply a second layer and also wait until the paint dries;
- Carry out a similar procedure on both sides of the car until the desired darkening is achieved.
Remember that it will be impossible to restore the lights after applying varnish. You'll have to buy new optics.
Liquid rubber
A relatively new method based on the use of liquid rubber. Moreover, in Russia, PlastiDip products are the most popular.
Liquid rubber is sold in the form of spray cans or in cans, the contents of which are poured into the spray gun. To tint the headlights, special transparent rubber is used.
When a layer of material is applied, the optics acquire a matte and slightly darkened structure. Rubber can be used to quickly and easily improve the appearance of your lights. The material dries quickly and is removed from the surface.
Film
Objectively, the best material for tuning taillights is special high-quality films. They are made specifically for rear lights. Additionally, they have a damage protection function.
Its advantages include:
- adequate price;
- high quality;
- long service life;
- ease of application;
- protecting the headlight housing from damage;
- possibility of dismantling;
- good light transmittance;
- minimum complaints from traffic police officers;
- wide choose.
Application methods
Refusing to decorate a car in this way just because of fines is not entirely the right decision. You just need to find out what is allowed and allowed, and what is prohibited, and then you can safely modify the car. Tinting the rear lights will not only give your car a modern appearance, but will also protect the glass or plastic of the headlights from various scratches and clouding. The surface will become as smooth as possible if the application process is performed using a special film.
There are two methods that allow you to darken your headlights. This is the use of paint and tinting the rear lights with film. Which of these two methods should you choose? Each driver will decide for himself. Both tuning methods have their pros and cons and differ in cost, investment of labor and time.
Installation of LEDs and overlays
A fairly simple way to transform your Priora is to buy ready-made “eyelashes” in specialized tuning stores. However, it will be much cheaper to make them yourself. To do this, just take tubes or a piece of plastic (an alternative is vinyl film) and cut them into thin lines with a stationery knife. You can curl future “eyelashes” with your own hands using a hair dryer and soap solution. They are then attached to the car body using double-sided tape, glue or sealant.
Some drivers believe that “angel eyes” tuning looks much more impressive and useful in poor lighting conditions of Russian roads. It involves attaching LEDs to the headlights or taillights.
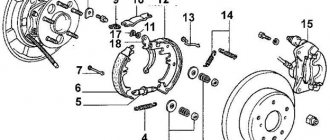
For this DIY upgrade you will need:
- disassemble the front or rear headlight, having previously dismantled the element;
- stick masking tape on the outer part of the glass of the optics, which will prevent it from being damaged;
- bend the plastic sides (brackets) of the optics, under which the reflector is located;
- heat the sealed adhesive with which the glass is fixed in the headlight using a household or construction hair dryer and remove the glass;
- remove the reflectors using a Phillips screwdriver. Don’t forget to cover the turn signal lens with tape for protection;
- Apply several layers of black paint to the reflector. This, combined with bright LEDs, will provide a greater tuning effect. Let the paint dry;
- take an LED strip with a cross section of 2.6 mm. Remove the reflector's metallic backing, bend the tape into a circle and attach it using fasteners or glue;
- After the glue has dried (about 2 hours), reassemble the headlight or lantern. Don't forget to re-apply the sealant to the glass.
Cilia
Tuning Priora headlights, for many, ends precisely at the “eyelashes”. These are ordinary covers that follow the shape of the top of the headlight and are painted in body color. They are sold ready-made in auto parts stores, but eyelashes can be made. They can be made from a piece of vinyl film, the shape of which will have to be changed in order to be applied to the headlight - this is done with a soap solution (in the same way as with applying tint). The trims from the store are attached to the body either with sealant or double-sided tape. Remember that eyelashes limit the height of the illuminated space. In addition to them, there are other worthy ideas for tuning the Lada Priora.
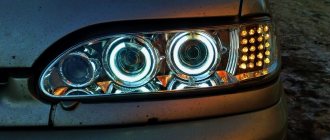
Headlight tinting
You can tint the headlights on the Priora yourself using the following means:
- black tint film;
- black spray paint. Unlike film, it is applied in several layers.
In some cases, the headlights on a Priora are tinted not black, but in a different color that matches the shade of the body. You need to understand that applying tinting will worsen the visibility of the road surface at night. Therefore, in order to avoid accidents, such modernization is most often carried out on car lights.
To install the tint yourself, cut out the required section of the film. The glass (reflector) of the lantern is moistened with a soap solution or water, and the film is applied there by heating it with a hairdryer. If paint is used, you will need to remove the glass and apply it to the inside of the lantern. Possible incomplete painting (pasting), but application of a pattern.
I want to darken the rear lights on a car, but I don’t know what’s best, some say varnish is better, some say film, help, give advice) it’s very necessary) the faster the better)
Comments 29
Yes, tights are actually the coolest option, they cost less and they look cooler!
I have a little idea, when I take a photo I’ll post it)
Pull your tights over the headlights))
I bought a film from a company I don’t remember, rolled it up in red, it’s really cool and it shows through clearly! the film itself is transparent for tinting headlights, that’s what I said in the store, they gave me the price of 450 rubles for 1m x 1m! so the simplest and best option)
I don't like red((
Oracal red film looks super.
I don't want red(
Just now from the garage, I was gluing the lanterns) Oracal8300 film No. 73 Spray the lantern, the film with soapy water, apply it, smooth it, and then heat it with a hairdryer and pull it to the sides! It stretches very well! The main thing is to warm it up well! (an ordinary household hairdryer) Light transmission is not much different from the stock! I looked at the sun during the day and everything is clearly visible! About road accidents “in the ass” - it’s already been discussed somewhere, CRAZY!, for ratoseev there is also a 3rd stop under the glass! ))) P.S. When you pull, don’t forget to tighten the side of the light, which is closer to the trunk! It’s visible!
>
How to install angel eyes
Angel eyes on the Priora are LEDs that are installed inside the front unit, along the perimeter of the lenses and in the rear light. To do this you need to purchase:
- Electric wire of moon-white color. Type SH; diameter 2.6 mm;
- Receiver (Operating voltage – 12 Volts).
After everything is ready, you can begin active actions:
- Raise the hood, remove the battery (this will make it easier to work).
- Dismantle the block, remove the substrates.
- First secure the wires in place with tape (lightly) or clothespins - this is done to fix their position. Then fix them with epoxy resin.
- Wait for the resin to dry, secure the substrates and seal all the gaps with sealant so that the glass does not fog up. We carry out the installation.
Vinyl film: features
This method will take much less time than the previous option. This method is also less labor-intensive than with dyeing. But there is one point with which there may be certain difficulties. You need to stick the film so that there are no wrinkles on the surface. Among the advantages of using this method is the ability to quickly remove the film at any time. There are many shades. There are all colors (for example, the red tinting of the rear lights looks great). The shade can be matched to a specific car.
Work step by step
Let's get to work. The first step is to wash the headlight. Remove the backing from the film and moisten it generously. We also wet the lanterns. Place the film on the lens. We also wet the top. We take a squeegee and begin to expel the water from under the film from the center to the edges. If the tinting material has anti-gravel protection, you don’t have to worry about scratching it with a squeegee. It is very important to ensure a good fit of the material at the edges. The edges can be heated with a hairdryer and additionally smoothed for reliability.
After this, it is necessary to roughly trim the excess film. Sometimes during these manipulations the film needs to be heated and pulled to the side. Heating allows the film to become more elastic.
When we remove the excess trimmed film, it is necessary to glue the edges of the lanterns with an alcohol solution - this will increase the adhesion of the adhesive layer. After a while you will see that the edges are well glued. To be sure, we warm them up again with a hairdryer. We remove the protective layer and make a clean cut along the contour of the headlight.
There can be many colors of tinting, however, if you just want to additionally protect the optics and give them shine, you can use a transparent film to tune Priora headlights with your own hands.
Tinting with film: instructions
For the work you will need the following tools: a hair dryer, a fairly sharp knife, an alcohol solution and a regular spatula. The first step in tinting the taillights is to thoroughly clean the surface. First, the headlights are cleaned by removing moisture from them. This is convenient and effective to do using a microfiber cloth. Experts also recommend using special cleaning products. Then an alcohol solution is sprayed onto the surface of the film and onto the headlight. This is done in order to simplify the tinting process.