The generator gets very hot, every 10 owners of VAZ and Lada cars face this problem. In fact, not only the domestic auto industry suffers from this disease, including many foreign cars that quite often have problems with generator overheating.
If the generator in your car heats up, then you should not put the problem on hold, as it is quite serious. It is better to immediately contact specialists for diagnosis and subsequent repairs.
Theory of the issue
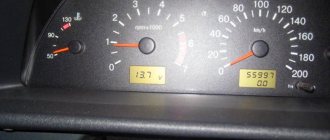
While the car is moving, a dead battery receives a charge voltage of 13.6 to 14.2 V. For the correct and stable operation of all systems in the car, these voltages must be maintained until the engine starts and the crankshaft rotates. Together with the motor, torque is supplied to the generator through the drive belt. At this moment, an amount of energy is generated that will be sufficient for the stable functioning of all systems and to maintain a charge on the battery.
If the generator does not charge, then in most cases the reasons must be sought in the excitation circuits, as well as in the output voltage circuits from the generator to the battery. But this is not always the case. Sometimes problems are related to the generator itself.
When the driver turns the key in the lock, the relay in the ignition system also starts at the same time. “Plus” flows through the relay and fuse in the mounting block. Next, the voltage passes through the on-board network, reaching the battery charge lamp and charge sensors. It then passes through diodes, relays, elements in the mounting block and finally to the connector in the generator. There, electricity comes to the relay-regulator and, passing through brushes and slip rings, enters the exciting winding.
How to determine that the generator is not charging the battery
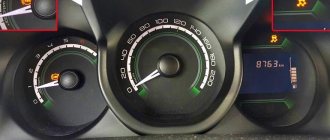
The easiest way to check that the generator is not charging (VAZ-2110 is no exception) is by looking at the dashboard. There is a control lamp on it. Classic VAZ models also have a voltmeter. The arrow should be in the green zone, and the control lamp should be in normal mode (when everything is in order, it does not light up). If this is not the case, then charging does not occur. It is worth considering the problem in detail.
Normal or not normal?
The generator inevitably heats up during operation, so first of all, let’s figure out what kind of heating can be considered normal. For example, if you have driven a long way without stopping. In this case, even the new and most modern generator will overheat to 90-100 degrees. This is normal, because the device produces currents at the level of 100-110 amperes.
It’s a completely different story if such heating is achieved after 15-20 minutes of travel, when the engine has not yet had time to heat up. Heating is often accompanied by a burning smell or a specific buzzing sound. These are already reasons to be wary.
Generator overload
If the battery is charging, but the voltage is insufficient, it means the generator is overloaded. This is facilitated by the installation and connection, in addition to standard electrical equipment, of various gadgets that require electricity. The generator is operating at the limit of its capabilities.
Modern drivers love various car tunings. Thus, serious music systems, powerful lighting and other equipment are installed. Someone also increases the battery power. So, with a 70 Ah battery, the standard VAZ generator cannot fully charge it. It just doesn't have enough power. As a result, the generator provides little charge.
Short circuit to the rotor housing
In the event of this malfunction, the entire field winding will be closed and the generator will not be able to operate. Often, short circuits to the frame occur in places where the ends of the winding are connected to the slip rings on the rotor. You can check this using a 5 V lamp. To check, the wire should be connected to one of the slip rings, and the second to the rotor core or its shaft. In the event of a short circuit, the lamp will light up. This generator is faulty. You can insulate the short circuit or replace the winding completely.
News:
- Chevy-Clan.RU »
- Technical Section »
- TechSection »
- Square – Chevrolet Blazer / GMC Jimmy »
- Optics. Headlights (Moderators: Akulych, Daria, i-man) »
- The generator is heating up.
Author Topic: The generator is heating up. (Read 19073 times)
0 Users and 1 Guest are viewing this topic.
- Chevy-Clan.RU »
- Technical Section »
- TechSection »
- Square – Chevrolet Blazer / GMC Jimmy »
- Optics. Headlights (Moderators: Akulych, Daria, i-man) »
- The generator is heating up.
The page was generated in 0.323 seconds. Requests: 56.
- List of forumsDiagnostics and repair of MitsubishiDiagnostics and repair of Mitsubishi
- Search
Algorithm for finding the cause
We looked at typical faults. But it is important to find the main reason. If the car has standard equipment and there are no abnormal energy consumers, then you can begin to diagnose the generator directly. If there are additional consumers, it is better to turn them off. In this case, it must be disconnected physically, from the on-board network.
Next, all consumers are connected and the leakage is measured in the same way with a multimeter. If it is large, then the reason should be sought not in the generator or battery, but in one of the devices in the on-board network. If no leakage currents are detected at rest, then most likely the VAZ generator is not charging. We have already discussed the reasons.
Why does the diode bridge of the generator get hot?
Excessive heating of the generating device will certainly lead to further problems. Heating occurs for various reasons, but most often the diodes in the unit burn out.
In general, checking the diode bridge in such cases is a must. It happens that after overhauling the generating device or replacing machine components, the car service center forgets to put gaskets on. For example, under the rectifier unit itself. Because of this, the device begins to get very hot, as it short-circuits to the case without protection (gasket).
Faulty diode bridge of the VAZ generator
It could also be this: the soldering on the diode bridge is relaxing. The reason will only be revealed by opening the GU (generator). There may be unsoldered contacts or so-called “dry” soldering. It is possible that the terminals are not tightened or the rectifier unit is broken.
Design of a car generator
Any generator, with the exception of direct current models, creates multiphase alternating current - three or four phases, depending on the power. Why such a complication if the on-board network uses only direct current anyway? The fact is that a multiphase alternating current generator has higher efficiency, and most importantly, the current is removed not by brushes from the rotating rotor, but from the stationary stator windings. Accordingly, there are no problems with burnout of the collector (the current in it is much less than what the generator produces), and the collector itself is simpler - two rings, and not a set of insulated lamellas.
Wiring
When it comes to overheating in the power supply system, why not pay attention to the wiring. In this case, it is recommended to test the entire positive cable laid from the battery to the power unit. It is possible that there is not enough insulation somewhere and there is a short circuit.
Generator bearing
There should be a fuse on the wiring going from the battery to the main unit. When a diode bridge breakdown or other short circuit occurs, the fuse fails, not the positive wire. This option is available on some domestic models (for example, GAZ).
Possible causes of malfunctions
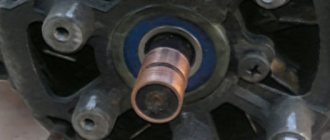
Brush wear
If the generator does not charge the battery, then the first thing that comes to mind on cars with sufficient mileage is wear of the brushes. There are few purely mechanical components in generators that affect its performance - and the brushes, constantly rubbing against the commutator, are worn out.
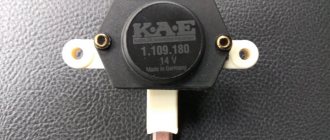
As the contact wears out, the contact deteriorates, and the current in the rotor winding drops accordingly. At first, the generator gives little charge at low speeds, “waking up” after re-gasping, then it fails completely. The brushes themselves can be either a separate unit or interlocked with a relay regulator.
When removing the brush assembly from the generator, you can easily feel how far it can be extended so that the elasticity of the springs is no longer felt - this will be the remaining working length of the longest brush. Please note that more often the brushes wear unevenly: on the side of the cover, where dirt and brush wear products accumulate, the brush wears out faster. This is also noticeable by the presence of a groove on one of the rings.
The groove itself is not so bad if it is worn evenly. Here it is wavy, with sharp changes in diameter - a direct indication of replacing the slip rings or rotor assembly. On foreign generators there is a monoblock design, when the diode bridge, the relay-regulator, and the brush assembly are one whole. Replacing such a monoblock is not a cheap matter, and it is stupid to do it when only the brushes are worn out. Therefore, they are soldered, selecting suitable ones from domestic generators or power tools.
Break
In the rotor, in addition to wear of the slip rings, there are few probable causes of malfunction - relatively low currents do not allow the winding to burn out, and much more often the wire breaks at the junction with the collector. The rotor is checked with a tester: first, the resistance between the collector rings is measured, then between the rings and the “ground”. In the first case, the resistance is several ohms, in the second - “infinite” (there is no short circuit of the winding to the housing).
Stator and diode bridge
Another reason why the generator does not charge is the most loaded components: the stator and diode bridge. With constant overloads, they overheat, which for the stator is fraught with destruction of the insulation, short circuit to the housing and fire of the winding, and for the diode bridge - failure or breakdown of the diodes. Externally, the symptoms are similar - the power of the generator drops (one or two phases do not work), or the generator fails completely.
The generator on the VAZ 2110 produces little charge: reasons, how to repair
Any generator in a car is designed to convert mechanical energy into electrical energy. As soon as the engine starts, the generator begins to charge the battery and provide energy to all electrical appliances of the car. The device itself is located under the hood, and it works due to the crankshaft.
It is he who, with the help of a belt, drives the generator roller. There are times when the device suddenly stops charging. This leads to the car being de-energized. If you continue driving with a broken generator, then after a while the car will become completely disabled, since the entire supply of electricity in the battery will be used up.
And since the device does not charge, the battery will not charge.
When working properly, the battery is always fully charged and does not require additional charging. If the battery often dies, you should check the functionality of the generator and the condition of the battery.
If the VAZ 2110 generator produces little charge, the reasons for this may be different. Perhaps the reason is mechanical damage or oxidation of the contacts. Or the wire that goes from the device to the battery may fray. Most often, generator failure is caused by brush wear. If the latter are worn out or jammed, the device may stop producing current.
A total of two types of generators were installed on the VAZ 2110 car. The first type was installed on a carburetor car. This unit has the number 9402–3701. The second type was installed on the VAZ 2110 injector. This species is numbered 3202–3771. These generators are not very different from each other, so their faults are similar.
Let's look at the main types of breakdowns:
- If the car has a large amount of equipment installed that requires a lot of electricity, then the generator simply will not be able to cope with the heavy load. Because of this, the battery will not receive the required amount of charge, which will lead to rapid wear and tear of the battery.
- Incorrect battery selection. If you choose a battery that is more powerful than what the generator is capable of charging, the battery will be constantly undercharged. This will cause the battery to wear out quickly.
Connection diagram for the VAZ-2110 generator
Connecting a generator to a VAZ 2110 car is not difficult. All you need is some wrenches and patience. First you need to determine which side the mechanism is installed on. Everything is simple here. You just have to look at the fastenings and location of the rollers. After this, you should place the device on the seat.
The next step is to connect the positive and negative wires. The positive wire is usually red and thick. The negative one is slightly smaller, black or brown. The wires must be placed in their places on the generator and tightly clamped with nuts. Make sure that the wires are securely and firmly fixed. This determines how well the electricity will flow from it. After this, you can fix the device in its seat using bolts. Next, we put on the belt and start the car to check its performance.
If there is no charging, then you should proceed to detailed diagnostics of the device. First, let's look at the VAZ 2110 charging circuit diagram. Electrical connection diagram for the generator on a VAZ 2110, VAZ 2111, VAZ 2112 car:
1 - battery; 2 - generator; 3 — mounting block; 4 — ignition switch; 5 - generator malfunction warning lamp in the instrument panel
Basic faults
There can be many reasons for a generator malfunction on a VAZ 2110. Here, both minor damage and failure of the entire device are possible. Let's look at the list of main faults:
- Too many additional electrical devices connected. You should turn everything off and check whether the quality of the element has changed.
- If the generator does not charge, the battery may be too large. In this regard, the battery receives a charge, but does not have time to fully charge after a deep discharge.
- Short circuit of the stator or damage to the winding itself. There may also be poor connections between working parts.
- Winding break. In this case, the generator will not charge at all.
- Interturn closure. The coils may fly, so it is worth checking this in detail using a voltmeter.
- Short circuit on the rotor housing. Due to this failure, the entire winding may fail. If this happens, you will have to completely replace it.
- Short circuit in winding phase. With such a malfunction, the generator will become very hot and the battery will not be charged.
- Brush wear. The so-called “chocolate” can also fail. It can be easily replaced by purchasing it at your local auto parts store.
- The malfunction may not lie in the generator itself. The fuse may have failed and will prevent charging. Or the wire coming from the generator is broken. All this should be checked before you take out the unit itself.
How to repair
Each problem has its own approach. The main thing is to correctly determine the cause of the breakdown. Let's look at how to repair a generator on a LADA 2110. First, let's look at its internal structure and design.
VAZ 2110 generator parts:
1 — protective casing of the rectifier unit; 2 — screws for fastening the voltage regulator; 4 - rectifier block; 5 - capacitor; 6 — back cover; 7 - stator with windings; 8 - rotor; 9 — front cover; 10 — spacer sleeve; 11 - pulley; 12 — washer; 13 — spring washer; 14 — pulley fastening nut; 15 — front bearing; 16 — rear bearing; 17 — coupling bolts of covers; 18 — bolts (with insulating gaskets) for fastening the rectifier block and stator winding terminals; 19 — bolt (without insulating gasket) for fastening the rectifier block; 20 — capacitor mounting screw; 21 — fastening elements of the contact bolt; 22 — spacer sleeve; 23 — insulating sleeve; 24 - contact bolt There is a weak contact in the generator circuit. It is necessary to clean all the main places where the conductors are connected, as well as the places in contact with the vehicle ground. To do this, you will need a rag soaked in gasoline. In addition, the problem may be with the brushes. The brushes and the springs that press on them should be replaced. It makes sense to clean the contact rings using sandpaper. The breakdown consists of a break in the winding. First of all, you should figure out where exactly the break occurred. If there is an internal break, the entire coil will have to be replaced. If the break is external, then you can try soldering followed by insulating the connection point. You need to check all the coils and determine which of them has a short circuit. After that, try to fix it. The device does not charge the battery. There is a possibility that a short circuit has occurred to the rotor housing. Therefore, it is necessary to check where exactly the short circuit occurs. This mainly happens at the points where the ends of the winding are brought out. Therefore, to eliminate this, it is necessary to insulate or change the winding. The main element in the generator circuit is the relay regulator. It is he who sets the output voltage. Therefore, it often happens that the breakdown is the failure of the regulator relay. As a rule, the reason for the breakdown of the relay is wear of the brushes. They either wear out or jam. Therefore, to restore the regulator relay, you just need to replace the brushes or buy a new relay. Short circuit in the stator phase winding You will have to check the insulation between the turns in the stator coils. If the insulation is broken, try restoring it or replacing the coils. Or the easiest way is to buy a new generator. The diode bridge fails. If such a breakdown occurs, you need to buy a new one or try to replace the diodes - there are only 6 of them in the generator. But the replacement procedure is not as easy as it seems at first glance. Therefore, it is better to contact a specialist. Short circuit to the stator housing It is necessary to replace the defective coils. The positive wire coming from the generator shorts to the housing. In this case, it is necessary to find the location of the short circuit and fix it. Stretching the belt, due to which charging will also be incomplete. It is very easy to fix this problem: tighten the belt or install a new one.

