Replacing the thermostat
Suddenly the engine began to heat up, and the fan did not work; at a temperature of 110 degrees, I touched the radiator pipe, but it was cold! The thermostat is stuck on the small circle. I bought a new one from Luzar; my friends who used it on the Internet did not praise it, but unfortunately there were no others in the store.
By chance, the opportunity arose to change it in a garage, with a pit and all the amenities (thanks to friends), otherwise I didn’t want to mess around outside in the cold, and it’s not aesthetically pleasing to pour antifreeze down a tray)))
Here is a list of tools and spare parts needed for the job:
1. Ratchet 2. Heads for 10, 17 and 19 3. Curved screwdriver 4. New thermostat 5. Empty container for draining coolant
We put the car in a pit to drain the antifreeze (although you can drain the coolant on the ground, but I liked the option with a pit much better, my pan is dirty, and the coolant does not drain evenly from the radiator along it, just have time to catch it) .
Using sockets 19 and 17 we unscrew the 2 bolts and 2 nuts securing the engine oil pan, and also with a socket 10 we unscrew the crankshaft pulley protection
Here is the plug in the radiator for draining antifreeze, unscrew it
We place a board across the pit and place a cut container under the radiator cap, in my case it was a 5 liter bottle
Now we slowly unscrew the cap of the coolant expansion tank until antifreeze runs out of the radiator, adjust the pressure force as necessary and wait until the coolant is drained into the container, tighten the radiator cap.
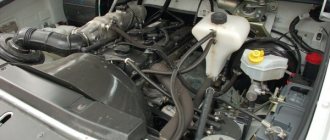
After draining the antifreeze, you can begin dismantling the faulty thermostat. For ease of dismantling, we need to remove the air filter, just unscrew the two bolts securing the filter to the car frame, loosen both clamps on the pipe, disconnecting it from the filter and move the filter itself to the right as shown in the figure below. , not forgetting to disconnect the connector of the mass air flow sensor,
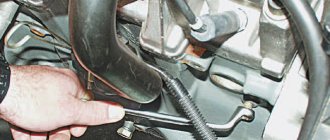
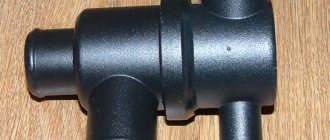
We also disconnect the connector of the phase sensor and coolant temperature sensor, move the wiring to the side, here it is our old and faulty thermostat
(came a little out of focus)
Based on numerous tips, I decided to coat the flanges of the new thermostat with lithol instead of applying sealant, I don’t know if this is correct or not, I just decided to try
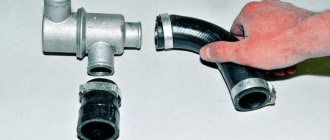
When installing a new thermostat, we replace the old and hard pipes and clamps with new ones, I replaced only one, a short one, since it was in poor condition, I left the old clamps (because I forgot to buy new ones)))))
The thermostat is installed, the pipes are dressed and tightly tightened with clamps, do not forget to connect all the disconnected connectors to the sensors, put the air filter in place and tighten the clamps on the pipe, now you can fill in antifreeze, to do this, loosen the clamp on the throttle hose and start pouring antifreeze until it comes out of the hose coolant will flow (this is done to keep the system from airing).
After this, we put the hose on the throttle and tighten the clamp, adding coolant to the required level.
You can check, we start the car and wait until it warms up, in my case the thermostat worked almost exactly as it says on the package, a large circle opens up the radiator pipe is hot, everything worked out, now my temperature does not exceed 90 degrees and the antifreeze does not squeeze out from the expansion tank.
I wish you all successful and smooth roads, without breakdowns!
Features of the VAZ-2115 thermostat and its operating principle
The thermostat is an essential element in a vehicle's cooling system. A new domestically produced part can withstand from 80,000 kilometers to 100,000 kilometers, and an imported one - about 120,000 kilometers. It is very important that the thermostat is of high quality, so it is necessary to purchase it for replacement in specialized auto stores.
A car thermostat controls the temperature of the coolant (for example, antifreeze), and distributes it among circulation circles - small and large. If the vehicle engine and cooling fluid are cold, the thermostat valve will be closed, allowing the small circulation circle to operate.
As soon as the optimal temperature regime of the cooling liquid is reached, the thermostatic valve will operate, that is, it will open and a large circulation circle will come into effect.
The flow of coolant will enter the radiator, and the temperature will stop increasing, and its level will stabilize - optimally 90 degrees. This is the principle of operation of the thermostat element in good condition.
Design Features
A thermostat is a small mechanical valve. The device regulates and determines the temperature of the coolant in the engine system and is responsible for the quality of warming up the car engine. The structure consists of the following elements:
- frame;
- inlet pipe. Connects directly to the cooling system;
- wax ball;
- main valve Responsible for blocking the main circulation process;
- piston;
The thermostat regulates the temperature of the coolant in the engine
- bypass valve. If necessary, closes the small cooling circle;
- special spring to hold the portable valve;
- outlet pipe. Connects to a pump pumping cooled liquid;
- a spring holding the bypass valve;
- additional inlet pipe. The element is connected to the radiator.
This video will help you get acquainted with the principle of operation of the thermostat:
Types of modern thermostats
Today, car manufacturers equip engines with different thermostats. There are several main types of these useful structures:
- Electronically controlled device. Suitable for all operating modes of the power unit. Electronic devices are supplemented with a special heating resistance. Known for their efficiency and accuracy. Their use allows to reduce fuel consumption.
- Single valve. Reliable and durable unit. The majority of cars are equipped with a single-valve thermostat.
There are several main types of
two-valve automobile thermostats. One thermostat has two valves: the main and the secondary. The main one is used to circulate antifreeze in a large circle. The second, the so-called bypass valve, performs similar actions, only in a smaller circle. Two-valve thermostats are in demand in the CIS.
Two-stage. The design also provides two valves: large and small. It is recommended to install in a system with high coolant pressure.
It will be useful: How to remove a brake drum on a Renault Logan
Signs and causes of failure
Any malfunctions in the operation of the device have a detrimental effect on the operation of the entire vehicle. The main symptom and cause of the malfunction is considered to be corrosion. It gradually corrodes the locking pin and cylinder. A sign of a broken thermostat in this case is a pulsating, continuous flow of cooled liquid.
It does not matter what position the valve is in. Signs of a faulty thermostat also include:
- The lower pipe becomes warm within a few minutes of operation of the unit. The device is always open.
- The car engine quickly overheats. When a car engine overheats, the design pipes (lower and upper) are at the same temperature.
A faulty thermostat is indicated by engine overheating and several other indicators.
While the device is operating, the engine needle drops sharply and shows a temperature lower than normal. When the engine stops running, the needle reading increases. Staying in a closed position for a long time. In this case, the structure literally jams. The temperature on the instrument panel shows that it is boiling. After prolonged operation of the engine, the lower pipe remains cold.
Due to breakdowns, the car cannot start normally. You should understand why the thermostat is not working and find out the signs of unit failure as soon as possible. Violation of the temperature regime has a detrimental effect on the engine: it quickly wears out and becomes unusable.
When does a thermostat need to be replaced?
For proper operation of a vehicle, it is important that the temperature of its engine is within the same limits. This can be achieved through the use of coolant - antifreeze or antifreeze - and the proper operation of the entire cooling system of the car. As soon as the temperature begins to exceed the required limits (most often it is 90 degrees), you should check the car thermostat for serviceability. If it turns out that this part is out of order, then there will be a need to replace it with a new one.
We replace the thermostat on a VAZ-2115 ourselves
According to experts, the procedure for replacing a thermostat takes about an hour if tools and consumables are available. Therefore, you should take care of this before carrying out this operation. You will need the following:
- Tools:
- standard car mechanic kit (screwdrivers of various sizes and configurations);
- capacity of more than 7 liters for draining liquid waste.
- Materials:
- new thermostat;
- heat-resistant sealant;
- set of gaskets for repair;
- antifreeze or antifreeze (as a coolant).
Now you can begin the procedure for replacing the failed thermostat element, which consists of the following steps.
- Preliminary – stage of preparing the vehicle for the repair procedure:
- the car is installed on an inspection hole or on a flat surface;
- the engine is turned off;
- put on the handbrake;
- the engine is cold.
- Removing the old thermostat element:
- unscrew the expansion tank cap;
- open the radiator tap to drain the coolant from it;
- drain the coolant into a prepared container;
- remove the air filter (at the same time carry out a visual inspection for any malfunctions of this part);
- loosen the clamps of the radiator pipes;
- disconnect the hoses from the radiator and from the thermostat element;
- unscrew the fastening bolts (4 pieces);
- remove the thermostat (it is removed together with the seal ring).
- Installation of a new thermostat:
- lubricate the perimeter of the circuit with heat-resistant sealant;
- install a new sealing ring;
- put a new gasket;
- install a new thermostat;
- connect all hoses;
- tighten the clamps tightly;
- screw the plug on the drain valve at the bottom of the radiator;
- fill with coolant.
- Verification stage:
- start the vehicle;
- check for possible leaks;
- warm up the car to the optimal temperature - more than 90 degrees (this operation is necessary for the large circle of the cooling system to start);
- We check all hoses and pipes in operating mode - they should be hot.
A nuance of a working thermostat on a VAZ-2115: when starting a still cold engine, the lower pipe on the radiator will begin to heat up already at 85 degrees of coolant.
This can be determined by touch. To fully ensure that the newly installed thermostat element is functioning at the proper level, you should also turn on the heating element - the stove. If there are no failures or leaks in this mode, then the thermostat is installed correctly and without errors.
If you are not confident in your abilities, then to replace this part you should seek help from qualified specialists, that is, to the nearest car service center.
Purpose, design and principle of operation of the thermostat
The coolant circulating through the working channels of the engine blocks, its main purpose is to remove excess heat accumulated in the power unit due to the friction of the working elements of the engine and the impact of the high temperature of the exhaust gases passing through the exhaust circuit.
The main elements of the cooling system of the VAZ 2114, which are responsible for lowering the temperature of the antifreeze, are the electric cooling radiator fan and the thermostat.
To understand the principle of its operation, you need to see what the thermostat on a VAZ 2114 looks like. Structurally, it is designed in such a way that the valve that regulates the coolant flow is located inside a housing with three pipes:
- two inputs - from the engine and radiator;
- one day off - to the pump.
The main working element of the valve itself, located inside the thermostat, is a solid heat-sensitive filler, which, when heated, through a rubber insert, acts on the piston that moves the main valve. When it heats up, it opens it, when it cools down, on the contrary, it closes the hole, preventing the flow of antifreeze.
The thermostat is attached to the engine through a pipe to the cylinder head on the left side, under the air filter. It is connected to the radiator and pump using rubber pipes. On a cold engine, the valve of this coolant flow regulator is closed and after starting, the liquid that begins to be pumped by the pump forces moves along a “small circuit” or “in a small circle.” Both of these expressions are used among motorists. When moving in a small circle, the antifreeze passes through the heater radiator, intake manifold and throttle assembly. Liquid is not supplied to the radiator; the valve cuts off this path.
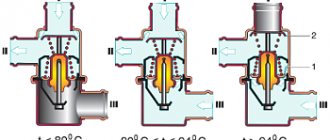
As the engine heats up, the coolant takes away some of the heat, heats up and, passing in a “small circle” through the thermostat, heats the temperature-sensitive element. The piston begins to move and open the main valve. This begins to happen when the liquid temperature reaches 87 degrees. In this case, part of the coolant begins to circulate through the radiator. When the temperature reaches 102 degrees, the valve opens completely, moving eight millimeters. In this mode, the entire coolant flow rushes in a “large circle” through the cooling radiator.
Experts recommend checking the operation of the thermostat without removing it from the car. To do this, after starting the engine, you need to touch the lower pipes coming from the radiator with your hands. They should be cold until the temperature rises above eighty degrees. As soon as the temperature rises above 85 degrees, the tubes should begin to heat up and after a while you can feel that the “large circle” circulation is working. The tubes should get quite hot.
If the lower pipes leaving the radiator continue to remain cold, it means the main valve has not opened and the thermostat is faulty. A malfunction of this regulator may also be indicated by the fact that the lower tubes begin to heat up almost immediately after starting the engine. This indicates that the valve is open and does not close when cold.
In both cases, a thermostat failure does not bring anything good for the engine. In the case when the valve is open, the antifreeze, passing in a “large circle,” does not have the opportunity to heat up to working condition. This reduces engine power and other performance parameters. In the case when the main valve is closed, the engine has a high risk of overheating the blocks. This is the most dangerous condition for the power unit. If you drive in this mode for some, even not very long, time, you can damage the engine, even to the point of breaking the shafts. And this, at a minimum, is a major overhaul of the entire internal combustion engine.
There is a different way to check the thermostat on a VAZ 2114. To do this, you need to pour water into a pan and, placing it on the stove to heat, immerse the thermostat there. Knowing at what temperature the thermostat on the VAZ 2114 opens, use a thermometer to monitor the heating of the water in the pan. At about 87 degrees the valve should open. If this happens, then the device is fully operational. It is better to check it in this way before installing it in place of a failed one.
Many car enthusiasts often ask specialists whether it is possible to repair the thermostat.
There is only one fairly reliable way to help the valve work. To do this, lightly hit the device body with a screwdriver several times. The impact should open the valve.
If this does not happen, then the thermostat on the VAZ 2114 needs to be replaced.
The operating principle of the thermostat VAZ 2115, 2114, 2113, 2109
What does a thermostat consist of? Let's get a look!
The thermostat consists of a housing, a bypass valve, a main valve, a temperature sensing element (usually located near the main valve) and a spring.
How does the thermostat work on VAZ 2115, 2114, 2113, 2109
When the car is not warmed up, the thermostat valve is closed, as in the photo. In this case, the coolant moves in a small circle, as in the photo below.
When the machine warms up to operating temperature (87-90 degrees), the temperature-sensitive element slowly begins to heat up, as a result of which the spring compresses, the main valve opens and the liquid flows in a large circle.
Car thermostat: how to check, typical faults, symptoms
The thermostat is a small but important element of the car, which allows the driver to save on engine maintenance and fuel. Essentially, the thermostat is a temperature regulator in the cooling system. Due to it, the engine warm-up speed increases, and the car maintains the desired thermal conditions during operation.
The main task facing the thermostat in a car is to prevent the circulation of coolant through a large cooling circle until the engine warms up after starting.
After starting the engine, the antifreeze begins to circulate in a small circle until it reaches an operating temperature of approximately 90 degrees Celsius. Having warmed up, the coolant enters a large circulation circle and circulates through it until it cools down again (due to various reasons).
Through its actions, the thermostat maintains the operating temperature in the engine, preventing it from overheating or excessively cooling.
How to understand that the thermostat of the VAZ 2115, 2114, 2113, 2109 is faulty?
There are two reasons why you can understand that the thermostat on the VAZ 2115, 2114, 2113, 2109 is faulty:
- The car does not warm up.
- The car overheats and boils.
There are also two ways to check the thermostat:
- Check the removed thermostat for functionality.
- Check the thermostat without removing it from the car.
Let's take a closer look at each of the options.
How to check the removed thermostat of a VAZ 2115, 2114, 2113, 2109 for functionality?
In theory, everything is simple. Take a pan with cold water, a thermometer up to at least one hundred degrees and a thermostat. We put it all on the tile to warm up and wait... We wait until the water temperature reaches 85 degrees, at which point we begin to look at the main thermostat valve. At 87 degrees it should open. If it does not open or opened earlier, then the thermostat is faulty.
How to check the thermostat of VAZ 2115, 2114, 2113, 2109 without removing it from the car?
A prerequisite in this case is that the car must be cold. After starting the engine, grab the lower pipe coming from the radiator with your hands. Until the temperature reaches 80 degrees it should be completely cold. When it reaches 85 degrees, the tube should begin to warm up slowly. And when 90 degrees is reached, full circulation of hot coolant should begin (i.e. the valve is completely open). The lower tube should be hot.
It happens that immediately after starting the engine, when it has warmed up only 50 degrees, warm liquid begins to flow through the lower tube. This shouldn't happen either!!! This means that the valve is constantly open.
I hope my article helped you solve your problem. If you have any questions, leave them in the comments and I will definitely answer them.
Verification methods
The cause of overheating may be: failure of the temperature sensor (the fan that blows the radiator does not start); or a malfunction of the fan itself; insufficient antifreeze level in the system. Therefore, first make sure that these elements are in good condition. Then start checking:
After this, you can start checking:
- The engine starts for 10 minutes. With the hood open, check by touch that all rubber tubes have warmed up. When the cabins connected to the radiator are colder than the others, it means the thermostat of the vases does not open or opens poorly.
- Start the engine and monitor the temperature using the indicator in the cabin. Check the heating of the upper tube going to the radiator. It will be cool to 85-90 degrees, otherwise the thermostat does not work well.
- This method takes the longest. You need to remove the thermostat and place it in a pan of boiling water. The device almost immediately opens the main valve, then, as the liquid cools, the valve should close completely. A non-working thermostat either does not open or does not close completely, and this is noticeable to the naked eye. You can monitor the trigger temperature if you have a thermometer that allows you to do so.
The last method is more effective, but the most labor-intensive. A poorly functioning thermostat is replaced. There is no need to delay this. Severe overheating will result in serious and expensive repairs.
Replacing the thermostat on VAZ 2113, VAZ 2114, VAZ 2115
Thermostat is an element of the cooling system that supplies coolant to a large circle at a certain temperature. The thermostat ensures that the engine runs correctly and does not get too hot. It is also responsible for warming up: if the thermostat is worn out and the fluid immediately comes out in a large circle, then the car takes a very long time to heat up (especially in winter), which means the car’s fuel consumption increases. Over time, a lot more problems will emerge, because running the engine for a long time on a cold engine is very destructive, and driving on a cold engine is even worse. There is a lot of load on the engine, lubricant does not reach all parts well, etc. If possible, in very cold weather (-25 and above, although -20 is already enough), we recommend not using the car at all if you want the engine to live a long enough life and not require major repairs in the near future.
Note! You will need the following tools: a couple of screwdrivers of different lengths with different heads (it is most convenient to use a short screwdriver), a large wide container with a capacity of approximately 10 liters, a small saucepan (fill with water and immerse the thermostat).
Thermostat location
On injection cars it is located under the air filter housing, on carburetor cars (the first VAZ 2115 were produced in a carburetor version for a couple of years) it is located in the same place, but the housing is moved to a slightly different place, so on the carburetor you don’t need to bother and remove the housing, but simply throw off the high-voltage wires and get started to work. In any case, do not be alarmed, the housing can be removed quickly and easily, read the article: “Replacing the air filter housing on VAZ cars.” After removing the housing, you will see the thermostat with the naked eye (indicated by a red arrow in the photo below), and next to it there is a battery (indicated by a blue arrow). We hope we have clearly explained the location of the thermostat and you can easily find it.
When is it necessary to change the thermostat?
Over time, it wears out and the valve begins to work incorrectly (usually it freezes in one position). The engine temperature will depend on the stuck position. There are two such provisions:
- The first is a fully open valve. Symptoms: the fluid comes out in a large circle, causing the car to heat up too much, which is not very noticeable in the summer, but noticeable in the winter, because The car doesn't really warm up.
- The second is a completely closed valve. Symptoms: the fluid runs in a small circle, the car gets very hot and when parked for a long time with the engine running, its temperature reaches the red mark.
A rare case - the valve is in the middle. Symptoms: the car does not warm up for too long, but it is noticeable over time even when parked for a long time with the engine running in the summer. It gradually overheats and the engine temperature slowly reaches the red mark. It happens that the cooling fan does not work and the thermostat does not come to a wide circle - be careful, the engine will overheat in a short period. Please note that 10 minutes of engine operation in the red zone leads to cylinder head failure. Longer load on the engine will lead to the need for a cap. repair.
Note! There is a method for checking the thermostat without removing it. Warm up the car to a temperature of 87-92 °C (and while the engine is cold, touch the lower pipe coming from the thermostat (photo below, indicated by number 6, it should always be cold until the engine reaches 87-92 °C). On a warm engine the lower hose should warm up.If the hose begins to warm up ahead of time or does not become warm at all, even at engine operating temperature, then the thermostat is faulty and needs to be replaced.
Where is
It is located under the air filter housing on injection cars, but on carburetor Samara 2 (namely, the first VAZ 2115 were produced for a couple of years in a carburetor version), it is located exactly there, but the housing on them has simply been moved to a slightly different place, so it is no longer necessary on the carburetor It doesn’t take much trouble to remove the housing, but I just threw off the high-voltage wires and started working, but it doesn’t take long to remove the housing and on the injector it 100% needs to be removed to get to the thermostat, and after the housing is put aside, you will immediately see the thermostat is not armed it will even be visible to the eye (For clarity, it is indicated in the photo below with a red arrow) and next to it there is also a battery (indicated by a blue arrow) so that you understand 100% where it is and do not lose sight of it.
Replacing the thermostat on a VAZ 2113-VAZ 2115
Note! The main thing is safety: do not work on a hot engine to avoid burns. Work only with a cold unit, especially when working with engine oil and coolant.
Removal
1) The first step is to drain the coolant from the cooling system. The engine cooling jacket does not need to be touched, and the liquid must only be drained from the radiator. We described detailed instructions in the article: “Replacing coolant on a VAZ 2114”). Unscrew the cap on the expansion tank (small photo), then cover the generator with something (indicated by the blue arrow) to prevent antifreeze from getting in. Contact with antifreeze can result in a short circuit. By the way, for safety reasons, disconnect the battery by disconnecting the terminals). Remove the engine protection, if equipped. Place an empty container under the front part (the location of the drain plug near the radiator, indicated by a red pointer). Unscrew the plug, the coolant will begin to flow into the empty container. After emptying the tank, screw the plug back into place and begin replacing the thermostat.
Note! If you have a new coolant (for example, they just changed it a month ago), then you can only drain it into a clean container and then pour it back into the car engine, nothing bad will happen from this, but if the fluid is already bad, then be sure to change it to new, don’t skimp on it, it protects the engine from overheating, as well as from corrosion (special additives are present in the fluid)!
2) Unscrew the screws holding the hoses with clamps (marked in red). Pay attention to the hose, the fastening screw of which is indicated by a blue arrow. It is removed together with the thermostat, so unscrew the screw securing it to the pipe (small photo) and remove the thermostat along with this short hose. Now unscrew the screw securing the hose to the thermostat and separate them from each other.
Installation
The thermostat is installed in the reverse order of removal. Cracked hoses are replaced with new ones, otherwise they may leak. Before installation, the thermostat is checked for serviceability (we strongly recommend this procedure). Water is poured into the pan and heated to a temperature of 78-80 °C (measured with a thermometer). Then the thermostat is immersed and when the temperature reaches 87+2 °C, it must begin to open, or rather its valve. We have indicated the details with arrows in the photographs.
Sources
- vaz-russia.com/remont-vaz-2113/zamena-termostata-na-vaz-2113-vaz-2114-vaz-2115.html
- vaz-zona.ru/kak-proverit-termostat-na-vaz-2115-2114-2113-2109/
- ladaautos.ru/vaz-2115/kak-proisxodit-zamena-termostata-vaz-2115.html
- drive2.ru/l/9032036/
- drive2.ru/l/4918112/


