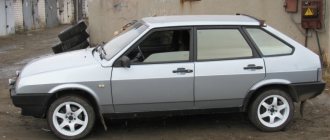
It's no secret that domestic cars are more affordable and cope better with driving on bad roads. However, the attractive price comes at the cost of sacrificing some functionality, interior comfort, and a simple, no-frills design. All interior decoration can be called unremarkable and gray, and the VAZ 2114 is no exception.
But “traditional craftsmen” have proven more than once that it is possible to completely transform this car without even going to a workshop. If you wish, you can also do the tuning of the VAZ 2114 interior with your own hands, if you take into account the advice given by experts in this field and sensibly assess your own strengths.
Deflectors for car windows and hood: installation and removal instructions
Deflectors on car windows and hoods are used everywhere. Most vehicles on the road are equipped with black or body-colored visors pasted over the sliding windows.
Some vehicles have a similar design in the front part of the hood. What are these devices used for? How to choose and install a deflector with your own hands?
Why are deflectors needed?
The structures under consideration have several functional purposes, which include:
- Protection of the hood from mechanical damage - a deflector mounted in the front part of the hood changes the direction of the air flow flowing around the car. Together with the upward flow, small stones and wheel spikes are diverted from the car, flying out from under the vehicle in front. In the absence of the so-called “fly swatters” all this ends up in the windshield of the car. In addition to the above, the deflector mechanically protects the edge of the hood from flying sand and dust.
- Protection of the windshield from insects - the direction of the oncoming flow changing under the influence of the device helps to remove mosquitoes and midges, which in warm weather literally stick to the windshields of cars that are not equipped with protective devices. Installing a fly swatter solves this problem.
- Improving the design of the car - visors and fly swatters significantly improve the appearance of most cars. Black elements look best when installed on light-colored cars.
- Protection from splashes in the cabin - a deflector on the car windows allows you to open them a little even in heavy rain. Of course, if the window is completely lowered, the device will not save you.
Criteria for choosing car deflectors
Installation of deflectors begins with their selection and purchase. It is necessary to select products based on several parameters. First of all, the visors must match the shape of the door or hood where they are planned to be mounted
It is important that the coincidence of all angles is accurate. Otherwise, the installed deflectors will not last long and will soon disappear
The second selection criterion is the method of attaching the products to the glass. There are plug-in and self-adhesive visors. Installing a hood deflector is always done in one way, so there is nothing to choose from.
The quality of a product is determined by its manufacturer. It is preferable to purchase goods from a monobrand manufacturer. However, devices of acceptable quality can also be sold by brands that develop several car models at once.
The most famous companies today are the following:
- Mono-brand (products for one brand of vehicle): climair, airpiex, heko.
- Multi-brand (products for several brands): autoclover, mobis.
- Little-known (not very common, usually Russian manufacturers): strelka, cobra, comfort.
Fly swatter installation procedure
Installing a fly swatter on the hood requires some knowledge. Violation of the installation technique leads to damage to the paintwork. The result is accelerated corrosion of the metal under the deflector.
Things to consider before installation
Before gluing the deflectors to the car, you should evaluate the condition of the hood edge.
Corroded areas should be cleaned, treated with a rust converter, puttied, primed and painted. The device should not be placed on rusty surfaces, as moisture almost always accumulates under the device. This will lead to the final destruction of the metal within several months.
The second factor to consider is the speed at which you plan to travel. On relatively low-speed vehicles, installation of deflectors can be carried out using adhesive tape or standard fasteners. For high-speed vehicles, additional fastenings should be made.
If installation is planned using glue or tape, the temperature in the room where the work is being carried out must be at least 10 °C. Otherwise, the fixing compounds will not stick to the paintwork and the deflector will fall off at the first shake. Installation using mechanical clips or bolts can be done at any temperature.
How to dismantle central deflectors and install new ones
Removal of deflectors may be necessary in one of the following cases:
- they are clogged and require cleaning;
- a deeper cleaning of the system with removal of the air ducts is necessary;
- the deflectors were pressed into the air duct;
- The deflectors are broken and need to be replaced.
In any case, whatever the reason for dismantling them, it is quite simple to do and does not require a lot of free time or special tools. The entire process of removal and reinstallation takes place in just a few steps, the first of which is removing the dashboard panel.
In order to do this, you need:
- disconnect the battery;
- remove the receiver/radio tape recorder, disconnect the cable harness from it;
- remove the center console screens;
- remove the cigarette lighter by disconnecting the harness of suitable wires;
- remove the ashtray light bulb and disconnect the wires that go to it;
- remove all protruding buttons and adjustment knobs (to do this, carefully pry them off with a screwdriver);
- Use a Phillips screwdriver to unscrew the screws holding the instrument panel panel (one each on the left and right);
- Unscrew two screws located above the dashboard and two screws located under it;
- pry and remove the rear window heating plug;
- Unscrew the self-tapping screw located under this plug with a Phillips screwdriver;
- move the panel back and to the right;
- disconnect all blocks with wiring harnesses from the switches and on-board computer.
Heat from side deflectors
We return heat from the side deflectors
using pliers. VK group: Instagram: .
How to remove double-sided tape and replace window deflector
Once the panel is completely detached, the deflectors themselves can be removed. To do this, you need to unscrew the three screws responsible for fastening the central deflectors. One of them is located under their body, the other two are on its sides. After this, all that remains is to remove the deflector, clean it (if necessary), and install it back.
Assembly of the front panel and its installation are also carried out according to the above described scheme, but in the reverse order.
Before installing the deflectors in their place, it will be very useful to cover their perimeter with sound-absorbing material, such as modelin.
https://youtube.com/watch?v=7OUuphinDvo
Getting rid of noise in the VAZ 2106
Noise in the interior of “our” cars is, unfortunately, an integral feature, as, indeed, are potholes on the roads. Absolutely everything in the car rattles. Sometimes a simple car enthusiast gets used to this and does not pay attention. However, of course, there are owners who are trying to get rid of this drawback. There are several ways to eliminate noise in the cabin, each effective in its own way.
Do-it-yourself tuning of a VAZ 2106 at home involves eliminating the noise in the cabin by pulling it through and mounting everything that rattles on screws. Here, both ordinary rubber mats and polyurethane foam are used, which are used to fill the voids in the car body.
It should be recalled that if you have started a repair, the result of which should be the elimination of noise in the cabin, you will first have to completely disassemble the interior itself. This will subsequently allow you to get to problem areas.
The main noise comes from the front end, that is, the area under the driver and passenger seats. The hole for the gearbox, the front panel, and the internal cavity of the sills are also noisy. It is these places that need to be finished with high quality, first of all. Standard factory sound insulation is most often represented by several sheets of pressed tarred glass wool, which are glued piece by piece under the feet, as well as several sheets under the instrument panel.
Of course, this is not enough to avoid annoying noises. It is advisable to spray the front end with an anti-corrosion compound. But you need to glue sound insulation on top of it. You should not neglect regular polyurethane foam. It absorbs noise well. This material can be used to seal all corners and fill hidden cavities of car sills and side members.
You can also apply a thin layer of foam to the area where the gearbox will be located. This should be done from the inside of the cabin. The area under the rear seats is also better soundproofed. Attention should be paid to the wheel compartments through which noise from the wheels passes.
Removal and replacement instructions
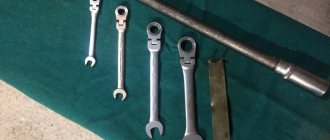
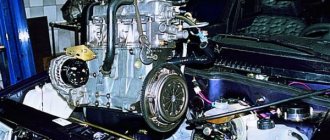
If you need to dismantle the heater, you will need to completely remove and disassemble the dashboard. As for directly replacing the radiator device, it will be enough to only partially disassemble the console. Repairing such a plan is not a particularly simple undertaking, however, if you have patience and strength, you can do everything yourself. To perform the work, you will need standard plumbing tools, including screwdrivers, wrenches, and pliers.
Replacing the VAZ 2114 heater radiator is performed as follows:
First of all, the antifreeze is drained from the heating system. To do this, you need to unscrew the filler cap of the expansion tank and drain the consumables from the main radiator assembly into a previously placed container under the drain hole. When the liquid from the radiator is drained, it is necessary to unscrew the cap in the cylinder block, which will allow the liquid to be drained from the BC. If you notice that the antifreeze has become dark and contains sediment and deposits, then most likely the consumable has already reached the end of its service life and it’s time to change it. Next, you need to remove the audio system from the center console. Remove the frame, pull out the radio itself and disconnect the connectors and wires from it, after which the device can be dismantled. Next, remove the plug and unscrew the screws of the frame that secures the dashboard - in total you need to unscrew 4 screws - two on top and two on the bottom. It is not necessary to dismantle the device itself. After completing these steps, you will need to remove all control levers and sliders from the heating system control unit. Next, the protective cover on the steering column is dismantled; the clamps are located at the top and bottom. The next step is to remove the diagnostic connector cover; it is located in the center console, under the cigarette lighter. To do this, you need to unscrew the screws that secure the connector itself, after which the cover can be removed without any problems. During this step, be careful not to damage the connector. Having done this, you can disconnect the connector from the cigarette lighter. After completing these steps, you need to disconnect all connectors and plugs that are on the center console. At this stage, be careful - it is better to mark all the connectors in advance, otherwise you can confuse them during panel assembly. Next, the signaling unit is removed; to do this, you need to unscrew two screws. This will leave the center frame of the dashboard free so it can be removed. Having done this, you will be able to get to the cigarette lighter illumination connector; it will also need to be disconnected. The next step will be to dismantle the glove box. It is attached to six self-tapping screws; they need to be unscrewed. There are fasteners on the sides of the control panel - self-tapping screws; they will also need to be unscrewed. Remove the screws that secure the ECU mount. Then unscrew a few more screws that secure the heating system control unit. Next, there are plastic trims on the A-pillars; they will need to be dismantled; to do this, again, you need to unscrew the screws. There is a special screw between the steering column and the panel, which also needs to be unscrewed. Having completed these steps, you have loosened the center console, now all that remains is to lift it up and towards the seats. It is not necessary to completely remove the console - you just need to have it pulled back enough to remove the radiator. The panel must be fixed to the side. Now you need to get to the clamps installed on the hoses of the heating unit; use a screwdriver to loosen them. Remove the hoses, but before doing this, wrap them with a rag, since they will most likely release residual antifreeze.
Pay attention to the condition of the pipes - if you see that they are worn out or heavily clogged, or there are signs of damage, then it is better to replace them immediately. The radiator is directly fixed to the heater body using three self-tapping screws - they need to be unscrewed, and the device itself must be removed
After dismantling, the device is replaced with a new one, the assembly procedure is carried out in the reverse order.
Price issue
Prices for radiators vary, but they vary roughly within the same range. The cost of devices depends on the quality of the product, the manufacturer, and the place where it is purchased. For example, Luzar products for the VAZ 2114 on average cost on the market from 900 to 1300 rubles. Aluminum radiators from the manufacturer DAAZ cost on average about 1 thousand rubles.
Loading …
Disassembling the front door
1) First, we need to remove the main handle with which the door closes. We press out the decorative trim with a screwdriver, but be careful not to damage it. Next, unscrew the bolts, there are two of them, and remove the handle.
2) Then we remove the decorative trim of the unlocking handle, you know that kind of black plastic, we also pick it up with a screwdriver and pull it out, there are two latches there, be careful.
Problems with the stove on a VAZ 2115
The VAZ-2115 is an updated version of the earlier G8, Nine and VAZ-21099. The same characteristics are available for the three- and five-door hatchbacks VAZ-2113 and VAZ-2114. The interior heater design in these cars is the same, so if you are the owner of one of the listed models, then this article should be of interest to you.
Let us also recall that we have already discussed on our website Vodi.su the question of how to fix problems with the stove on a VAZ-2109.
The device of the interior heater of the VAZ-2115
The stove design here is standard:
- fan - it directs the air flow;
- radiator - heated antifreeze from the engine enters it for cooling, and the heat generated during this is sent to the passenger compartment;
- heater tap - when you turn on the heater, the tap opens and antifreeze begins to flow into the heater radiator;
- damper rods - used to regulate the air supply, as well as to heat the legs and windshield;
- heater resistor - serves to create additional resistance so that you can select the operating mode of the stove.
Improvements in the interior
Salon, it should be given special attention. This is where the driver himself spends most of his time and it should be no worse than outside.
Lux salon
It is necessary to add more luxury to the car. If your 2114 is not a luxury build, then you can buy a trip computer and install it instead of the plug. You can also install heated seats and much more.
Cases
Covers help not only protect seats from wear and contamination, but also even give a stylish look to the interior. In some cases, if the seats on a car are already damaged and in order to hide the defects, it is necessary to remake them, which is very expensive, and this is where covers come to the rescue.
Steering wheel cover
When the steering wheel in a car reaches 100,000 km, it begins to fall into, let’s say, a sad state. To protect the steering wheel or, on the contrary, to hide shortcomings, you can install a steering wheel braid. Currently, braids that completely hide the steering wheel are very popular. Such braids are put on the steering wheel and sewn together.
Rugs
Rugs also give the car interior a pleasant look, it’s like an excellent wool rug in an apartment that is pleasant to step on. Currently, EVA mats have gained great popularity in the automotive market; these mats not only have a good appearance, but also collect up to 2 liters of moisture, which is very useful in winter.
Interior noise insulation
Soundproofing the interior will not only help get rid of unnecessary crickets in the cabin, but will also help achieve greater comfort from the car. Sound insulation can be carried out either in stages or completely. It is recommended to start with the doors and you will immediately feel the difference.
Acoustic shelf
This shelf is installed to replace the standard shelf of the VAZ 2114. As you know, the standard shelf is not capable of serving faithfully for a long time. Therefore, many motorists install acoustic shelves made of more durable material on their cars. This shelf not only becomes stronger, but also provides better sound quality for the acoustics.
VAZ 2115: replacing the heater radiator with your own hands
In order to replace the heater radiator on a VAZ-2115 with a “Euro-torpedo”, you need to remove it. But it is possible to replace the heater core without completely removing the instrument panel.
So let's get started.
Disconnect the negative terminal from the battery. Drain the coolant. To do this, unscrew the drain plug on the cylinder block using the head at “13”. The plug is located just below the ignition module. Sometimes, depending on the design of the ignition module, it must be removed because it blocks access to the traffic jam.
To minimize coolant loss, place a container under the engine to collect the liquid and unscrew the plug. We also remove the plug from the expansion tank, otherwise a vacuum will form in it, which will retain the coolant.
For further work you will need the following tools:
- Screwdrivers – Phillips and flat blade
- A set of heads, or rather heads for “8” and “13”
- Key to "8"
- Chisel and hammer
We've prepared the tools - let's get to work
- Remove the steering shaft facing casing and turn off the emergency lights button.
- We snap out the steering column switches and, having removed the connectors from them, put them aside.
- We disconnect the gray and black wires from the base of the horn slip rings, having previously remembered which is which, otherwise the signal may be triggered by turning the steering wheel.
- Unscrew the screws and remove the side screens of the console.
- Open the cover that covers the diagnostic connector and, by unscrewing 2 screws, remove the connector from the instrument panel. Remove the connector from the cigarette lighter and the ashtray illumination lamp.
- From the heater control unit, remove the speed selector handle and the damper control lever handles.
- We remove the radio, unfasten it and pull out the “slides” of the radio (they will interfere when removing the instrument panel panel).
- After unscrewing 7 screws (one is located under the decorative plug to the right of the button block), disconnecting the connectors from the buttons and the BSK block, remove the instrument panel panel.
- We remove the instrument cluster.
- We unscrew the bolts securing the central bracket (the top ones, unfortunately, are not visible in the photo), this is where the “8” key comes in handy. We take out the bracket and, having disconnected the connector of the engine control unit, remove it.
- We unfasten the heater control unit and lower it down as far as the damper control cables will allow.
- Using a marker, mark the position in which the steering column is located so that when assembling it, put it in the same place. Using a chisel, unscrew the 2 shear bolts, do not cut them off, but rather unscrew them and turn them counterclockwise with blows. When assembling, you need to install new ones (as a last resort, you can install regular ones, not shear ones), but it is better to install those that are provided for by the design. Unscrew the 2 nuts to “13” and lower the column onto the seat.
- Remove the front strut covers.
- Loosen the clamps and remove the pipes from the heater radiator. It is necessary to either substitute something or use a material that absorbs liquid well, since some coolant remains in the radiator.
- Next, unscrew the 5 screws that hold the Torpedo. Two - in the area of the A-pillars, two - under them at the bottom of the panel and one in the niche of the steering column, to the right of the instrument lighting control.
- That's it, you can start replacing the radiator. To do this, move the right side of the instrument panel to the side. Unscrew the 3 screws securing the radiator to the heater body. Another one holds the damper control cable; we also unscrew it and release the cable. We remove the radiator from the heater housing.
- If necessary, clean the inside of the heater through the opened hole (usually fluff and dry leaves).
- We install a new radiator and assemble it in the reverse order.
- Assembly nuances.
- When assembling, make sure that the instrument panel seal on the windshield side is in place. The intermediate body of the central nozzle stood where it was supposed to without distortion. The wiring must pass through the same openings as before disassembly, otherwise you will have to start assembly from the beginning.
- After assembly, tighten the drain plug. Pour in coolant, new or old, after passing it through a fine-grained sieve. For cleaning, it is very good to use a paint filter funnel (sold where car paints are sold).
- Warm up the car until the radiator fan comes on. Check connections for leaks. We check the operation of the heater and dampers. We check the operation of the electrical equipment of the instrument panel.
- This completes the replacement of the heater core.
Sources
Required tools and materials
To achieve good sound insulation, you need to prepare a whole set of tools and materials in advance:
- Stroyizol SD 90 grade.
- Splen marked 3004.
- Accent 15 LM KS.
- Be sure to buy vibroplast type Gold.
- Adgilin.
- Vizomat MP.
- Stock up on a metal ruler.
- A construction tape measure won't hurt.
- Square.
- Hairdryer, preferably a household one.
- Montage.
- Screwdrivers with different tips.
- Awl.
- Keys.
- Sharp scissors.
How to disassemble the instrument panel on a VAZ 2114
Before embarking on this complex process, the driver must carefully familiarize himself with the design and arrangement of the instrument panel on his car. When disassembled down to the cogs, it looks like this:
The device of the VAZ 2114 dashboard
Instrument panel and its accessories:
1 - VAZ 2114 torpedo, or - instrument panel, that is, the main part of the entire structure to which the instrument unit, on-board computer, stove control levers, key blocks and other linings and latches are attached;
2 — overlay on the instrument panel, has a decorative function, it also contains air duct outlets for blowing the windshield;
5 — ashtray body;
6 and 11 - right and left crossbars;
7 and 10 - right and left console screens;
8 — instrument panel;
9 — central bracket.
If you carefully study this diagram, it becomes clear how to remove the panel on a VAZ 2114. Having determined the order for yourself, you can begin the process.
Using a Phillips screwdriver, you need to unscrew the three screws holding the left console screen. For convenience, when doing this work, it is better to use a screwdriver with a short handle and blade.
Left screen of the VAZ 2114 console
When removing the screen, carefully remove the lower edge of the trim from the body bracket. The right console screen is secured with five self-tapping screws. Using a Phillips screwdriver, carefully unscrew all the screws while holding the trim with your hand.
Right screen of the VAZ 2114 console
remove the screen without allowing it to get caught in the wiring harnesses that are hidden behind it.
Disconnect the ground from the battery by disconnecting the connectors. If your car has a radio, disconnect it from the main bundle of wires by pulling out the connecting connector. If there is no radio installed on the car, then simply pull the wires out of the panel; they should be closed with a plug. Be sure to turn off the cigarette lighter and remove the socket with the ashtray light bulb.
Remove the handles from the heater damper control levers. To make the process easier, pry them off with a flat-head screwdriver.
Removing handles and levers from the dashboard of a VAZ 2114
Despite the apparent simplicity of this item, removing the handles from the levers can take a lot of time. To do this, a clear example is given of how this should be done on a removed unit.
Removing the handle using a VAZ 2114 screwdriver
Remove the electric heater fan handle by simply pulling it towards you.
Removing the handle of the electric fan VAZ 2114
Unscrew the cross-head screws securing the instrument panel to the brackets on the right and left with a screwdriver.
Self-tapping screws on the dashboard brackets of VAZ 2114
in the window on the instrument panel where the instrument unit is located there are two screws on top and two on the bottom - under the window. It is necessary to turn them out, loosening the cover (2) and the shield (8).
Releasing the lining and shield of the VAZ 2114
pull out the plug and unscrew the screw located behind it.
Self-tapping screw under the plug VAZ 2114
- remove the two screws from the bottom holding the trim and remove it.
- Having marked the wires suitable for the switches, disconnect them.
Disconnecting wires from VAZ 2114 buttons
Unscrew the bolts from the steering wheel bracket.
Bolts on the VAZ 2114 steering bracket
Using the “8” key, unscrew the screws of the lower bracket fastening.
Lower mount on the VAZ 2114 bracket
- Unscrew the self-tapping screw and remove the light guide.
- remove the fasteners of the heating control unit and remove the cartridges from the back of the unit.
Cartridges from the reverse side of the VAZ 2114 block
- remove the decorative insert, removing all external parts.
- Unscrew the nuts with a key to “21”.
- remove the hydraulic corrector illumination.
- Unscrew the top and bottom fastenings of the panel, remove the fastening to the cross member on the left side.
Upper mount on the left side of the VAZ 2114 panel
Now you can remove the VAZ 2114 torpedo.
Removing the instrument panel of VAZ 2114
Installation is in the reverse order.
In order to clearly see the whole process in motion, you can watch a video on how to remove the dashboard on a VAZ 2114.
https://youtube.com/watch?v=F-FEZZiQ31Y
It would seem, why suddenly remove the air duct deflector. The need for this may arise for various reasons. For example, it may simply fail, in which case it should either be repaired or replaced. To improve the interior, some people purchase deflector grilles from other car models and install them. Our goal is to tell you how to remove the air duct deflector in order to carry out the desired operations. The process will be examined using the example of different VAZ models. Here you will also find instructions on how to remove the air deflector on foreign cars.
Tuning the interior of the VAZ 2107
Tuning a VAZ 2107 with your own hands, what can be done in the cabin? This question worries many car enthusiasts, and we will try to answer it for you. The domestic auto industry did not particularly care about the beauty of the interior of its cars. In this regard, many owners try to create the aesthetics inside the car themselves. Today, on the Internet and beyond, you can purchase various parts of materials that will help with tuning.
1. Since passengers in the car spend the entire journey in a sitting position, it is necessary to make the seats more comfortable compared to the factory version. Sports anatomical seats, which are created on the basis of foam, have increased density and are an excellent option for creating additional comfort. They are equipped with special lateral supports for the seat and back. Their design is designed to support the neck in a comfortable straight position without straining the lumbar muscles. After such modifications, driving a car will become much more convenient. A simpler option is to replace the seat covers.
2. Since childhood, many of us have felt like a racer. If you replace the standard steering wheel with a sports one, you can feel like a real Formula 1 car driver. The interior will have a unique and unique look if the steering wheel is also covered with leather, carpet, Alcantara or other material. For many, Alcantara is a new material. It has different structures and colors, but, among other things, it is durable and abrasion-resistant, but, accordingly, it is more expensive than leather.
3. Car enthusiasts often tune the VAZ 2107 torpedo. To remake it, you do not need to use expensive materials, and the possibilities are limited by our imagination. You can cover it with leather, velor, or beautifully trim it with carbon fiber or wood. When the design of the torpedo is changed, you can move on to tuning the dashboard.
How to remove air ducts on a VAZ 2114
It was evening, there was nothing. A bad idea came to my mind - to illuminate the air ducts of the stove. The question is why? The answer is... he knows, just for fun, plus I was looking for information on the net about the illumination of the air ducts of the VAZ 2114 torpedo, I really didn’t find anything, just a couple of photos of the finished version of an unknown artist.
I also didn’t really see any information on removing the grilles, so I’ll write a little about it, maybe someone will need it. The grill itself looks like this
Hi all! When buying a car, I experienced such an unpleasant moment as the self-closing curtains of the central stove deflectors on bumps. This really bothered me; unfortunately, you can’t find such scarce things in our stores. And therefore, when I lived for a short time in Saratov, I found all 3 nozzles (central and two side). Just before the New Year holidays, I went to BBC and saw all the nozzles in a single copy, and even with a discount + 5% card. I don’t think long, I take it. Upon arrival home I decided to start installing it. Just in time for your birthday.
First of all, I pulled out all the buttons, plugs, bk, etc. from a torpedo.
I unscrewed all the screws and safely removed the cover.
Replacement is simple, just unscrew three screws and put them in place. Before installing the new deflector, I glued it with modelin or anti-creak, whichever is more convenient for you. I also glued the exhaust air duct inside along the perimeter. The exhaust air duct inside was all covered in dust, I suppose the dust had accumulated even before installing the cabin filter adapter, since I had previously driven without a filter at all. I wiped everything thoroughly there and safely started reassembling it, oh no, before assembling it I ran more wiring to the panel so that the emergency warning light would light up, it won’t fit into this entry, so I’ll tell you in another one.
The deflector fit very tightly, so it was centered with the air duct.
Next I set about replacing the side ones. I started with the driver's license. Mine was dented, just like the passenger one, in principle it could have been repaired, but I considered it necessary to replace it with a new one, because the car was no longer new and the plastic on them had faded.
Replacement is also quite simple, it is held on by 8 latches (two on top under the lining and two on the bottom under the lining, the remaining four are fixed in the air duct, also, two on top and two on the bottom). I needed a knife and a flat screwdriver, oh yes, it’s even better to put a cloth under the screwdriver and knife so as not to scratch the plastic.
Content
When carrying out tuning, many people pay attention to the fact that the interior should be changed. The interior of the VAZ 2114 is gray, unremarkable, and often shabby. At the same time, almost all cars of the automaker in question leave the water with an unfinished interior, which causes quite a lot of complaints. That is why, some time after purchasing a car, many people have a question: VAZ 2114 interior tuning - what stages of work need to be performed to improve comfort, what can be changed and what result can be achieved.
It should be noted right away that the result will depend on the investment; with the right approach, you can transform the interior of the vehicle almost beyond recognition. Let's consider all the features of transforming the interior of the car in question.
FakeHeader
Comments 7
I cut a piece of metal from a nail of the same diameter and fused it into plastic))))
I thought about doing this too) what was the result? Doesn't the nail fall out over time?
No, that’s how the former Logan sold it, it seems to me that it turned out even stronger than the standard one, now I’ll have to do it on the Sander, otherwise passengers have a bad habit of twisting the deflector until the crap...))))
I should also try soldering a stud)
I cut a piece of metal from a nail of the same diameter and fused it into plastic))))
I don’t even understand where the carnation is and why?
There are 4 latches in the “curtains” of the deflector, reminiscent of some kind of pistons. They broke off from the author. This problem is common, and in order not to buy a new “flap”, a piece of nail similar in diameter and length is soldered into place of the broken piston
The overall impression of a car's interior is made up of little things. Only a set of measures to improve the interior make it truly attractive and unique. Let's consider one of these modifications, which concerns air duct deflectors and can significantly change the interior of the Lada Largus.
Preparation
First of all, it is necessary to prepare the car interior for installing new sound insulation by dismantling all removable parts: seats, mats, panels. We carry out this procedure step by step:
- remove all seats:
— unscrew and remove the trim from the B pillar and door sills;
— carefully remove the carpet and coverings (we will need them later):
— remove the foam cushions to level the floor;
— remove the factory sound insulation:
After removing all removable parts from the interior, you must wash the floor thoroughly and thoroughly go over the metal with a degreaser.
It should be noted that in domestic cars, the drain holes at the bottom of the body are not sealed with plastic plugs, and water often enters the interior through them during bad weather. Therefore, before installing sound insulation, you should think about high-quality sealing of these holes.
Cleaning and flushing the radiator of the VAZ 2114/15 stove
You can increase the efficiency of the stove by cleaning and flushing the radiator. The procedure can be performed without dismantling the radiator or with dismantling it. In the first case, you will need to remove the outlet and inlet pipes from the heater and pour a cleaning solution into it. Citric acid, plumbing cleaners (for example, “Mole”), etc. are used as such a solution. Then the radiator is washed with running water and coolant is added. You can clean the radiator better by removing it from the car. This will allow you to wash it not only from the inside, but also from the outside, removing dirt between the honeycombs. Washing is usually carried out with running water.
If after performing these procedures the stove does not work better, the radiator must be replaced.
Video: flushing the stove radiator
Thus, diagnosing a malfunction and determining the cause of poor heating of the VAZ 2114/15 interior with your own hands is quite simple. Self-repair and replacement of individual elements of the heating system are also not very difficult. It is enough just to strictly follow the recommendations of specialists.
Source
Clock backlight in VAZ 2110
A watch is a useful thing. However, designers did not create this element of the interior of domestic cars as ideal. This concerns the lighting of the dial, which is not uniform. As a result, only individual parts are highlighted, and the arrows are poorly visible. In this situation, tuning the VAZ 2110 interior, or rather, its important element - the clock, will come in handy.
To make the backlight uniform, you should replace the factory light bulbs in the watch with modern LEDs. If you replace two light bulbs with LEDs, the illumination will be more uniform; the result ultimately depends on how the light from the diodes is scattered. If you install one instead of two LEDs, you can achieve an improved result. It should be placed in the center. You can abandon the factory bases and equip the watch with LEDs at your discretion.
However, in this situation, you will need to disassemble the watch and attach the required number of diodes with superglue. They need to be connected together, but at the same time, we must not forget about resistors. Also, if you wish, you can remove the filter or paint it the desired color.
Types of heater radiators installed on VAZ 2114/15
The manufacturer installs its own aluminum radiators on the VAZ 2114/15 with a service life of 3–5 years, after which the radiator is replaced. Selecting a new heat exchanger is quite difficult. There is a wide range of radiators from various manufacturers on the market. Of course, there are fakes.
Heating system radiators for the entire Samar family have catalog numbers 2108–8101060 and 2108–08101060–00 and the same dimensions:
- length - 250 mm;
- width - 158 mm;
- height - 42 mm.
The scheme of their attachment to the body is also identical.
Radiators for the VAZ 2114/15 stove are produced under catalog numbers 2108–8101060 and 2108–08101060–00
The VAZ 2114/15 can be equipped with aluminum and copper radiators, which have their own advantages and disadvantages.
| Aluminum | Copper | |
| Service life, years | 3–4 | 5–7 |
| Heat dissipation, W/mg | 209,3 | 389,6 |
| Maintainability in the event of a leak | Conditionally repairable | Repairable |
| Cost, rub. | 800–1000 | 1600–1800 |
The main advantages of copper products are longer service life, increased heat transfer and maintainability. However, they usually cost almost twice as much as aluminum ones. The technical characteristics of radiators are largely determined by their manufacturer.
Radiators DAAZ
The most popular among VAZ 2114/15 owners are radiators manufactured by Luzar, Hola, Craft, Pekar, etc. They are all in the same price category and have similar performance characteristics.
DAAZ radiators are highly efficient and have a long service life
DAAZ aluminum radiators have improved parameters. They have a service life of 4–7 years and a price of about 1000 rubles. The design features of such radiators include a larger number of lamellas (thin plates), and this significantly increases the heat exchange area. DAAZ radiators are the best option for VAZ 2114/15 owners.
Due to the larger number of lamellas, DAAZ radiators have increased heat transfer
What is tuning?
The term “tuning” means improving the primary characteristics of a vehicle. The VAZ 2114 is an updated version of the classic “nine”, and the model itself is in great demand among fans of the domestic automobile industry, largely thanks to the improvements made to the design of the “Samara” of the second model. But like any domestic “iron horse,” these cars have many shortcomings, which is why most modern motorists are forced to make modifications to the original car design, which improve both the functionality of the vehicle and its comfort.
How to remove air duct grilles on a VAZ 2114
- Registration
- Entrance
- To the beginning of the forum
- Forum Rules
- Old design
- FAQ
- Search
- Users
Now it is in a closed state, I tried to open it, but something got stuck there. I remember shooting on 9 in 2 seconds, but here I don’t know how. Please tell me.
maybe your nozzle is right there and there is something to jam
halt
then this is correctly called a blowing nozzle and not an air duct, you take a minus screwdriver with a thin tip and carefully insert it from the bottom or top of the nozzle itself and slowly pull it out, but everything is done carefully so as not to break the nozzle itself and spoil the panel.
Did you film it yourself? I think it should be something different there because... answer I tried, I'm afraid I'll break something
Granta tunnel in 2113/2114/2115. Tunnel from grants.
Dedicated to all those who like to drink in the car