Actually, I'm fine. Now. I am writing this post so that people whose working fuel pump suddenly stops working can find it in a search.
I had this problem for a long time, and I suffered for a very long time, and did not know how to eliminate the consequences of this unknown crap, while flipping through a lot of information. And so, this morning, when at minus 35 the car did not start, and I stupidly forgot about this trick, and having drained the battery I almost went to work on a minibus, I again remembered what needed to be done. I'll tell you what the point is. The fuel pump just refuses to turn on. The brain should supply a minus voltage to the fuel pump turn-on relay, but for some reason it does not supply it periodically. Either a glitch in the brain, or a bug in the signaling. But I’m not the only one, and the problem, as it turns out, visits many.
What should we do if the fuel pump does not work when we turn on the ignition?
On the front passenger side we open the side of the torpedo, it is indicated under the number 3
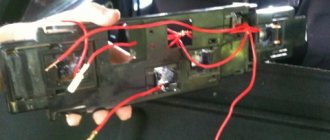
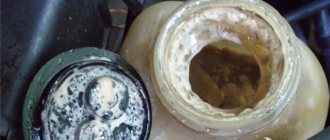
Having opened the hatch, we see 3 pres and 3 relays. Mine is approximately as shown in the photo below. What should I do to make the car move? There are 2 options here:
1. The photo shows the negative contact. You need to pull out the relay a little, attach a wire to the relay contact, and throw it onto the body ground. After that, put the relay in place. What does it give? The fuel pump will start working when the ignition is turned on. I should immediately note that the fuel pump will work constantly. I just don’t recommend leaving the ignition on with this modification, because... You could burn out the fuel pump.
Option 2. Using the same principle, you need to close the positive contacts, they are shown in the photo. This procedure will allow you to start the fuel pump even with the ignition off, and you will be able to get to the service center, or wherever you planned to go.
Do not forget, after you have reached the place, to delete the modification data, because... I recommend using them only in emergency cases. Using it “on a regular basis” may not be safe and may lead to unpleasant consequences.
Scheme
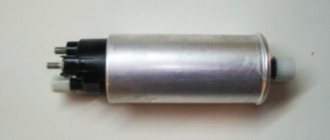
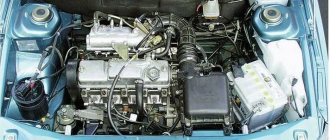
The fuel pump circuit is not particularly complicated. In fact, the unit is an ordinary electric motor, powered by 12 volts from the car’s on-board network. The problem is that getting to it is not easy - you will have to disassemble half of the interior.
The fuel pump is mounted directly on the tank body. The inlet hole is protected by a mesh - this is a filter that provides rough cleaning of the fuel. This element prevents dirt and solid foreign matter from penetrating into the assembly, so its characteristics remain stable.
The electrical circuit includes:
- control module;
- ignition unit;
- wiring;
- fuse;
- relay.
All 2110 models that left the assembly line before 2000 have mechanical fuel pumps. Its components are:
- frame;
- top cover;
- return spring;
- two valves;
- a pusher equipped with a diaphragm.
Power is supplied to the fuel pump in the 2110 model after turning the key in the ignition switch. Voltage is supplied first to the relay. It closes and the unit begins to pump fuel. When the hoses are full, the on-board computer turns off the current. The engine is cranked by the starter and starts.
An important point is that detailed pinout of the fuel pump is not required when troubleshooting a fault, since most often easily replaceable standard elements fail.
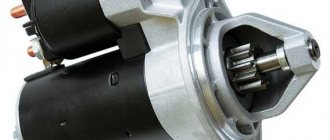
Final check before replacing the starter
We turn the key to position II, and nothing happens... In this case, open the hood and remove the air filter by unscrewing the screw on the body and loosening the clamp on the pipe. The starter is located under the filter housing. In the photo we see the following: someone disconnected the solenoid relay cord.
What we found under the filter, we check with a needle probe that when you turn the key, “+12” appears. Then, after checking, we wrap the cord with electrical tape.
- The copper is polished to a shine;
- The wire (see photo) is supplied with “plus”;
- The starter doesn't even click.
The first thing you need to check is the battery contacts. We remove the terminals (key “10”) and look at what is under them. There is no point in measuring the voltage with a probe - it will show “12 Volts”.
The fuel pump does not work - what could be the reason?
In the mechanical version there are many moving parts, which causes wear on the fuel pump. Most often, failure occurs due to:
- damage to one or both valves;
- destruction of the diaphragm;
- body deformation.
Very rarely, fuel corrodes the gasket - this happens if it has a manufacturing defect.
When the diaphragm begins to let air through, the pump cannot work well - the fuel enters the crater with oil, which is manifested by a sharp increase in its consumption. The engine itself starts unstably (especially when warm).
It is not difficult to make sure that the diaphragm is corroded to holes. Remove the dipstick from the crater and bring a lit match to it - the gasoline will immediately ignite.
Mechanical pumps also often break due to deformation at the points where the unit is attached to adjacent elements of the fuel system. This is indicated by oil leaks at the joints.
The electric pump may not work if:
- the fuse link has blown;
- the relay is broken;
- the wiring is broken;
- The control module has failed.
Fuel pump relay and fuse
As soon as the ignition is turned on, the pump motor starts working - this is indicated by a characteristic sound. Complete silence indicates a breakdown.
Thus, the relay protects the circuit from high inrush currents, sometimes reaching 80 or even 300 amperes. The operating principle of this element is as follows: voltage is supplied to an electromagnetic coil, which attracts the armature and closes the contacts.
The relay in question can withstand 30 amperes. Exceeding the specified indicator disables the element (its winding may burn out).
To detect a relay in an injection machine, no pinout is needed - the unit is located in the cabin, under the instrument panel. Remove the housing (unscrew the 2 screws) and you will see three elements. The one you are looking for is exactly in the center.
The location of the fuel pump fuse is to the left of the relay. By the way, it is also capable of burning out, and therefore the test begins with it. Do this:
- pull out the fuse and inspect;
- make sure the block is not broken;
- replace if necessary.
Sometimes the fuse blows right away. This means that the wiring is shorted (the insulation can be corroded by oil, or it can fray due to vibration). If there is no pinout, the required cores are found with a tester.
Also, the fuse-link burns out when the pump motor itself short-circuits.
If everything is in order with the fuse, then the question arises: how to verify that the relay is working. The easiest way is to try to start the car with the block open. A working unit will make a click. When the coil burns out, you will not hear any sounds.
Sometimes the pump may turn on sporadically. This means that the relay contacts are dirty. Proceed as follows:
- unscrew the block into which the element is inserted;
- pull it out (do not touch the wires);
- close the two opposing contacts.
This simple technique will allow you to check the operation of the fuel pump without any pinout. You simply supply power to it, bypassing the relay. If the motor turns on directly, it will have to be replaced.
Problems with the starter VAZ 2110 VAZ (2111, 2112)
+1″>When the starter is turned on, the armature does not rotate, the traction relay does not operate
The battery is faulty or completely discharged. Charge the battery or replace it.
The battery terminals and wire tips are heavily oxidized; lugs are loosely tightened Clean the pole terminals and wire lugs, tighten and lubricate with Vaseline
Interturn short circuit in the pull-in winding of the traction relay, its short circuit to ground or open circuit
Replace the traction relay Open circuit in the power supply circuit of the starter traction relay Check the wires and their connections in the circuit between plugs “50” of the starter and the ignition switch
The contact part of the ignition switch is faulty: contacts “30” and “50” do not close. Replace the contact part of the ignition switch.
The armature of the traction relay is stuck. Remove the relay, check the ease of movement of the armature.
+1″>When the starter is turned on, the armature does not rotate or rotates too slowly, the traction relay is activated
The battery is faulty or discharged. Charge the battery or replace it.
The battery terminals and wire tips are oxidized; lugs are loosely tightened Clean the pole terminals and wire lugs, tighten and lubricate with Vaseline
The lugs of the wire connecting the power unit to the body are loose. Tighten the lugs of the wire.
The contact bolts of the traction relay are oxidized or the nuts securing the wire tips on the contact bolts are loose. Clean the contact bolts, tighten the nuts securing the wires
The commutator is burning, the brushes are stuck or worn out. Clean the commutator, replace the brushes.
Break or short circuit in the armature winding Replace the armature
+1″>When the starter is turned on, the traction relay is activated and switched off repeatedly
Battery is low Charge the battery
Open circuit or short circuit in the holding winding of the traction relay Replace the traction relay
Large voltage drop in the power supply circuit of the traction relay due to severe oxidation of the wire tips. Check the wires and their connections in the circuit from the battery to the “50” plug of the starter.
+1″>When the starter is turned on, the armature rotates, the flywheel does not rotate
Freewheel slipping Check the starter on the stand, replace the clutch
Reducer gears are damaged Replace damaged gears
+1″>Unusual starter noise when rotating the armature
Excessive wear of the armature and drive shaft bearing shells. Replace the shells or covers and supports with shells.
The starter is loose or its cover on the drive side is broken. Tighten the fastening nuts or replace the starter.
The starter is attached incorrectly. Check the starter fastening.
Reducer gears are damaged Replace damaged gears
The teeth of the drive gear or flywheel ring are damaged. Replace the drive or flywheel.
The gear does not disengage from the flywheel: – the clutch is stuck on the splines of the drive shaft – the armature of the traction relay is stuck Do the following: – clean the splines and lubricate them with engine oil – replace the traction relay or eliminate the jam
How to change filters
The filter mesh often becomes clogged with dirt - this leads to unstable operation of the fuel system. To remove it, the pump does not need to be disassembled, but it must be removed. Next, the mesh will need to be changed or simply cleaned.
First reduce the pressure in the system, otherwise gasoline will spread throughout the cabin. To do this, pull out the fuse, start the engine and let it stall.
Replacing the mesh is done as follows:
- turn off the ignition;
- raise the rear seat;
- remove the hatch (fixed with two screws);
- open the connector with the wires;
- Use a wrench (17 mm) to unscrew the fuel hoses;
- unscrew the nuts securing the pump (8 pcs.);
- remove the plate;
- pull out the assembly (along with the gasket);
- change the mesh;
- Reassemble in reverse order.
No power supplied
As the pinout indicates, there are 4 wires going to the pump:
- in the center - plus and minus;
- at the edges – fuel level control.
To check whether current is flowing, connect a light bulb (12 V) to the negative and positive contacts and turn on the ignition. If everything is in order, it will flare up. If there is no result, the plus and minus removed from the pump connector are connected in turn to its ground, and then to the relay block.
Next, when:
- the lamp (when the negative wire is connected to ground and the ignition is turned on) blinks, then this contact is damaged;
- the improvised indicator did not flash - there are problems with the plus.
If the wire is installed on the relay and the lamp lights up, there is a break between it and the pump. Disassemble the harness and replace the faulty wire. You don’t need pinouts in this situation either.
When it turns out that it was the pump motor that burned out, it will have to be replaced - it cannot be repaired.
Fuel pump diagnostics
If the gas tank is full, the battery is in good condition, the spark plugs are dry and give a spark, and the starter rotates the engine, then the reason is the fuel pump. The most common reason is that after turning on the ignition, there is no power supplied to the fuel pump. In the same way, it manifests itself when the car is moving, when the power is lost and the engine begins to stall. Another important nuance is the supply of the required amount of fuel.
The pump may be working, producing a hum and buzzing, that is, power is supplied, but not producing the required pressure.
The pressure in the fuel system with a working fuel pump is considered normal to be more than 3 bar. This pressure is collected in the fuel rail and corresponds to a value of 300 kPa. To check the condition, you need to take a pressure gauge and measure the pressure in the fuel rail, taking into account those indicators that are considered normal for each individual model.
For a VAZ-2110 with an injector, the pressure at the moment the ignition is turned on should show no less than three atmospheres, at idle speed - 2.5, and when the gas pedal is pressed - from 2.5 to 3 atmospheres. This method allows you to accurately determine:
- Failure of the rail pressure regulator.
- Fuel pump malfunction or decreased performance due to wear.
- Severe contamination of the filter or mesh.
A decrease in pressure leads to the fact that the engine does not start or starts with difficulty, it begins to stall, and dips appear during operation. If the pump is to blame, then the fuel pump coarse strainer may be clogged. In this situation, there is no need to change the entire unit; you can clean the mesh or install a new one. If you suspect that the fuel pump is not receiving power, you need to turn on the ignition and listen. A slight buzzing or hum should be heard when the fuel pump is operating. And if you don’t hear anything, then there is a problem with the operation of the fuel pump or the wiring to it.
The main list of reasons why the fuel pump on a VAZ-2110 car does not pump includes:
- fuse malfunction;
- non-working relay;
- motor failure;
- oxidation of contacts in the wiring leading to the fuel pump;
- fuel pump failure.
Prevention
Actually, prevention is necessary for all systems and components of the car. But most often, the driver himself is to blame for a “missed” minor malfunction of the fuel pump, which leads to its subsequent failure.
Need to:
- listen to how the car works, and not to its musical part;
- regularly check the condition of the filters and change them on time;
- at least after winter (or better yet, when the season changes), remove and wash the gas tank. At the same time, check the serviceability of the fuel pump and change the mesh in it.
Wiring
On almost all car models, the wiring to the fuel pump consists of three wires: “positive”, “negative” and a wire for determining the amount of fuel in the tank.
If the fuel pump stops pumping, the wiring may be damaged. You can check the power using a 12 W lamp, powering it from the external connector of the fuel pump. When the ignition is turned on, the light should light up. If not, then the external circuit is broken somewhere. To check the external wiring, you need to connect in turn the “positive” and “negative” contacts removed from the fuel pump power connector. It is necessary to close the “negative” contact to ground, after which the light will light up when the ignition is turned on. So, it can be determined that the contact is inoperative. If the lamp does not light up, then the “positive” contact is damaged. Placing a contact on the relay in which the light does not light up, there may be a problem with the wiring in the section from the relay to the fuel pump.
Electric motor
If searching for a problem in the fuel rail and wiring does not produce results, you need to check the fuel pump motor. It is responsible for circulating fluid in the internal part of the fuel pump. When checking, it is necessary to take into account that after a certain period of time the terminals on the fuel pump may oxidize and there will be no power. This is also often the reason why the fuel pump stops working. This means that the motor is most likely working, but the terminals need to be cleaned and tightened.
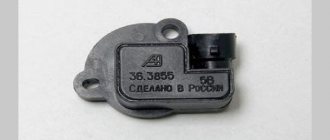
Relay
Next to the ground, under the dashboard, there is a fuel pump relay.
After turning on the ignition, the operating relay allows the pump to create the required pressure in the system in a few seconds, after which it turns off. When you turn the key in the ignition, you can hear a soft click, which means that the fuel pump relay is turned on, and exactly the same when it is turned off. If the relay does not make a click, then the problem is in it or in its contacts. Then it is advisable to replace it with a new one. When looking for the cause of a non-working fuel pump, you need to check the fuse. It is located under the hood and has a resistance of 15 A. It must be carefully inspected; if it is not working, it should be replaced with a new one. The fuel pump in the VAZ-2110 car is immersed in gasoline for active cooling, and the bad habit of driving a car with a minimum amount of gasoline in the tank can very soon cause the fuel pump motor to become inoperative due to burning.
Tips for motorists
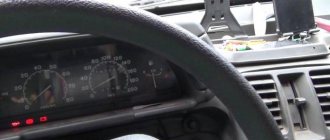
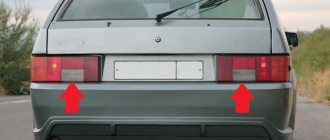
The fuel pump on the VAZ-2110 is of a submersible type, installed in the gas tank located under the underbody of the car, in the rear seat area. When the ignition is turned on, the driver should hear the sound of its operation, since at this moment it raises the pressure in the fuel line of the engine power supply system. The operation of the fuel pump involves an electronic control unit, a fuel pump relay and a fuse that protects the electrical circuit of its activation from overloads.
If, after turning the ignition key to the on position, you do not hear the sound of a running fuel pump for a short duration, then your car’s engine will not start. You need to start looking for the cause of this malfunction by checking the fuse. You need to look for it not in the mounting block, but in the interior of the car. To do this, you will have to unscrew a couple of screws on the right passenger side of the front console and remove the plastic shield. In this case, you will see three relays and three fuses standing in front of you.
In the middle of this row there will be a fuel pump relay, and to the left of it there is a fuse that protects the electrical circuits of the fuel pump and injectors. We take it out and check its integrity, and at the same time it is necessary to look at the condition of the contacts in which it is located. If they are oxidized, they need to be cleaned. If the fuse is intact and undamaged, then you next need to replace the fuel pump relay next to it with a known good one, or ask familiar drivers for “ten”, or you will have to purchase a new one.
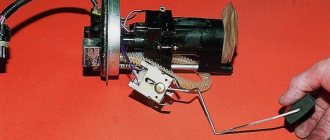
If in this case the fuel pump does not work, then you will have to check its functionality next. To get to it you will have to remove the rear seat cushion. Underneath it you will see a hatch closed with a metal cover, unscrew the screws securing the hatch and in the resulting hole you will see the upper part of the gas tank, where the gas pump is installed.
Disconnect the wiring harness and try to power the fuel pump directly from the battery. If it works, then the fault must be looked for either in the wires coming from the fuel pump or in the electronic control unit (ECU).
If you install a security alarm on your car, which has a function to turn off the fuel pump, then the positive power wire of the fuel pump is cut and an additional relay is installed in its gap, which, in the event of a break-in, should turn off the fuel pump so that the engine stalls and does not start again. In this case, it is necessary to check this relay as well.
If your actions to eliminate this malfunction do not lead to success, then you will have to contact diagnosticians at a service station, since it is unlikely that you will be able to check the electronic control unit on your own.
How does a modern pump work?
The carburetor has been replaced by a modern, more reliable injector, so many owners of even the first ten cars are now trying to modernize their cars by removing the carburetor. And they do it right! But along with the injector, some other systems also need to be replaced.
Carburetor cars use a diaphragm pump to pump fuel when the engine is running. In the same place where the injector is installed, the electric fuel pump turns on, creating the necessary pressure even before the engine starts.
Fuel pump operation diagram
That is, it is powered by a battery. If an injector is installed on the VAZ 2110, then the performance and economy of the car is incomparably higher.
For an electric fuel pump, all the data that allows it to operate correctly is supplied from the computer. But, as you know, perfect units, like a perpetual motion machine, do not exist, so from time to time the pump on a VAZ 2110 (injector) needs to be disassembled in order to repair it.
Fuel system design
Advantages of injection models
The main function of the pump is to supply fuel to the combustion chamber. It must meet certain requirements. The main criterion is pressure.
The pumps for injection and carburetor engines are different. Thanks to the engine with direct fuel injection, there is no need for preliminary preparation of the combustible mixture. As you know, the carburetor is the weak link. Difficult adjustments, clogged jets, difficult starting in cold weather create inconvenience for owners of classic VAZ brands.
Tens and VAZ-2112 internal combustion engines have significant advantages. Let us note the advantages of injection units:
- support for environmental standards;
- direct injection into the combustion chamber;
- fuel economy;
- system reliability;
- increased engine power;
- starting a cold unit without warming up;
- dispensing a portion of the mixture;
- The fuel module is controlled electronically.
Unfortunately, the injector has a number of disadvantages. Maintenance and repairs have to be carried out at a service station. It also requires qualified personnel and a computer to determine the malfunction of electronic components. Let us point out other disadvantages:
- design complexity;
- high requirements for the octane number of gasoline;
- complex diagnostics and repairs;
- expensive spare parts and equipment.
Why is it acting up?
Let's look at the main faults.
- The main, most common reason that the fuel pump makes a loud noise and does not cope with its functions is the filtration system, which includes fuel filters, as well as a special mesh that is located inside the fuel pump. You can suspect that the culprits are here based on the following signs: • your fuel pump is buzzing much louder than usual. Moreover, you need to listen to it exactly when it starts, immediately after turning the ignition key. When the engine starts, you are unlikely to hear the pump humming, because it will be joined by the sounds of a running engine. In addition, you should know that the VAZ 2110 fuel pump hums loudly on its own, and its noise is drowned out by the fuel in the tank where it is located. Therefore, when getting into a car, you should not immediately turn on the music, but listen to how all its systems work; • failures occur in engine operation, which also indicates that fuel is supplied intermittently due to contamination of the filtration system; • These same faults are indicated by a drop in power. Most likely, the mesh is clogged with microparticles of various dirt, which enter the gas tank along with the fuel, or are formed there due to condensation and corrosion processes.
- The clearances available in the supercharger have been increased. A strained sound may indicate this malfunction. You can hear it working under load. In addition, power drops; the VAZ 2110 (injector) has poor throttle response. Gaps increase for several reasons. In winter, condensation may crystallize; in summer, the density of the fuel decreases, causing the fuel pump to cool and lubricate less well. Both provoke the formation of scratches, cavities, and grooves, due to which the gaps increase;
- The fuel pump suddenly stops due to the supercharger wedge, as a result of which the fork that connects the supercharger and electric motor shafts breaks. This blows the fuse. The ignition should be turned off immediately. There is a concern that when the pump stops and the current increases, the gasoline may ignite;
- In addition, a malfunction of the electronics transmitting signals to the fuel pump cannot be ruled out. Before you begin repairing it, you should check the reliability of all connections and wiring.
Repair work
On a carburetor VAZ 2110 it is easier to replace the fuel pump if necessary. It is located under the hood and is not difficult to get to. It is enough to disconnect the pipelines, then unscrew the pump itself.
The electric fuel pump installed on an injection machine is located directly in the gas tank, so it is more difficult to get to it; this is done from the passenger compartment by removing the rear seat.
All fuel pumps are dismountable. After removing the cover, the mesh is removed and its condition is assessed. Of course, you can wash it, but it’s even better to replace it right away. Before starting repairs, you should purchase a repair kit, which must be equipped with a mesh.
Final check before replacing the starter
We turn the key to position II, and nothing happens... In this case, open the hood and remove the air filter by unscrewing the screw on the body and loosening the clamp on the pipe. The starter is located under the filter housing. In the photo we see the following: someone disconnected the solenoid relay cord.
What we found under the filter
Using a needle probe, we check that when you turn the key, “+12” appears. Then, after checking, we wrap the cord with electrical tape.
- The copper is polished to a shine;
- The wire (see photo) is supplied with “plus”;
- The starter doesn't even click.
The first thing you need to check is the battery contacts. We remove the terminals (key “10”) and look at what is under them. There is no point in measuring the voltage with a probe - it will show “12 Volts”.