Adjusting your car headlights is an important element of road safety. Proper adjustment of headlights ensures good visibility on the road at night. Incorrectly adjusted headlights do not provide good visibility to the driver and cause serious discomfort to drivers of oncoming cars. You can adjust the headlights either at a car service center or yourself. Regularly adjusting headlights allows the driver to have confidence in his car.
Why do you need to adjust headlights?
Adjusting the headlights is necessary to prevent emergency situations on the road associated with dazzling oncoming drivers and insufficient illumination of the traffic lane. Incorrectly adjusted headlights impair visibility at night.
- If the light is too low, the distance you can see ahead is significantly reduced. In this case, you may not notice the obstacle or pedestrian, and you will not have enough time to make the right decision.
- If your headlights don't illuminate the right shoulder, you may also miss a pedestrian on the side of the road or a parked car. Also, you will not have a reference point when an oncoming car approaches close.
- If the headlights are turned up, they will blind oncoming drivers, which can lead to an emergency situation, since the driver of the oncoming car cannot see anything.
Turn on the headlights and mark the position
Turn on the low beams (do not turn on the high beams or fog lights). Using tape, form a cross in the center of each headlight beam on the wall (the options for applying guidelines here may vary).
It is considered normal if the light from the driver's side headlight is slightly lower than the second headlight. This is done to prevent light from shining onto oncoming traffic when the car is on the road.
How should low beam headlights shine?
The strength of a car's lighting devices is determined by special devices; you cannot measure it yourself, and this is not necessary. But the low beam of the headlights is distributed unevenly, which is very important in the dark.
The diagram shows properly diffused low beam headlights, which allows you to see the right side of the road, the space in front of the car and does not interfere with oncoming cars. The light is distributed in a similar way due to the different shapes of the diffusers.
Correctly adjusted headlights:
- the maximum part of the light should illuminate the traffic lane for a distance of at least 60 meters.
- The overall flow of light is slightly shifted to the right, which makes it possible to illuminate the right side of the road.
- The left side of the light stream illuminates the oncoming lane in such a way as not to blind oncoming drivers.
If, when driving at night on a highway outside the city with low beams, oncoming cars flash at you, thereby warning you that you are blinding them, then the headlights of your car are not adjusted and it is worth adjusting them so as not to create emergency situations on the road.
The distribution of luminous flux is greatly influenced by the load on the machine. In cars with manual adjustment, you need to independently adjust the direction of the headlights when the car is loaded with passengers or things. Many modern cars are equipped with automatic headlight adjustment depending on the load.
When is tuning necessary?
The quality of roads in the countries of the former USSR, especially in the periphery, leaves much to be desired. Long-term operation of the vehicle in such conditions leads to a violation of the factory settings of the external lighting elements. Gradually, the settings get lost, causing the head optics to direct beams of light in different directions - up or directly under the wheels of the car.
Consequences of incorrect headlight adjustment:
- the driver has to strain to see the unlit part of the road surface;
- if the reflectors of the optics are raised at a large angle, passengers of oncoming cars suffer from glare;
- insufficient illumination of the roadside can lead to an accident - the driver will not notice an obstacle or a person walking along the edge of the road in time.
Note. Electrically adjusting the lighting devices does not help the situation, since the servos only change the angle of the optics up and down, and both headlights at the same time. The task of such systems is to adjust the direction of light beams depending on the vehicle load.
When you need to adjust your headlights yourself:
- if you notice multidirectional light streams (for example, the left headlight shines down, the right one shines up);
- drivers of oncoming cars constantly signal about blinding by briefly turning on the high beams;
- after repair, replacement or removal of front optics units;
- after being hit by the front of a car as a result of an accident;
- when installing rims or tires of other sizes;
- after replacing the front “sagging” springs;
- during the installation of fog lights (FTL).
If you happen to change burnt out light bulbs, then you do not need to adjust the position of the light fixtures. Another thing is the installation of new types of elements (xenon, LED) instead of standard halogen bulbs. In this case, it is advisable to adjust the low beam headlights.
Why does the headlight adjustment go wrong?
A new car purchased from a dealership has headlights adjusted at the factory. But during the operation of the car, various situations arise that lead to disruption of the headlights.
Reasons for changing headlight settings:
- replacing low and high beam lamps. Usually, when buying a new lamp to replace a burnt-out one, drivers are guided by the type of lamp. The manufacturer of the lamp is often ignored. Finding an original replacement lamp is often very difficult. A lamp of the required type, but not from the original manufacturer, may have different settings, which will affect the formation of the luminous flux. Therefore, after replacing the low or high beam lamp, it is advisable to manually adjust the headlights.
- Natural wear and tear during machine operation. Under the influence of vibration, temperature changes, and mechanical influences, the settings in the headlights are lost. Therefore, for cars with high mileage, it is advisable to periodically check the correct settings.
- Replacing the headlight. If one or both headlight assemblies have been replaced in the car, it is necessary to adjust the headlights. Usually this is done directly at the service center, but you need to make sure that this work is done.
- After an accident or impact in the front bumper area, the headlight settings may also be lost, since even a slight misalignment can significantly affect the direction of the light beam.
- Increasing the rigidity of the suspension, repairing the suspension by changing its rigidity.
- Replacing tires or wheels with a different size.
When to adjust headlights
Adjusting the headlights is necessary when all of the above situations occur, as well as:
- if oncoming cars blink at you, warning you of blindness;
- before a long trip;
- if you feel that the road is insufficiently or incorrectly illuminated;
- when installing fog lights;
- in preparation for undergoing maintenance.
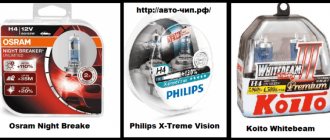
About lamps
Often car owners do not know how to improve headlights. First of all, adjustment. Secondly, installing good lamps.
A few words about lamps. About the simplest and most common at the moment, the halogen ones. For example H4. What does good mean? The manufacturer and price will allow you to draw a conclusion about the quality without installing the lamp in the headlight. The price range for H4 lamps is from 150 rubles to 1500 rubles. My opinion: for 150 they are not needed, for 1500 too, but from 500 to 1000 rubles this is my product. The manufacturer is up to your taste. H4 lamps can also have a power of 100 watts. Do not install such lamps. There are at least three reasons.
- No well-known lamp manufacturer has such power. Such lamps are made by dubious “offices”.
- Such lamps emit a huge amount of heat, the reflector overheats and begins to melt. As a result, a clearly defined spherical surface is lost and the light flux is directed anywhere, the position of the lamp changes, which further diverts the light flux from the desired direction. The “glass” of the headlight deteriorates; in fact, modern headlights are made of plastic; it becomes cloudy, cracks, and becomes a light-blocking filter.
- As a result, you need to change the headlight.
The same applies to lamps H1, H7, etc. I don’t think we need to talk about Chinese xenon. There is a lot of light, it is bright, only these lamps do not shine on the road, but wherever they want and in the eyes of the oncoming driver first of all. It seems bright, but you can’t see anything at all. Of course, there are exceptions, but only exceptions. If you have installed Chinese xenon, turn on the low beam at night, move 80 - 100 meters away from the car, sit down so that your head is at the same level when you are sitting behind the wheel of the car and evaluate whether the headlights of your car are blinding you or not. Would it be comfortable for you to leave with such an oncoming person or not? And then decide whether you need such light or not. I'm not even talking about the attitude of the traffic police towards such a light, and possible problems with the inspector on the road, who has a real chance to “issue” a fine for you.
If all this headlight adjustment is a way to adjust the low beam, high beam, a procedure with screens, lamps, is too confusing for you, just evaluate how your headlights shine. If you suspect that it is not correct, contact the service and they will adjust it for you and you will see how much more pleasant it is to drive with good lights and none of the oncoming drivers wish you anything bad.
Here is an example of one of the devices for adjusting headlight beams.
Device for adjusting headlights
In my opinion, the adjustment result on the screen is better and more accurate.
How to check your headlight settings yourself
If you don’t want to check how your lighting system is configured yourself, you can contact a car service center. But this procedure can be performed independently, especially since such a skill will not be superfluous if the need ever arises to check the settings during a long trip.
To do this, you need to drive up to a distance of 5 meters to a flat vertical surface (a wall, garage door or fence) in the dark, turn on the low beam and look at the shape of the light beams on the wall. If the car is not loaded, the headlight height adjustment should be in the “0” position.
Two headlights form two slightly intersecting light streams. The upper horizontal level of the light beams should be at the same height, approximately 5 cm below the middle of the headlights. If this is the case, then most often no adjustment is needed. If the headlights shine higher or at different levels, it means that the headlights will need to be adjusted.
After replacing the lamp in one of the headlights, you need to check the settings of the light beams. If the replaced lamp does not give the entirely correct beam direction, then you can focus on the light beam of the second lamp. You can adjust it using a special screw, which will allow you to raise or lower it.
The high beam setting is checked in the same way.
If there is no vertical wall nearby, you can use the help of a passenger. You need to ask him to stand in front of the car, 5 meters away, and see how the low beam illuminates him. When properly adjusted, the light beams are at the same height, approximately at the level of the knees of an average person. This way you can give a very rough estimate, but if there are significant deviations, they will catch your eye.
High beam adjustment
To adjust the high beam headlights, the easiest way is to use the same stand you made yourself.
First you need to mark the centers of each light fixture and draw two straight lines vertically. Then you should check the setting. The beam of light should go almost parallel to the road surface. The center of each ray falls at the intersection of the corresponding vertical lines with the upper horizontal one.
Preparing the car for adjusting the headlights
Before you start adjusting the headlights, you need to prepare the car, eliminating all factors that could distort the final result.
To do this you need:
- unload the car from all heavy things;
- fill a whole tank of fuel or the tank must be at least half full;
- equalize the pressure in all wheels to the recommended values;
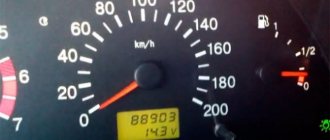
- move the headlight range control on the dashboard to position “0”;
- When adjusting the headlights, a person must be sitting in the driver's seat or a load must be lying in the mass approximately equal to the driver's mass.
Preparing to make adjustments
To achieve the correct position of the headlights, the adjustment procedure must be performed under certain conditions. Carry out the following preparatory work:
- Find a flat area without a slope adjacent to a vertical wall. One of the suitable options is a concreted entrance to the garage; the role of the setting template will be played by the gate.
- Remove unnecessary items from the trunk and interior of the car, leaving only the factory tool kit, first aid kit and spare tire. The goal is to ensure the curb weight of the vehicle specified in the operating instructions.
- Check the pressure in all tires and adjust them to normal if necessary.
- Clean the optical glass from dust and other contaminants that block the path of light flow. Do not use solvents, only ethyl alcohol-based glass cleaners.
- It is advisable to fill the fuel tank full, fill the washer tanks to the top and, if necessary, add antifreeze to the expansion tank.
A headlight adjustment diagram is drawn on the garage door or wall adjacent to the site. You will need a tape measure, a long straight bar and a marker. The color depends on the chosen background - for a white wall it is better to take a black felt-tip pen, for a dark gate - chalk. The diagram is drawn as follows:
- Drive the machine close to the wall. Using body parts or the car brand emblem as a guide, mark a point on the surface that coincides with the central (longitudinal) axis of the vehicle.
- Measure 7 m from the gate and drive the car to the specified distance. Draw a vertical line through the marked point.
- Take 4 measurements on the car: from both headlight bulbs to the ground and to the center of the car. On models equipped with separate high and low beam optics, the listed measurements are made for all four bulbs separately.
- Subtract 50 mm from the number indicating the distance to the ground. Set this size aside on the wall and draw a horizontal line.
- From the vertical axis, plot the distances to the centers of the lamps along the drawn line. Place marks in the form of segments. The scheme is ready.
Note. For separate optics, you need to draw 2 horizontal lines, and the second one must clearly correspond to the measurement from the high beam bulbs to the ground. Segments corresponding to the location of the outer lamps are laid out on it.
Before adjusting the position of the optics, it is also recommended to treat the adjustment screws with a penetrating aerosol lubricant such as WD-40, since the connection threads could become soured due to extremely rare rotation. As a rule, the adjusting screws are located on the rear plane of the headlight housing, facing into the engine compartment. The shape of the head is for a Phillips screwdriver, hexagon or special key.
Where are the headlight adjustment screws located?
Before you begin adjusting the headlights, you need to find out the location of the adjustment screws. They are found in all headlights, of all types. But they may have different locations and different designs. The necessary information for a specific machine model should be found in the operating instructions or on the Internet, where you can also find a video, which will greatly facilitate the entire process.
Each headlight has two screws, one of which adjusts the light output vertically, the other horizontally.
The setup system may also be different. Some screws need to be turned by hand, others with a slotted or Phillips screwdriver, and others with a hex or star. This question is also worth clarifying in order to prepare the necessary tool.
Security measures
In order not to cause harm to health or break the headlights during work, you need to remember a few simple tips:
- Wear gloves when working and do not touch the wiring.
- Only use suitable tools for the adjusting screws, they break very easily.
- Put the car on the handbrake.
- When adjusting, do not apply excessive force.
Finally, one more adjustment method.
It is not difficult to adjust the headlights if there is a flat area with a wall opposite it. The main thing is to apply the markings correctly; the accuracy of the adjustment depends on this. If after carrying out the work oncoming drivers blink, it means the light is too high and needs to be lowered.
Headlight adjustment
Adjusting the headlights consists of several stages:
- wall marking,
- alternate (left, right) low beam adjustment,
- high beam setting.
Adjusting the low beam headlights
To do this, you will need a flat area without a slope, which rests against a vertical wall. We will make markings on this wall. First you need to carefully drive close to the wall.
- We place a point on the wall that defines the central axis of the car.
- On the wall we place a point that corresponds to the center of the left headlight, and a point corresponding to the center of the right headlight.
- We drive away from the wall by 5 meters (some motorists prefer to drive away by 7.5 meters, in which case the lower horizontal line on the wall will have to move down a few centimeters).
- Through the three marked points we draw three vertical straight lines corresponding to the central axes of the left headlight (1), the center of the car (0), and the right headlight (2).
- Through the two extreme points we draw the first horizontal line (3).
- Below the first horizontal line, draw a second horizontal line (4). To find out at what distance from the first line to draw the second, you need to know the angle of the headlight. The percentage deviation of the light beam relative to the road may differ for different car models. You can look for this marking under the hood on the headlight or in the car manual. Most often it is 1%, but it can be 1.3% - like the Lada Priora, or have a different value. If the headlight angle is 1%, then we draw a line 5 cm below the first one, if we moved 5 meters away. If we moved 7.5 meters, then draw a line 7.5 cm below the first one. 1% deviation at a distance of 5 meters is the 5 cm through which we draw the second line. If the deviation angle is 1.3%, then draw the second line below the first by 6.5 cm (if you moved 5 meters) and 9.75 cm (if you moved 7.5 meters). If the angle of deviation is different, then you need to calculate it yourself (well, it’s not for nothing that we learned proportions at school).
- The second horizontal line is important - it defines the upper limit of the line of light.
The first part of the adjustment is done - markings are applied. Now let's proceed directly to the adjustment itself. We insist on the headlights one at a time. To do this, cover one headlight with something opaque (plywood, black film, blanket).
- Using the adjusting screws, we adjust the left beam of light so that its upper border merges with the lower horizontal line, and the inclined segment begins at the intersection of the lower horizontal line and the leftmost vertical line running through the center of the left headlight.
- Then we adjust the right headlight in the same way. We close the left one. The upper limit of the light beam of the right headlight should also follow the lower horizontal line, and the inclined segment should begin at the intersection of the lower horizontal line and the rightmost vertical line running through the center of the right headlight.
Low beam is set.
If lamps with combined low and high beam are used, then nothing else needs to be adjusted; the high beam will be adjusted automatically. If lamps are used separately for low and high beam, then now you need to start adjusting the high beam.
Adjusting the high beam headlights
The high beam of the car is used to illuminate the highway when there is no oncoming car. The high beam must illuminate the road for at least 150 meters so that the driver can see road signs and markings and notice a pedestrian from afar. The high beam has strong brightness and high power, so it cannot be used in populated areas and when an oncoming car is approaching, as many accidents occur due to driver blinding.
To adjust the high beam, we will use the same flat area and vertical wall, with markings already applied, which were used to adjust the low beam. The luminous flux of high beam lamps does not have such clear lines as low beam. Therefore, it is easier to configure it. It should run almost parallel to the road surface.
The center of the light beam of the left headlight should be located at the intersection of the vertical line passing through the center of the left headlight and the horizontal line connecting the centers of both headlights. The center of the light beam of the right headlight must be located accordingly at the point of intersection of the same horizontal line with a vertical line passing through the center of the right headlight.
If this is not the case, then the light beams of the high beam lamps must be adjusted using two adjusting screws.
Adjusting the foglights
Fog lamps are designed to create better visibility during fog, when low and high beams cannot cope, as the light of their light beams is reflected from the suspension of water in the air during foggy weather.
Fog lights have a yellow light and are located much lower than conventional headlights, so they shine under the fog. Fog lights should not shine too high and should not blind oncoming drivers. They should also not shine too low, as this will significantly reduce visibility. Self-adjustment of fog lights does not require significant accuracy.
To set up the fog lights, you still need the same flat area and vertical wall. The adjustment is performed alternately for the left and right fog lights. The car is parked 5 meters from the wall.
We apply markings on the wall:
- Using a tape measure, measure the distance from the ground to the center of the fog lights (this value on the left and right should be the same). We mark these points on the wall. We draw a horizontal line through the centers of the fog lights.
- Draw a second horizontal line below the first. How many centimeters lower must be calculated. Manufacturers do not indicate the angle of the light beam on the fog lights themselves. In this case, you need to focus on the low beam angle. If it is 1%, then for fog lights it will be half as much, that is, 0.5%. And at a distance of 5 meters from the wall, this will mean 2.5 cm. That is, 5 meters from the car, the beam of light will drop to the ground by 2.5 cm. We draw the second horizontal line below the first by 2.5 cm. If the angle of inclination of the near the amount of light in your car is not 1%, but has a different value, then you need to calculate how much the light beam should fall in 5 meters.
The lower horizontal line is the upper limit of the luminous flux of the fog lights. They should not shine above this line. We adjust the luminous flux of the fog lights along the lower horizontal line.
Adjusting LED headlight bulbs
LED lamps have a higher luminous flux than conventional lamps. Therefore, if they are not configured correctly and blind oncoming cars, this is especially dangerous. Basically, LED lamps are regulated in the same way as low beam. The differences are as follows.
When installing an LED lamp, you must install it so that the plane of the LEDs is oriented vertically. For this purpose, some lamps have a rotating base. With its help, you can rotate the lamp around its axis to align the light beam.
Adjusting lensed headlights
Lensed headlights come in adjustable and non-adjustable versions and with auto-levelling. Fixed, as the name suggests, cannot be adjusted. They cost less and are considered of lower quality.
Lensed headlights with an automatic regulator have a big disadvantage, namely that if the regulator fails, the lamp becomes unregulated.
Adjustable lensed headlights are adjusted according to the same principle as regular low beam. To adjust them, special regulators (bolts or handles) are used. Where they are located and how to operate them, you need to look in the instructions or on the Internet, since they are completely different for different models.
Settings
If it is not possible to set up the system at a car service center, you can do it yourself. To do this, you will need a flat area with a wall or a solid fence opposite it. This is a prerequisite for any adjustment option.
Low beam
In this case, it is easier to use a universal method, which is almost the same for all cars. Only the distance from the wall to the car can differ; most often it is 7.5 meters , but some models are placed 5 meters away; it is better to clarify this point separately in order to correctly adjust the light. Next you need to prepare the markup.
- The car is driven close to a wall or fence, then marks are made on the surface clearly in the middle of the low beam headlights and opposite them. These will be the main guidelines.
- Then you can drive the car away and start drawing. Two more marks are placed 5 cm below the center of the headlights and connected by a horizontal line. Vertical lines are also drawn through the points to provide a clear reference point.
- The central axis of the machine is determined and also marked on the wall. The end result should look something like the diagram below.
All parameters are determined individually, since the size of the cars and the location of the headlights are always different.
Then you can start setting up. It is important that at least half a tank of gasoline is filled in the car, and that a person is sitting in the driver’s seat or there is a load approximately equal in weight to the driver. The easiest way to adjust headlights near a wall is this:
- The car is located at a distance of 5 or 7.5 meters, and the center line should coincide with the middle of the hood. It is important to position the car correctly.
- The hood is opened and a screwdriver or other tool is prepared for adjustment. The light is turned on and one headlight is covered with cardboard or any other opaque element.
- The upper edge of the light flux (it is clearly visible) should be located along the line. If it is displaced, adjustment is made with the corresponding screw that regulates the light in the vertical plane.
- Adjustment in the horizontal plane must be done so that the place where the luminous flux begins to rise is at the vertical mark opposite the headlight.
This is what the adjusted light output looks like.
The second method is in many ways similar to the first, but in this case you will need to place the machine at a distance of 10 meters from the wall. In this case, the horizontal line is drawn 12 cm below the center. Some argue that increasing the distance allows for greater tuning accuracy, so if you have the space, you can try this option.
Before adjusting the light, do not forget to set the headlight range control to zero.
Video: A visual example of setting up the headlight.
High beam
The high beam headlights do not have clear lines, they distribute the light evenly, so the adjustment will be much easier. The preparation process is almost the same as with low beam, the main guideline will be a horizontal line 5 cm below the center of the headlights and vertical lines opposite the bulbs.
In this case, you need to adjust the light so that the center of the beam falls at the intersection of the vertical and horizontal lines of the corresponding headlight. Here accuracy is not so important, since long-range lighting is used only when there is no oncoming traffic. If the low and high beam are combined in one bulb, then adjusting one option is enough for the headlight to work as it should.
High beam is distributed differently than low beam.
If the adjusting screws do not provide normal adjustment, it is worth loosening the headlight and adjusting its position. Often problems with light are caused by improper installation.
In the video they set the high beams on a Hyundai Tucson.
Fog lights
In this case, there are no screws for adjustment and the position of the light flux can only be changed in the vertical plane. Before you begin, you should loosen the fog lights. They often oxidize, so it is advisable to treat them with a penetrating lubricant in advance.
A line is drawn on the wall; its height should be 10 cm below the location of the fog lights. After this, the car needs to be driven 7.6 meters, positioned opposite the markings and the headlights turned on. In this case, the upper limit of the light flux should coincide with the line; only this position will ensure normal visibility in fog.
Fog lights also require adjustment to function properly.
How to adjust headlights on the road (if there is no wall)
In a situation where you need to adjust the headlights during a long trip and there is no vertical wall at hand, you can use manual means. The setup technique does not change. We check each headlight in turn, covering the second one with something opaque.
- We wait for darkness.
- We find a flat area or a free section of the road.
- We come close to the car with the low beams on in front and put our hand to the trousers in the place where the border of the light passes.
- We move 5 meters away from the car, the border of the light should drop by 5 cm.
- If it goes higher, then the headlight needs to be adjusted.
You also need to remember to tighten the adjustment wheel on the dashboard when you load the car: put a heavy load in the trunk or take passengers into the back seat. In this case, the rear of the car lowers, and the front lifts up, and the headlights begin to blind oncoming traffic.
Adjust the headlights
audimanual.ru
When adjusting one headlight, you will need to cover the second one. Use a tarp or piece of thick, light-blocking fabric to focus on adjusting one headlight at a time.
- While adjusting the vertical position using the top screw, observe the position of the light source on the wall in front of you. The vertical position of the most intense part of the light should coincide with the horizontal line of the tape that you applied to the wall;
- Proceed in the same way when adjusting the horizontal position. Aim to move the beam so that it lines up with the vertical line of the tape.
How to adjust headlights in a car service center
If you don’t want to or can’t adjust the headlights yourself, you can contact a car service center. At service stations, headlight adjustment is adjusted using special devices, so the adjustment is more accurate and of higher quality than doing it yourself. It is not profitable to buy such devices for personal use, since they are expensive and do not need to be used often.
Adjusting the headlights according to the device
First, the longitudinal axis of the device is aligned with the central axis of the car; the device must stand strictly perpendicular to the headlights. Next, it is leveled in a horizontal plane, focusing on the air bubble, following the example of a building level.
Then set the adjustment angle on the device. A value of "0" means that the headlights shine parallel to the road. Next, set the desired angle, which is indicated on the car headlight. The device allows you to very accurately adjust the angle of the light beam with an accuracy of tenths of a degree.
Drive away from the wall in reverse at a distance of 7.5 meters
To clearly maintain the distance, use a tape measure to measure the required distance from the wall. Important! Back up as smoothly as possible.
- Having backed up, turn off the engine and turn off the headlights, open the hood;
- Before starting work, make sure that the hood is secured, locate the left and right headlight housings;
- Remove decorative elements blocking access to the headlight housing. Check your vehicle's owner's manual;
- Adjustment screws should be located on the top and side of the headlight housing: one to adjust the vertical position and the other to adjust the horizontal position.
VOLVO
Tips and tricks
Having figured out how to adjust the headlights without a stand, it is quite possible to implement this procedure yourself. In this case, it often happens that inaccurate rotation of the screws can cause broken threads, etc.
For this reason, you need to determine in advance where such adjusting screws are located on a particular car, as well as what tool is best to rotate them without the risk of damage.
We also note that if the headlights were previously raised, after adjusting the headlights it may turn out that there is not enough light. In this case, clouding of the headlight glass is often the cause. The problem is partially eliminated by installing more powerful lamps (sometimes it helps), but it is optimal to improve the light by polishing the headlights or completely replacing the headlight glass.
As a rule, an integrated approach can significantly improve the quality of lighting, while the headlights shine on the road without blinding other drivers. You can also make improvements by replacing halogen lamps with xenon ones.
There are two ways to go. If the model has a version with xenon from the factory, then the headlights can be replaced, as well as completing the car with all the necessary elements. It is also possible to install xenon not as standard.
We also recommend reading the article on how to polish car headlights yourself. From this article you will learn what it is for, as well as how and how to polish headlights, how to carry out this procedure with your own hands, etc.
It is important to remember that in many countries such manipulations and changes to the design of the car are prohibited. Moreover, even if after such an installation no problems arise with regulatory authorities, it is important to understand that simply replacing a halogen lamp with a xenon lamp is not enough. Xenon lamps are much brighter than halogen lamps!
Standard headlights and reflectors are not designed for such a luminous flux and strongly dazzle oncoming traffic, even if all headlight adjustments are made correctly and exactly according to the diagram.
Of course, blinding oncoming drivers can cause conflicts on the road, and also worsens the safety of both the owner of a car with such optics and other road users.
The only solution is to install lensed xenon. As part of this installation, the standard headlight is separately prepared, the glass is polished, after which a lens is installed in the headlight, which allows you to form a clear cut-off line and accurately distribute the light on the road, while avoiding dazzling oncoming drivers.
It is also recommended to install a separate headlight washer or constantly monitor their cleanliness. If you have a headlight leveler, you should definitely use it if the rear of the car is loaded and the headlights start to shine upward for this reason.
Finally, we’ll add that if adjusting the headlights yourself is done in makeshift conditions, it’s important not to forget about the roadside lighting. If the light output from the left headlight, first of all, should not blind other drivers, the level of illumination of the right side of the road can be slightly improved by raising the right edge of the light beam a little higher.
Preparatory work
Setting up the car lighting system is best done by a service station. They have the necessary certified equipment, specialists, and experience. Self-adjustment is not as accurate, but is free. To carry it out, it is necessary to prepare the machine itself, select a flat area, and make a screen with markings.
Machine preparation:
- Clean the internal cavity and external surface of the headlights from dust, dirt, eliminate defects: cracks, chips, large scratches;
- They check the tire pressure, place loads on the driver's and passengers' seats, fill the fuel tank at least halfway: create the conditions in which the car is used daily.
Site requirements: flat, strictly horizontal surface, enough space for maneuvering. Any suitable vertical surface is used as a screen: a building wall, a portable partition mounted from scrap materials.
An adjustment diagram is drawn on the screen. It is individual for each model range. Consists of several lines and dots.
Create a diagram in the following sequence:
- Drive the car close to the screen; mark the location of the center of the car and the centers of the headlights;
- Vertical lines are drawn through the points, designated by letters: “A” is the left line, “O” is the central (axial), “B” is the right line;
- A horizontal line is drawn through the points reflecting the location of the centers of the headlights; Below it, at a distance of 5-7.5 cm (depending on the model), draw another horizontal line; the points of its intersection with the side lines are designated by the letter “K” (control); start making adjustments.
Reasons for the displacement of the light beam on a passenger car
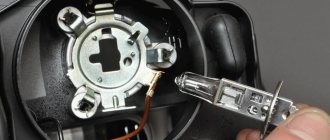
The simplest reason for additional adjustment would be replacing the light bulb.
There are often situations when this optical element burns out while on the road.
As a rule, headlight bulbs should be replaced in pairs. On the other hand, very often motorists insert only one light source that is approximately suitable in terms of parameters. Therefore, the light beam cannot be formed normally.
In addition, on some cars it is extremely inconvenient to install a lamp, so various distortions are possible here.
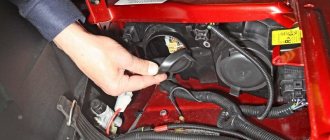
After damage to the front end as a result of an accident, repairs often require removal of the optics. After this, the rear-mounted headlight will no longer shine as well as before. Under such circumstances, additional configuration will definitely be required.
Situations often arise when headlights have to be replaced due to various breakdowns. During long-term use, the glass becomes cloudy, the reflector burns out, and the plastic dries out and cracks. In such cases, the optics are most often completely replaced. After this procedure, adjustments must be made.
In addition, the headlights can simply be stolen. Under such circumstances, you will have to buy and install new optics. This also needs to be done correctly.
When adjustments are futile
If you feel that your car is in dire need of light correction, read the guide below carefully. Although this should be done periodically, please note that in some cases it may not be as successful.
For example:
- poor quality optics or light bulbs. A typical example is the installation of light sources that do not match the power parameters set by the manufacturer. There is only one solution - installing lamps (in particular, xenon) that can solve this problem. Only if you are not afraid of penalties from the traffic police;
- cloudy plastic that begins to scatter light in reduced volumes. The easiest way may be to polish the headlights, which you can easily do at home with your own hands. Of course, this should be preceded by a light quality check, which will be discussed below;
- the appearance of cracks on the glass of the optics. The safest solution is to replace them with new ones, because cracks will cause light to refract incorrectly.