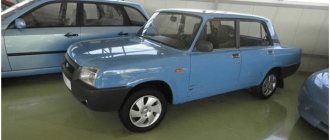
Modern youth no longer begins their automotive experience with the “classic penny”, because they want more modern and reliable cars. But the financial capabilities of most young people are not so great that they can immediately get behind the wheel of a foreign car, and therefore most novice car enthusiasts buy themselves a “ninety-nine”. And if it is injection, then we can consider ourselves lucky.
Specifications
VAZ 21099 has fairly high technical and design characteristics. At the same time, the engine lasts for 150+ thousand kilometers. It all depends on driving style and maintenance.
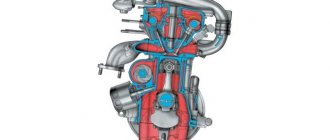
Let's consider the main technical characteristics of the motor installed on Sputnik vehicles. The VAZ 21099 engine injector received a modification marked 2111/2114.
| Name | Index |
| Volume | 1.5 liter (1499 cm3) |
| Number of cylinders | 4 |
| Number of valves | 8 |
| Fuel | Petrol |
| Injection system | Injector |
| Power | 77 hp |
| Fuel consumption | 8.2 l/100 km |
| Cylinder diameter | 82 mm |
All cars with fuel injection were equipped with a 5-speed manual transmission.
Malfunctions of VAZ 21099 - the injector also fails!
Regardless of the time of year outside, very often the car may simply stop starting, or begin to respond poorly to the gas pedal. In this case, all on-board computer sensors may not show errors. The causes of failure should be sought in the injector.
Usually the breakdown is associated with clogging of the fuel injector nozzles, which increases fuel consumption in the car and reduces traction. Due to the fact that the fuel does not enter in the quantity required for engine operation, the idle speed begins to float. For a VAZ, the normal value when the engine is idling in warm weather is 900 rpm. When starting in the cold season, the engine produces 1500 rpm; with proper operation, after 5–10 minutes they should drop to 900.
It is also worth paying attention to the throttle valve of the intake manifold - over time, black deposits appear on it, which prevents it from properly passing air. It is enough to clean the damper with a special spray and gently wipe with a cloth - the problem is eliminated!
Service
Engine maintenance, in this case, does not depend on its volume and power, since the carburetor and injector did not differ much in design features, except for the injection system. So, let's look at the procedure for carrying out maintenance of the power unit 21099.
Since the engines stopped being produced in 2011, the technical diagram will be given for a power unit that has undergone a major overhaul.
Maintenance - 1. Carried out after 1000 km. According to the recommendation, in this service it is worth changing the oil filter and power unit oil.
Maintenance - 2. Performed at 10,000 km. Here, not only the lubricating elements and the fuel filter are replaced.
Maintenance - 3. After 20,000 km, it becomes necessary to adjust the valves, replace all existing filters, and also diagnose the engine for leaks. It is also recommended to measure the compression and adjust the valves. Don't forget that you need to change the oil.
TO - 4. In this maintenance, the elements of the gas distribution mechanism, water pump, and clutch are checked. Also, in addition to the standard procedure for changing the oil and filter, the valve cover gasket is also changed. This maintenance is done at 30 thousand km.
Subsequent maintenance is carried out according to scheme 2-5 of the technical map described below. Do not forget that untimely maintenance of the power unit can increase the wear of internal elements, as well as reduce the service life of the motor.
It is recommended to fill the engine with 3.5 liters of oil. The most suitable markings are 5W-30, 5W-40, 10W-40, 15W40. When changing lubricant without flushing, it is necessary to fill in 3-3.2 liters of fluid.
Where is the temperature sensor located?
If the temperature sensor does not show on the instrument panel, there is a high risk of overheating the engine, since the instrument panel does not inform the driver about the heating of the internal combustion engine coolant. Of course, the instrument panel or electrical wiring may be faulty, but most often the temperature sensor (DTOZH) on the engine itself refuses to work.
Where is the temperature sensor located on an injection car 099? Of course, you need to look for it in the engine compartment:
- open the hood;
- we find the wiring that is located between the rear of the engine valve cover and the air filter housing;
- where the DTOZH is located can be seen in more detail in the following photos.
Repair
Repair of the power unit is carried out with your own hands. As practice shows, most car enthusiasts carry out this process in their garage. Elements such as the thermostat, water pump, spark plugs and high-voltage wires can be changed without problems. As for the injectors, to clean them you will need a special stand, which is available at car services.
To reduce fuel consumption, you can flash the engine control unit. This is what motorists do. This operation can only be performed independently, but it is recommended to contact professionals who understand the process and also carry out additional adjustments.
Carrying out a major overhaul will require some design knowledge and engine repair skills. So, to grind the plane of the block and head, you will need a surface grinding machine. Also, for boring cylinders, a boring and honing stand is required. All other operations are performed by hand.
Content
The injector is controlled by electrical signals that come from a microprocessor
, and in order to issue them, he monitors signals from sensors installed on and in the engine.
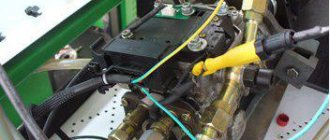
The only work that can be done on an injection engine to adjust it and stabilize its operation is flushing the injector, or rather flushing the injectors.
Wiring diagram for VAZ-2109 carburetor
- Headlight.
- Electric motor for headlight glass cleaning system. An optional part, used mainly on export vehicles.
- Limit switch for powering the engine compartment lamp.
- Klaxon.
- An electric motor drives a fan installed on the radiator of the cooling system.
- Temperature indicator that provides a control signal for the electric drive of the fan impeller.
- Alternator.
- Fluid supply valve for headlight glasses. Used in conjunction with paragraph 2.
- Fluid supply valve for the glass of the fifth door.
- Fluid supply valve to the front glass.
- Spark plugs.
- Hall sensor used to distribute ignition pulses.
- Coil.
- Limit switch for reverse gear lights.
- Fluid temperature meter in the cooling system.
- Starter.
- Accumulator battery.
- A sensor that measures the fluid level in the brake booster.
- Switch that controls the ignition system.
- Sensor for determining the position of the top dead center of the piston of the first cylinder. Installed on some export VAZ 2109 with a diagnostic system. Found only on cars before 1995.
- Diagnostic block. Optional element, installed together with item 20.
- Controller for controlling the solenoid valve installed in the carburetor.
- Starter switch contact block.
- Limit switch on the carburetor.
- Economizer valve.
- Sensor signaling an emergency decrease in oil pressure.
- Washer pump drive.
- Fan impeller motor for ventilation and heating systems.
- Resistance providing additional fan speeds.
- Speed shifter.
- Windshield wiper drive.
- Cigarette lighter.
- Illumination system for levers for adjusting heater operating parameters.
- Socket for additional equipment.
- Lamp for auxiliary lighting of the engine compartment.
- Illumination system for the glove box on the instrument panel.
- Relay and fuse link mounting block.
- Instrument panel light switch.
- Parking brake lamp limit switch.
- Brake lamp limit switch.
- Steering column switch lever block.
- Exterior lamp switch.
- Hazard switch.
- Turn on the rear fog lamp.
- Bimetallic fog lamp fuse.
- Heated glass switch on the fifth door.
- Turn signal repeaters on the front fenders.
- Central interior lighting.
- Individual lampshade.
- Switches for backlight operation on the middle pillars.
- Ignition switching unit.
- Egnition lock.
- “Low” type instrument cluster.
- Choke limit switch on the carburetor.
- Rear lights.
- Fuel level meter in the tank.
- Heated glass.
- Rear wiper drive.
- Two lamps for room illumination.
Block head and timing device
All front-wheel drive cars of the VAZ family, be it 2109, 2110 or 2114, have one cylinder head, common to all cylinders. They are mounted to the block using ten screws. During installation, a metal gasket is placed under it. This gasket is for single use and cannot be reused. There are five camshaft bearings at the top of the cylinder head.
Article on the topic: Oil leakage from under the valve cover: why does it occur and what to do?
The camshaft of the engine of the VAZ-2109 car has the index 21083. Some engines are equipped with 2110 or 2111 shafts; their design is slightly different from 21083, which allows for an increase in engine power. The shaft is cast from cast iron, there are five supports and eight cams on it that open the valves. It is driven by a toothed belt from the crankshaft pulley. The shafts can be correctly installed relative to each other using the alignment lug on the rear timing belt cover and the marks on the drive gears and flywheel.
Seats are pressed into the cylinder head, as well as valve guides. On the inside of the bushings there are grooves for supplying lubricant; the bushings are closed on top with oil deflector caps.
The valves are made of steel, and the intake head is made of heat-resistant steel. They are mounted obliquely in one row. The inlet valve has a larger diameter than the outlet valve. The gaps between the valves and camshaft cams are adjusted using shims that have increased wear resistance.
Pushers are metal cups moving in the cylinder head holes. To improve wear resistance, the surface in contact with the ends of the valve stems is cemented.
Let's get started:
- First you need to drain the coolant into a special separate container. Any liquid remaining in the radiator should be removed using a hose and funnel. Carefully remove the air ducts and, be sure to pay attention to possible misalignment of the holes that are located in the panel with the stove nozzles. If the misalignment exceeds 50%, you need to cut the interior heater.
- Next, having previously marked the connectors of the switches and light bulbs, remove the instrument panel. We disconnect the steering wheel, steering column trim and steering column switches. Next, we dismantle the heater: unscrew the 4 M10 nuts, disconnect the wire connector and all connectors on the heater body.
- Disconnect the radiator hoses and remove the heater valve cable latch. Next, carefully remove the heater, after unscrewing the two fan screws. Remove the radiator by unscrewing the three bolts. Be careful - there may still be coolant left here.
- Then make turbulators. These are special plastic spirals that increase the heat transfer of the radiator. “According to the rules,” they should be installed at the factory, but most often they are not. To make them yourself, you need to cut aluminum or copper plates, the width of which is 6 mm and the thickness is 1.5 mm. One side of such a plate should be clamped in a drill, and, at the same time, the other, using a vice, should be twisted into a spiral.
- Carefully inspect the bottom of the heater. Make sure there are no deformations, displacements, breaks or other defects. Then disassemble the stove by separating the body into two halves. To do this, use a screwdriver to open the latches and then unscrew the screw under the central nozzle. Remove the damper control levers.
- Carefully inspect the inside surface of the stove. If the foam has come loose, carefully glue it back, you can add strips of bitoplast. The housing should be made as airtight as possible. Adjust the center shutter.
- Before you begin assembling the heater, be sure to lubricate the places where the dampers are attached with a special grease. At the same time, when connecting the halves of the case, apply silicone or acrylic sealant to the connector. The heater should be assembled in the reverse order of disassembly. If there is deformation on the bottom wall, fill the gap with sealant.
- There should be no gaps between the stove body and the radiator. In the places where the housing is connected to the radiator, bitoplast should be glued. Next, you need to balance the fan impeller by winding wire around the blades. The wires must be routed through a special rubber plug located in the heater housing.
- Be sure to adjust the travel of the dampers. You need to be guided by the fact that the levers should always be clearly fixed in their extreme positions. Adjustment must be carried out by selecting the positions of the braid. Next, adjust the stove tap. You should choose a position in which the tap will not close completely.
- It is necessary to lubricate the hoses and radiator tubes with sealant before installing them. New clamps should be used. When the assembly is completed, you have filled in the coolant and warmed up the engine, you should tighten the clamps again. Before installing the instrument panel, you need to glue foam and bitoplast to the inlet holes of the nozzles.
Examination
Today, VAZ 2109 car owners use two methods to check the condition of the coolant temperature sensor. Let's say right away that the second one is more reliable, but the first one is easier. Decide for yourself which of the methods presented below to use.
Verification method
Your actions
According to the table, check whether the resistance corresponds to that required at a particular temperature of coolant or boiling water.
Temperature (in degrees Celsius)
Resistance (Ohm)
If there are deviations from the norm, we conclude that the sensor no longer performs its functions properly and therefore requires mandatory replacement.
Replacement
