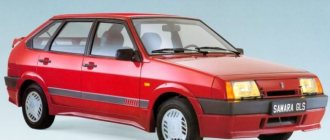
The LADA Granta station wagon has very serious problems with noise insulation, which I solved on my car for relatively little money. And it only took me... 3 hours!
Or rather, not from me, but from the masters, which I really liked with its convenient calculator for calculating the cost of sound insulation. Please do not consider this publication an advertisement for “Avtoshum”, I don’t have any goodies from them, but I can’t do without mentioning their masters.
Further text will be large, there will be many numbers and photographs of the work being performed. And there I also measured the noise level and made interesting conclusions...
All photos: author
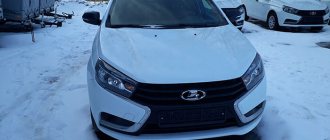
The photo shows the same car of mine in which problems with sound insulation were observed. They are explained like this: LADA Granta Cross
- a budget station wagon, and all budget station wagons, by definition, are distinguished by a not very pleasant booming body - like a bucket. Sedans (especially sedans!), hatchbacks and liftbacks are not so burdened with booming noise and this is a plus for them!
I knew this and even once drove a similar Granta (they drove me up and there was a buzz), but the practicality of the station wagon body was in the first place for me. And making a car “noisy” is just a matter of money.
Let's talk more about money
Even my youngest daughter told me that “why should I buy a new car and then finish it up?” Alas, she didn’t know that a car that was more or less decent in terms of sound insulation (station wagon) was another 350 thousand, no less - LADA Vesta SW Cross. And here, even if I suddenly order a full Shumka, everything will cost me 26 thousand (plus “wishes”).
I didn’t order full sound insulation, but only ordered floor insulation for 8,000 rubles. Along the way, “wishes” arose, which were valued by the craftsmen at another 2,000 rubles - I agreed and they did everything!
Beginning of work…
Materials and tools
Body soundproofing material
In order to carry out acoustic tuning with your own hands, you will need tools that are found in the trunk of almost every passenger car: a jack and a set of keys. In addition, you will need:
- hair dryer;
- knife;
- scissors;
- dense roller;
- sandpaper;
- solvent.
While the list of tools is relatively small, the list of materials that can be used to protect a car from extraneous noise is quite extensive.
Soundproofing Lada involves the use of the following materials.
- Vibration isolators designed to reduce vibration from the main components of the machine - engine, wheels and gearbox.
- Sound insulators that have the ability to reflect external sound waves, preventing them from entering the car interior.
- Sound absorbers, which due to their structure almost completely absorb sounds.
- Anti-squeaks designed to eliminate the characteristic sounds produced by rubbing or contacting parts.
A wide range of such materials are available for sale to improve the acoustic qualities of the interior.
Speaking of masters...
Two people worked: an older man (in the photo with glasses) and a young guy. It was very interesting to watch how they performed the same job in very different ways (on the right and left of the car). For example, when gluing the floor began, the older one glued the material in small pieces. But the young man tried to paste the entire sheet of material at once. And, of course, the first one was more dexterous... Experience, sir...
In general, well done guys! I am a professional in several fields myself and love to see how other professionals work. Liked! Thanks to them!!!
Covering car doors with soundproofing materials
Now let's look at the process of soundproofing doors in a Lada Granta car in more detail. To do this yourself, you need the following materials and tools:
- set of acoustic plugs for cars;
- 5 sheets of 3 millimeters each of “Vibroplast” Gold or Aero;
- 2-3 sheets of “Bitoplast” 10 millimeters;
- pistons;
- rubber roller;
- alcohol;
- corrugated pipe;
- protective gloves;
- knife;
- screwdrivers and keys.
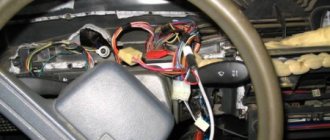
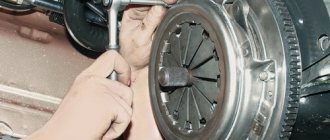
Having prepared the Lada Granta car and the necessary equipment, you can begin to work. First you need to remove the trim from the car doors.
Step 1
Step 2
To do this, remove all the plugs by prying them up and unscrewing the screws. By snapping the pistons off the bottom edge, you need to pull off the covering material. Then, you should unscrew the columns and remove the dirt-proof films. Next, you need to treat the work surface with a degreaser, for example, alcohol, to remove dirt and dust. Then you need to smooth out the old vibration-isolating pad or glue a new one. Remember to wear gloves to avoid possible cuts and burns.
Step 3
Next you need to cut the material. Noise insulation is best achieved with the Vibroplast Gold/Aero vibration absorber. It needs to be cut into pieces of approximately 10 by 15 centimeters or strips. On the foil side, each element should be heated with a hairdryer to a certain state in order to prepare it for use.
You need to remove the paper from the molten piece, push it through the technological windows and stick the skins onto the metal, leveling it with a roller. Such maneuvers must be performed for each door of the Lada Granta car.
Step 5
At the next stage, you seal the technological holes with your own hands with vibration-proofing material. But before this, the wires should be secured by putting a corrugated pipe on them.
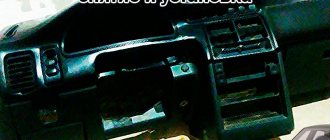
What the disassembly showed...
Disassembly showed that AvtoVAZ has a so-so attitude to sound insulation of its budget cars. Well, noise in the form of felt-loose mats cannot be considered serious. Is it really the same noise on Vesta?
After the “opening,” two interesting points emerged:
1. The felt “sound insulation” under the driver and front passenger is not at all the same as under the rear passengers - it is thinner and the material is slightly different (at least on my car)…
2. While studying the issue of sound insulation, I often came across information that there is no... vibration insulation under the driver! There is something underneath everyone, but let the driver feel the road with his feet, otherwise what kind of driver is he then? :)) So it was on my car! This surprised me very much...
I also discovered an interesting and funny solution: a foam plastic foot rest for the front passenger - I’ve never seen anything like this and no matter how AvtoVAZ know-how it was (the vocational school students were frolicking in practice again?)…
However, Chinese automakers compete very successfully with our AvtoVAZ using “bypass” technologies - I personally saw a Shumka made of sand
(!!!) sewn into fabric mats, similar to how we sew quilted jackets... I think it was Chery Amulet... :))
Tools and materials
To perform work on dismantling the car interior and applying materials, you can get by with standard tools, but it is better to purchase some specific equipment. List of tools:
- Screwdriver Set;
- wrenches and sockets;
- a set of plastic grips and spatulas for disassembling the car interior;
- narrow stitching roller made of plastic or hard rubber;
- protective gloves.
The use of modern self-adhesive materials allows you to do without a hair dryer. To improve elasticity, vibration insulation sheets can be laid out in the sun before pasting. List of materials:
- rags;
- sponges;
- solvent;
- vibration isolation sheets;
- sound insulation sheets;
- cushioning material;
- plastic clamps;
- soundproofing mastic.
As a solvent, in order not to suffer too much from the pungent odor, it is better to use white spirit.
Let's get to work...
STP brand materials were used
:
- The first layer is vibration-absorbing material GB with a thickness of 3 mm;
- The second layer is the noise-absorbing “Barrier KS” (4 mm);
- The third layer (“wish” on the front wheel arches) is Noise Block (2 mm).
From left to right: GD, Noise Block and Barrier KS.
I will say right away that the thicker the material, the better. But I chose the most budget. True, the result is quite significant (more on that later), but if the means allow, then it is better to put a thicker second layer.
And this is not only my personal knowledge of physics, but also the conclusions of Shumka tests by the Za Rulem magazine somewhere in the mid-90s - I remember that article. Everything there is linked to the number of surfaces that sound encounters on its path. In thick material, in its numerous layers and bubbles, there are more such surfaces! It will take a long time to explain, but know: thicker is better!
Please note that the “vibration” is not glued to the stiffeners, but only to the “area” elements - they are the ones most vibration-loaded. Those.
Please note: Review of Volkswagen cross up! .
There’s no need to blow the minds of the craftsmen if they vibration-isolate the way I do, and not every inch, whether it’s needed or not, it won’t do any good.
But be sure to check this: it is the “vibration” that needs to be rolled in forcefully with rollers like these. Just don’t try to demand from the craftsmen that they roll out the second layer as well - the whole point of the noise will be immediately lost. The second layer is simply applied “by hand”!!!
One of my “wishes” was that the craftsmen would make noise and the “podium” on which the passenger sofa lies. According to the original “plan”, i.e. the one that costs 8,000 rubles, Shumka only reaches this podium and rises to the top. That's all. I asked to cover everything up to the backs of the seats.
The second layer completely repeats the first. Everything looks like this, but let me remind you that if funds allow, then do not be greedy for thicker Shumka, at least in the area of the arches and along the central tunnel (the muffler runs below there). True, problems may arise with laying the floor covering, but here you need to find a balance or insist on your own!
In the photo above, I show you the second “wish” - increased noise in the arches and partially in the front shield. A thin Noise Block is pasted here. According to the masters, it gives an effect. This is probably true, but I have very noisy stock Pirelli Cinturato P1
and this Noise doesn’t even save you from it. But still, the roar of rubber is now noticeably less audible.
However, we must take into account that my wheels are a little overinflated. Instead of the required 2 “points” I pumped up 2.3 (+15%). This is a “cargo” habit I have, which appeared after two explosions. *
wheels on MAN and Gazelle. Overinflated wheels are hard and make more noise.
*
—
Only under-inflated wheels explode due to overheating.
.
The old factory Shumka is put back on top of the one made. This is normal and saves us money. You can, of course, demand that a thick Shumka be rolled up instead, but... Mani, mani...
Interior noise protection
Work in the cabin involves soundproofing the wall of the engine compartment, rear parcel shelf and doors. In addition, you can treat the glove compartment panels with anti-squeak yourself. Car doors have the largest surface area that can be subjected to acoustic tuning in the cabin.
Soundproofing doors begins with disassembling them. After removing the trim, the entire surface of the door is cleaned of dirt and degreased. Next, two sheets of vibration absorber are glued overlapping. A layer of sound-absorbing material is glued onto them, and an anti-creaking sheet is placed on top of it. Rubbing parts and holes for them are covered with anti-squeak. The plastic trim is covered with a vibration isolator, and the door opening handle is covered with anti-creaking. After this, you assemble the door yourself. The sound insulation of the remaining doors of the Lada Grant is similarly arranged.
The interior floor can be covered with layers of vibration-insulating and noise-absorbing materials. Particular attention should be paid to the absence of cracks. Soundproofing the trunk shelf is necessary not only to get rid of rattling parts and noise from the luggage compartment. It is important for improving the sound quality of a speaker system that is mounted on a shelf. This work begins with dismantling the shelf. After this, layers of vibration absorber and noise absorber are successively applied to the product.
Anti-creaking is glued in places where the shelf touches the side platforms. The wall of the engine compartment is covered first with vibration and then with noise absorber. The moving parts of the pedals are covered with a material that eliminates squeaks.
Comparison of treatment zones
There are zones that can be processed independently of the others:
- doors;
- wheel arches;
- trunk;
- salon floor;
- front panel;
- ceiling.
The treatment of Lada Granta doors and wheel arches provides the most noticeable effect. After finishing, doors become heavier, close more clearly and with a more noble sound. Sound insulation of doors cuts off street sounds, road debris reaching the outer surface can no longer be heard, and acoustics begin to sound differently. The wheel arch treatment combats the sound of tires rolling.
The intensity of the sound from pebbles flying along the arches and streams of water from under the wheels is reduced. When installing a powerful audio system, ceiling insulation becomes important. Without connection to quality music, the ceiling is not an important area. Soundproofing materials only show themselves here when it rains. In the trunk area, it is necessary to suppress the noise of the exhaust system. This area becomes especially important when installing powerful speakers in the luggage rack and a subwoofer in the trunk.
Soundproofing the cabin floor muffles engine and transmission noise. These sounds largely reach the vehicle's interior by being reflected from the road surface. In the front panel you have to fight with “crickets”. In general, this is limited to pasting sealant on the joints of parts, rods, wiring and pulling all fasteners.
Even the most complete sound insulation rarely gives a 100 percent result. Difficult-to-eradicate “crickets” become especially noticeable against the backdrop of a general reduction in noise. You need to be prepared for this when deciding on such long and painstaking work.
Manufacturers' recommendations (different methods)
Installation diagrams for trunk sound insulation with materials:
StP Aero Plus (3mm)
Bimast Bomb Premium (4.2mm)
Shumoff Mix F (6.2mm)
Accent Premium (8-10mm)
Approximate price of materials (depending on body type):
- Budget option (2 layers, thin vibration damper and heat insulator), up to 2,500 rubles.
- Popular option (2 layers, vibration damper and sound absorber), about 3,000 rubles.
- Maximum effect (3 layers of vibration damper, sound absorber and sound insulator), more than 3,000 rubles.
Sound insulation of the hood
It's better to start work from the hood. This is the easiest area where you can practice cutting and gluing special materials. Inexpensive vibration and sound absorbers can be used for the hood. Vibroplast M1 is perfect for the first, and Splen for the second.
1. Raise the hood and inspect it from the inside. If there is thermal insulation there, carefully remove it. The inner surface of the hood lid is not uniform. It has symmetrically located recesses. In fact, they need to be insulated.
2. Treat the surface with white spirit and wipe dry with a rag. We measure, mark and make patterns from cardboard that correspond to the shapes and sizes of the recesses.
3. We transfer them to vibration-absorbing material. Cut it out.
4. Heat the cut out part with a hair dryer to make it more elastic.
5. Having removed the protective film on the adhesive layer, glue the vibration absorber to the selected area. After this, we warm it up again with a hairdryer and press it to the surface with maximum force, using a roller or spatula;
6. When all the recesses are glued, we cut out and glue the sound-absorbing material – Splen – in the same way.
7. We install the insulation back.
Roof sound insulation
To soundproof a roof, it is better to use a thin vibration damper such as Vibroplast M1 or “Silver”. There is absolutely no need for excess weight here. For sound absorption, Spleen with a thickness of 4 mm is ideal, which is also a good heat insulator.
The processing procedure is similar.
2.Remove the factory sound insulation.
3. Degrease the surface with white spirit.
4.Mark, cut, warm up the vibroplast.
5.Glue it between the stiffening ribs and press it.
6. Apply a sound absorber as the second layer.
Application rules
To remove interior parts, all visible screws are unscrewed. The element is pryed off from one edge and then along the entire perimeter to snap off the plastic or metal clips. To remove load-bearing elements such as seats or seat belts, you have to use wrenches and sockets. The surface to be treated is thoroughly cleaned of dirt and anti-corrosion coatings, dried and degreased.
Many people strive to cover the entire surface of the metal with vibration insulation. This is a pointless waste of time and expensive material. It is necessary to paste over extended flat surfaces that are capable of resonating. By default, 70% of the surface is covered. Never seal service or ventilation openings. They allow moisture to escape and air to circulate. The plugs must be left open; they will be needed to perform technological operations.