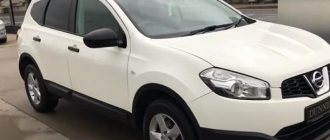
The one hundred and fourteenth car model is AvtoVAZ’s own development. The car belongs to the Samara-2 family and is the result of a deep restyling of the VAZ 2109. The 2114 has new headlights, a bumper, a hood, and a spoiler that looks very impressive. And in the cabin, a European instrument panel and an on-board computer appeared, allowing you to find out the error codes of the VAZ 2114. From the point of view of maintainability (compared to the nine), the car has become more complicated: diagnosing the VAZ 2114 and self-repairing are difficult. The same can be said about the repair of the VAZ 21140, which was the original model in the Samara-2 line.
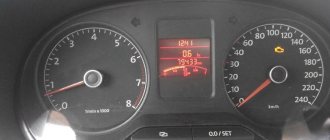
For the VAZ 2114, the injector was first supplied as standard; an 8-valve engine with distributed fuel injection was installed on the car. And since 2007, they developed a new engine for Euro-4, at the same time an electronic gas pedal appeared, and a speedometer and tachometer were installed. Fault codes from the on-board computer began to be transmitted to the dashboard. Thanks to this, preliminary diagnostics of the VAZ 2114 became possible.
In 2009, a 16-valve version of the engine appeared. The engines began to be equipped with electronic control. There were even examples equipped with an exhaust system with a neutralizer. But in 2013, the VAZ 2114 was removed from the assembly line.
Repair at the service center
Repairing a VAZ 2114 with your own hands is a difficult task that requires certain knowledge and skills. The car manufacturer, in the official document “VAZ 2114 Operating Manual,” urges car owners not to try to fix malfunctions on their own every time. Only at the service center will technicians be able to connect the diagnostic connector and read the VAZ 2114 error codes.
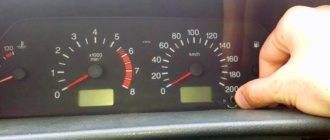
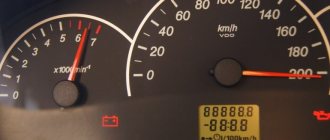
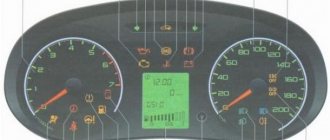
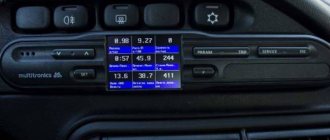
The error codes from the dashboard do not match the professional ones. The fault code for the coolant temperature sensor on the dashboard is 15, and on a professional computer it is 0115. Before going to the service, you should read the fault codes from the car’s on-board computer and compare them with professional ones. To read the codes on the dashboard, do the following:
- Without inserting the key into the ignition, press and hold the odometer reset button;
- insert the key into the lock, turn it to position 1, release the button, at this moment testing of the devices will begin;
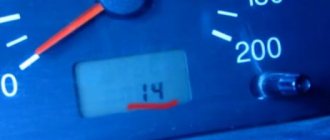
- Press and release the button again - the software version will be displayed on the monitor;
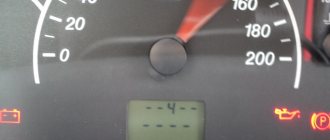
- Press and release the odometer button again, then a fault code will appear. If two errors occur, the sum of their codes is reflected.
A more in-depth diagnosis will be carried out by professionals. The manufacturer leaves little for the car owner to do independently. Judging by the typical set of spare parts, these are only two points (the repair manual describes them): installing a spare wheel and replacing fuses.
For a VAZ 2114 car, repairs and maintenance are often best performed at a service facility.
Replace without removing the panel
But no matter what method is used, you will first have to drain the coolant from the system. Therefore, you will have to stock up on antifreeze in the required quantity in advance.
First, let's look at the replacement method without removing the panel. As already mentioned, this will require making cuts in some places.
To complete the work you will need:
- Set of screwdrivers of different lengths;
- Hacksaw blade for metal;
- Flat container for draining residual coolant from the radiator;
- Rags.
Having prepared everything and drained the coolant from the cooling system, you can begin work:
- We remove the storage box (glove compartment) from the panel, for which it is necessary to unscrew 6 screws securing it;
- Remove the side trims on the center console;
- Use a metal blade to make the necessary cuts: The first cut is vertical
, we do it on the inner wall of the panel near the center console (behind the metal strip of the glove compartment). Moreover, here you will have to make two cuts.
The second cut is horizontal
, runs in the upper part along the rear wall of the opening under the glove compartment.The third is also vertical
, but not end-to-end. It is done on the right on the rear wall of the lower storage shelf of the panel; - After all the cuts, part of the panel together with the wall can be bent down, which will provide access to the radiator. We bend this part and fix it;
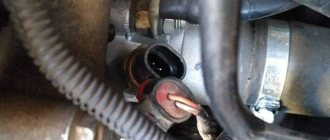
- Unscrew the near bracket for fastening the heating system flap control cable and move the cable to the side;
- Loosen the clamps of the coolant supply pipes to the radiator. In this case, you should place a prepared container under the connection points, since liquid will flow out of the heat exchanger. Remove the pipes;
- We unscrew the three screws securing the radiator, remove it and immediately inspect it.
Afterwards we replace the heat exchanger, fix it in the seat, connect the pipes to it and clamp it with clamps. To make the pipes fit easily, lubricate them with soap.
At this stage of work, you should fill the cooling system with liquid and run it to remove air pockets.
Next, it remains to make sure that the connections between the pipes and the radiator are not leaking, and that the damper and faucet are connected without errors.
After this, all that remains is to return the cut part of the panel to its place and fix it. To do this, you can use screws and plates.
The main thing is to fix it in several places so that in the future the cut off part does not rattle when moving. Use sealant or silicone.
This method is convenient because if you replace the radiator again (which is quite possible), all the work will be very simple - you just need to remove the storage box and unscrew a few screws.
In addition, all cuts are made in such places that after assembling the panel and installing the glove compartment they will not be noticeable.
Spare wheel installation
Modern tubeless tires allow you to drive for quite a long time with a small puncture. And if during your daily morning inspection it turns out that the tire is somewhat flat, do not rush to get the spare tire and jack. It is quite possible that by pumping up the tire you will be able to get to the nearest tire shop. There they will install a spare tire on the car, repair the broken wheel, balance it, and check the wheel alignment.
If there is a serious breakdown on the road, further operation of the car is impossible without installing a spare wheel. Smoothly stop the car on the side of the road, turn on the hazard warning lights, and put up a warning triangle. The procedure, as described in the repair manual, is as follows:
- Stop the engine, engage first gear, and put the car on the parking brake. Place chocks under the wheels on the good side.
- Place the jack under the thrust bracket. Raise the car slightly and use a wheel wrench to remove all four wheel bolts.
- Raise the car until the broken wheel comes off the road, remove the wheel bolts, and remove the wheel.
- Install the spare wheel, screw in (without fully tightening) the wheel bolts.
- Lower the car, tighten the bolts, remove the jack.
After this, you should go straight to the tire shop. It is unlikely that there is another spare tire in the trunk, and in the event of a new breakdown, the driver's position will be difficult.
When replacement is required
Ignition switch kit
There are several basic situations when a car owner may urgently need to replace a unit. The reasons for the malfunction of the VAZ 2114 ignition switch include:
- Mechanical failure of keys;
- Lost key;
- Damage to the lock as a result of an attempted theft;
- Broken ignition contacts.
Replacing fuses on a VAZ 2114
An automobile fuse is a protective device that prevents the failure of electrical components of a car. Models of the Samara-2 family (as well as other AvtoVAZ models) use low-voltage fuses. They are a housing with two contacts connected to each other by a protective element made of a metal alloy.
For VAZ 2114 fuses, repairs include their replacement. The fusible elements are clearly visible, and the fact of fuse failure is easily determined visually. This element melts and is destroyed when the limit value of the passing current is exceeded. Depending on this limit value, fuses vary in color.
| Limit value of passing current. | Color. |
| 5 A. | Orange. |
| 10 A. | Red. |
| 20 A. | Yellow. |
The VAZ 2114 relay and fuse box is located in the engine compartment. It is located directly under the windshield on the left in the direction of travel of the car. The operating instructions state that on the cover of the unit (on the inside) there is a diagram of the location of the fuses. Using it you can determine the location of the required protective element. In the upper right corner of the block there is a bracket for special tweezers. These tweezers make it easy to remove and install fuses.
After replacing a burnt-out element, do not forget to stop by a workshop so that the cause of the problem can be determined and eliminated.
Methods for replacing a radiator
There are two ways to remove the heater radiator on a VAZ-2113, 2114, 2115. The first involves completely removing the front panel
, which is necessary to access the heat exchanger.
Note that complete dismantling is a relative concept, since the panel itself is not removed from the car, but is only disconnected from the body, which allows it to be moved and thereby allow access to the radiator.
You will also have to move the torpedo itself.
Second method - without removing the panel
. But it is not suitable for everyone, since to provide access it is necessary to make cuts in some places so that it is possible to tilt the lower part of the panel in the area where the heat exchanger is located.
The disadvantage of the first method is that it is labor-intensive, since you will have to unscrew a lot of fasteners and disconnect the wiring, of which there is a lot that goes to the panel.
As for the second method, the panel itself will essentially be damaged, although it is cut in places hidden from view.
Also, after completing the replacement, you will have to think about how to reattach and secure the cut parts.
But since the stove radiator can leak at any time, ease of access to it is very important, so the second method is preferable.
Additional spare parts for the trip
If you plan to travel a long distance (more than 500 km), experienced motorists recommend taking with you not only a spare tire and fuses, but also having:
- lamps for headlights, parking lights and brake lights, rear lights. Driving with burnt out lamps is dangerous (especially in the dark and in poor visibility);
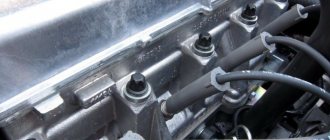
- spark plug set. One of the common causes of engine failure or abnormal operation is flooded spark plugs;
- timing belt;
- set of high-voltage wires.
It is better to buy new and original spare parts, and a VAZ 2114 dismantling shop is sometimes not the best place to purchase them. On a long trip you should also take a supply of consumable fluids (oil, antifreeze, antifreeze), cigarette lighter wires and a tow rope. And if maintenance is carried out in a timely manner, this will minimize the risk of breakdown of any nature.
We recommend reading:
- Repairing the air flow sensor VAZ 2114
- Injectors for VAZ 2114
- We make a spoiler for the VAZ 2114
- Depreciation of the gearbox of a VAZ 2114 car
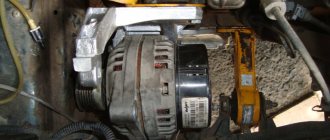
- Generator VAZ 2114: repair stages
- Adding an amplifier to the steering rack of a VAZ 2114
Main reasons for replacement
There are not many reasons why it may be necessary to replace the radiator of the interior heating system. One of them is the appearance of a leak.
Heat exchangers are made of non-ferrous metals - copper or aluminum.
Gradually, these metals oxidize due to exposure to liquid, which leads to the appearance of cracks through which coolant flows out.
The second reason for replacing the heater radiator is clogging of the tubes with contaminants. The coolant, circulating through the cooling system, washes away corrosion products, small particles, etc.
Moreover, the liquid cannot contain them and these polluting elements settle on surfaces, including the stove radiator.
As a result, the heating system first loses efficiency, and later (if it is heavily contaminated) it simply stops working.
In some cases, radiator blockages can be eliminated by flushing using chemicals.
But if the blockage of the tubes is severe, then the plugs can only be removed from the dirt mechanically. And this can only be done with the radiator removed.
Before you start disassembling, you should first make sure that the problems arose with the radiator.
So, a leak of this element is manifested by the appearance of traces of antifreeze on the floor in the cabin.
But the same result can also be caused by damage to the radiator pipes or loss of tightness at the point of their connection with the heat exchanger.
A decrease in heating efficiency can occur not only due to blockage of the radiator tubes, but also due to severe clogging of its honeycombs.
Dust, fluff, leaves, and insect remains get clogged between the cooling fins, making it difficult to transfer heat to the air.
But in this case, it is very easy to identify the problem - turn on the stove fan at full power and check the air flow from the deflectors.
If it is not strong, the radiator should be cleaned, which also cannot be done efficiently without removing the element.
The stove may also stop heating due to the radiator becoming airy, which often happens when replacing the coolant. Often the cause is a malfunction of the cooling system elements, especially the thermostat.
In general, before removing the heater radiator, you should make sure that it is the cause of poor interior heating that is hidden there. And for this you will have to check almost the entire cooling system.
Troubleshooting Methods
There are two methods for detecting faults:
- Visual;
- Diagnostic.
Ignition switch circuit
We suggest studying a visual method for determining a malfunction or breakdown of the contact elements of the ignition switch using the table.
| Action | The device is working properly | The device is faulty |
| Turn the key to the right position (ignition) | All electrical equipment turns on | All or part of the electrical equipment does not work |
| Turn the key to the second position | The starter is spinning | The starter does not work, the traction relay does not click under the hood |
But diagnostics allows you to get a more detailed answer. In addition, a visual inspection will not give you the opportunity to find all the reasons that could cause the ignition switch to break down.
To work, you will need a mini-tester and a multimeter in ohmmeter mode:
- Disconnect the power supply from the ignition switch. To do this, you need to remove the skin from the steering column;
- Switch your multimeter to an ohmmeter;
- On the block coming from the lock you need to find pins 7 and 4, which correspond to pins 15 and 30;
- Connect the multimeter probes to them;
- Turn the key to the “Ignition” position;
- On the block, find pins 7 and 3, corresponding to 50 and 30. Also connect a multimeter to them;
- Turn the key to the second position - Start the engine;
- If serviceability is present, the device will show zero resistance in both test cases.
Engines
Initially, the model was produced with a single power unit option - the VAZ 2111 8-valve injection engine with a working volume of 1.5 liters. The power unit had distributed fuel injection - this improved the dynamic properties of the car and had a positive effect on fuel economy.
In 2007, the model began to be equipped with a new 8-valve 1.6-liter VAZ-11183 engine. The new modification with a Euro-3 environmental class power unit was assigned the VAZ-21144 index.
In 2009, another modification was released - VAZ 211440-24. Under the hood of the car is a 16-valve 1.6-liter engine with a power of 89 hp.
In 2010, the VAZ 211440-26 was released with an engine from the Lada Priora. The working volume of the 16-valve power unit is 1.6 liters, power is 98 hp.
With proper maintenance, power units do not cause problems during operation. Engine overhauls must be carried out after 150–200 thousand kilometers.