Decoding error codes on the instrument panel of the VAZ-2112
Car : VAZ-2112. Asks : Maxim Perepelkin. The essence of the question : How to decipher error codes on the instrument panel of a VAZ-2112?
Good day, please help me understand my situation, and more precisely, the error codes on the instrument panel . No matter how much I try, nothing comes of it, everything is somehow too complicated for me, I don’t understand the Internet well enough to find it, but then a friend recommended your site, they say you will find everything there and if you need anything, they will personally help you.
So I decided to ask this question, I hope for a complete schedule of each code and what it is responsible for, so that I could look at it, so to speak, and understand what’s what, and not sit like I did and think, what the hell is this and why. Traveling constantly for diagnostics turns out to be very expensive, thanks in advance.
How to replace generator brushes
To get rid of error 8, which occurred in the VAZ-2114 due to worn alternator brushes, follow these instructions:
- Remove the wiring harness.
- Disconnect the rubber cap from the terminals of the plus wires, which is designed to protect the part. To do this, unscrew the wire fixing nut and remove the wires from the generator housing.
- Remove the black casing, made of plastic, by disconnecting 3 fasteners on spring mechanisms located along the perimeter of the block.
- Find the regulator responsible for adjusting the voltage and use a Phillips head screwdriver to unscrew it.
- All that remains is to pull out the regulator along with the brushes attached to it, and then disconnect the wire block.
- Now replacing the brushes will not be difficult.
- Installation of the updated VAZ-2114 voltage generator is carried out according to the same instructions, but in reverse order.
Excerpt from open sources
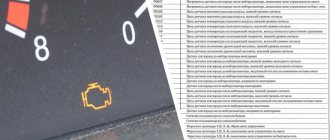
2 - Excessive voltage. 3 - Fuel level sensor error*. 4 — Coolant temperature sensor error*. 5 — Outside temperature sensor error**. 6 — Engine overheating***. 7 - Emergency oil pressure***. 8 - Brake defect***. 9 - Low batteries***. E - Recognition of an error in a data packet stored in EEPROM.
Note: * – an error is registered if within 20 seconds. a sensor break is detected; ** – an error is registered if within 20 seconds. The actual sensor data is not recognized (indication on the LCD is “— °C”); *** – accompanied by an acoustic signaling device.
Source
How to fix the problem?
To fix the problem, you should diagnose the car again. This can be done either by self-diagnosis or using a scanner. In the first case, the check is carried out using the following algorithm:
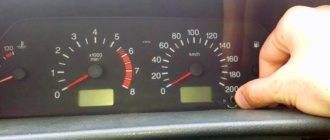
- On the speedometer, firmly press the odometer button.
- Insert the key into the ignition switch and turn it to the first position.
- Release the pressed button. After this, the arrows on all instruments will begin to move actively.
- Press the key again and release it. Information about the firmware version should appear on the dashboard.
- Repeat the procedure. After this, error information will be available.
If the problem reappears, it is a good idea to test the car using a special scanner. You will also need a laptop for this. The scanning device should be connected to the diagnostic connector on the car and laptop. Fault codes will be visible on the latter's screen.
If an error is detected repeatedly, it is recommended to reset the negative terminal of the battery for a few minutes and then repeat the test again. If it again reveals a problem, an inspection of the associated machine components is required to determine the malfunction.
First of all, it is recommended to check the control light, its wires and the block. All wiring of the instrument should be inspected. Sometimes the defect can be noticed visually. If the lamp burns out, it must be replaced. It is recommended to install a regular one rather than a diode one. It is a good idea to clean the connections, removing oxides and other contaminants. Often, when checking, you can see an incorrect connection of the control lamp or damage to the wiring. The latter could break, rot or receive other damage. If no visible defects are found, you need to test the wires with a multitester. If you have no experience, it is better to sign up for a car service.
If, in addition to the code, the owner is concerned about problems with starting the engine, low or constantly changing voltage, or charging the battery, the generator needs to be diagnosed. It will be checked by a multitester. Often, a malfunction of the autogenerator is indicated by extraneous sounds emanating from it when the engine is running. This part can often be repaired, but replacement may also be required.
Motorists can identify and fix most of the above breakdowns on their own. But identifying defects in an electronic control unit usually requires a professional approach. Therefore, if you were unable to find the cause on your own, you should contact an electrician within a reasonable time. It is worth noting that in case of failure, the unit is most often replaced.
In addition, a specialist will help you find rarer causes of this fault code.
VAZ (LADA) errors via OBDI protocol. Self-diagnosis.
1 — Malfunction of the engine control unit.
2 — The voltage in the on-board network is too high.
3 — Malfunction in the electrical circuit of the fuel level sensor.
4 — Malfunction in the electrical circuit of the antifreeze controller.
5 — Error in external temperature controller.
6 — Overheating of the engine (power unit)
7 — Emergency oil pressure in the engine.
8 — The voltage in the vehicle's electrical network is too low.
9 — Low battery level (battery is discharged)
12 — Malfunction in the electrical circuit of the malfunction indicator located on the instrument panel.
13 — No data (loss of communication) from the oxygen sensor (lambda probe)
14 — High signal level of the coolant temperature sensor (antifreeze).
15 — Malfunction in the electrical circuit of the coolant temperature controller.
16 — Increased voltage in the vehicle’s electrical network
17 — Low voltage in the on-board network
19 — Malfunction in the electrical circuit of the crankshaft position sensor.
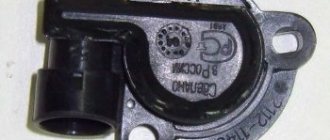
21 — Malfunction in the throttle position regulator.
22 — Low signal level of the throttle position sensor
23 — High signal level of the intake air temperature sensor
24 — Malfunction in the electrical circuit of the vehicle speed sensor.
25 — Low signal level of the intake air temperature sensor
27 — Incorrect signal from the exhaust gas system sensor
28 — Incorrect signal from the exhaust gas system sensor
33 — Malfunction in the electrical circuit of the air flow meter
34 — Malfunction in the electrical circuit of the air flow meter
35 — The ECU has detected a deviation in idle speed
41 — Incorrect signal coming from the phase regulator
42 — Malfunction in the electrical circuit of the electronic ignition system
43 — Incorrect signal coming from the knock sensor
44 — The mixture in the engine cylinders is too lean or rich
45 — The mixture in the engine cylinders is too lean or rich
49 — Vacuum leak
51 — Malfunction of one of the memory modules of the control unit - RAM or PROM
52 — Malfunction of one of the memory modules of the control unit - RAM or PROM
53 — Incorrect signal coming from the exhaust gas sensor
54 — No signal from the octane corrector regulator
55 — Poor air-fuel mixture at low load on the car engine
61 — Malfunction in the electrical circuit of the oxygen sensor (lambda probe)
E - Determining an error in a data packet stored in EEPROM
Source
How to charge a VAZ-2114 battery yourself
You need to know how to charge a VAZ-2114 battery not only if self-diagnosis shows error 8. Correct and timely charging of the battery will extend its life. To do this, follow the recommendations of experts:
- Remove the battery and carefully go over it with a cloth, your task is to thoroughly clean it from dirt. Focus on the top of the piece.
- Now check the electrolyte load indicators. According to service station workers, the electrolyte level should be between the minimum and maximum icons located on the battery case. If the electrolyte is not enough, it must be added to the norm.
- Charge the battery when the plugs are turned out with a current of 5.5 A. Also monitor the density of the electrolyte.
- While charging, the battery can reach a temperature of 40 degrees, this is the maximum allowable value. However, experts believe that even this figure is too high - it is necessary to lower it to 27 degrees by interrupting battery charging.
- When should charging be completed? If a large volume of gas comes from the battery, the electrolyte voltage and its density are kept constant. 3 measurements are taken as a basis.
- If the density is different, then it needs to be adjusted. The increased density can be reduced by adding distilled liquid to part of the material. If it is low, use the method of adding electrolyte with increased density.
- When the adjustment has been made, do not remove the battery from charging for up to half an hour, then turn it off and check the electrolyte readings after half an hour. If the material level is too high, use a rubber blower to remove excess material.
Error Diagnosis Methods
In 2022, errors on the VAZ 2110 on-board computer can be identified in two ways.
Self-diagnosis VAZ 2110: error codes
To enable self-diagnosis mode, the driver or technician will need to perform a certain sequence of actions.
If everything is done correctly, one of the following symbols will light up on the device:
Also, error 14 VAZ 2110 or another two-digit number will indicate the presence of two problems. Usually, with such a picture, the ciphers are summed up. For example, error 10 VAZ 2110 may indicate problems in circuits No. 4 and 6.
How to reset errors on a VAZ 2110
Typically, the procedure is carried out after repairing the unit for which the fault code is responsible. In this case, the symbol does not disappear - it must be forcibly reset. This is done quite simply. The user is required to enter the service mode (hold down the daily mileage button), then double-click on any control. After completing the manipulations, a code will appear on the display. To eliminate this, the daily mileage button is pressed for 3-4 seconds and the system is reset. The machine exits the dialog box automatically after 30 seconds of inactivity.
Diagnostics using a scanner
The method involves connecting an external computer with the program installed. This opens up more opportunities for car diagnostics. In this case, error codes for VAZ 2110 and VAZ 2112 consist of 5 characters.
- P – failure or malfunction of the power plant, transmission;
- B – body systems are damaged;
- C – a problem has been detected in the vehicle’s chassis;
- U – violation of pairing of different modules.
- 0 – general value;
- 1/2 – manufacturer code;
- 3 – reserve.
- 1-2 – violation in the air-fuel mixture supply devices;
- 3 – malfunction of the ignition units;
- 4 – atmospheric emissions control device;
- 5 – malfunction of the engine speed or engine speed meters;
- 6 – failures in electronics;
- 7-8 – malfunction of the gearbox module;
- 9-0 – reserve unit.
Error codes VAZ 2112
On Lada cars produced in 2001 - 2007 and subsequent ones, the manufacturer installs a BC capable of performing a self-diagnosis procedure. Thanks to this, the motorist can independently read the fault codes of the VAZ 2112 and determine the presence of a breakdown. Errors are reflected on the instrument display in the form of one or two-digit codes. The disadvantage of the procedure is the lack of an accurate determination of the location of the breakdown - self-diagnosis is only capable of a general determination of the circuit.
Faults can also be read using additional equipment. The connected scanner provides detailed information about the specific location of the breakdown.
Diagnostics using special equipment
The diagnostic process using special equipment consists of checking the car using a laptop. To connect to the diagnostic connector you will need a cable with an adapter. Using this cable, we connect the computer to the connector via USB output. For testing you will also need software; the power of the computer used is not important. There are many versions of different testing programs on the Internet.
Diagnostics is performed as follows:
- It is recommended to inspect the vehicle before starting the inspection. Check the volume of consumables - engine oil, brake fluid, coolant.
- Find the diagnostic connector and connect your laptop to it. If you have a special scanner, then that's even better. But since finding a scanner is not so easy, and buying one is not cheap, you can use a laptop. Before testing can begin, the ignition must be activated. There is no need to start the power unit.
- After connection, the testing utility starts. The software interface may vary. When you launch the software, graphs or a list of parameters with numbers may appear. This information will allow you to draw conclusions about the operation of the power unit.
- The scan starts. Fault codes will appear on the laptop screen. To decrypt, use the information provided in this article. We could not describe all the codes, but we deciphered those that occur most often. Usually, when downloading a program to a computer, users are provided with a separate file describing the faults.
- After decryption, the problem is repaired.
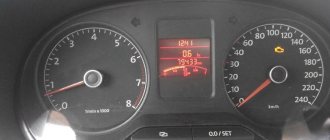
Error codes VAZ 2112 8 and 16 valves on the instrument panel: decoding
In modern Lada models, a Euro shield is installed. There is an enlarged display here, where the main and secondary fault codes are displayed. On models 8 and 16 cells, the BC failure codes during self-diagnosis are identical, and the procedure for decoding them requires instructions. There are 9 direct ciphers in total. Codes can stack if there are two or more problems at the same time. If the tidy shows 21, this may mean there are problems No. 6, 7 and 8 at the same time.
If we talk about computer diagnostics, fault codes are deciphered according to a standard scheme that is relevant for all OBD2 variants.
Error 1 1
Says that a critical failure has been detected in the microprocessor system. Open the ECU module and perform a thorough diagnosis using special equipment. Simply cleaning or replacing damaged terminals often helps.
Error 2 on VAZ 2112
The actual on-board voltage differs from the set voltage. The problem may be a short circuit in the main wiring line or a critical discharge of the battery. Study the wiring and basic power components of the car.
Error 3
The fuel level sensor is damaged or not working properly. Check the condition of the float. The cause is a breakdown of the control wiring.
VAZ 2112: error 4
The code indicates that the DTOZH is out of order or is not functioning correctly. The problem should be resolved in the same way.
Error 5
The outdoor thermometer has failed. Check the sensor and its wiring.
Error 6
The code indicates overheating of the power plant. You need to stop immediately and wait for the engine to cool down.
Error 8 2112: 8 valves
Brake system malfunction. Troubleshooting begins with checking the brake fluid level and pad wear.
Error 9
The battery has gone into a deep discharge. Replace the module with a new one or charge the worn element.
Error 10: decryption
In the most common case, the code is a combination of problems 6 and 4. We are talking about a failure of the DTO and overheating of the motor. Problems should be resolved in parallel.
Error 12
Indicates a problem in the electrical circuit of the indicator on the device. Check the appropriate fuse and bulb.
Error 14
Increased signal from the DTOZh controller. There is a short circuit in the controller circuit.
2112 displays fault 18
It is a combination of errors 2, 9 and 7. Problems are resolved in the same way as individually.
Lada 2112 shows breakdown 26
A software glitch that combines three or more problems at the same time. To troubleshoot the problem, perform detailed network diagnostics.
Error 45
Similar solution to problems as in the above paragraph.
Error 34
Mass air flow sensor – low output signal level. The circuit may be damaged or the sensor may be faulty.
Code 78
A simple combination that the machine can use to represent problems 7 and 8 at the same time.
Error 89
Similar meaning and principle of education.
Error 210
Communication with the immobilizer is lost. Perform diagnostics of the wiring and contact groups of the module.
Malfunction P0102
A controller error indicates a low signal from the mass air flow sensor. There is an open circuit or the sensitive area of the sensor is dirty.
P0123 - breakdown
Short circuit on TPS. The circuit is producing too high a signal. There is a short circuit in the circuit. Check the line carefully for damage.
P0131 - error
Lambda probe No. 1 – line damage.
Error 132
Same for DK2.
Breakdown 0134
DK1 wires are broken. Code P0134 indicates a complete loss of communication with the sensor.
Error P0171
The malfunction can be displayed as the number 171. The coding indicates the problem of the fuel mixture being too lean. Check the line for cracks, leaks and damage - air is being sucked into the system.
Lada 2112: error 0172
A similar problem P0172 indicates the opposite effect. Here the fuel mixture is too rich. At 172, you need to check the air filter and mass air flow sensor for functionality.
Error P0300
When code 0300 lights up on the diagnostic scanner, check the ignition system. The error indicates multiple misfires in the cylinders.
P0301 - breakdown
A similar problem with more precise location indication. A misfire was detected in the first cylinder. The repair sequence is identical to point 0300.
Code 0328
Excessively high signal level from the knock sensor. The reason was the filling of low-quality fuel or a physical malfunction in the ignition unit.
Code 0325
There are problems with the knock sensor. Inspect the sensor for damage and replace it with a new device if necessary.
0335 - error
Displayed as 335. There is a problem with the DPKV wiring. The lines are examined for oxides or mechanical damage.
Fault 0340
Likewise for DPRV. For code P0340, the repair steps are identical.
Code 0343
Phase sensor – excessively high signal.
0443 - code
The canister purge valve is faulty, check the unit for damage or mechanical failure.
Error 0505
Short circuit on the speed sensor. Check the entire line.
Fault 0507
Idle speed too high. Check the mixture formation and mixture supply control module.
Code 456
The evaporative emission control module is not functioning properly. Check systems for damage.
Error 603
The ECM is damaged or there is a software glitch. Take the car to an electronics technician. Self-repair will not be effective.
P1135 - error
Incorrect mixture formation in partial load mode. Run system diagnostics.
Error 1426
Code P0426 indicates a problem in the wiring of the canister purge valve.
Error P1513
The idle speed regulator is damaged - a break with a short to ground. The wires need to be insulated or replaced.
1514 - malfunction
The idle speed control is damaged or there is a short circuit.
Error 1602: 2112 16 valves
Indicates that the powertrain control controller is losing voltage. The car does not start well when cold and crashes while driving.
Error 3456
The system requires checking the fuel level sensor. The module is damaged or its wiring is broken.
RAM error 2112
Indicates that there is a problem with the external thermometer. The sensor cannot be repaired; it must be replaced with a known good one.
KB 2112 sensor synchronization error
Indicates that there is damage in the sensor line or a malfunction of the sensor. The wiring and element are fully checked.
Error: lean mixture
If this code lights up on the dashboard, the control unit has nothing to do with it. If the mixture is lean, perform diagnostics on the fuel lines. The trouble is caused by air leaks at the joints or pipes.
Error: Mixture too rich
A similar problem caused by an air line obstruction. Here the filter may become clogged, the mass air flow sensor may break, or air may be sucked into the system after the sensor.
Phase sensor error
Check the sensor for problems. Repair consists of replacing the entire module.
Knock sensor error
The cause of the breakdown and the corrective actions are completely similar to the point indicated above.
Oxygen sensor malfunction
The controller may fail due to filling with low-grade fuel or problems with the mixture formation system.
Camshaft sensor malfunction
The DPRV may malfunction after passing a puddle or too active washing. To fix the problem, just dry the device well.
Crankshaft sensor malfunction
Worn gear on the working part of the sensor. The sensor can only be replaced entirely with a fully functional one.
Speed sensor malfunction
The DS on a car is reliable, but a problem can happen after driving along a broken road or crossing a ford - the sensor simply floods with water. If the diagnostics determines that there is a problem, the entire sensor must be replaced.
ECU malfunction
The module is diagnosed using special equipment. Experienced electronics engineers can resolder or repair the part, but in most cases, the unit is simply replaced with a new one.
How to fix the problem
To resolve the error, do the following:
- Check the sensor for functionality. If it breaks, you simply need to replace it.
- Make sure there is no plaque on the contact. If it is there, you need to clean it.
- Check the operation of the on-board circuit and make sure that it has contact.
- A random error can only be corrected by flashing the on-board computer, but to do this you need to go to the nearest service station.
So, you can solve this problem yourself, however, as practice shows, this does not always work out. It is worth noting that this code often appears in winter, if the car has been standing outside for a long time and not in the garage. It is noteworthy that it does not matter which engine is installed - 16 valves or 8 valves.
Error codes on the 16 valve VAZ-2112: self-diagnosis on the dashboard
Almost every owner of a 16-valve VAZ-2112 has encountered the fact that the on-board computer periodically produces errors. They indicate malfunctions in the operation of the engine system and other important components. The first sign that a malfunction has occurred is the appearance of the “Check Engine” indicator on the dashboard . But not all motorists know what this means. Therefore, it is necessary to connect to the computer and determine what error and malfunction is in the system.
Crankshaft and camshaft
- code 0335 indicates a malfunction of the crankshaft position sensor. Therefore, when you see 0335 on the computer, you need to check whether the signal is coming from this sensor. If you find that the signal is weak, you can help by changing the air flow if it is excessive (above the maximum). After this, error 0335 should disappear;
- When you see error 0340, you know that the camshaft position sensor is most likely faulty. Although in fact, even if 0340 is displayed, the camshaft itself may be in good condition, the car is working as usual. But when the numbers 0340 do not disappear while the engine is running, this unit should be carefully inspected.
You can read more about the operation of the crankshaft sensor in this material: https://vazweb.ru/desyatka/dvigatel/datchik-kolenvala.html
Error codes
It is recommended to carry out diagnostics and flashing of the ECU with the on-board PC removed.
Now let's decipher the codes of all ECU error codes that can pop up when connecting the car's on-board computer to a laptop or tablet PC: 0102 - Low signal level of the mass air flow sensor 0103 - High signal level of the mass air flow sensor 0112 - Low level of the intake air temperature sensor 0113 - High Intake air temperature sensor level 0115 - Incorrect coolant temperature sensor signal 0116 - Incorrect coolant temperature sensor signal
How to read errors?
In order to read errors, you need to connect a laptop or tablet PC to the car via a special K-line cable. Let's look at what tools will be needed to connect the car to the computer and determine error codes:
K-line cable for connecting a laptop to a car
In order to connect, you need to find a connector for the cable. It is located under the steering column. Now you need to connect the cable itself and then the USB connector. The following programs are considered optimal for use: VAG-COM USB KKL adapter; VAZ diagnostic program for models, Priora, Kalina, Grant; USB driver Autocom cdp pro cars USB; ScanMaster 2.1 in Russian for ELM327.
Car diagnostics using a laptop
Troubleshooting and reset
Eliminating ECU errors is quite simple. In the reading program, you need to find the desired fault and decipher it. Then, it is recommended to fix the problem that caused the error. The last step is reset. It can be found in program tools or actions.
Many car enthusiasts make a mistake when working with software, because they “reset” not the errors themselves, but the entire software, thus leaving only the car software shell. After such actions, usually, the car may not start and software adjustment of the equipment or replacement of the entire software as a whole is required. Therefore, in this case, it is recommended to contact a car service, where they will do everything correctly.
Diagnostics using additional tools
To diagnose cars, including the VAZ 2110, various equipment is used, which is connected to a special connector. Thanks to this equipment, which is not particularly complicated or expensive, you can get a complete picture of the condition of the car.
The service station uses a personal computer to which data from phase sensors is transmitted via a special cable.
Adapter for car diagnostics
Bluetooth devices have appeared on the market that allow diagnostics using a smartphone, tablet or laptop.
They work according to the scheme. The device is connected to the connector, the ignition is turned on and the diagnostic process begins. The data comes from phase sensors to the ECU. From it to a mobile device on which specialized software must first be installed.
This makes it possible not only to obtain more data, but also to present it in a more visual form. This method allows a driver, even with little experience in operating a car (in our case, a VAZ 2110), to obtain all the data about his car.
But most drivers prefer to carry out diagnostics at a service station. So that you are aware of the data that the on-board computer produces through RAM from the phase sensors, we will present the transcripts of common errors.
Decoding combinations
If problems arise with electrical equipment, they must be corrected immediately. Error code 1602 will indicate that not everything is in order in this matter.
Sometimes error 1602 can simply be reset and does not appear in the future. Socialists call such data “good.”
Error 1602 sometimes appears if:
- the battery was disconnected for some time;
- there was a voltage surge when starting the engine, for example, in cold weather.
But if error code 1602 appears all the time, you need to check the entire network. Perhaps there is a break. If error code 1602 constantly appears, you can try cleaning the battery terminals. Check if they are securely fastened. Didn't help, error 1602 still appears? Check the circuit. You need to start from the positive terminal of the battery. Start with the electrical fuse and fuse link.
Check the ground of the ECU, TPS. Sometimes it happens that the cause of error code 1602 is an alarm that can block the controller circuit and affect the readings of the phase sensors. In such a situation, you need to file a claim with the company that installed the alarm.
Error 0102 indicates a low signal level, which is reported from the mass air flow phase sensor.
Code 0102 will be stored in RAM memory in the following situations:
- low air consumption, which depends on the speed of rotation of the crankshaft;
- how open the throttle is;
- Several cycles have passed since the problem appeared.
If the error appears periodically, then you need to:
- check the condition of the air barrier;
- fastening the wiring block to the ECU;
- check IAC;
- clean the throttle pipe.
Another error that may occur is 0300. 0300 appears in cases where the RAM detects frequent misfires.
If error code 0300 is displayed constantly, then you need to check the following components:
- spark plug;
- nozzles;
- ignition system;
- increased or decreased compression levels may be the cause of code 0300;
- Also, code 0300 may appear in case of wiring failure.
You cannot ignore the appearance of error 0300. In the future, this may lead to deterioration in the performance of other nodes.
It is not difficult to master car diagnostics, in particular the VAZ 2110. It will extend the service life due to timely detection of faults detected by phase sensors.
Prevention of breakdowns of electrical appliances
To prevent breakdowns of electrical circuits, you must follow a number of simple rules.
Errors on the VAZ 2110 (2112) panel provide the user with complete information about the condition of the vehicle’s components and assemblies. If you know the decryptions, the driver can independently fix the breakdown of the vehicle electronics.
Indications for self-diagnosis and contacting specialized service stations will be different, error codes are also displayed differently. Therefore, today we will consider two options.
It is not at all necessary to use the on-board computer to diagnose problems with the car. Not all VAZ 2114 owners know about this method, so we will definitely tell you about it.
It consists of the following steps.
Let's now look at the most popular errors that occur during such diagnostics and figure out what the code means. Even without an on-board computer, you can detect faults on the VAZ 2114 using the odometer codes.
We suggest you familiarize yourself with them in the table.
| Code | Description |
| 1 | Problems with the microprocessor |
| 2 | There are problems in the fuel level indicator sensor circuit in the tank. |
| 4 | The power supply voltage is too high |
| 8 | Voltage too low |
| 13 | There is no signal from the oxygen sensor |
| 14 | Coolant temperature sensor signal level is very high |
| 15 | Coolant temperature sensor signal level is very low |
| 16 | The voltage in the on-board network is too high |
| 17 | Very low voltage in the on-board network |
| 19 | The crankshaft position sensor is sending an incorrect signal. |
| 24 | Vehicle speed sensor is faulty |
| 41 | Phase sensor sends incorrect signals |
| 51 | Problems detected with the persistent storage device |
| 52 | Problems detected with the random access memory device |
| 53 | CO potentiometer does not work |
| 61 | Lambda probe sensor does not work |
Plus, all fault codes will be stored in memory until you manually reset them. To do this, you need to disconnect the terminals from the battery while keeping the ignition on, wait a few seconds and connect it back. Don’t forget to do this, especially if you are going to go to a service station for diagnostics. They will find these errors and will eliminate them, although in fact you have already done everything yourself before. Pay extra money? No, it's not worth it.
How to fix error 10?
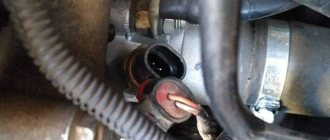
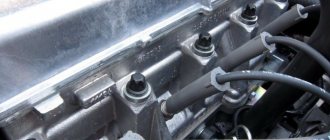
Car service specialists check error 10 with an OBD-2 scanner. Since low voltage in the network is a consequence of weak battery charging, first check its charge level. Every self-respecting car owner is recommended to have a multimeter to monitor the condition of electrical wiring, leads, contact connections and the battery itself. Sometimes VAZ 2114 on-board computers provide erroneous information. This happens because the sensors going from the battery to the computer have “intermediaries” in which the voltage is lost. Therefore, to ensure that the readings are correct, the battery should be measured directly, preferably with a digital multimeter. It is more convenient to use and has less distortion than the traditional one. The voltage in the battery is measured first with the engine running. Normally, the readings should be 13.5-14 V. If it reads 14.2 V or higher, then the battery is discharged and the generator is overloaded to maintain the required voltage. If the multimeter shows a voltage of 13-13.4 V when the engine is running, it means that the battery is not fully charged, and therefore the generator is not working well. The alternator brush may be worn out and require replacement. Pictured: worn generator brushes. New brushes must protrude no less than 5 mm.
If the battery voltage shows less than 11 V when the engine is not running, then the battery is discharged, and before diagnosing the fuel sensor, it must be charged and make sure that the generator is working normally.
It should be taken into account that in cold weather the measuring device may show increased voltage in the vehicle's electrical network for the reason that the battery may have discharged a little overnight due to sub-zero temperatures, or the electronics have reacted to the lower air temperature and are putting more charge into the battery . There is nothing wrong with increased battery voltage. As soon as the electrical consumers turn on, the voltage will equalize.
In addition to the charging state, it is also necessary to inspect the terminals for the presence of oxidation. If necessary, they are cleaned. After making sure the condition of the battery, charging it if necessary, after checking the generator and its brushes, you should again reset all indicators by de-energizing the computer. If the error does not disappear or it changes to number 2, or 0460, you should proceed to checking the fuel level sensor circuit. For this you will also need a multimeter. During the check, it is necessary to inspect the contacts on the FLS itself, ring the wiring coming from it for a short circuit or break. It is also necessary to inspect the sensor itself. It is located next to the submersible fuel pump under the gas tank cap.
And to get to it, you have to remove the rear passenger seat.
What does error 10 mean?
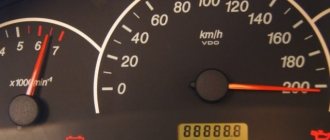
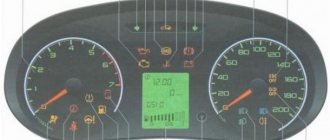
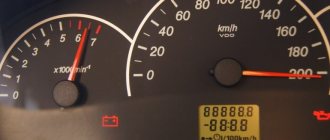
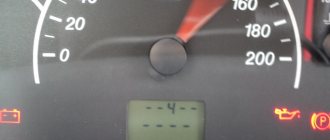
The driver of the VAZ 2114 sees error codes on the dashboard under the speedometer.
In the list of error codes 10 on the VAZ 2114, injector 8 valves do not exist. However, its appearance on the display is not uncommon. It means adding two known codes. To make sure that code 10 is not a glitch that arose as a result of errors stored in the computer’s memory, they can be reset by disconnecting the car’s power supply terminal from the battery. A de-energized control unit will clear the information stored in it. And if, while the car is moving, error 10 in the VAZ 2114 appears again, then you will have to understand its cause. For reference, we provide a table of codes 1-9, which can also turn out to be independent problems, or consist of codes that are similar in meaning. For example, the number 5 on the display indicates a problem with the temperature controller, and at the same time can be composed of codes 1 and 4.