Using the built-in controller, drivers can identify the main error codes for Priors 8 and 16 valves on their own. The procedure is carried out using a built-in computer or a connected device. Almost all modern cars are equipped with a system of various sensors that monitor the condition of automotive components. The bottom line is that the functionality of many working units directly depends on the correct functioning of the existing sensors.
On the other hand, turning off some indicators may not affect the operation and movement of the car, and malfunctions are detected much later, when the negative consequences of deactivating the sensors appear. Symptoms of the indicators turning off include unstable engine operation, excessive fuel consumption, and excessive wear of parts.
How to check errors on Prior yourself
It’s terribly useful to do both the first and the second, and the third is basically “oil”! This is how you can cure any patient - disconnect the oxygen, go for a smoke, you come.
These are messages about factory testing of BOSCH 7.9.7+ Euro3 KSUD, as far as I understand. Try this: 1. Starting position: ignition off, battery on. 2. While holding down the daily mileage reset button, turn on the ignition. All positions of familiarity areas (segments) should light up on the LCD, which indicates the start of self-testing. 3. Press any of the on-board computer control buttons. The LCD should display the program version (Ver 1.0 and higher). 4. Press any of the control buttons again. The following error codes (if any) should be displayed on the positions of the first and second lines of the LCD:
2 — increased voltage of the on-board network; 3 — fuel level sensor error (if a break in the sensor circuit is detected within 20 s); 4 — coolant temperature sensor error (if an open circuit of the sensor is detected within 20 s); 5 — error of the external temperature sensor (if there are no sensor readings within 20 s, the indication on the LCD is “-C”); 6 — engine overheating (the criterion for triggering the acoustic alarm is met); 7 — emergency oil pressure (the criterion for triggering the acoustic alarm is met); 8 — defect in the brake system (the criterion for triggering the acoustic alarm is met); 9 — the battery is discharged (the criterion for triggering the acoustic alarm is met); E - error detection in the data packet stored in the EEPROM.
5. If necessary, you can reset error information. To do this, press and hold down the daily mileage reset button for 3 seconds. 6. Press any of the control buttons again. All positions of the familiar areas (segments) should light up on the LCD - the system has returned to the state of point 2. 7. If you do not press any control buttons for about 15-30 seconds, the panel goes into operating condition.
Where did you see the zero? I’m curious. You had or have the following errors: 3 - fuel level sensor error (if an open circuit of the sensor is detected within 20 s); 4 — coolant temperature sensor error (if an open circuit of the sensor is detected within 20 s);
5 - error of the external temperature sensor (if there are no sensor readings within 20 s, indication on the LCD is “-C”
; Resetting does not cure. Before resetting, we always read what happened. If there are repetitions of the same mistakes, you need to figure it out. Anyone who thinks that by resetting he is curing something is simply an idiot.
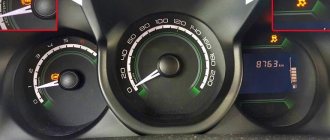
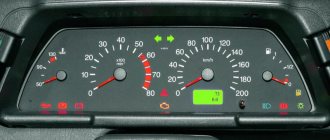
To check instrument panel error codes, you need to enable test mode. To do this, you need to press the daily mileage reset button and, without releasing it, turn on the ignition. All familiar positions should light up on the liquid crystal display (LCD), and the arrows of the tachometer, speedometer, coolant temperature indicator and fuel level indicator should move from minimum to maximum values and back. The serviceability of the LCD and the above sensors is visually checked.
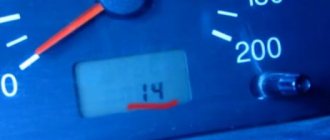
Press any key to switch functions of the on-board computer (BC). The program version is displayed on the LCD.
Press the BC function switch button again. The LCD should display (if present) the following error codes:
2 – increase the voltage of the on-board network,
3 – fuel level sensor error*,
4 – coolant temperature sensor error*,
5 – error of the external temperature sensor (if there is no sensor reading within 20 seconds, indication on the LCD is “-C”),
7 – emergency oil pressure**,
8 – brake system defect**,
9 – battery is discharged**,
E – detection of an error in a data packet stored in EEPROM.
*- if an open circuit of the sensor is detected within 20 seconds
**- the criterion for triggering the acoustic alarm is met
If necessary, you can reset error information. To do this, press and hold down the daily mileage reset button for 3 seconds.
The next time you press any of the BC control buttons, all familiar positions should light up on the LCD - the system has returned to its initial state.
If you do not press any control buttons for approximately 30 seconds, the instrument panel enters the operating state.
The electronic control unit and on-board computer in modern car models help the driver quickly find a fault. But to understand electronics, a motorist must be able to decipher codes. In the material you will find a table with all the errors, as well as explanations of the most common codes: 1602, p0504, p0422, p1558. You will also learn how diagnostics are performed.
Self-diagnosis using BC
The owner can identify the main error codes of Priora 8 and 16 valves using the built-in controller and on-board computer (BC), without resorting to the services of car service diagnosticians. To do this, you must activate the vehicle testing option. The arrows on the instrument panel move to the maximum possible position. Further manipulations are performed in the following sequence:
- The ignition is turned off and the daily mileage reset button is activated. Then the ignition is turned on again with the button held down;
- After this, all the icons on the instrument panel should light up, and the arrows of the control devices should begin to move from zero to maximum values. This behavior indicates the normal functioning of all sensors;
- On the right steering wheel switch there is a key for selecting BC functions. After pressing it, information about the software category will appear on the display;
- You should press this button again, combinations of problems will be displayed on the monitor. If necessary, error information is also reset here. To do this, hold down the mileage reset button for a few seconds.
Decoding errors
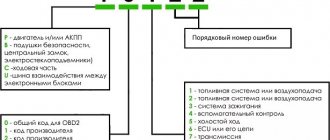
Each code consists of five characters: P 1 4. Let's say right away about the fourth and fifth characters - they indicate the serial number of the error. Now it’s worth taking a closer look at what the codes consist of
The first character may vary depending on the vehicle system:
- P – malfunctions in the operation of the power plant; the symbol also indicates defects in the automatic transmission.
- U – you need to look for a fault in the interaction node between the system units.
- B – defects in the operation of body systems, which include electric lifts, airbags, etc.
- C – chassis sensors have detected a malfunction in the chassis system.
Let's move on to the second character:
- 3 – reserve.
- 2 and 1 – codes set by the manufacturer.
- – common code for on-board diagnostics (OBD-II).
The third symbol indicates to the motorist the type of breakdown:
- 1 and 2 - indicate defects in the operation of the fuel unit or the appearance of malfunctions during the air supply.
- 3 – breakdowns in the ignition unit.
- 4 – indicates auxiliary control.
- 5 – in idle mode, some components do not work correctly.
- 6 – electronic unit or its circuits.
- 7 and 8 – defects in the operation of the gearbox.
Checking with a plug-in tester
More accurate and comprehensive diagnostics can be performed using a connected computer or a special tester. However, the data displayed on the screen is alphanumeric. The letters have the following meaning:
- P
– errors in the operation of the electronic systems of the power unit; - C
– problems with the functioning of the chassis; - B
– electronic malfunctions in the cabin; - U
– joint system errors.
In addition, the number 0 means OBD code 2, numbers 1 and 2 indicate the enterprise code, and 3 is the backup password.
Basic ignition system
(the letter P precedes the digital designation):
- 0300
– no spark in the cylinders of 16 valves; - 0326
– defect or short circuit in the knock indicator circuit; - 0337
– difference of the crankshaft controller to ground; - 0343
– high level in the headlight sensor circuit 0342 – a similar low indicator; - 0422
– signaling device malfunction; - 0444, 0445
– failure of the adsorber valve; - 0480, 0481
– problems with the fan assembly.
Fuel-air system
(the letter P is located before the numbers):
- 0030
– open circuit between the oxygen indicator and the exhaust gas converter; - 0116
– problems with thermal control of the cooling fluid; - 0102
– error in the air flow control circuit; - 0201, 0202, 0203, 0204
– break in the injector wiring; - 0217
– overheating of the power unit; - 0172
– excess amount of air,
0171
– gasoline, in the fuel mixture; - 0230
– malfunction of the electric fuel pump; - 0266 0269, 0270, 0272, 0274
– problems with injector drivers.
In principle, diagnostics using BC makes it possible to identify the main faults. Basic error codes for Priora 8 and 16 valves using a plug-in tester provide significantly more information. To understand it, you should study the decoding of indicators, which is not so difficult.
Error 1602
If error 1602 appears on the on-board computer of the Lada Priora 16 valves, this means that the on-board voltage in the controller has dropped. As the experience of VAZ 2170 owners shows, error 1602 does not affect the operation of the car; if you remove the terminal from the battery, then 1602 will disappear, but after a while it will appear again. There may be several reasons for 1602:
- Problems with the generator. Measure its voltage; in good condition it produces 13.7-14 V.
- A large voltage drop during engine starting also leads to the appearance of 1602. The ECU records the voltage drop and automatically adjusts the time. First of all, you need to check the ground on the electronic control unit.
- Codes 1602 appear when the security system blocks one of the electrical circuits.
Deciphering faults in the fuel and air systems
- P0030 - the oxygen sensor heater wire to the exhaust gas converter has broken;
- P0031 - the same electrical wire has shorted to ground;
- P0032 - the same wire has shorted to the on-board network (BS);
- P0036 - the wiring of the oxygen sensor heater is broken, after the converter;
- P0037 - the same wiring has shorted to ground;
- P0038 - it has shorted to BS;
- P0102 - weak signal in the mass air flow sensor network;
- P0103 - very strong signal in the network of this device;
- P0112 - weak signal in the air temperature sensor network;
- P0113 - very strong signal in the network of the same device;
- P0116 - antifreeze temperature sensor signal is out of operating range;
- P0117 - poor signal from the antifreeze temperature sensor network;
- P0118 - very strong signal from the antifreeze temperature sensor;
p0504
Also, many owners of a Lada Priora with 16 valves have questions about the appearance of error p0504. She tells the owner that there is a malfunction in the brake pedal sensor. To find out the exact reason for the appearance of p0504, you need to remove the sensor and disassemble it. Pay attention to its springs, one of them could burst - replace the damaged part.
see also
Another reason is copper contacts, which can burn. Inspect them and clean them if necessary. Sometimes error p0504 pops up due to the incorrect position of the brake pedal sensor on Priora 16. Twist it and check whether codes p0504 remain on the screen or not.
ABS fault detection
You can find out about problems with the ABS by looking at the indicator light on the instrument panel. If it lights up for no reason or does not go out after the required period of time, you need to go to a service station and undergo computer diagnostics. Modern Priora ECUs have a diagnostic connector through which you can easily connect a portable scanner or a stationary motor tester.
All ABS electronics are connected to the mechanical part of the car, so only an experienced diagnostic technician can accurately determine the error that the system produces. ABS error codes start with 0035 and end with 0800. In order to deal with them correctly and determine the reason for the light bulb to light up, you need to have a table of error decoding on hand or resort to qualified help.
Error 0422
The efficiency of the Priora 16 neutralizer has fallen below the normal level - this is what error p0422 reports to the owner of the Lada Priora 16 valves. As practice shows, codes 0422 pop up quite rarely. If code 0422 appears on the on-board computer screen, then you need to perform the following steps:
- We examine the catalytic collector. Its body and filling must be in good condition;
- If damage is found, the catalytic collector should be replaced with a serviceable one;
- If the catalytic converter is not the cause of the message, then the remaining actions to eliminate p0422 must be entrusted to specialists from the service center.
To get rid of 0422 you will need to reflash the cathode collector. If you have the equipment to set the settings, you can do the work yourself.
How is self-diagnosis performed?
We have sorted out the main errors on the Priora, now it’s worth finding out how self-diagnosis is performed. The VAZ 2170 with 16 valves has a special controller with which diagnostics are performed. If you have an on-board computer installed, then diagnostics are performed on it. There is also special equipment that allows for a more in-depth check of Priora 16 class systems.
Since most Priora 16 cars already have an on-board computer, we will consider the option without the use of special devices. Diagnostics begins with activation of the test mode. The work proceeds according to the following scheme:
- Turn off the ignition. Now we hold down the daily mileage reset button, without releasing the button, we start the ignition of the Priora 16 cl;
- On the instrument panel you will see a display with an indication. After turning on the ignition, all components of the instrument panel will light up. The needles of the temperature, speedometer, tachometer and other instruments will begin to move to the maximum level and back. This behavior indicates that self-diagnosis has begun;
- Let's move on to the right steering wheel switch. Here you will find a button for switching the on-board computer settings. Click on it, a message with the software version will appear on the instrument panel screen;
- The instrument panel error diagnosis will begin if you press this key again. Various codes will appear on the display, which you can decipher in the table below;
- When the diagnostics are complete, you can reset the error data. Press and hold the daily mileage reset button for about 5 seconds.
Hello. I got error 1570 on BC - “immobilizer, no positive response or open circuit.” It appears when you turn the ignition key in the form of a beeping buzzer (the car with the key on the dashboard does not blink or light up), and it does not stop for some time after starting the engine. Resetting the error does not help. How to defeat her?
p1558
This error usually occurs on cars with a 127 engine. It is associated with the throttle valve, the quality of which in this power plant leaves much to be desired. P1558 does not interfere with normal engine operation, but you can still try to fix it. Some people solve the problem by flashing it, but we offer a simpler method.
Remove the throttle valve, and then remove the cover - this can be done using a hexagon. We find a plastic gear inside - this is the working part. Lubricate the gear thoroughly and reassemble in reverse order. Most likely, error p1558 will disappear after these manipulations.
system in Idle speed errors and ECU Lada P0500
Priora - a malfunction in the sensor that is responsible for Pri. the speed of the last digit is 6, the revolutions are low, and the high 7 is at. At 11 the regulator broke, and at 60 the voltage is low, at code 62 it is too low. Low code 63 indicates high voltage. malfunction - 0601 checksum. Code 0627 indicates tears in the fuel pump cables. If the problem code is 46 and 47 - 0645 with air conditioning.
This is a basic list of faults and problems that occur in the car. If you decipher them correctly, then it will be much easier to repair the car and even correct errors. But Priora, with the most efficient equipment, you need to remember that a good auto mechanic cannot be replaced by any testing device.
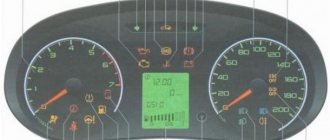
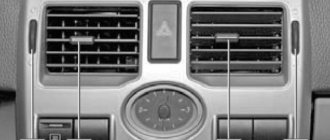
Instrument panel of Lada Priora: general information on symbols
Domestic cars such as the Lada 2170 are extremely in demand among domestic consumers due to their low cost and budget maintenance. Among the benefits, one can also highlight its disadvantages - the Priora’s tidy is not the most reliable element of the car, which necessitates frequent intervention in the electrical part of the car.
The dashboards of cars from different years of manufacture are almost identical. The symbols on the board of the 2013 version differ little from their 1st and 2nd generation counterparts. Here are signs indicating identical faults and corresponding to similar indicators.
Troubleshooting
There are several methods for troubleshooting the problem, but together they constitute a complete diagnosis of the car for faults in the coolant temperature sensor. After all, error number 4 gives a signal about exactly this. You can fix it like this:
- First we check the sensor to see how well it functions. It copes with the assigned tasks, there are no complaints about the speed and clarity of data transmission - let's move on to the next point. Does not respond to signals - most likely, it is completely broken and requires replacement.
- This is followed by checking for contact and absence of plaque. If a problematic connection is identified, the sensor will have to be replaced with a new one. And if the surface is covered with plaque, it is necessary to thoroughly clean the seat.
- Now you can move on to the on-board circuit, make sure that there is contact there.
- The remaining dilemmas usually lie in electronics, for this reason the car is taken to a specialist who can adjust the device. Usually in such a situation the ECU is re-flashed, which means that errors are prudently reset.
Priora dashboard indicators with interpretation
A separate category of indicators is mainly responsible for indicating the status of on-board systems and mechanisms. Such symbols do not indicate serious damage, they simply notify the driver.
The description and full explanation of the indicators looks like this.
| Visual Identification | Decoding |
| Fuel level indicator | Indicates the remaining gasoline in the fuel tank. When the supply is exhausted, the following sign lights up. |
| This indicator indicates that there are less than 10 liters of fuel left in the gas tank and the car needs to be refueled urgently. Initially, the red symbol of the gas station flashes, but when the fuel reaches 5-6 liters, it lights up constantly. | |
| On VAZ models, it indicates a low battery or a strong drop in voltage in the network. It usually appears after prolonged attempts to start the car in the cold. To fix it, just replace or charge the battery. | |
| The key against the background of the red car indicates that the immobilizer is turned on. This option is not available on 2008 models. Depending on the configuration, a green key may flash on the car’s dashboard. If the lamp blinks, the system is faulty. | |
| Standard turn signal activation indicators. The indicator lights light up for left or right turns respectively. If the indicator lights blink simultaneously, the hazard warning system is on (the red triangle lights up in parallel). | |
| A similar indicator lights up when the car is parked with the handbrake. It may also indicate a serious malfunction of the engine. | |
| The ABS system is not working correctly or the wheel is punctured. The system is present in cars optionally and is not directly related to the brake system. | |
| The red watering can is marked accordingly. The light indicates a critical drop in engine oil pressure. If the indicator goes out after the car warms up and the speed of the power plant is equalized, everything is in order. | |
| The green symbol indicates the activation of the side lights. | |
| The car's headlights are in long range mode. Lights up only when the mode is activated. | |
| Antifreeze temperature dial indicator | The indicator is installed on all machines without exception and displays the actual antifreeze temperature. |
When the seal is broken
Computer ECU.
HOW TO DIAGNOSIS THE ECM
Here in the first place is the IAC, a device that regulates the supply of additional air bypassing the throttle valve. It works by means of a micromotor that extends and retracts the shutter mechanism. If there is a malfunction, the engine will not start at idle. Or, conversely, it increases the speed to 1500-2000. "Check" lights up
Bonus and discount cards How to use your Personal Account Official websites of stores Phones and hotlines Mobile applications Registration in the program Activation of the card How to check your balance About bank cards
What do the icons on the Priora dashboard mean?
There is a separate group of icons indicating the presence of breakdowns and malfunctions within the vehicle’s on-board systems. The emblems are displayed in the space surrounding the main instruments. The following is a transcript of the signs with photo accompaniment.
| Icon | Decoding |
| If the car with the key is flashing, this indicates a malfunction or lack of response from the immobilizer. To fix the problem you need to check the block. | |
| An exclamation mark surrounded by brackets blinks on the dashboard, indicating a malfunction in the brake system or ABS. A similar indicator located slightly higher may indicate an incorrectly pumped brake system. | |
| The electric power steering is faulty or defects have been detected in the operation of the mechanism. Mostly installed on cars after 2011 model year. | |
| Failure in the wiring or units responsible for controlling the airbags. If the icon lights up after starting the engine, the specified element may not work under shock load. | |
| Seat belts are not fastened. Can also be red. At the same time, it is accompanied by a sound signal. | |
| The passenger airbag is not activated or is faulty. Usually lights up when the engine starts. | |
| If the indicator blinks constantly, this indicates a battery failure or critical discharge. | |
| An urgent check of all engine systems is necessary - a critical malfunction has been detected. |
The reasons why these icons may light up always require driver intervention. Ignoring machine signals can cause serious damage.
Depending on the year of manufacture and configuration, the interpretation of the instrument panel indicators may differ. The exact definition can be found in the vehicle's service manual.
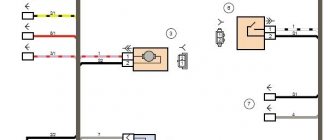
Malfunctions of auxiliary systems and ignition
Camshaft sensor location
P0337 - crankshaft sensor shorted to ground;
Return to contents
How to enable autotesting on Priora
Self-diagnosis of the VAZ Priora dashboard is necessary to be able to detect hidden problems or defects in on-board systems. To complete the procedure, you will need to perform a certain sequence of actions.
- Get into the car and insert the key into the ignition lock.
- Press and hold the daily mileage reset button.
- At the same time, turn on the car's ignition.
- If everything is done correctly, the instrument arrows will make several full revolutions and return back. All indicators will also flash.
The problem will be identified if any signal does not respond to manipulation.
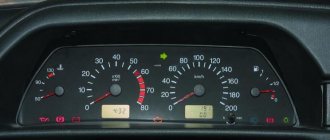
Error codes on the Priora dashboard
When entering self-test mode, combinations of numbers and letters may appear on the display indicating the part of the circuit where a malfunction is detected.
Usually, after entering the service mode, one or more numbers appear on the device:
- 2 – a critical overvoltage was detected in the on-board network, caused by a short circuit or breakdown of the unit;
- 3 – an error has been detected in the fuel level sensor, a circuit break is possible;
- 4 – there is overheating of the cooling system, or the corresponding sensor is broken;
- 5 – the thermometer that determines the temperature outside is broken or there is an open circuit in versions before 2012, mounted optionally;
- 6 – the engine has boiled, you need to wait for cooling or check the serviceability of the sensors;
- 7 – the oil pressure in the crankcase of the power plant is too low, the sump may leak or the lubricant level has dropped significantly;
- 8 – breakdown of the brake line or units of the corresponding system;
- 9 – the battery is discharged or the element is faulty; it can also appear after the car has been idle for a long time in the cold;
- E – the firmware has failed or there is a critical error in the EEPROM data packet.
Code meanings for self-diagnosis
Using the on-board computer, the driver can determine the following faults:
- Code “ 2
” – excessive voltage in the on-board network. To eliminate it, you need to check the main electrical circuits; - The number “ 3
” indicates a malfunction of the fuel control indicator; - «4
» – problems with the refrigerant temperature sensor; - The number “ 5
” means incorrect operation of the environmental indicator; - Code “ 6
” means engine overheating; - «7
» – critical lubricant pressure; - The number “ 8
” indicates a malfunction in the brake system; - «9
» – signals that the battery is low; - The " E
" symbol indicates a problem with the packet data.
It is worth noting that if the BC options switch key is inactive for more than 10 seconds, the instrument panel will return to normal operation.
When do you need dashboard repair or replacement?
The Priora tidy does not have a large number of parts that are subject to frequent breakdowns. Typically, repair of the indicator unit comes down to replacing light bulbs and individual elements of the device. Users resort to replacing the board only when there is a malfunction of the contact group, connectors, or the board is damaged.
In case of serious damage (major short circuit leading to burnout of the main structural elements), repair may not be cost-effective. The cost of labor and materials often exceeds the price of a new module.
Possible malfunctions and ways to eliminate them
When operating a vehicle, individual components of the instrument panel may fail. Among the most common breakdowns are factors.
- Burnt out contact of one of the indicator lamps. Usually resolved by replacing the light bulb.
- Failure of the contact group can be eliminated by completely replacing the module - resoldering the part is not economically profitable.
- Malfunction of arrow indicators. It can be fixed by replacing the block.
VAZ errors and their solutions
Owners of domestic cars can easily find a problem with their car. This became possible thanks to the use of on-board computers and the introduction of modern equipment diagnostic tools. This article will describe in detail the errors and how to eliminate them in VAZ 2110, 2112, 2114, Kalina, Priora and how to eliminate them.
How to diagnose a car yourself
Do not rush to go to the service center. Although specialists use test benches to detect malfunctions, and their diagnostics are more accurate, every car owner is still able to find out the cause of the problem using information about the error codes of the on-board computer.
To view error codes recorded by the controller:
- Sit behind the wheel, then press and hold the odometer button. It is located at the bottom of the dashboard.
- Turn the key in the lock to position “1”. While turning the key, release the button. This will be followed by a quick set of readings on the instruments.
- After this, press the button again: the display will show the controller firmware version.
- Finally, press the button the last, third time to display the VAZ controller errors.
VAZ error codes:
- P0030 - Oxygen sensor heater before the converter, control circuit open
- P0031 - Oxygen sensor heater before the converter, control circuit short to ground
- P0032 - Heater of the oxygen sensor to the converter, short circuit of the control circuit to the board. net
- P0036 - Oxygen sensor heater after the converter, control circuit open
- P0037 - Oxygen sensor heater after the converter, control circuit short to ground
- P0038 - Heater of the oxygen sensor after the converter, short circuit of the control circuit to the board. net
- P0102 - Mass air flow sensor circuit, low signal level
- P0103 - Mass air flow sensor circuit, high signal level
- P0112 - Air temperature sensor circuit, low signal level
- P0113 - Air temperature sensor circuit, high signal level
- P0116 - Coolant temperature sensor circuit, signal out of acceptable range
- P0117 - Coolant temperature sensor circuit, low signal level
- P0118 - Coolant temperature sensor circuit, high signal level
- P0122 - Throttle Position Sensor Circuit Low Signal
- P0123 - Throttle Position Sensor Circuit High Signal
- P0130 - The oxygen sensor before the converter is faulty
- P0131 - Oxygen sensor circuit to converter, low output level
- P0132 - Oxygen sensor circuit to converter, high output level
- P0133 - Oxygen sensor circuit to the converter, slow response to changes in mixture composition
- P0134 - The oxygen sensor circuit to the converter is inactive
- P0136 - The oxygen sensor after the converter is faulty
- P0137 - Oxygen sensor circuit after the converter, low signal level
- P0138 - Oxygen sensor circuit after the converter, high signal level
- P0140 - The oxygen sensor circuit after the converter is inactive
- P0141 - Oxygen sensor after the converter, heater is faulty
- P0171 - Fuel supply system too lean
- P0172 - Fuel system too rich
- P0201 - Cylinder 1 injector, control circuit open
- P0202 - Cylinder 2 injector, control circuit open
- P0203 - Cylinder 3 injector, control circuit open
- P0204 - Cylinder 4 injector, control circuit open
- P0217 - Engine temperature is higher than permissible
- P0230 - Fuel pump relay circuit malfunction
- P0261 - Cylinder 1 injector, control circuit short to ground
- P0263 - Injector driver fault 1
- P0264 - Cylinder 2 injector, control circuit short to ground
- P0266 - Faulty injector driver 2
- P0267 - Cylinder 3 injector, control circuit short to ground
- P0269 - Injector 3 driver malfunction
- P0270 - Cylinder 4 injector, control circuit short to ground
- P0262 - Cylinder 1 injector, control circuit shorted to on-board network
- P0265 - Cylinder 2 injector, control circuit shorted to on-board network
- P0268 - Cylinder 3 injector, control circuit shorted to on-board network
- P0271 - Cylinder 4 injector, control circuit shorted to on-board network
- P0272 - Faulty injector driver 4
- P0300 - Random/multiple misfires detected
- P0301 - Cylinder 1, misfire detected
- P0302 - Cylinder 2, misfire detected
- P0303 - Cylinder 3, misfire detected
- P0304 - Cylinder 4, misfire detected
- P0326 - Knock sensor circuit, signal output out of acceptable range
- P0327 - Knock sensor circuit low signal
- P0328 - Knock sensor circuit, high signal level
- P0335 - Crankshaft position sensor circuit is faulty
- P0336 - Crankshaft position sensor circuit, signal out of acceptable range
- P0337 - Crankshaft position sensor, short to ground
- P0338 - Crankshaft position sensor, open circuit
- — Malfunction of the camshaft position sensor
- P0342 - Phase sensor circuit, low signal level
- P0343 - Phase sensor circuit, high signal level
- P0346 - Phase sensor circuit, signal output out of acceptable range
- P0351 - Ignition coil of cylinder 1 (1-4), control circuit open
- P0352 - Ignition coil of cylinder 2 (2-3), control circuit open
- P0353 - Ignition coil of cylinder 3, control circuit open
- P0354 - Ignition coil of cylinder 4, control circuit open
- P0363 - Misfire detected, fuel supply to idle cylinders is turned off
- P0422 - Neutralizer efficiency below threshold
- P0441 - Gasoline vapor recovery system, incorrect air flow through the canister purge valve
- P0444 - Canister purge valve, control circuit open
- P0445 - canister purge valve, control circuit short to ground or on-board network
- P0480 - Fan relay, control circuit open
- P0481 - Cooling fan 2 circuit malfunction
- P0500 - Vehicle speed sensor is faulty
- P0506 - Idle system, low engine speed
- P0507 - Idle system, high engine speed
- P0511 - Idle speed control, control circuit faulty
- P0560 - On-board network voltage is below the system operability threshold
- P0562 - On-board voltage, low level
- P0563 - On-board voltage, high level
- P0601 - Engine control system controller, ROM checksum error
- P0615 - Additional starter relay, control circuit open
- P0616 - Additional starter relay, control circuit short to ground
- P0617 - Additional starter relay, control circuit shorted to on-board network
- P0627 - Fuel pump relay, control circuit open
- P0628 - Fuel pump relay, control circuit short to ground
- P0629 - Fuel pump relay, control circuit shorted to on-board network
- P0645 - Air conditioning compressor clutch relay, control circuit open
- P0646 - Air conditioning compressor clutch relay, control circuit short to ground
- P0647 - Air conditioning compressor clutch relay, control circuit shorted to board. net
- P0650 - Malfunction indicator lamp, control circuit faulty
- P0654 - Instrument cluster tachometer, control circuit faulty
- P0685 - Main relay, control circuit open
- P0686 - Main relay, control circuit short to ground
- P0687 - Main relay, control circuit shorted to on-board network
- P0691 - Fan relay, control circuit short to ground
- P0692 - Fan relay, control circuit shorted to on-board network
- P1102 - Oxygen Sensor Heater Resistance Low
- P1115 - Faulty oxygen sensor heating circuit
- P1123 - Rich mixture at idle
- P1124 - Lean mixture at idle
- P1127 - Rich mixture at Partial Load
- P1128 - Lean mixture in Partial Load mode
- P1135 - Oxygen sensor heater circuit 1 open, short circuit
- P1136 - Rich mixture in Light Load mode
- P1137 - Lean mixture in Light Load mode
- P1140 - Measured load differs from calculation
- P1141 - Post-converter oxygen sensor 1 heater malfunction
- P1171 - Low level CO potentiometer
- P1172 - High level CO potentiometer
- P1301 - Cylinder 1, misfire detected, critical for the converter
- P1302 - Cylinder 2, misfire detected, critical for the converter
- P1303 - Cylinder 3, misfire detected, critical for the converter
- P1304 - Cylinder 4, misfire detected, critical for the converter
- P1386 - Knock Channel Test Error
- P1410 - Canister purge valve control circuit short circuit to +12V
- P1425 - Canister purge valve control circuit short circuit to ground
- P1426 - Canister purge valve control circuit open
- P1500 - Fuel pump relay control circuit open
- P1501 - Short circuit to ground of the fuel pump relay control circuit
- P1502 - Short circuit to +12V fuel pump relay control circuit
- P1509 - Idle Air Control Circuit Overload
- P1513 - Idle air control circuit short circuit to ground
- P1514 - Idle air control circuit short circuit to +12V, open
- P1541 - Fuel pump relay control circuit open
- P1570 - Immobilizer, circuit faulty
- P1602 - Engine control system controller, power supply loss
- P1606 - Rough road sensor circuit, signal out of acceptable range
- P1616 - Rough Road Sensor Circuit Low Signal
- P1617 - Rough road sensor circuit, high signal level
- P2301 - Ignition coil of cylinder 1 (1-4), control circuit shorted to board. net
- P2303 - Ignition coil of cylinder 2 (2-3), control circuit shorted to board. net
- P2305 - Ignition coil of cylinder 3, control circuit shorted to board. net
- P2307 - Ignition coil of cylinder 4, control circuit shorted to board. net
We recommend: What to check before buying a car
Mass air flow sensor
- P0101 - Diagnosis of reality. Air flow is out of range
- P0102 - Low value diagnostics. The signal period is greater than the upper maximum permissible value
- P0103 - High value diagnostics. The signal period is less than the lower maximum permissible value
Intake air temperature sensor
- P0112 - Low value diagnostic. Voltage is less than the lower maximum permissible value
- P0113 - Diagnostics high value. Voltage is greater than the upper maximum permissible value
Coolant temperature sensor
- P0116 - Diagnosis of reality. Temperature is less than calculated value
- P0117 - Low value diagnostic. Voltage is less than the lower maximum permissible value
- P0118 - Diagnostics high value. Voltage is greater than the upper maximum permissible value
Throttle Position Sensors
- P2135 - Diagnostics of the mismatch between the signals of two sensors. The sensor voltages differ by the threshold value
- P0122 - Low value diagnostic (sensor 1). Voltage is less than the lower maximum permissible value
- P0123 - High value diagnostic (sensor 1). Voltage is greater than the upper maximum permissible value
- P0222 - Low value diagnostic (sensor 2). Voltage is less than the lower maximum permissible value
- P0223 - High value diagnostic (sensor 2). Voltage is greater than the upper maximum permissible value
Accelerator pedal position sensors
- P2138 - Diagnostics of the mismatch between the signals of two sensors. The sensor voltages differ by the threshold value
- P2122 - Low value diagnostic (sensor 1). Voltage is less than the lower maximum permissible value
- P2123 - High value diagnostic (sensor 1). Voltage is greater than the upper maximum permissible value
- P2127 - Low value diagnostic (sensor 2). Voltage is less than the lower maximum permissible value
- P2128 - High value diagnostic (sensor 2). Voltage is greater than the upper maximum permissible value
Injectors
- P0201, P0202, P0203, P0204 - Diagnostics of open control circuit. Driver diagnostics
- P0261, P0264, P0267, P0270 - Diagnosis of control circuit short circuit to ground.
- P0262, P0265, P0268, P0271 - Diagnostics of a short circuit in the control circuit to the on-board network.
We recommend: Self-diagnosis of faults on the VAZ 2115
Control oxygen sensor
- P0130 - Signal circuit integrity diagnostics. Voltage is less than the lower maximum permissible value or greater than the upper maximum permissible value
- P0131 - Low value diagnostic. Voltage is less than the lower maximum permissible value
- P0132 - Diagnostics high value. Voltage is greater than the upper maximum permissible value
- P0133 - Slow Response Diagnosis. The signal period is greater than the maximum permissible value
- P0134 - Activity Diagnostics. Voltage is less than the upper maximum permissible value and greater than the lower maximum permissible value
- P0030 - Diagnostics of open circuit of the heater. Driver diagnostics
- P0031 - Diagnostics of a short circuit of the heater circuit to ground.
- P0032 - Diagnostics of a short circuit of the heater circuit to the on-board network.
Diagnostic oxygen sensor
- P0136 - Signal circuit integrity diagnostics. Voltage is less than the lower maximum permissible value or greater than the upper maximum permissible value
- P0137 - Low value diagnostic. Voltage is less than the lower maximum permissible value
- P0138 - Diagnostics high value. voltage is greater than the upper maximum permissible value
- P0140 - Activity Diagnostics. Voltage is less than the upper maximum permissible value and greater than the lower maximum permissible value
- P0036 - Heater circuit open circuit diagnostics. Driver diagnostics
- P0037 - Diagnostics of a short circuit of the heater circuit to ground.
- P0038 - Diagnostics of a short circuit of the heater circuit to the on-board network.
Fuel supply system
- P0171 - Diagnosis of poor mixture composition. Fuel correction coefficients are greater than the upper maximum permissible value
- P2187 - Diagnosis of poor mixture composition (at idle).
- P0172 - Diagnostics of the richness of the mixture. Fuel correction coefficients are less than the lower maximum permissible value
- P2188 - Diagnostics of the richness of the mixture (at idle).
- Engine overheating - P0217. Engine temperature monitoring
Misfire for toxicity
- P0300, P0301, P0302, P0303, P0304 - Diagnosis of the presence of misfires affecting toxicity. The number of misfires is greater than the maximum permissible value
Misfire to protect the converter
- P0363, P1301, P1302, P1303, P1304 - Diagnosis of the presence of misfires affecting the converter. The number of misfires is greater than the maximum permissible value
Knock sensor
- P0326 - Low value diagnostics. Normalized signal level is outside the acceptable range
- P0327 - Low value diagnostics. The normalized signal level is less than the lower maximum permissible value
- P0328 - High value diagnostics. The normalized signal level is greater than the upper maximum permissible value
Crankshaft position sensor
- P0335 - Signal presence diagnostics. Change in air flow in the absence of a signal from the crankshaft position sensor above the maximum permissible value
- P0336 - Diagnosis of reality. The controller counts the wrong number of teeth per revolution of the crankshaft
Camshaft position sensor
- P0340 - Diagnostics of signal presence. The sensor signal does not change when the engine is running
- P0342 - Low value diagnostics. Low sensor signal for several crankshaft revolutions
- P0343 - High value diagnostics. High sensor signal for several crankshaft revolutions
Ignition coils
- P0351, P0352 - Open circuit diagnostics. The primary circuit current is less than the maximum permissible value
- P2301, P2304 - Diagnostics of a short circuit to the on-board network. The primary circuit current is greater than the maximum permissible value
- Neutralizer - P0422. Determining the capacity of stored oxygen by comparing the amplitude range of the control and diagnostic oxygen sensors
Canister purge valve
- P0441 - Functional diagnostics. The response of the idle control system is greater or less than the maximum permissible value
- P0459 - Diagnostics of a short circuit to the on-board network. Driver diagnostics
- P0458 - Diagnostics of a short circuit to ground.
- P0444 - Open circuit diagnostics.
Cooling fan relay 1
- P0692 - Diagnostics of a short circuit to the on-board network. Driver diagnostics
- P0691 - Diagnostics of a short circuit to ground.
- P0480 - Open circuit diagnostics.
Cooling fan relay 2
- P0694 - Diagnostics of a short circuit to the on-board network. Driver diagnostics
- P0693 - Diagnostics of a short circuit to ground.
- P0481 - Open circuit diagnostics.
- Cooling fan - P0485. Diagnostics of cooling fan supply voltage
- Vehicle speed sensor - P0500. Signal presence diagnostics
- Brake pedal sensor - P0504. Diagnostics of sensor signal mismatch time
Onboard voltage
- P0560 - Diagnosis of value validity. voltage in circuits Cl. "30" and Cl. “15” differs by the threshold value
- P0562 - Low value diagnostic. Voltage is less than the lower maximum permissible value
- P0563 - High value diagnostic. Voltage is greater than the upper maximum permissible value
- P1602 - Supply voltage diagnostics. Power failure
Controller
- P1640 - EEPROM diagnostics. EEPROM test error
- P0601 - Software checksum diagnostics. Invalid checksum
- P0606 - Internal controller checks. ADC is faulty
- P2105 - The monitoring module is faulty.
Starter relay
- P0615 - Open circuit diagnostics. Driver diagnostics
- P0616 - Diagnosis of a short circuit to ground.
- P0617 - Diagnostics of a short circuit to the on-board network.
Fuel pump relay
- P0627 - Open circuit diagnostics. Driver diagnostics
- P0628 - Diagnosis of a short circuit to ground.
- P0629 - Diagnostics of a short circuit to the on-board network.
A/C clutch relay
- P0645 - Open circuit diagnostics. Driver diagnostics
- P0646 - Diagnostics of a short circuit to ground.
- P0647 - Diagnostics of a short circuit to the on-board network.
How to remove information about corrected errors from the controller memory
Sometimes, after troubleshooting, error messages remain in memory and periodically appear on the panel.
To clear an error code from memory:
- Write down and check for irrelevant codes that appear.
- Reset the daily mileage readings by pressing the corresponding button, after which the error code is guaranteed to be deleted from memory.
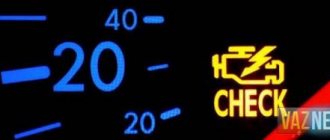
How to get rid of the "Check Engine" message
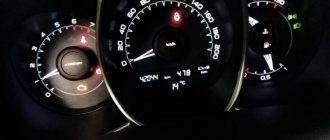
Sometimes drivers see a glowing orange icon at the bottom of the instrument panel. This is how the computer reports an engine malfunction. Self-diagnosis will not allow you to determine and correct the cause of the motor problem. However, the error often appears on serviceable cars. Therefore, to reset the problem code:
- Turn on the ignition, but do not start the car.
- Open the hood and use a wrench to loosen and remove the negative terminal on the battery.
- After a minute, return the terminal to its original position.
- Close the hood and turn the ignition key to position “0”.
- Turn the ignition back on and start the engine. After a short time the error should disappear.
We recommend: Maintenance
If the above instructions did not help, it is worth carrying out a more accurate diagnosis of the car at a service center in order to correct the problem at an early stage.
How to dismantle and install the Priora dashboard
To dismantle the module, you will need to prepare two screwdrivers – a Phillips and a flathead one. A complete replacement of the Priora tidy looks like this.
- Disconnect the wires from the battery.
- Pull the steering column all the way down and remove the steering wheel from the pin.
- You will also need to remove the cover covering the fuse box.
- Unscrew the 4 bolts holding the instrument panel and remove it.
- Loosen the two mounting bolts of the trim panel and remove it.
- Disconnect the wiring harnesses from the contact groups and completely remove the board from the machine.
Installation is performed in reverse order.
Specialization : Graduated from the State Automobile University, worked for 20 years at GAZ-56, now I drive a Zhiguli.
Source