The popular Russian-made model is very widespread in the CIS countries due to its optimal cost and increased cross-country ability, which is critically important in the conditions of domestic operation. Motorists buy cars for off-road travel and small towns, where the quality of roads leaves much to be desired.
The disadvantages of the car include weak wiring - when the load increases to the design limit, on-board electronic systems often fail, which causes software failures. Chevy Niva error codes appear on the dashboard display or are detected using special equipment, but the common thing is that they all indicate a malfunction of a specific component.
Chevrolet Niva error diagnosis
The most reliable way to identify what is wrong with a car is to diagnose electrical appliances and equipment. The procedure allows you to accurately identify breakdowns and quickly repair your car.
There are two ways to detect a problem in a car.
Self-diagnosis VAZ 2123
The simplest procedure allows the motorist to independently identify the damaged area and repair the damage. Thanks to the successful firmware of the on-board computer, some errors are displayed on the standard display. In this case, nothing happens on its own - you will need to perform several steps manually:
- turn off the engine and turn off the ignition;
- find the daily mileage reset button on the dashboard and press it;
- at the same time turn the key in the starting cylinder;
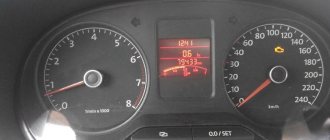
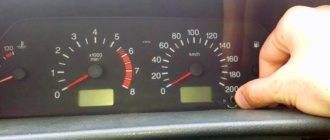
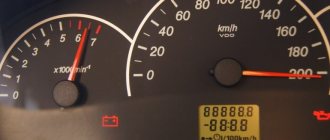
- if everything is done correctly, all the indicators on the dashboard will light up, and the instrument arrows will make a full circle and return to their place;
- at the same time, the firmware version of the on-board computer will be reflected on the built-in display;
- The next press of the key will display a network error.
If the manipulations are correct, one of the indicated codes will appear on the display, and each Niva Chevrolet error number will be responsible for its own section of the highway:
- 0 – error 0 Niva Chevrolet indicates that there are no problems in the on-board circuits; most likely, the breakdown is purely mechanical in nature;
- 1 – standard error of the Niva Chevrolet ECU – the processor is not working correctly;
- 2 – for a Chevrolet Niva, error 2 indicates a lack of power to the gas tank float;
- 4 – malfunction of the battery or generator; a critical excess of the rated voltage of more than 16 volts was detected in the on-board circuits;
- 8 – has the opposite meaning; on a Chevrolet Niva, error 8 indicates an excessive voltage drop in the wiring due to a deep discharge of the battery or a malfunction of the generator;
- 12 – error 12 Chevrolet Niva reports a breakdown of the control indicator;
- 13 – signal transmission from the lambda probe is disrupted, you need to check the device and main power lines;
- 14 – on Niva Chevrolet, error 14 indicates a critical antifreeze temperature, the system requires cooling, otherwise the power unit may boil;
- 15 – the motor is too cold for normal operation, usually the error disappears after a good warm-up or replacement of the sensor;
- 19 – malfunction of the DPKV, the encoding indicates an incorrect speed of rotation of the unit;
- 21/22 – the throttle position differs from the calculated values up/down;
- 23/25 – the air mixture on the intake manifold is excessively cooled or overheated;
- 24 – open circuit of the speedometer, accompanied by a lack of response of the instrument needle to the driver’s manipulations;
- 27/28 – incorrect display of the actual amount of exhaust from the calculated value;
- 33/34 – Mass air flow sensor, the indicators of the device are overestimated or underestimated, relative to the actual state of the system;
- 35 – incorrect operation of the engine at idle, you need to check the correctness of the mixture formation settings;
- 41 – the phase distribution sensor or DPRV has detected an open circuit or the data received is erroneous;
- 42 – multiple misfires were detected, the system turned off the fuel supply to the damaged cylinders;
- 43 – the detonation channel sensor generates an error;
- 44/45 – fuel mixture is too rich/lean; you need to check the fuel lines for mechanical damage;
- 49 – the vacuum gauge is out of order or overloaded;
- 51 – ROM has failed, or there is a breakdown in the power cables;
- 52 – RAM is not working correctly, damaged, no power;
- 53 – the adsorber purge valve is faulty;
- 54 – octane corrector controller is de-energized or broken;
- 55 – the calculated load on the internal combustion engine differs from the established one;
- 61 – the oxygen quantity controller in the intake system transmits incorrect data to the computer.
At the same time, you need to accurately understand that, for example, when error 10 is on the display, the Chevrolet Niva tells the driver that there are several problems (standard, unambiguous codes are summed up).
You should also know that Niva Chevrolet self-diagnosis errors do not reflect the exact location of the breakdown. Codings can only show the section of the wiring where you need to look for the cause of the malfunction. Also, these encryptions may be the result of a software failure after an unsuccessful wash or disconnection of the battery. To obtain more accurate data, the user needs to connect a special diagnostic scanner.
List of Chevrolet Niva errors
Hi all.
Let’s immediately understand what will be discussed in this post. Let's understand the definitions of what self-diagnosis and diagnostics are. Self-diagnosis is the ability of a system to independently detect, localize and analyze errors and failures. Car diagnostics is testing its various systems and actuators, identifying faults and drawing up a diagnostic chart. The technology for diagnosing a car depends on the unit being tested; for example, diagnosing the chassis of a car can be done either independently or with the help of special equipment. And it is impossible to diagnose a car in terms of its electronic control systems without a computer. Self-diagnosis of the Shniva is very simple. To do this, you need to hold down the daily mileage reset button with the car turned off and turn the key in the ignition switch to position 1 (as is known, the key has 2 positions). All the arrows on the instrument panel will reach the maximum and begin to return back (so twice), at this time you need to press the key again and you will see the firmware version of the machine’s computer. I couldn’t find what this version is responsible for and how they differ from each other! By pressing again, an error code will appear.
List of errors: 0
— there are no malfunctions;
1
- microprocessor is faulty;
2
— breakage of the fuel level indicator sensor;
4
— increased supply voltage in the on-board network (above 16 V);
8
- reduced supply voltage in the on-board network (below 8 V).
If there are many faults, then a number corresponding to the sum of fault codes is displayed. For example: 6=2+4; 10=2+8; 12=4+8; 14=2+4+8. 12
- malfunction of the diagnostic lamp circuit;
13
— no signal from the oxygen sensor/Lamda probe;
14
— high signal level of the coolant temperature sensor;
15
— low signal level of the coolant temperature sensor;
16
— increased voltage of the on-board network;
17
— reduced voltage of the on-board network;
19
- incorrect signal from the crankshaft position sensor;
21
- high signal level of the throttle position sensor;
22
- low signal level of the throttle position sensor;
23
— high signal level of the intake air temperature sensor;
24
- no vehicle speed sensor signal;
25
— low level of sensor signal;
27
— high signal level of the CO potentiometer;
28
— low signal level of the CO potentiometer;
33
— high signal level of the absolute pressure sensor;
34
— low signal level of the absolute pressure sensor;
35
— idle speed deviation;
41
- incorrect phase sensor signal;
42
- malfunction of the electronic ignition control circuit;
43
- incorrect knock sensor signal;
44
- lean mixture composition;
45
- enriched mixture composition;
49
— diagnostics of vacuum loss;
51
- EPROM error;
52
- RAM error;
53
- increased voltage;
54
- no signal from the octane corrector sensor;
55
- electronic control unit error;
61
- degradation of the oxygen sensor/Lamda probe. In order to reset the error, you need to hold down the daily mileage reset button and wait until the error number changes to 0.
ELM327
is a scanner that connects to the car via the OBDII connector (in the Chevrolet Niva this connector is located on the right side below the steering wheel).
Today we’ll talk about the ELM327 mini, the work with which consists of connecting the scanner to a phone (depending on the scanner, the connection is via Bluetooth or Wi-Fi) on Android and the Torque program (I use this program to connect to the car, but there are specialized programs such as SZ Viewer for Suzuki). There are two versions of this scanner: v1.5, which everyone recommends, and v2.1, about which everyone says that it is not finalized. Therefore, after reading articles, I decided to buy this scanner for myself!
Source
Diagnostics using third-party equipment
More precisely, errors on Chevy Niva can be identified by connecting additional equipment. The technique is more technically complex, but allows us to determine the cause of a breakdown or failure with minimal error. In this case, the sequence of actions is as follows:
- turn off the engine;
- find the contact connector under the dashboard, the connector is located at the bottom of the steering column;
- connect the configured computer to the ECU output;
- turn on the ignition;
- follow the program instructions.
If all actions are performed correctly, all available information and any errors in the form of encrypted codes will be displayed in the desktop window.
- Priora error codes and their interpretation
There are also specialized scanners designed specifically for Chevrolet NIVA. Dealer devices are connected to the place of the standard signaling unit through an output cable.
Separately, we should highlight modern devices designed to connect a smartphone to a car, while reading encodings and controlling operating modes occurs directly from the gadget’s display.
At the same time, you should know what the encodings displayed during diagnostics mean. The code consists of several elements.
First part:
- P – the motor electronics have failed;
- C – there are problems with the chassis;
- B – interior space, a problem has been detected;
- U – there are problems when establishing pairing of on-board systems.
The next element is a single digit:
- 0 – OBD 2;
- 1-2 – standard code of the manufacturer;
- 3 – reserve part of electrical equipment.
The following digit determines the exact serial number of the line in which the defect was detected:
- 0 – exhaust system device;
- 1-2 – violation of the fuel or air supply device to the engine;
- 3 – ignition does not work correctly;
- 4 – additional equipment control;
- 5 – monitoring the engine idle state;
- 7-8 – transmission and chassis design.
NIVA CLUB
International Niva Club
- List of forumsAuto - EquipmentTechnical section Lada 4x4 NivaInjection engine
- Search
- Links
- Unanswered topics
- Search
- Online store "NIVA SHOP"
Active topics
ECU errors. Check-Engine - the light came on!
- Go to page:
Check-Engine - the light came on!
Post by ILIA » 13 Dec 2010, 16:14
Re: Injector light came on!
Post by Anton » 13 Dec 2010, 16:16
Re: Injector light came on!
Post by Captain » Dec 13, 2010, 6:30 pm
Re: Injector light came on!
Post by ILIA » 13 Dec 2010, 18:40
Re: Injector light came on!
Post by Magellan » Dec 13, 2010, 07:54 pm
Re: Injector light came on!
Post by ILIA » 14 Dec 2010, 13:12
Re: Injector light came on!
Post by ALK » Dec 14, 2010, 01:27 pm
Who knows what's going on behind the fence of the zoo? ©
Re: Check-Engine - the light came on!
Post by Portada » Dec 14, 2010 6:35 pm
ECU errors. Check-Engine - the light came on!
Post by Axen » Mar 19, 2011, 03:24 pm
All ECU errors and symptoms are malfunctions. It is known that it is difficult to identify some faults even when identifying an error. The error must match the classifier. (for all types of ECU.
specify) First position: B — is for body codes P — is for powertrain codes C — is for chassis codes
Second position: 0—code common to OBD-II 1—manufacturer code
Third position - type of malfunction: 1 - fuel system or air supply 2 - fuel system or air supply 3 - ignition system 4 - auxiliary control 5 - idle speed 6 - ECU (ECU) or its circuits 7 - transmission 8 - transmission
The fourth and fifth positions are the serial number of the error.
Here are several types of ECUs installed on AvtoVAZ: https://www.chipautovaz.ru/Article06.aspx PS: Before asking questions, visiting the link is required! In the question, indicate the model and modification of the ECU. etc.
Re: ECU errors
Post by Axen » Mar 19, 2011, 4:30 pm
Re: ECU errors
Post by dimanoff2007 » Mar 19, 2011, 4:54 pm
Re: ECU errors
Post by Xavi » Mar 19, 2011 5:27 pm
The most popular Niva 21214 errors and methods for eliminating them.
Engine error codes (P0000)
Note!
Chevrolet Niva on-board computer errors found in this way reflect the most accurate state of affairs at the current time.
- VDO Panel Errors and Fault Codes
- 0102/103 - the pulse from the mass air flow sensor is too low or high, damage to the device or its wiring may occur;
- 0112-0113 – similar indicators from the device for measuring the actual temperature of the intake manifold;
- 0116 – the level of the DTOZh signal is outside the permissible limits, urgent diagnostics of the system is required;
- 0117/0118 – is responsible for the above element and indicates that the signal level is too low/high; it is also necessary to check the sensor itself;
- 0122/0213 – excessively weak or strong impulse from the TPS, cleaning the mechanical part of the device or replacing the sensor may help;
- 0130-0132 – incorrect data transmission from DC1 installed to the catalytic converter; the part may need to be replaced or cleaned;
- 0133 – is responsible for the above element and indicates a slow response of the device to driver commands;
- 0134/0135 – breakage of the power line/breakage of the heater DK1;
- 0136 – short circuit with contact to the negative wire of DK2;
- 0137/138 – critical drawdown/exceeding the permissible norm of the signal from the oxygen sensor installed after the exhaust gas converter;
- 0140/0141 – open circuit of the wiring or breakdown of the DC2 itself;
- 0171/0172 – malfunction of the fuel supply device; the mixture is excessively lean or rich; it is necessary to check the fuel lines for damage; the fuel pump and its relay should also be diagnosed;
- 0201-204 – damage to the injector driver control wiring for each engine cylinder in series;
- 0261/0264/0267/0270 – short circuit on the body for wiring the driver of each injector in series;
- 0262/0265/0268/0271 – similar, only with a touch to the vehicle’s on-board wiring, for each cylinder, respectively;
- 0300 – the electronic control unit has detected multiple misfires, the gasoline supply is turned off;
- 0301-0304 – similarly, misfires are observed for each working chamber, respectively, the controller cuts off the flow of fuel to the damaged module;
- 0327-0328 – the knock sensor is not working correctly, a weak or too high signal is detected;
- 0335 – DPKV is out of order or its wiring is damaged, you should immediately perform physical diagnostics of the sensor;
- 0336 – the same sensor does not work correctly;
- 0337/0338 – short circuit to the body/break in the DPKV wiring;
- 0340 - therefore, error p0340 Niva shows that there are problems in the circuit of the above sensor;
- 0342 – critical reduction in the permissible impulse from the DPKV;
- 0343 - error 0343 Niva warns that the actual impulse from the DPKV is above the permissible limit;
- 0422 – obstruction of the catalytic converter has been detected, the device needs to be replaced;
- 0441 – the actual value of the flow meter differs from the calculated values;
- 0443 – the canister purge valve is faulty or there is serious damage to the power cables;
- 0480/481 – failure or damage to the wiring of the fan relay No. 1/2 of the cooling system;
- 0500 – the speedometer sensor shows incorrect data;
- 0503 – DSA pulse is interrupted or the wiring is short-circuited;
- 0506/507 – the power plant XX regulator is blocked, a low or high speed level is detected;
- 0560 – the performance of on-board systems is limited due to a critical voltage drop, usually the cause is a deep discharge of the battery;
- 0562/563 – there are voltage surges in the on-board network, up or down from the reference value;
- 0601 – error in writing or reading information for a permanent recording device;
- 0603/604 – similar for RAM;
- 0615 – there is no power to the starter relay, you need to check the safety insert and wiring;
- 0616/617 – Short circuit on the on-board network or on the car body of the starter relay wiring;
- 1135 – interruption or incorrect operation of the control wiring DK1;
- 1140 – mass air flow sensor error, the measured value differs from the calculated value;
- 1141 – disruption of the operation of power lines DK2;
- 1386 – incorrect signal from the mixture detonation channel length sensor;
- 1410 – Short circuit of the canister purge valve lines with contact with other wires;
- 1425 – similar, only with contact on the car body;
- 1426 – complete break in the lines of the canister purge valve – no pulse;
- 1501/02 – there is a short circuit in the control and power lines of the main fuel pump touching the standard wiring or body, respectively;
- 1509 – critical overload of the power plant idle speed control relay;
- 1513/514 – short circuit of the above module with contact to the wires or car body;
- 1541 – control of the electric fuel pump is lost, there is a break in the cables;
- 1570 – APS does not respond, control elements or control lines may be damaged;
- 1602 – error 1602 Niva indicates that there is no power in the controller;
- 1606 – the rough road sensor is acting up;
- 1616/617 – too weak or strong impulse from DND;
- 1640 – error in writing or reading the EEPROM system;
- 1689 – false data in the error memory, the system needs to be reset;
- 2188 - error 2188 Niva warns the user that an excessively rich fuel mixture is supplied to the engine at idle speed (the engine choke).
ERRORS ON-BOARD COMPUTER KALINA/PRIOR
0102 Low level of mass air flow sensor signal 0103 High level of mass air flow sensor signal 0112 Low level of intake air temperature sensor 0113 High level of intake air temperature sensor 0115 Incorrect signal of coolant temperature sensor 0116 Incorrect signal of coolant temperature sensor 0117 Low level of temperature sensor coolant 0118 Coolant temperature sensor signal high 0122 Throttle position sensor signal low 0123 Throttle position sensor signal high 0130 Oxygen sensor signal 1 incorrect 0131 Oxygen sensor signal low 1 0132 Crankshaft sensor signal high 1 0133 Slow response oxygen sensor 1 0134 No signal from oxygen sensor 1 0135 Malfunction of oxygen sensor 1 heater 0136 Short circuit to ground of oxygen sensor 2 0137 Low level of oxygen sensor 2 0138 High level of high signal of oxygen sensor 2 0140 Open circuit of oxygen sensor 2 0141 Malfunction of oxygen sensor 2 heater 0171 Too lean mixture 0172 Mixture too rich 0201 Injector 1 control circuit open 0202 Injector 2 control circuit open 0203 Injector 3 control circuit open 0204 Injector 4 control circuit open 0261 Injector 1 circuit short to ground 0264 Injector 2 circuit short to ground 0267 Injector circuit short to ground sunki 3 0270 Short to ground in the injector 4 circuit 0262 Short to +12V in the injector 1 circuit 0265 Short to +12V in the injector 2 circuit 0268 Short to +12V in the injector 3 circuit 0271 Short to +12V in the injector 4 circuit 0300 Many misfires 0301 Misfires in 1 cylinder 0302 Misfire in cylinder 2 0303 Misfire in cylinder 3 0304 Misfire in cylinder 4 0325 Knock sensor circuit open 0327 Knock sensor signal low 0328 Knock sensor signal high 0335 Crankshaft position sensor signal incorrect 0336 Crankshaft position sensor signal error 0340 Sensor error and phases 0342 Low phase sensor signal 0343 High phase sensor signal 0422 Low converter efficiency 0443 Canister purge valve circuit malfunction 0444 Short or open canister purge valve 0445 Short to ground canister purge valve 0480 Cooling fan circuit malfunction 1 0500 Incorrect Speed sensor signal 0501 Invalid signal speed sensor 0503 Speed sensor signal interruption 0505 Idle speed controller error 0506 Low idle speed 0507 High idle speed 0560 Incorrect on-board network voltage 0562 Low on-board network voltage 0563 High on-board network voltage 0601 ROM error 0603 External RAM error 0604 O Internal RAM error 0607 Malfunction knock channel 1102 Low oxygen sensor heater resistance 1115 Faulty oxygen sensor heating circuit 1123 Rich idle 1124 Lean idle 1127 Rich partial load 1128 Lean partial load 1135 Oxygen sensor heater circuit 1 open, short circuit 1136 Rich mixture in Light Load mode 1137 Lean mixture in Light Load mode 1140 Measured load differs from calculation 1171 Low CO potentiometer level 1172 High CO potentiometer level 1386 Knock channel test error 1410 Canister purge valve control circuit short circuit to +12V 14 25 Chain control circuit of the canister purge valve, short circuit to ground 1426 Control circuit of the canister purge valve open 1500 Open circuit of the fuel pump relay control circuit 1501 Short circuit to ground of the fuel pump relay control circuit 1502 Short circuit to +12V of the fuel pump relay control circuit 1509 Overload of the idle speed regulator control circuit 1513 Idle air regulator circuit really speed short circuit to ground 1514 Idle speed control circuit short circuit to +12V, open 1541 Fuel pump relay control circuit open 1570 Incorrect APS signal 1600 No communication with APS 1602 Loss of on-board power supply voltage to the ECU 1603 EEPROM error 1606 Rough road sensor incorrect signal 161 6 Sensor rough road low signal 1612 ECU reset error 1617 Rough road sensor high signal 1620 RFOM error 1621 RAM error 1622 EPROM error 1640 EEPROM Test error 1689 Incorrect error codes 0337 Crankshaft position sensor, short to ground 0338 Crankshaft position sensor, short to ground open circuit 0441 Air flow through valve incorrect 0481 Cooling fan circuit malfunction 2 0615 Starter relay circuit open 0616 Starter relay circuit short circuit to ground 0617 Starter relay circuit short circuit to +12V 1141 Oxygen sensor 1 heater malfunction after the neutralizer 230 Fuel pump relay circuit malfunction 263 Force driver malfunction nki 1 266 Malfunction Injector Driver 2 269 Injector Driver 3 Malfunction 272 Injector Driver 4 Malfunction 650 CheckEngine Lamp Circuit Malfunction
Chevrolet Niva error reset
The standard procedure for resetting the controller occurs only after all faults have been completely corrected, otherwise annoying encryption will appear again. The procedure is performed in two available ways.
- Disconnect the battery from the on-board network for 10-15 minutes. The controller will completely reboot and return to factory default settings.
- In the BC menu, enter the “errors” service, press the daily mileage reset button and wait for the sound signal from the car, and horizontal lines should appear on the display.
Bottom line
The most common Niva Chevrolet computer errors are found in 90% of car diagnostic cases. There are also a large number of rare failures that are not included in the list due to their low prevalence.
01 April 2022 20 316
The fault indicator (Check Engine) on Chevrolet Niva cars is located in the instrument cluster. When the warning light turns on, it signals to the driver that the on-board diagnostic system has detected a malfunction of the ECM and the vehicle continues to move in emergency mode. To determine the cause, you should use a diagnostic tool, with which you can read error codes and decipher them according to the table below.
Auto parts for foreign cars, auto repair
P The control unit has detected a mechanical fault in the idle air boost drive. P The ignition off timer in the engine management system has failed.
Decoding the P combination As mentioned above, the P code is a common combination when diagnosing a Chevrolet car. P indicates that incorrect data is being received into the control unit from the ABS control unit.
In particular, when R appears, the BC signals a malfunction of the bad road sensor.
Chevrolet Niva error codes. Carrying out diagnostics.
This time there is nothing to worry about, as the appearance of such messages may be due to a lack of communication with the device itself. It is also worth checking the standard chevrolet niva error p0118 anti-theft system, if so, then check the adapter itself. As standard, it is connected to the diagnostic line between the ECU and the immobilizer.
And if it is missing, a plug is installed in its place. To restore communication with Chevrolet Niva error p0118, install a jumper with contacts, as shown in the following figure: Depending on the year of manufacture, the connectors may differ from each other. Self-diagnosis. If it is not possible to check with a special device, then this can be done using self-diagnosis, which will help to quickly identify all problems associated with the operation of the car.
The speedometer needle will begin to move up, when pressed again, information about the firmware will appear on the screen, and when pressed again, all existing errors will be shown. Let's take a closer look at the Chevrolet Niva fault codes with their decoding - as practice shows, knowing how to carry out an independent check is very useful, since this knowledge helps to quickly identify the fault and fix it in a timely manner.
Check engine error If a check mark is lit on a Chevrolet Niva, this warns of the presence of malfunctions associated with Chevrolet Niva error p0118 with engine operation.
Chevrolet Niva error p0118 occurs at the moment when the engine begins to correct a malfunction or error and writes a certain code into its memory. P, P valve of the exhaust gas recirculation system is faulty or blocked - the device requires replacement.
P The on-board computer has detected a controller malfunction - the device needs to be reprogrammed. P The control unit reports a malfunction of the engine control system controller.
Check Engine
When the ignition is turned on, the indicator should light up, so the ECM checks the serviceability of the lamp and control circuit. After starting the engine, the indicator should go out if the controller memory does not contain the conditions for turning it on.
If:
- The Check Engine light is constantly on - in this case, the driver is obliged to make the vehicle available to service technicians as soon as possible.
- A flashing Check Engine Light indicates a problem that can cause serious damage to the ECM (for example, a misfire can damage the catalytic converter).
To protect against random, short-term errors that may be caused by loss of contact in electrical connectors or unstable engine operation, the warning light turns on after a certain period of time after detecting a malfunction in the ECM. During this period, the on-board diagnostic system checks for a malfunction.
After eliminating the causes of the malfunction, the alarm will turn off after a certain delay time, during which the malfunction does not appear, and provided that there are no other fault codes in the controller’s memory that require turning on the alarm.
When clearing (deleting) fault codes from the controller’s memory using diagnostic equipment, the indicator goes off.
- Chevrolet Niva error 8 how to fix
Tuning options
The choice of options for tuning is not particularly large:
- Install a device from another car. In this case, you will need the services of a qualified electrician, since the connectors will have to be redone. You can also install a digital version of the tidy - it will be more than original.
- As a tuning option, you can install LED bulbs instead of regular ones. Many car owners choose this option because it is less expensive and the easiest to implement.
- Another tuning method is to install original instrument scales on the speedometer, tachometer and other sensors. Moreover, you can buy such scales either ready-made or make them yourself in accordance with your preferences.
Self-diagnosis
To carry out repair and maintenance work on the vehicle's engine management system, a diagnostic tool should be used. In service centers this can be DST 2M (DST-10, DST-12), for self-diagnosis an OBD-II scanner ELM327 (price about 200 rubles, see the AliExpress catalog) and a smartphone with installed software (for example, OpenDiag) are suitable. or an on-board computer installed in the car.
| Error code | Description |
| P0030 | Oxygen sensor heater before the converter, control circuit open |
| P0031 | Oxygen sensor heater before converter, control circuit short to ground |
| P0032 | Heater of the oxygen sensor to the converter, short circuit of the control circuit to the board, network |
| P0036 | Oxygen sensor heater after the converter, control circuit open |
| P0037 | Oxygen sensor heater after converter, control circuit short to ground |
| P0038 | Heater of the oxygen sensor after the converter, short circuit of the control circuit to the board, network |
| P0102 | Mass Air Flow Sensor Circuit Low Signal |
| P0103 | Mass Air Flow Sensor Circuit High Signal |
| P0112 | Intake Air Temperature Sensor Circuit Low Signal |
| P0113 | Intake Air Temperature Sensor Circuit High Signal |
| P0116 | Coolant temperature sensor circuit, signal out of range |
| P0117 | Coolant Temperature Sensor Circuit Low Signal |
| P0118 | Coolant Temperature Sensor Circuit High |
| P0122 | Throttle Position Sensor Circuit Low Signal |
| P0123 | Throttle Position Sensor Circuit High |
| P0130 | The oxygen sensor before the converter is faulty |
| P0131 | Oxygen sensor circuit to converter, low output level |
| P0132 | Oxygen sensor circuit to converter, high output level |
| P0133 | Oxygen sensor circuit to the converter, slow response to changes in mixture composition |
| P0134 | The oxygen sensor circuit to the converter is inactive |
| P0135 | Oxygen sensor to converter, heater faulty |
| P0136 | The oxygen sensor after the converter is faulty |
| P0137 | Oxygen sensor circuit after the converter, low signal level |
| P0138 | Oxygen sensor circuit after the converter, high signal level |
| P0139 | Oxygen sensor circuit after the converter, slow response to changes in mixture composition |
| P0140 | The oxygen sensor circuit after the converter is inactive |
| P0141 | Oxygen sensor after converter, heater faulty |
| P0171 | Fuel system too lean |
| P0172 | Fuel system too rich |
| P0201, P0202, P0203, P0204 | Cylinder 1 injector (2,3,4), control circuit open |
| P0261, P0264, P0267, P0270 | Cylinder 1 injector (2,3,4), control circuit short to ground |
| P0262, P0265, P0268, P0271 | Cylinder 1 injector (2,3,4), control circuit shorted to on-board network |
| P0300 | Random/multiple misfires detected |
| P0301, P0302, P0303, P0304 | Cylinder 1 (2,3,4), misfire detected |
| P0327 | Knock Sensor Circuit Low Signal |
| P0328 | Knock Sensor Circuit High Signal |
| P0335 | Crankshaft position sensor circuit is faulty |
| P0336 | Crankshaft position sensor circuit, signal out of range |
| P0337 | Crankshaft Position Sensor Low Signal |
| P0338 | Crankshaft Position Sensor High Signal |
| P0339 | Crankshaft position sensor, no signal |
| P0340 | Camshaft position sensor is faulty |
| P0341 | Camshaft position sensor, signal out of acceptable range |
| P0342 | Camshaft Position Sensor Circuit Low Signal |
| P0343 | Camshaft Position Sensor Circuit High Signal |
| P0422 | Neutralizer efficiency below threshold |
| P0441 | Gasoline vapor recovery system, incorrect air flow through the canister purge valve |
| P0444 | Canister purge valve, control circuit open |
| P0458 | Canister purge valve, control circuit short to ground |
| P0459 | Canister purge valve, control circuit shorted to on-board network |
| P0480 | Fan relay 1, control circuit open |
| P0481 | Fan Relay 2, Control Circuit Open |
| P0500 | Vehicle speed sensor is faulty |
| P0506 | Idle system, low engine speed |
| P0507 | Idle system, high engine speed |
| P0508 | Idle speed control, control circuit short to ground |
| P0509 | Idle air control control circuit faulty |
| P0532 | Air conditioning pressure sensor, low signal |
| P0533 | Air conditioning pressure sensor, high signal level |
| P0560 | On-board network voltage is below the system operability threshold |
| P0562 | On-board voltage, low level |
| P0563 | On-board voltage, high level |
| P0601 | CUD controller, ROM checksum error |
| P0615 | Additional starter relay, control circuit open |
| P0616 | Additional starter relay, control circuit short to ground |
| P0617 | Additional starter relay, control circuit closed to on-board network |
| P0627 | Fuel pump relay, control circuit open |
| P0628 | Fuel pump relay, control circuit short to ground |
| P0629 | Fuel pump relay, control circuit shorted to on-board network |
| P0645 | A/C compressor clutch relay, control circuit open |
| P0646 | A/C compressor clutch relay, control circuit short to ground |
| P0647 | Air conditioning compressor clutch relay, control circuit shorted to on-board network |
| P0691 | Fan Relay 1 Control Circuit Short to Ground |
| P0692 | Fan relay 1, control circuit shorted to on-board power supply |
| P0693 | Fan Relay 2 Control Circuit Short to Ground |
| P0694 | Fan relay 2, control circuit shorted to on-board power supply |
| P1386 | SUD controller, detonation detection channel error |
| P1570 | Immobilizer, circuit faulty |
| P1602 | Court controller, power supply loss |
| P1640 | COURT controller, EEPROM memory read-write error |
| P2187 | Fuel system lean at idle |
| P2188 | Fuel system rich at idle |
| P2195 | Oxygen sensor to the converter, stuck in a lean mixture |
| P2196 | Oxygen sensor to the converter, stuck in a rich mixture |
| P2270 | Oxygen sensor after the converter, stuck in a lean mixture |
| P2271 | Oxygen sensor after the converter, stuck in a rich mixture |
Error P2188
P2188 (Fuel supply system rich at idle) is one of the most common errors on the Chevrolet Niva.
Code P2188 is entered if:
- the engine is idling;
- fuel supply control is carried out in feedback mode based on the signal from the control oxygen sensor (B_LR = “Yes”);
- the fuel supply adaptation function is activated (B_LRA = “Yes”);
- the value of the RKAT parameter is outside the lower limit of the acceptable range (-8%).
The Check Engine light comes on after 2 drive cycles in which the check was unsuccessful.
Use the following flowchart to determine the cause of the problem:
After repair, start the engine, reset the codes and make sure there is no malfunction.
Decoding codes
Now we suggest that you familiarize yourself with the decoding of the combinations. Why errors may occur and how to eliminate them can only be found out as a result of diagnostics.
The elm327 channel published a video showing the diagnostic procedure for a Chevrolet Niva using a special adapter and an Android-based mobile phone.
Common mistakes
First, let's look at deciphering frequently occurring problems that occur in the Chevrolet Aveo in the back of the T250, T300, Niva and other models.
Let's consider the malfunctions encountered in the operation of power units.
Error P1602
P1602 (Court Controller, power supply loss) is another common Chevrolet Niva error.
Code P1602 is entered if the following conditions are met:
- ignition on;
- The controller has detected a loss of RAM data.
The codes should be cleared using a scan tool. If the code is entered again, check the power supply circuit from the battery to pin “12” of the controller.
What errors have you encountered on Chevrolet Niva? You will find other reference information on ChevyNiva here.
Keywords: Niva on-board computer | Niva engine | esud niva
Share on social networks:
Found an error? Select it and press Ctrl+Enter..
How to run diagnostics?
Press the daily mileage reset button and hold it. Turn on the ignition and release the button.
The arrows on the dashboard start moving - this is the entry into the mode. Press the button briefly twice and it will display an error code.
As follows:
Nothing is clear, but there is a special table that deciphers these codes. It looks like this.
Sometimes it happens that the code we need is not in the table. This is fine. If the figure is not the same as in the table, then this means the presence of two malfunctions at the same time. For example, code 6 means the simultaneous presence of codes 2 and 4. And code 10 means errors 2 and 8.
All other error codes are deciphered in the same way. True, this system is quite primitive. Normal diagnostic tools have more detailed information about faults. The codes would look, for example, like this:
“P0303” - 03 means misfire, and the second 03 is the cylinder number. That is, the engine is tripping.
Error codes on the dashboard provide little information. It is much better to use special diagnostic equipment. Even the cheapest one can scan almost all Chevrolet Niva engine errors.
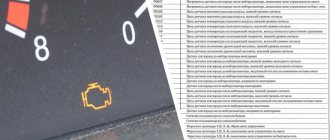
It may happen that an unknown combination of numbers and symbols appears on the dashboard, this indicates that the on-board computer is warning you that there are certain malfunctions in the car, and in order to correctly decipher the error codes on the Niva Chevrolet car and make the necessary repairs, you need to know what this or that information warns about. This article will help you with this, as in it we will look in detail at what different combinations of numbers mean and how to correct them.
But before we look at what errors there may be, let’s figure out how to detect and decipher them in general. In order to do this, you must first of all diagnose the car itself, since you can’t do without it. One of the simplest diagnostic methods is the information that appears on the dashboard, but in addition to numbers, certain phrases can also be displayed, but the car owner cannot always understand the translation of this message.
To find out in more detail about the causes of a breakdown on a Niva Chevrolet car, you can use a special scanner. It is a laptop computer with special software installed, thanks to which self-diagnosis occurs without any problems.
Scanner types:
- Universal ones, which are usually used by many specialized car services, but they cannot be called full-fledged since they do not always allow one to identify certain errors.
- The second type of scanners is dealer scanners. They are not sold in the public domain; they can only be purchased from an official dealer. This device detects breaks associated with electrical wiring without any problems; it can be used to interrogate the on-board computer and chip key. Having this device, you can easily determine what errors they are talking about.
Now let's take a closer look at what errors can appear in the Chevrolet Niva SUV and what they mean.
How to fix error 14 on a VAZ-2114 on the instrument panel
The on-board computer installed in the VAZ-2114 makes life much easier for the car owner in such a difficult task as diagnosing faults. Agree, there can be quite a lot of breakdowns with the same symptoms, and sometimes you have to check several versions until you get to the bottom of the real cause.
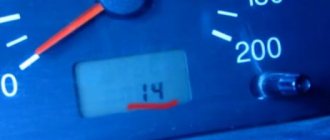
What does error 14 mean on the odometer display of the VAZ-2114 during self-diagnosis
Often, many car enthusiasts strive to solve all problems with their car on their own, going for service only in particularly serious cases. This approach in relation to the VAZ “fourteenth” model is completely justified. The design of the car is quite simple, because it is a restyling of the well-known “nine”, to which the designers made some changes. Well, the undoubted advantage of self-diagnosis and repair is the absence of the need to pay, in addition to spare parts, for the work of car service technicians.
The car has become more modern, it now has the ability to conduct self-diagnosis. Let's look at this procedure in a little more detail. First of all, you should find the odometer button on the instrument panel, which is responsible for mileage (total and daily) - you need to press it and hold it in this position. Next, turn the key in the ignition switch - you need it to be in position 1. After this, release the odometer button. You will see arrows start running on the panel. Then we press the odometer button again, but no longer hold it, but immediately release it. You will see information about the firmware.
After this, you should repeat the steps described above again, in exactly the same sequence. If there is any malfunction in your car, its code should appear on the odometer display.
There is a special table to decipher them. For example, the appearance of code 14 means the signal level coming from the coolant temperature sensor is too high. Accordingly, to eliminate the problem, you should check its performance and, if necessary, replace it with a new one.
You can do this yourself, there is nothing complicated here. At the same time, there is no need to delay solving the problem. The thing is that a problem with the coolant temperature sensor leads to such unpleasant moments in the car’s operation as:
- significant increase in fuel consumption;
- startup problems;
- uneven engine operation;
- change in the composition of exhaust gases.
You can check the functionality of the sensor using a multimeter or voltmeter. This must be done in two modes - with the engine just started, cold, and warmed up to operating temperature (the corresponding indicator will indicate it). In the first case, the voltage when the ignition is on should be 2 Volts, in the second - 0.5. Any deviation from these numbers indicates a sensor malfunction.
However, even after fixing the problem, an error code still appears on the display after self-diagnosis. This phenomenon is explained by the fact that they are simply stored in memory and are not erased. To reset the error code, you need to do one simple manipulation. In particular, you need to turn on the ignition and then disconnect the positive terminal from the battery. After pausing for a few seconds, we put it back. In the vast majority of cases, the error will no longer appear after such a simple manipulation.
By the way, if you plan to go to a car service center, be sure to follow this procedure. Unscrupulous craftsmen often take advantage of this situation. They show the client the problem he allegedly has, and then charge him money to fix it. At the same time, they simply reset the error in a few seconds using the above method. In order not to pay money just like that, it is better to do it yourself.
You should draw your attention to one more, very important point. In some cases, the self-diagnosis procedure is quite capable of misleading you. The thing is that the processor can sum the codes when two errors are detected. For example, if the microprocessor fails (code 1) and there is no signal from the oxygen indicator. During self-diagnosis, the number 14 (1+13) will appear on the odometer display. Therefore, also pay attention to the behavior of the car, since this method of determining breakdowns is not always 100 percent correct.
However, it is still better to know the error codes. After all, self-diagnosis, despite certain shortcomings, is still your assistant. Often this simple procedure helps direct the search in the right direction, thereby saving you time. As already mentioned, you shouldn’t completely rely on it alone, but this function can safely be called very useful, if only for its simplicity. Of course, reading the on-board computer is a more reliable option. But this requires a special cord, laptop and software. That is, you can’t do without a visit to the service. Self-diagnosis helps you identify the problem yourself – even if not with 100% accuracy.
How is self-diagnosis performed?
Most car enthusiasts prefer to regularly go for computer diagnostics of their vehicles. If you do not have the opportunity to visit a service center or do not have a scanner to check the car, then you can do it differently - run the on-board computer diagnostic program. To do this you need to do the following:
- Press the daily mileage reset button on the odometer and at the same time turn the key in the ignition.
- If you did everything correctly, the speedometer and gauge needles will begin to move along the scales.
- Click the reset button again. The display will show the current firmware version of the on-board computer. After this, you need to repeat the action with the reset button so that the bookmaker displays whether there are errors in the system. If they are present, their numbers will be shown on the display.
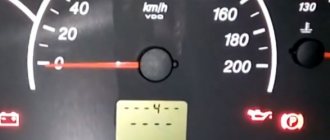
This diagnostic will not take much of your time; you can quickly check the Chevrolet Niva system. If the number 8 appears on the display, then do not be upset - this error with number 8 is not terrible in most cases, you just need to check individual components of the car.
SELF-DIAGNOSTICS OF THE KALINA/PRIORA INSTRUMENT COMBINATION
- With the ignition off, press the “Reset” button (reset daily mileage). While holding the button, turn on the ignition.
- The instrument panel will go into self-diagnosis mode, all segment positions will light up on the display, all indicators will light up, and the arrows will travel the full path.
- Using the control button on the right steering column switch, we switch between modes (self-diagnosis, firmware version, error codes).
- To reset errors, you need to be in error mode and press and hold the “Reset” button for more than 3s.
- The diagnostic mode exits automatically after inactivity for 20-30 seconds.
Decoding error codes in the dashboard:
- 2-increased voltage of the on-board network;
- 3-fuel level sensor error (if a break in the sensor circuit is detected within 20s);
- 4-error of the coolant temperature sensor (if an open circuit of the sensor is detected within 20s);
- 5-outside temperature sensor error (if there are no sensor readings within 20s, indication on the LCD is “-C”);
- 6-engine overheating (the criterion for triggering the acoustic alarm has been met);
- 7-emergency oil pressure (the criterion for triggering the acoustic alarm is met);
- 8-defect of the brake system (the criterion for triggering the acoustic alarm is met);
- The 9-battery is discharged (the criterion for triggering the acoustic alarm is met);
- E-determination of an error in a data packet stored in EEPROM.
What does error 8 mean?
In the table for decoding error codes of the on-board computer, error number 8 means that there is low voltage in the electrical network of your Chevrolet. To eliminate it you need to do the following:
- check the battery charge status;
- diagnose and, if necessary, repair the generator.
Most often, error 8 appears due to problems with the battery. It may lose its capacity over time and produce a voltage less than 8 V required for the normal functioning of the electrical network and vehicle sensors. Similar procedures are carried out if the network voltage is too high.
If you think that the error message was not generated by the on-board computer due to a problem, then you can check its readings. To do this, remove the negative terminal from the battery for 10 minutes, and then plug it back into the power supply. If there are no problems, then the error on the dashboard will disappear.
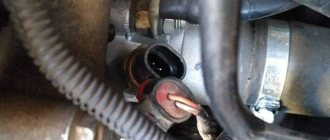
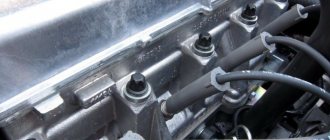
What you need to know about a sensor malfunction
First of all, it is important to understand the operating principle of the sensor located between the thermostat and the block head. This element has two contacts leading to the fan and control unit. Its main function is to help regulate the fuel mixture, depending on the engine temperature. Thanks to it, all the main characteristics of the VAZ-2114 engine are adjusted.
DTOZH is considered one of the most reliable and rarely fails. If it produces the wrong temperature, the consequences may be:
- increased fuel consumption;
- problems with starting the engine, especially in winter (the computer does not read the engine temperature correctly);
- uneven operation of the power unit, detonation and loss of power;
- change in engine operating temperature (normally it fluctuates between 80 and 90 degrees);
- antifreeze boiling in the expansion tank;
- change in exhaust color due to a different composition of exhaust gases.
If the sensor malfunctions, the computer cannot correctly read the engine temperature, so it incorrectly sends signals to start the fan and fuel injection.
What problems may be hidden in the Chevrolet Niva generator
If you are sure that the battery is in good condition and produces sufficient voltage, then you need to diagnose the generator. It is one of the weak points of the Chevrolet Niva. During its diagnostic process, malfunctions may be detected:
- pulley wear or damage;
- wear of current collecting brushes;
- rectifier failure;
- failure of the voltage regulator;
- destruction or wear of the bearing;
- wires are damaged;
- collector wear.
Before dismantling, you can check the generator by paying attention to the headlights and other signs. The malfunction is present in the following situations:
- headlights burn dimmer than usual;
- while the engine is running, the battery discharge lamp lights up or flashes on the dashboard;
- as engine speed increases, the brightness of the headlights changes;
- spontaneous shutdown of the radio;
- rapid battery drain.
If you have these problems, you need to replace the generator or its parts. We will give examples of how to install new brushes on this unit or replace it entirely.
Chip tuning
Some drivers do chip tuning of the Chevrolet Niva in order to increase engine power. The essence of this procedure is to remove the established restrictions by adjusting the optimal factory settings in the electronic control unit. This procedure helps to extract the additional performance inherent in the motor.
The whole process can be divided into several stages:
- Reading the necessary data from the electronic control unit
- Making the necessary adjustments
- Updating and recording new data
The main advantage of this procedure is:
- Engine power increases
- Speed limit removed
- You can change the fuel type
- All factory settings can be returned at any time
The disadvantages include:
- High cost of work
- The ECU may fail
- Increases fuel consumption, reduces system life
- Errors may appear
Each specialist has a different attitude towards chip tuning, some consider it useful, while others think that this procedure can negatively affect the performance of the car, while reducing its service life.
To summarize, we can conclude that you can identify error codes on a Chevrolet Niva either independently or using a special device. If malfunctions occur, they must be eliminated as soon as possible, otherwise this may lead to irreversible negative consequences in the operation of the entire system.
Similar:
- Replacing brake discs on a 3rd generation Honda SR-V. The third generation Honda SR-V is rightfully considered one of the most successful models ever produced under this Japanese brand. After the second one, which did not find a response.
- Removing knocking in the front suspension of the Niva Chevrolet The suspension of the Niva Chevrolet has an independent device. It is based on two wishbones located on both sides. To smooth out vertical vibrations, coil springs and shock absorbers are used.
- Main tire size for Chevrolet Niva All car enthusiasts, without exception, are necessarily faced with the need to change the shoes of their vehicles. This is due to the fact that the climate in our latitudes varies greatly, from...
- What are the bolt pattern and wheel offset parameters for the UAZ Patriot R16? A modern car consists of a large number of components and systems that are designed to make movement comfortable and safe, allowing you to move at high speed. But all these changes are lost.
Replacing brushes or the generator itself
Current collection brushes wear out most often, so here is a description of how to do this job:
- Remove the negative terminal from the battery and disconnect the wires leading from the generator casing.
- Remove the protective cap from the terminals of the positive terminal of the wires. Unscrew the nut that secures the block to the generator block.
- Disconnect the spring clips and remove the black plastic cover.
- Unscrew the voltage regulator mountings with a Phillips screwdriver. Take it out along with the brushes.
- Disconnect the wires from it. Remove the assembly together with the fastening bar, take off the belt.
- Release the generator from the bracket by unscrewing all the mounting bolts.
The further plan of action depends on what you will change. If the brushes are very worn, they need to be replaced. If the current collectors are visually intact, then the reason may be in other parts of the generator. In most cases, car enthusiasts simply change it entirely.
Why is error 8 associated with brake system problems?
Some car enthusiasts misinterpret error message 8, believing that they need to check the brake system. This is due to the fact that on VAZ cars this fault number indicates insufficient brake fluid level.
The Chevrolet Niva's on-board computer uses different designations, so you should not interpret them in the same way as in the VAZ. If you doubt the condition of the brake system, you can check it during the repair process. First of all, pay attention to the brake fluid level, and then check the pads.
Sources used:
- https://vaz-russia.com/chevrolet-niva-vaz-2123/kody-oshibok-niva-shevrole.html
- https://xn--80aal0a.xn--80asehdb/do-my-self/repair/repair-lada-niva-chevrolet/5746-rasshifrovka-kodov-oshibok-chevrolet-niva-lada.html
- https://nivachevrole.ru/varia/error-codes/
- https://expertniva.ru/elektrooborudovanie/kodi-osibok.html
- https://ladaprofi.ru/shevrole-niva/kak-ispravit-oshibku-nomer-8-na-shevrole-niva.html