Body repair of VAZ 2109 according to instructions
Today, do-it-yourself body repairs of the VAZ 2109 are carried out by many owners of this car. And in general, a considerable part of fans of the domestic automobile industry are faced with body problems. The price of repairing the body of a VAZ 2109 in car services leaves much to be desired, so you have to do some types of work yourself.
In reality, there is nothing complicated about replacing individual elements of the Nine’s body. If you have the necessary tools at hand, it will not be particularly difficult to replace, for example, a rotten arch or the bottom of a car, a threshold or a bumper. From the article you will learn how to do this without wasting a lot of time and effort.
Tools
Before moving on to the direct instructions for repairing the VAZ 2109 body, I would like to dwell on choosing the right tools. Every professional, master of his craft will confirm that a good tool is half the successful completion of any repair operation.
So, the list of necessary tools for body repair of the “nine” is quite wide, since the work is by no means simple and will require a considerable number of specific instruments:
- Special hammers are required, at least 3 types of them with different sizes for straightening work;
- A grinder with mounted circles (you need different discs that perfectly remove paintwork and rust);
- It is advisable that the garage have a carbon dioxide cylinder (about 10 cubic meters);
VAZ 2109 body repair and tools
- Without welding during body work, it’s like having no hands (it’s better to choose a device with a maximum current of 150 A);
- Good chisels with hardened tips and several similar metal drills;
- Lift (it is better to have 2 jacks);
- A good metal brush (you will need it to clean rusty areas of the body);
- A standard set of motorist tools (keys, screwdrivers, etc.).
Where to start and where to end
Repair work begins with dismantling the deformed, rotten parts of the “nine”:
- Disassembling the engine compartment, draining coolant and antifreeze.
- Removing the doors.
- Dismantling the amplifier - “TV”.
- Rusty areas are cut off with a grinder.
- The holes will have to be repaired or patched.
- Problem areas are strengthened with iron.
- Mudguards are reinforced with spot welding.
- Spare parts are adjusted in accordance with the geometry of the car.
- Thresholds and wings are fastened with bolts followed by electric welding.
- New arches are installed, and if necessary, the bottom is completely changed.
Algorithm for carrying out body work on the “nine” in general terms
VAZ 2109 body repair
Let's get acquainted with the work process so far in general terms:
- First of all, it will be necessary to remove those areas of the body that are rotten or deformed;
- On the “nine”, over time, the front floor with sills and reinforcements, the bottom in the rear, doors and fenders rot most quickly.
Note. It may even be impossible to install a jack, since the area provided by the manufacturer for it (the jack) becomes unusable. To work in this place, the car can be raised using an engine support beam instead of a support.
- The hood of the “nine” also cannot “boast” of endurance. In the place where the battery is located, it becomes covered with rust;
- The floor of the fuel tank is also considered a noticeable problem on the “nine”;
- The same fate befalls optics reflectors, muffler and other parts over time.
In general, corrosion is the number one problem for domestic cars. It seems that the level of anti-corrosion protection on them is good, but rust eats through everything over time, and there is no escape from it.
VAZ 21099 body repair
Let's continue:
- The engine compartment is disassembled and the coolant and radiator are drained;
- Doors are removed;
- If a TV (amplifier) is installed in front, then it must be disassembled;
- Rotten areas will have to be cut off with a grinder;
- You will also have to cut off rusty panels and fenders;
- Holes can simply be welded or patched;
- It is recommended to place additional metal pieces on problem areas;
- Mud flaps must be reinforced with new elements, and then secured with spot welding;
- It is also necessary to fit new parts to the body so that no problems arise;
- It is advisable to fasten the wings and sills with self-tapping screws and bolts, followed by welding of the parts.
Note. It is also necessary to restore the geometry of the body, which takes a lot of time. You will need a slipway machine on which you will have to fix the car. The slipway has special clamps that ensure reliable fixation of the machine. You can read more about the “nine” checkpoints below.
- After this, you can begin welding the new floor. At this stage of work, patches, amplifiers and connectors are widely used. Be sure to cover all areas with anticorrosive at the end;
- It’s better to install new arches, too, and not bother with their repair.
Control points of the VAZ 21099 body and their measurements
It is advisable to cover the arches with resin mixed with waste oil. This is an excellent remedy against rye, but you can’t apply it to the bottom for well-known reasons.
Restoring the original condition of the body and parts with your own hands usually involves simple painting and removing dents. It cannot be done without polishing, which protects the surface well from corrosion.
VAZ 21099 body repair on a slipway
As for the complete restoration of a body involved in an accident, the services of professionals will be required. Only in a car service can you properly restore the body, according to basic control points. Here there is appropriate equipment, and the specific technology for carrying out it is well known to the masters.
In any case, before carrying out repair work, it is necessary to check the condition of the body. The most well-known verification method involves measuring the distances between control points and then comparing them with the passport values.
Specifically, the body is checked as follows:
- The dimensions are checked diagonally;
- The condition of the vehicle struts is studied;
- The roof is subjected to a visual inspection, the dimensions of the diagonals of the door frame and the roof itself are measured;
- Particular attention is paid to measuring the front and rear window frames;
- Finally, a detailed visual inspection of the car from all angles is required. Maybe where there is a bulge, there is a larger gap, and so on.
Body dimensions of the "nine"
Removing rotten parts
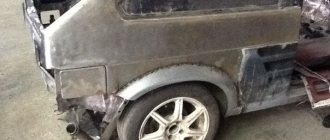
We begin repairs by removing rotten, rusty and deformed parts. I will describe the process using the example of a car, a VAZ 2109, which I was tasked with repairing. First, I’ll give you my problem areas in the car. The front floor of the car is completely rotten with all the jacks and reinforcements. And the jack could only be used with a sub-engine beam. The rear floor was also rotted. Corrosion also affected the car doors. In general, the bottom was almost absent. The wings were not in the best condition.
The front hood was noticeably rusty, all the floor connectors and the floor of the gas tank and spare tire were missing. The same fate befell the reflectors of almost all headlights. The front spar burst in the gearbox area. And above the muffler, in the floor of the trunk, there was a huge hole. The corners of the door were “eaten” by corrosion.
I describe in detail the condition of my car so that car enthusiasts can identify similar faults in theirs and draw the right conclusions. Once the necessary tools for car body repair are at hand, we begin installation.
The main passport dimensions between the control points of the VAZ 2109 body
| Diagonal of the front doorway from the extreme point of the lower threshold to the middle of the roof | 1345 mm (plus/minus 5 mm) |
| Diagonal of the front door opening from the lowest point of the windshield to the middle of the lower threshold | 1000 mm (plus/minus 5 mm) |
| Distance between the front door hinge area and the pillar in a straight line | 963 mm (plus/minus 5 mm) |
| Diagonal of the rear door opening from the point where the lower sill meets the door center pillar to the roof | 1112 mm (plus/minus 5 mm) |
| Diagonal of the rear door opening from the top of the B-pillar to the lower sill | 860 mm (plus/minus 5 mm) |
| Long diagonal rear side window frame | 706 mm (plus/minus 3 mm) |
| Short diagonal rear side window frame | 383 mm (plus/minus 3 mm) |
| Hood diagonal | 1610 mm (plus/minus 5 mm) |
| Distance from the middle of the hood to the middle of the windshield | 712 mm (plus/minus 5 mm) |
Interesting video about the repair and straightening of the body of the “nine”
How much will the repair cost?
Restoring the worn out bottom of a “nine” or “eight” costs a significant amount - from 5 to 29 thousand rubles. The price of overcooking in car services varies depending on several points taken into account by the craftsmen:
- size of damage, depth of corrosion;
- possibility of carrying out repair work;
- difficulty of recovery;
- order fulfillment time;
- car service pricing policy;
- place of work.
The cost of overcooking the bottom of 2109 when purchasing the cheapest repair kit will be 5–8 thousand rubles. Purchasing consumables in specialized auto stores will cost 11–12 thousand rubles. For the work of a service technician, you will have to pay from 20 to 30 thousand rubles, depending on the assessment of the damage, the volume performed, and the complexity of the restoration.
Bumpers on the “nine”: repair and replacement
VAZ 21099 car body repair
Often the rear and front bumpers on the “nine” are removed to repair them or to restore other parts of the body. You will still have to learn how to remove them correctly and without problems, no matter how you look at them, if the owner intends to carry out body repairs on his own.
Dismantling
So, in order to remove the rear bumper:
- On the side we find the nuts that secure the bumper to the body and unscrew them (as a rule, there are 2 fasteners on each side);
- We find the nuts for the front bumper mounting and now unscrew them (it is recommended to hold the bumper so that it does not fall).
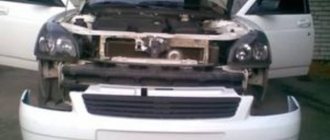
The front bumper is removed in the same way, only here you also need to remove the plastic fender liners.
Painting
Black bumper for VAZ 2109
The preferred color of bumpers on the “nine” is an eternal topic of discussion among fans of this car model. Many are on the side of the classic black color, although there are also those who believe that the color of the bumper should be in harmony with the color of the car.
Be that as it may, painting and decorative repairs are not difficult. The bumpers will need to be dismantled and thoroughly inspected for any deformations. If there are any, then you will have to straighten the elements and clean the remaining parts from old paint and rust.
Attention. If the bumper is plastic, then its defects can be repaired with putty.
Plastic bumpers can be easily removed from rust and paint using 200-400 grit sandpaper. If there are holes in the bumper, they can be closed with pieces of plastic removed from old bumpers or other plastic elements. As you know, plastic can be glued together well with a soldering iron with a power of 40-60 W.
Rear bumper vaz 2109
In general, parts of a damaged plastic bumper can be fastened in 4 ways.
- By melting the plastic of the bumper itself or additional linings. In this case, the width of the soldered seam can be left at 1.5 cm, and as for the depth of the solder, it should depend on the thickness of the bumper.
- By connecting with parallel seams. In this case, ordinary wire, nails with the heads removed, and other improvised means will help. You just need to solder these peculiar fasteners on the back side of the bumper.
- A more complex option involves the use of flexible wire, preferably copper. It is already soldered in the same way as method 3, only with a zigzag, a snake from the inside. If it is not possible to carry out this method on the back side of the bumper, you can also make a snake from the front side.
- The grille will connect the bumper pieces together more firmly than anyone else. To do this, you need to arm yourself with a mesh (a piece of a decorative radiator grille will do).
If you cannot find similar pieces of plastic, you can use other materials:
- The same grille, bent to the shape of the bumper. After the mesh is soldered into the bumper, you need to take some plastic similar in elasticity to the bumper material, and melt it, apply it to the mesh. The boundaries of the standard plastic must be carefully aligned with the edges of the applied material. After the plastic has hardened, everything must be smoothed and sanded;
- You can build up the missing part of the plastic with putty. Only it will need to be mixed with epoxy. It is necessary to carry out grinding at the final stage;
- The putty is also mixed with fiberglass.
Straightening works
On the VAZ 2109, body repair for dents involves straightening. It is divided into 3 types:
- correction of dents. This most common defect is eliminated using the vacuum method;
- elimination of bulges. During an impact, the metal on the car body bends in some places. This problem can be removed with a hammer;
- local repair. In this case, all work is carried out without removing components (technological holes located in the body are used).
Wings of the "nine"
VAZ 21099 body parts and repair instructions
The fixation of the front wings on the “nine” was done quite well, if we mean ease of removal. Just a few bolts hold them in place. Therefore, no welding is required to dismantle them; you just need to arm yourself with a pair of good shaped screwdrivers and an 8-size socket with an extension.
Details:
- Remove the fender liners, which are held on by self-tapping screws;
- The fender bolt holding the body element from below at the threshold is unscrewed;
- Two more bolts hold the wing on the inside;
- You will have to completely dismantle the bumper or unscrew its side fastenings, and then move it to the side to gain access to another bolt securing the wing;
- Finally, it remains to remove a few bolts securing the wing from above.
It is also not customary to tinker with a wing if it is deformed. You can easily replace it with a new one, especially since it is inexpensive - 1200 rubles. If you use auto-disassembly, you can buy the part even at half the price.
New wing of VAZ 2109
If, however, the wing has received minor deformations or there are traces of rust on it, then it is easy to repair the part. Again, it can be removed and then finished to perfection on a garage workbench.
If you don’t want to remove the wing, you can repair it directly on the car using straightening hammers, pliers and a jack.
Major body repair
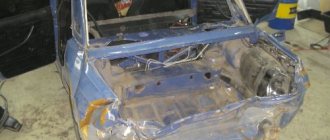
Major body repairs involve complete disassembly of the car. It is necessary to remove everything from the car, from the power plant to the interior trim, and drill out the resistance welding areas. This will allow you to detect hidden defects and carry out repair work most efficiently and less expensively.
When disassembling, take the “VAZ 21099 Operating Manual” as a basis. Damage can be varied, but the most common complaints are:
- the bottom, especially the left side, the driver’s seat, is often subject to particularly intense corrosion in Togliatti-assembled cars;
- trunk niches;
- rear side members;
- thresholds and threshold amplifiers;
- wheel arches (due to the design features, pay close attention to the rear ones).
If the rust is deep, there are cracks in the structure, and parts are subject to corrosion, including through corrosion, and deep deformation, then a major body repair will not be possible without welding work. It is necessary to weld problem areas. In most cases, parts need to be replaced. To do this, you can use a grinder to cut off areas and structural elements that are susceptible to through corrosion. In some cases, you have to buy a new bottom or limit yourself to a trough without a tunnel, it’s cheaper.
It is advisable to restore the geometry of the body after complete disassembly of the VAZ 21099, but in the conditions of an ordinary garage, it is impossible to do this with your own hands without special equipment.
After completing the dismantling and welding work, critical areas must be thoroughly treated with an anti-corrosion compound and painting can begin.
