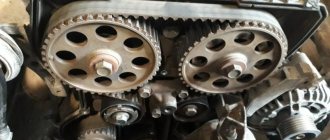
Replacing the kingpins on the UAZ “Bukhanka” requires no long-term repairs. If driven on a good road they can withstand up to 100,000 km. But if the road surface is not the best, it will create trouble. At the same time, while driving, the driver hears a characteristic knocking noise, which may intensify over time.
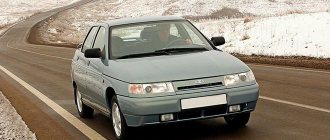
UAZ “Bukhanka” is a utility vehicle with a high level of cross-country ability. Serial production of the car was launched in 1965 and continues to this day. Every few years, UAZ carries out modernization in order to improve the functionality, convenience and safety of the models. The basic modification of the UAZ remains today.
Types of kingpins on UAZ
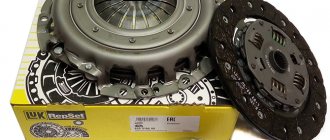
There are various types of kingpins, which are divided by price and design:
- Pivots with plastic inserts. These are standard kingpins that are installed at the factory during assembly. They do not require regular lubrication, are simple and cheap. The service life of these kingpins is short.
- Pivots with bronze inserts. This is a reinforced version of the spare part that will not need to be replaced after a mileage of 100,000 km. But every 15,000 - 20,000 bronze inserts need to be treated with lubricant. Good for off-road and rough terrain.
- Composite kingpins (with torsion on a bearing). When installed, these king pins require adjustment of the steering; instead of a tab, they are equipped with needle bearings. Bearing kingpins are an excellent option for moving on urban, flat terrain. These are not suitable for off-road and extreme travel enthusiasts.
- A pivot with a rotating element on a ball is more modern. Please note that any kingpins may require modifications during installation.
Kingpin on UAZ Bukhanka
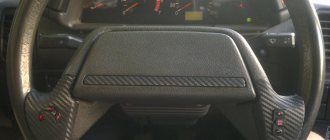
Identification data of the VAZ-2107 car
The vehicle's registration data is indicated on the summary plate (1), which is attached to the bottom shelf of the air supply box.
The plate shows the model and number of the car body, engine model, weight data, number for spare parts, design options and configurations. Next to the plate is the vehicle identification number - VIN (2). Rating plate:
1 - number for spare parts; 2 — manufacturing plant; 3 — mark of conformity and vehicle type approval number; 4 — identification number; 5 — engine model; 6 — permissible load on the front axle; 7 — permissible load on the rear axle; 8 — version and equipment; 9 — permissible maximum vehicle weight; 10 - maximum permissible weight with trailer
Correct injection of pins
The pins periodically need to be lubricated for long and comfortable use. The injection process is quite simple if you follow the basic instructions:
- Raise the car with a jack and hang the wheel.
- Turn the steering wheel to open access to the oil nipples.
- Clean them.
- Turn the top of the oil cans.
- Fill the air gun with lubricating fluid (you need to fill it until the old type of lubricant completely comes out), then bleed the air
- Lubricate until all the old grease comes out. After the procedure, close the grease nipple holes.
- Secure the wheel to the standard position.
With regular injection, all the pin channels will penetrate well, without stagnation. In winter, the frequency of syringing should be increased, but in summer this manipulation can be performed less frequently.
It is better to carry out work in winter in a garage to avoid freezing of the pins. If after these manipulations the pins continue to creak or knock, they will need to be completely replaced.
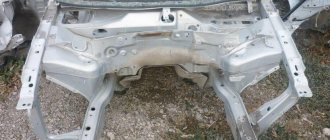
Preparing for painting
The surface of the machine must be prepared. It must be smooth, sanded for painting, clean, and free of grease.
If necessary, you need to putty all the uneven areas, sand them and prime them. Coloring them will not hide them, but will only emphasize them.
Soil can also be used from spray cans. It is applied in 2-3 layers. This is a one-component primer (without a hardener) and takes quite a long time to dry. After the solvent evaporates, a fairly thin layer remains, so it is not able to fill large scratches. The part for such a primer is prepared with abrasive P180 - P220. When applying several layers, drying time between them is required for about 10 minutes. The dried primer and old coating are prepared with P600-P800 sanding paper. All adjacent elements of the machine that are not subject to painting are covered with camouflage materials.
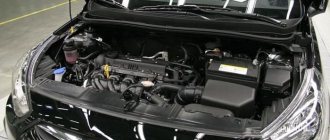
What to do if the factory king pin is broken
In order to understand how to change the king pins on a UAZ, you need to find out the purpose of the trips.
Off-road travel
If you plan to travel on difficult and bumpy roads. Where there will be a lot of dirt and stones, it would be better to install a durable king pin with bronze inserts. There is a small nuance when installing such a kingpin for the first couple of thousand kilometers.
The steering wheel will turn hard and tight, you will have to get used to it. However, with proper installation of the unit and high-quality lubrication, the steering wheel will then turn easier.
City trips
When driving around the city, the best option would be to equip your car with a kingpin on bearings. Additionally, a steering damper is installed, so this work will be more expensive. Otherwise, without a steering damper, the front wheels will feel unbalanced.
When driving around town on relatively flat roads, the pins on bearings have a long service life. And you won't need to replace these parts in the near future.
But for hard off-road use, changing the king pins will be a pressing issue for you. You can replace the pins yourself or go to a machine service station.
Don't make mistakes
The maximum effect from such painting can be obtained only if the intensity and scale of each detail of the picture are correctly selected, the nature of which is determined depending on the specific machine. Do-it-yourself spray painting of a car (VAZ, for example) will not look the same as on a BMW or any other foreign car. There is simply no universal solution here. You need to independently design a drawing that can highlight the character of the car and the owner. But this does not mean that in the absence of universal solutions one should forget about the rules. There are a certain number of nuances that everyone should know.
It is mandatory to use colors with shades of green, sand or brown. In any other case, the concept will be violated and the car will lose its warlike appearance.
Painting a car yourself with a khaki spray can means stains. The dimensions and contours of each of them are set manually, always taking into account the features of the body parts on which they will be applied. The uniqueness of the car will also increase - it will look very impressive if every spot is original.
What tools are needed to replace king pins?
To carry out the procedure for changing the king pins, you will need the following tools:
- jacking mechanism;
- set of open-end wrenches;
Stand support
- anti-rollback stops;
Socket set
- steering wheel finger removal tool;
- puller (homemade option is possible);
- a set of new kingpins;
- grease syringe;
- hammer;
- mites;
- pipe for knocking out the king pin;
- wire mechanism for cleaning channels;
- brush, cleaning cloth;
- tweezers;
- sharp-nosed pliers or wire cutters;
- ruler, caliper.
It is recommended to carry out work in a garage with a lift available. Before replacing, it is recommended to thoroughly wash the car for better visualization. And also thoroughly wash the wheel arches and the disassembly area.
About syringing
This is the name for the procedure for lubrication of mechanism bushings. It is produced through grease nipples using a specialized syringe. A waterproof lubricant (for example, Litol-24) is placed inside the latter.
How often should the pins be injected? This procedure is performed every 20 thousand kilometers or once a year. This simple preventative measure will extend the life of the bushings and ensure easier steering rotation. This is noticeable already from the first meters of the road.
Parsing
After entering the pit, place the goat under the rear wheels and set the handbrake. A jack is secured under the front axle; the nuts on the wheels should be turned one turn.
After lifting, move the wheel to the side. The car should be raised as high as the technical equipment allows you to do this. Next, install a trestle under the frame so that the machine is supported.
On the other side of the car, perform the same manipulations. The more free space there is under the machine, the easier it will be for you to do the work.
Typically, replacement of pins is carried out in three ways
- With complete disassembly of the car.
- With the removal of the car, but without disassembling the hub and steering knuckle.
- Without removing the car and without disassembling the hub and steering knuckle.
Professional craftsmen often choose the latter option without removing the car and without disassembling the hub and steering knuckle. With good knowledge of the process, making such a replacement will not be a problem for the master.
Repair of UAZ Bukhanka king pins
When changing this spare part, use the following operating algorithm:
- We hang the bridge from the front on a jack. To be on the safe side, you should place an additional trestle under the car to prevent it from falling.
- We pour out the transmission oil, take out the brake shield, caliper, steering wheel tip and unscrew the oil nipple.
- To remove the kingpin, you can screw an M10 bolt into it and pull it out. If necessary, you can use a stronger tool. For more guaranteed dismantling, you can install a steel sheet under the kingpin.
- The washer is removed, and to pull out the sleeve you can insert a nail or screwdriver under it. Lightly loosen the bushing in a circle. It can be removed with the help of pliers. After removal, the bushing should be cleaned with gasoline and new grease should be applied.
- To install a new kingpin, you need to place it exactly in its location and carefully drive it through the board with a hammer.
- Additional parts are fixed into their positions in the reverse order.
Replacing kingpins on a UAZ Bukhanka without disassembling the steering knuckle
The advantage of this type of changing pins is that the number of operations is reduced to a minimum, which significantly saves time. For such a replacement, you must perform the following manipulations:
- Clean the kingpin surfaces from dirt.
- Unscrew the kingpin cover.
- Screw in the original king pin mounting bolts 4-5 turns.
- Mount the puller (plate, bolt and nut).
- Press out the king pin. After pressing out, a bronze bushing remains in the steering knuckle.
- Cut an M27 thread in the bushing.
- Prepare a puller with M27 thread to press out the bushing.
- Clean the hole from dirt and chips using compressed air and kerosene.
- Apply a generous amount of bearing grease to the bottom of the king pin.
- Place the lower part of the king pin in the seat and press it into the steering knuckle.
- Coat the ball generously with oil and lower it into the seat.
- Lubricate the upper part of the king pin and press it into the hub.
- Put on the king pin cover and use it to press the king pin in completely (work gently so as not to rip off the bolt heads).
- Unscrew the cover to install the shims.
- After installing the adjusting washers, you need to assemble the structure and check the wheel for play.
Installing a new king pin
First, place the liner in place. The antennae on the liner must fit exactly into the depressions of the seat. Lower the liner all the way using a hammer and related tools. Hit it carefully so as not to break the liner.
When the bushing is completely seated, place a generous amount of lubricant under the grease nipple. Then place the king pin in the opening and screw the nut into its original position. Adjust the accuracy using tools.
After adjustment, proceed with similar work on the second side.
Important nuances
- the bearings must be positioned evenly - all axes must coincide;
- It is better to carry out welding with heating, so as not to damage the seating area for the bearing race;
- a design with a conical clamping insert is more effective when there is a solid insert. But the bearing needs to be tightened more tightly.
How to detect backlash
To detect play, simply shake the wheel sharply without lifting it with a jack to detect characteristic sounds. However, to more accurately determine the play, the wheel should be hung.
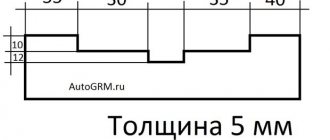
Elimination of play can be done using adjusting shims under the steering knuckle. The number of such metal plates must be the same at the top and bottom; when the backlash decreases or increases, the spacers are added or removed.
During this procedure, the king pin is tightened and the play is removed. After the manipulations, the play should be re-checked. If there is a lot of wear on the pins, you should not try to correct the situation with gaskets; in this case, it is better to replace the pins.
It is worth remembering that the first time after adjusting the pivot assembly, the steering wheel will turn a little stiffly, and the car will be delayed when turning.
After the first 100 km, the car's control will improve and the steering wheel will turn easier. After some time, it is worth re-checking for play.
Adjustment
After installation, it is necessary to check the tightening torques of the adjusting nuts of the king pins. The suspended wheel must be swung in a horizontal plane. If you feel beating, you need to tighten the adjusting nuts. Both nuts must be tightened simultaneously by the same number of turns.
Next, you need to check the wheel in the mode in which it operates when turning. If the rotation of the wheel in the horizontal plane is carried out with little effort, then the adjustment of the installed king pins has been carried out correctly. If rotation is difficult, then the nuts are overtightened. The overtightened adjusting nuts are also loosened synchronously by an equal number of turns.
After adjusting the kingpins, it is necessary to install the transverse link. Then you can remove the car from the lift or remove the safety stands.
Lubrication and adjustment of the installed kingpins should be repeated after 500-600 kilometers. It is also better to repeat the procedure after driving on severe off-road conditions, during which the vehicle’s chassis operates in enhanced modes.