Replacing brake discs is a fairly simple operation for any motorist. For theoretical preparation, you just need to have at hand the Operation and Repair Manual for your car model.
And if necessary, help from members of the forum (virtual club) of car lovers of the exact brand that you own.
The Internet today provides invaluable assistance to car owners in terms of transferring advanced national experience in the repair and maintenance of any brand of car from Tavria to Bentley.
It is enough to ask a question on the forum about how to repair a body or how to check a shock absorber, and you will hear objective and useful advice. And we will try to figure out how to replace brake discs.
When to change brake discs
The answer to the question of when to change brake discs exists in two versions. The first option is needed by those motorists who decide to tune the brake system or slightly improve it, in the form of installing ventilated brake discs. It is better to buy spare parts for foreign cars from trusted suppliers, for example, such as Techcom, who can provide a guarantee for their products.
On “classics” today, drum brakes are being replaced more often with disc brakes due to the latter’s higher efficiency. Not much work, adapting the faceplate to disc brakes is not a problem. Either you buy ready-made ones, or they will be made to order for you.
The second option is to carry out repair work on brake discs that have failed for any reason. This may be natural wear or mechanical damage to the discs.
How do you know when it's time to change your brake discs?
The behavior of the car will tell you. The braking distance increases, the car “goes” to the side when braking, the brake pedal has become “soft”, and the brake fluid level has dropped.
This is your signal that you need to check the condition of the brake system. Including measuring the thickness of the brake discs. The measurement is carried out with a conventional caliper at several points on the disk. The manufacturer indicates the minimum and maximum thickness of the brake disc directly on the disc.
Based on the measurement results, you decide on replacement. And remember that this is not a case when you need to save money or hope that “they’ll still come.”
Brake discs must be replaced in pairs on the same axle. Even if you are a supporter of a calm driving style, you need to carry out diagnostics of brake discs systematically. Not for wear, but to check for mechanical damage.
As practice has proven, front brake discs are replaced more often. There's a reason for this. Taking into account the fact that the load on the “front” of the car is greater, the braking system of the front suspension experiences greater loads than the rear brakes.
The technological process of replacing front and rear discs is, in principle, no different. Experts recommend making a decision to replace brake discs after the first disc resurfacing procedure. Grooving the discs a second time is not allowed.
What you need to replace brake discs
First of all, the brake discs themselves. It is highly recommended that when purchasing new brake discs, do not forget - a pair for one axle, and immediately buy new brake pads. The ideal option would be to purchase brake discs and pads from one manufacturer.
Some car enthusiasts, trying to save money, leave old brake pads when replacing discs. This leads to the fact that the grooves on the new brake disc will be filled with old pads. After all, the planes will not have a uniform area of contact.
To replace brake discs, you will need a standard one.
- standard set of wrenches according to the size of the fastener;
- jack and tire carrier for wheels;
- repair pit;
- tripod or “goat” for mounting a car;
- stops (shoes) for fixing the car;
- wire for fixing the caliper.
It is advisable that you have an assistant, who will be needed when dismantling the old and installing a new brake disc.
Before you begin removing and installing disks, check in the manual, or better yet, with fellow car models on the forum, whether you need “self-locking” bolts. Or you can use the old ones. Although, new ones are better.
Brake disc replacement technology
With the exception of some design nuances of different brands and models of cars, the procedure for removing and installing brake discs is typical.
- we fix the car using “shoes”;
- jack up the desired side, install the tripod and remove the wheel;
- before removing the brake disc, dismantle the operating point brake system, press out the piston of the working cylinder;
- remove all dirt from the surface of the hub and caliper so as not to change the bearing;
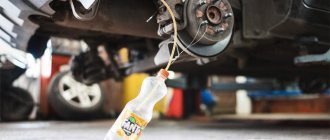
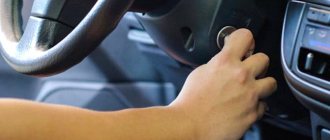
- the assistant presses the brake and holds the steering wheel tightly, and in the meantime, you unscrew (“tear off”) the bolts securing the brake disc to the hub. If necessary, pre-treat the bolts with Miracle Liquid WD;
- remove the brake caliper and secure it with wire so that it does not interfere with or damage the brake system hose;
- Next, we disassemble the caliper assembly: remove the brake pads, admire their workmanship, and are glad that we took new ones, remove the clamping springs, the caliper bracket itself;
- fix the hub, unscrew the fastening bolts completely and remove the old brake disc.
We recommend: How to change the brake drum on a VAZ 2107
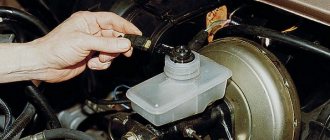
Installing a new brake disc is carried out in reverse order. Don't forget to install new brake pads. After replacing the brake discs, bleed the brakes.
Good luck with your DIY brake rotor replacement.
When changing pads, a motorist is usually faced with the question: when to change the brake discs, this time or do they not need to be replaced yet? These parts are quite expensive, and it is natural that the car owner wants to save money. But driving a car with “dead” disks is not an option; this means jeopardizing the integrity of the “iron horse” and the safety of the driver and passengers. Many have heard that the function of these elements can be restored by sharpening them. Is this true, and will it be safe to drive with sharpened discs? Let's look into it in detail.
When do you need to replace brake discs?
These parts can be damaged even if the driver is not a reckless driver. If the wheels of a car “fly” into a puddle during braking, the rising wave can forcefully overwhelm the disc mechanisms, and even a protective shield will not save them. If the car is driven long enough, they will heat up to a high temperature, and when cold water enters, the running surfaces will warp. The consequence of this will be a beating in the brake pedal and steering wheel while driving.
To determine whether the discs need to be replaced, it is necessary to inspect their surfaces when the pads are replaced. If the parts are not warped or cracked, and their residual thickness is not less than 50%!, further operation can be continued. If the time for replacing the pads has not yet come, and the driver, when pressing the brake while driving, feels a vibration that stops after releasing the pedal, this also indicates a malfunction of the elements in question. In this case, you need to change or sharpen the brake discs.
Do you need to resurface the discs?
Now we come to the next point in the story. So, is it possible to grind brake discs? Previously, it was impossible to do this, and if the driver did not know a turner who had the necessary machine, the elements had to be thrown out and replaced with new ones. Now there is equipment that can be used to sharpen them, returning the parts to functionality.
You can sharpen a disc if irregularities (burnout) appear on its surface. First you need to make sure that the thickness of the spare parts allows this operation. If they are too thin, a groove will not save the situation. Such elements will not be able to withstand high temperatures and will simply fall apart in movement, even if the master has sharpened such parts more than once and has extensive experience. In addition, before grooving, it is necessary to determine the amount of disc runout, as well as the degree of corrosion damage.
An additional advantage of this manipulation is that it will be cheaper to sharpen old spare parts than to buy new ones. To avoid shifting the brake balance, both discs need to be grooved. In addition, after this the old pads will have to be replaced, otherwise they will quickly damage the machined elements.
Features of the groove
The turning machine is installed on the disc hub. During operation, the engine is not started, the gearbox is set to neutral. The equipment itself will rotate the hub, while the cutters will gradually move on both sides of the part, removing approximately 20 microns of material from both the outer and inner surfaces in one pass. Then the cutters are rearranged and the grooving is performed again. In order to completely process an element, as a rule, a couple of passes are enough. First of all, the chamfers that were created when the part came into contact with the pads are cut off. This is done in order to ensure high quality processing, as well as reduce the load on the sharpening device.
Before starting grooving, the master inspects the discs and also checks the condition of the suspension. If the hub bearing has rolls or play, manipulation is not performed. The fact is that in this case the part will “walk” between the cutters, so it will not be possible to sharpen it smoothly. It is recommended to replace the bearing, even if it is just humming. If you change it after the part has been machined, then by pressing the hub, it and the disc itself, it is unlikely that it will be possible to place it straight.
Then, as mentioned above, the residual thickness of the element, the degree of corrosion damage, and the amount of runout are checked:
- If the thickness of the parts is very small, they are not sharpened, but replaced.
- When measuring runout, the thickness is checked in different places (the easiest way to do this is with an indicator). The difference in indicators should not be more than 0.05 mm, otherwise grooving will also not be performed.
- Do not grind discs even if there are deep corrosion spots, since upon completion of the work its thickness may not be sufficient.
We recommend: Is it possible to drive on winter tires in summer and what is the fine?
One of the tricks of car resellers is to grind only the chamfers when processing. It will be impossible to find traces of such an operation after 2-3 days, even if the car was just standing still. As a result, checking the condition of the elements by touch will not give reliable results, and it will not be easy to determine their actual wear.
After finishing the grooving, be sure to replace the pads, since their friction linings, worn in to the crooked disc, will quickly render the machined part unusable.
Grooving original discs (if possible) is beneficial not only in price. Parts used for original equipment, even after their service life has been partially exhausted, often surpass in quality new, but not original, spare parts. It is better to entrust this operation to specialized car services that have high-quality equipment. And the technicians there are more experienced than specialists from regular service stations or even dealer centers. The cost of services in such an organization is also more affordable.
In this article, we talked about whether it is worth grinding brake discs, as well as what signs can be used to determine that it is time to change them. Do not forget to pay attention to the condition of these parts when replacing the pads, even if no disturbances are observed while driving yet - a malfunction can occur suddenly and cause a road accident.
When to change brake discs
Many novice car enthusiasts do not know when to change brake discs. Therefore, we will first consider the answer to this question. This problem is often raised by those who intend to upgrade the car’s braking system.
For example, very often disc brakes are installed instead of drum brakes. This is due to the fact that the latter ensure optimal operation of the braking system. In this case, you just need to find an adapter for disc brakes and install it. Some car owners make this part on their own, while others buy an adapter in a store.
In addition, the question of replacing brake discs may arise in cases where a scheduled car repair is carried out. The discs may simply wear out or receive some damage.
How do you know when your brake discs need to be replaced?
There's nothing complicated about it. The main factors that indicate problems with brakes are:
- car drifting to the side during braking;
- decrease in brake fluid level;
- increase in braking distance;
- excessive “softness” of the brake pedal.
If at least one of these problems occurs, it is necessary to check the brake system. You can start by determining the thickness of the brake discs. To do this, you need to take a caliper and measure the thickness in different parts of the part. The permissible minimum thickness of the disk is indicated directly on it.
After this, you need to think about whether you need to change the brake disc or not. In this situation, you should not spare money, counting on the fact that the brakes still work more or less normally.
Replacing brake discs is carried out only in pairs on the front or rear axle. Even those drivers who drive very calmly should regularly check the condition of their brake discs. Mechanical damage may appear on them, so diagnostics must be carried out.
Experience shows that the most common replacement is the front brake discs. This is due to the fact that the front part experiences a greater load, and therefore the discs on the front axle wear out more often.
The procedure for replacing rear and front discs is similar. Experts advise thinking about replacing brake discs after the first grooving of these elements. Re-grooving is prohibited.
Preparing for the procedure of removing old and installing new disks
Although replacing brake discs is a relatively simple job, you may need quite a lot of tools, accessories and consumables! Here is an approximate list of them (much depends on the car model and the specific design of the brake mechanisms; especially unpleasant surprises can await you on the rear axle):
- universal set of wrenches and socket heads
- a device for expanding the caliper pistons (in some cases it can be replaced with a bearing or hub puller, a pry bar or a similar object, but it is better to use a specialized tool)
- aerosol can of brake cleaner
- grease (graphite or lithium)
- in some cases - an impact screwdriver (for removing the screws securing the disc to the hub)
- for rear disc brakes of VAG cars - a device for screwing in caliper pistons (in an emergency, it can be made using a grinder from a head with a diameter of 28 mm)
- If you see that any caliper is skewed, the pads are worn unevenly, etc. – better stock up on caliper guides and their boots, most likely the problem is in them.
Sometimes the guides can simply be cleaned of rust, lubricated with grease and a new boot installed, but if the guide is bent, then there is only one way out - replacement . And it’s much better if the spare part is purchased in advance - you won’t have to disassemble the unit twice.
What will you need?
Take your time to disassemble the car. First we need components and tools.
First, we will need new brake discs and pads. New! This is a very important circumstance. Do not install slightly worn or still normal ones, install new ones. Remember forever that when dealing with brakes, you should focus only on safety, and you should not try to save money or somehow show your ingenuity.
For example, some car owners, in an attempt to minimize financial losses from replacing discs, put their old pads on them. This is only a visible saving, since this causes the disks to deteriorate faster and become unusable. As a result, you will have to spend a lot more money.
Secondly, as you understand, we cannot reach the brake system with our bare hands, so we will need tools to replace it. You can also see how to use them in the video. The set is quite standard and does not include any specialized devices:
- set of wrenches;
- jack;
- stops (to immobilize the car).
It is preferable to have someone help you when removing the old brake system and installing the new one. You can also do it alone, but it will be much easier.
Preparing to replace the AP
Having determined that the TD is faulty, you need to prepare to change them yourself. To do this, you first need to buy a new spare part from a car store. When choosing brake discs for his car, the car owner must take into account his driving style. Does he like to accelerate sharply and actively maneuver? How often does he use the brakes? He drives a lot around the city or mostly intercity trips on the highway. The spare part from which manufacturer you need to buy depends on these factors. Discs can be standard or sports.
- Standard TD - made of cast iron, the casting is processed on a milling machine. They are ventilated and non-ventilated. Without ventilation, it is a single disc that is pressed on both sides by brake pads. A disk with ventilation is easy to distinguish - it is two disks connected by bulkheads. Ventilation occurs during movement due to air entering between these pancakes. Some of the respected manufacturers of these products are Bosh, Zimmerman, ATE.
- Sports TD - made of durable and ultra-strong gray cast iron, as well as austenitic stainless steel. These are considered to be more durable products that can last much longer and with more aggressive driving. Such discs are produced by EBC, DBA, Brembo.
The driver must remember that when the front brake discs are replaced, they must be changed in pairs, even if one of them is suitable for further use in all respects. The same rule applies to rear brakes.
This rule is explained by the fact that unequal weight of the same type of spare part on the wheels of the same axle will lead to loss of directional stability. Thus, for repairs, two or four TDs are purchased, but in no case one or three. In the garage or at a special technical site, the tools and materials necessary for repairs are prepared in advance.
- Jack and wheel wrench.
- Keys to "13" and "17".
- Ratchet wrench.
- Large flathead screwdriver.
- Thin flathead screwdriver.
- Clamp.
- A piece of wire to fix the stupor.
- Hammer.
- WD fluid to unscrew stuck fasteners.
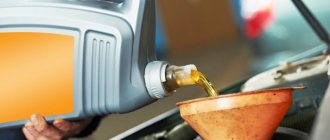
- Brake fluid, in case of bleeding the brakes.
- Rags.
Place the machine in a hole or on a prepared level area. Decide in advance whether the rear brake discs need to be replaced or only the front ones need to be replaced. This determines how to jack up the car. Raise the entire side or just the front wheels. After raising the car with a jack, remove the wheel using a balloon. Clean the released brake mechanism and the surface of the hub from dirt and oil using a brush and rag.
Brake disc thickness, permissible brake disc thickness
The minimum thickness of brake discs depends on the make of the vehicle and its model. Each manufacturer sets specific wear parameters depending on the characteristics of a particular vehicle.
That is, there are no universal evaluation criteria. The wear of the element directly depends on the driver’s driving style, his braking style and the condition of the road surface - if you constantly drive in rocky areas, the brake discs wear out much faster. In addition, the premature wear of brake discs is greatly influenced by the insufficient area between the disc and the pad.
To prevent accidents, car manufacturers indicate the nominal and minimum thickness of the element on the disks themselves in the form of two marks. It is worth saying that manufacturers indicate the minimum thickness with a margin, slightly increasing the figures.
We recommend: Replacing the thermostat Lada 2115 (VAZ 2115)
In order to check whether the brake discs on your vehicle are fake, pick up the brake disc and look at it carefully. Here you should see two numbers, the first of which will indicate the initial thickness of the element, and the second - the minimum acceptable value. If you do not see any markings on the brake disc, then it is simply fake, that is, a fake.
Repair or complete replacement of brake discs is carried out if:
- Disc deformation occurs, which manifests itself in the form of vibration and ineffective braking;
- Deep edges and grooves form throughout the brake disc;
- The thickness of the disk reaches a critical level of 1-3 mm (the measurement is made with a caliper; it is the working area that is measured, and not the outer edge);
- There are other damages that prevent effective braking.
- Brake disc crack.
- "Bead" formation.
- Uneven wear, the appearance of grooves, holes and depressions on the surface of the disc.
Signs of wear
The nature of braking changes
The trajectory of a vehicle with faulty brake discs may change unexpectedly during braking. At the same time, the braking distance increases significantly.
Dips that occur when you press the brake pedal, as well as increased brake fluid consumption, indicate a malfunction of the braking system.
You should sound the alarm if any of the above symptoms appear. Saving on brake discs means exposing yourself and your vehicle's passengers to an increased risk of an accident.
Replacement of rear pads (drum system)
- Carry out the same procedure as in the first two points when changing the front ones.
Remove the car from the handbrake. - Unscrew the brake drum fixing bolts and remove it. The drum may become stuck or cannot be removed as a result of misalignment of the pads, so tapping with a hammer may be necessary.
- Remember the location of all locking springs ( if installed incorrectly, the brake will not work ).
- Release the handbrake cable, remove all springs and rods of the rear brake mechanism with a screwdriver. Remove the pads.
- Install new pads and reassemble the brake mechanism in reverse order. Install the wheel (without removing the car from the jack).
- Put the car on the handbrake and try to spin the rear wheel, checking the operation of the rear mechanism.
- Remove the car from the jack.
Our recommendations
It is good practice to measure the thickness of your brake rotors annually. A mechanic should measure the thickness of the brake rotors every time the brake pads are replaced. As a rule, the service life of brake discs is twice as long as the brake pads. This means that the brake rotors need to be replaced every other time the brake pads are replaced. Operating a vehicle with worn brake pads or rotors will result in damage to the brake discs.
Replacing brake discs
Installation of brake discs
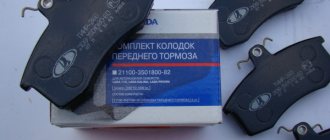
New brake discs
Replacing brake pads (disc system)
- Having chosen the pads recommended by the manufacturer, take a set of tools, unscrew the wheel nuts, jack up the car and remove the wheel.
You need to start replacing the pads on a cooled down car (so that the parts of the brake mechanism have cooled down), on a flat area without a slope and with a stop (except for the jack itself) placed under the bottom. Use wheel chocks under the wheels. - Unscrew the cap of the brake fluid reservoir (to make it easier to press in the brake piston).
- Unscrew the caliper guides, and if there are fixing brackets, remove them with a screwdriver. If your car is equipped with a pad wear sensor, disconnect the connector.
- Use a screwdriver to move the pads away (insert a powerful flat-head screwdriver between the pads) in order to press the brake piston. Remove the old pads. Clean the installation site from dirt.
- Install new pads. It is recommended to lubricate the caliper guides , but very carefully so that the grease does not get on the contact surfaces of the pads, otherwise the brakes will not work.
- Reassemble the brake system in the reverse order, install the wheel, and remove the car from the jack.
- Bleed the brakes and let the new brake pads break in.
How to choose a brake disc and not run into a fake?
Today, things have begun to be counterfeited to such an extent that it is practically not clear where the original part is and where the fake is, so remember one simple rule, spare parts should always be purchased in car stores (Not in some cooperatives where ordinary people trade, but specifically in a special auto store) and the larger it is, the better, even if you overpay a little in terms of money, you will still buy a good original item, because specialized auto stores generally do not sell counterfeit goods and be sure to check with the seller if there is guarantee for the purchased product, without a guarantee you even need to take it, in fact it’s just a recommendation to you from us, because as we said earlier, recently counterfeits have become so good that it’s no longer possible to tell where the original is where is the fake, well, make it a habit, never buy spare parts without boxes (They should all be packaged, and the box should contain a manufacturer’s certificate or something like that).
What kind of service is this?
The brake disc is a metal part with a smooth surface mounted on the wheel hub.
Most modern cars manufactured in 1999 and later are equipped with disc brakes on all wheels. Older vehicles may have drum brakes on the rear axle. Brake discs play an important role in the braking system. The friction between the brake pads and brake rotors causes the vehicle to slow down and stop. As brake rotors wear out (thinning and warping), they lose their ability to dissipate the heat generated by the braking system. This can cause the brake fluid to boil and significantly reduce the effectiveness of the braking system. Brake discs are an indispensable element of the braking system and are a metal disc that is pressed by the brake pads when you press the brake pedal. Thus, the stopping process is carried out due to friction between the brake pads and drums (you need to ensure that the brake drums are replaced in a timely manner). As it wears, the effectiveness of the braking system decreases. For its serviceability and reliability, replacement of brake discs .
Signs of faulty brake discs
The main signs of brake disc wear are:
- vibration when reducing speed and stopping;
- blue tint on the surface of the disk;
- increase in fuel consumption.
Their wear is affected by careful driving of the car, excluding racing and extreme braking. However, the reason for the failure of these parts is not only the serviceability of the mechanism parts. Proper installation and maintenance of brake pads is important. That is why when replacing brake discs, experts recommend replacing the pads. The process of replacing front brake discs consists of the following steps:
- removing brake pads;
- removing the brake mechanism;
- using a rope or wire, hanging the brake mechanism from the front suspension spring;
- cleaning the brake disc and treating areas with rust with a special liquid;
- removing the brake disc;
- Install the new brake disc in the reverse order.
The rear brake discs are replaced in a similar manner to the process described above.
Drive replacement cost
A similar type of car repair, such as replacing brake discs, is performed periodically and takes a significant period of time. Specialists will perform this repair in any convenient place, while the price of replacing brake discs is equal to the wholesale price, that is, it will be significantly lower than in a car service center.
What you need to switch to disc brakes
The standard kit for converting from drum brakes to disc brakes includes:
- 2 brake discs;
- 2 brake calipers (when purchasing used spare parts, it is advisable to immediately inspect the working area of the piston for scoring (there should not be any); before installation, the caliper must be serviced by replacing the boot and lubricating the areas under the guides);
- 2 brake hoses, as well as brackets and fasteners for their fixation;
- fittings, sealing copper washers, bypass bolts;
- 2 brake shields, which may have places for mounting calipers. If these are not provided, a plan washer is needed. Installing the anchor plate may require longer caliper bolts. If it is not possible to purchase an element, the plan washer will have to be sharpened according to an individual drawing;
- parking brake mechanism (the design of the components depends on the type of brake system you choose);
- The handbrake cable is overwhelmingly not suitable, so it also needs to be replaced.
Of course, the list may not be complete. If you want to change from drum brakes to disc brakes, carefully study the parameters of your system.
Keep in mind
Brake discs are replaced in pairs. When replacing brake discs on the front axle, new brake discs are installed on both front wheels. This work is performed in conjunction with replacing the brake pads. When replacing brake discs, the brake pads must also be replaced. The exception is when the brake pads have been recently replaced.
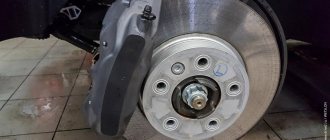
Car wheel brake discs
Removing the brake discs
Comparison of brake discs: old and new