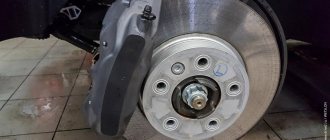
Reading time: 4 minutes(s) Some car owners do not pay attention to the CV joint until serious problems appear in it, which can no longer be ignored. This often happens due to ignorance of the specifics of how to check the CV joint on a car.
If we consider the purpose of a CV joint briefly, it is a special joint designed to transmit torque from a car’s gearbox (regardless of whether a manual transmission or automatic transmission is installed on the car) to the wheels. In front-wheel drive or all-wheel drive cars, transmission occurs with minimal losses even with significant changes in the drive angle.
CV joints on a car
Failure of the CV joint can lead to wheel locking while driving, which will cause a serious accident. Accordingly, you need to know how to check the CV joints for serviceability and periodically check them.
How to check CV joint wear - causes and signs of grenade wear
A constant velocity joint (popularly called a grenade) does not fail all at once, with rare exceptions. Among the main reasons for CV joint failure are:
- Lack or insufficient amount of lubrication.
- Damage to the boot, which allows dirt and water to enter the part, which accelerates wear.
- Initially low quality parts.
- Aggressive driving with sudden starting and braking, turning the steering wheel all the way to one side, towing heavy trailers.
- Mechanical damage when overcoming bumps on the road.
- Natural wear and tear.
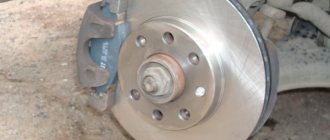
Worn CV joint
Before checking for a CV joint failure, you should pay attention to factors that may indicate problems:
- Crunching sound of the outer joint when turning with the steering wheel turned all the way at the moment of starting.
- Knocking and vibration of the internal joint during straight-line movement - initially when overcoming uneven surfaces, and later when driving on a flat road.
- The appearance of oily spots on the anthers.
- The formation of minor jerks when starting to move and accelerate, especially if the engine, clutch and gearbox are operating normally.
Leaking CV boot
Particular attention should be paid to the crunching sound, which is a sign of critical wear of the bearing and a signal for immediate replacement.
Sounds and symptoms of breakdown
There are several signs of a hinge failure:
- Anther rupture. It is enough to go to a service station, where the faulty element will be replaced, and the need to repair the CV joint itself will disappear.
- The sound of a grenade. The sound is very reminiscent of the friction of brake pads worn down to metal.
- Jerks. When the car starts moving, the driver may feel slight shocks. This behavior indicates broken grenade grooves.
- Clicks. They appear at the moment of movement, and their number varies from 2 to 5. When moving, the unpleasant sound disappears, but the next time you try to move, it appears again. This also indicates a malfunction of the grenade.
- Crunch. If the sound appears directly when moving, then this is an alarming signal. The CV joint is not only worn out, it is about to seize. Driving with such damage is dangerous, so it is best to call a tow truck and send the car to a workshop.
If at least one of the listed symptoms of a malfunction appears, then it is better to send the car for diagnostics. Experienced drivers can inspect the joint themselves and identify the source of the problem.
How to check the inner CV joint without removing it
There are several ways to check the internal CV joint for serviceability without removing it from the car. To implement the first, you will need a section of road with uneven surfaces located in such a way that a car can drive along them on one side.
Inner CV joint
The entire process of checking the internal CV joint in this case consists of several stages:
- We accelerate the car to 15-20 km/h.
- Then we run over one side of the bumps and listen.
- We repeat the procedure by driving the other half of the car over uneven surfaces.
The presence of a breakdown will be indicated by a knocking sound in the area where the hinge is installed, as well as increased twitching during further acceleration.
We drive through a hole on one side of the car
Another way to check which CV joint is crunching from the inside is to hang the car on a lift. The verification process consists of the following stages:
- The entire car or its front part is suspended, which allows you to create a critical angle and extremely increase the load on the inner CV joint.
- We start the engine and press the gas a little so that the wheels start rotating.
- We listen carefully from which side the uncharacteristic sound is heard, which will allow us to determine which internal CV joint has failed - right or left.
In this way, you can check the internal CV joints of the car without extra costs. Although it would be more informative to check at a service station if such an opportunity exists.
Checking the serviceability of the CV joint
Malfunctions of the internal and external CV joints manifest themselves in different ways. To check the external hinge, you need to turn the steering wheel as far as possible and slowly drive around the site. With this position of the steering wheel, maximum bending is formed between the axle shafts. In this case, a faulty outer CV joint will produce a crunching sound, depending on the speed of movement.
Diagnostics of the serviceability of the CV joint. Video:
Achieving maximum curvature of the internal joint is more difficult. To do this you need to do the following operations:
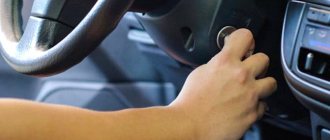
- hang the wheels by lifting the car with a jack or lift;
- start the engine;
- turn on the transmission.
In this position, the faulty internal hinge will make a distinct crunching sound.
How to check the CV joint on a VAZ 2109 and 2114, 2110
A standard test and determination “by ear” does not always make it possible to accurately determine the serviceability of the hinges. Before buying expensive parts, you need to find out and make sure that the problem lies precisely in them. To do this, perform the following operations:
- Place the car on the pit and hang the wheels;
- inspect the condition of the anthers;
- check the play between the axle shafts.
On Kalina, the front wheel drive can be checked similarly to the VAZ 2109
How to check the serviceability of the CV joint on a Ford Focus 2
The algorithm for checking Ford hinges is no different from the one given above.
How to check the CV joint on a Renault Logan
The breakdown of parts is indicated by a characteristic crunch (sound) and play of the axle shafts.
How to check the outer CV joint without removing it
There is one simple way to check the external CV joint without additional investment and with minimal time.
Outer CV joint
It is enough to choose a flat area on which you can ride without disturbing anyone. After this we perform the following actions:
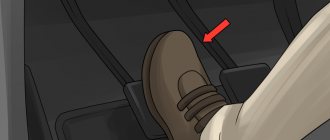
- Turn the steering wheel to one side as far as it will go.
- We begin a smooth movement and listen.
- We repeat the same procedure with the steering wheel turned in the opposite direction.
Turn the steering wheel all the way and go
In this case, how to check which CV joint is crunching is also quite easy. When turning the steering wheel to the right while moving, a crunching sound may appear in the left hinge and vice versa.
Hinge design
The transition from rear-wheel drive to front-wheel drive required automakers to develop new technical solutions. The transmission of rotation to the steered wheels is associated with large rotation angles. The driveshaft installed on rear-wheel drive cars could not cope with this task due to the limited turning angle and low efficiency. But, after changes were made to the design, it became the prototype of the modern constant velocity joint.
Automotive parts manufacturers produce two types of CV joints. The first is called "rtseppa" (better known as "six-ball"). It consists of two cages (inner and outer), steel balls and a separator separating them. Thanks to precision manufacturing and minimal clearances, the coupling can transmit high torque at high speeds and rotation angles of up to 60°.
The second type of CV joint is a “tripod”. Its design was developed in Japan, where it is used on some cars. Its structure is somewhat more complicated than that of a rzeppa, but it is capable of transmitting rotation at an angle and moving along its axis. The tripod consists of a body in which a three-rayed star with spherical rollers and a fork with profile grooves are fixedly fixed. The disadvantages of this design are the inability to work at angles exceeding 30°, the complexity of manufacturing and, as a consequence, the high price.
Regardless of the design and manufacturing technology, the drive components must be equipped with a boot secured with clamps and a locking ring to secure the part to the shaft. Damage to one of them is a reason to check the CV joint (grenade) on the car. The entry of water, sand or dirt into the internal cavity is unacceptable. Foreign substances will cause intense wear on the working surfaces and damage the drive.
For your information! The appearance of traces of grease on the outer surfaces of the boot is one of the signs of a faulty CV joint.
The hinge, whether it be a hinge or a tripod, cannot itself transmit rotation to the wheel hub. It is an integral component of a drive consisting of a shaft and two CV joints (internal and external). The first is made of thick-walled pipe with a diameter of 25-35 mm. The internal one is installed on the gearbox, and the external one on the wheel hub. The first one works at rotation angles not exceeding 30°, which allows you to install a tripod there. A CV joint of the CV type is fixed on the outer side.
However, during operation, the drive perceives not only torque loads. While the car is moving, the suspension swings, which leads to a change in the distance between the hinges. To compensate for this, the drive shaft in the inner CV joint can move along splines. In premium cars, a tripod with a rigidly fixed axle shaft is installed in this place. This design is more reliable, but more expensive than a drive assembled on the basis of simple CV joints.
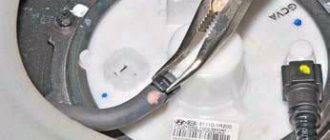
How to check removed CV joints
A simple way to check removed CV joints is to clean them of grease and conduct a thorough visual inspection. Especially in the area of working surfaces - balls, separators. There should be no cracks, chips, pockmarks or other marks indicating wear.
Inspecting the CV joint
A damaged CV joint must be replaced, since the metal elements of the part cannot be repaired. In case of emergency, you can swap places - in this case, the load will fall on the surfaces that have not yet been worn out, which will allow you to gain a little time before replacing parts. When installing new CV joints, they should be filled with new lubricant and sealed with a boot.
Troubleshooting
If the joint is severely worn, a complete replacement of the mechanism will be required, however, with timely diagnosis, replacing the CV joint and boot grease will help return the part to working condition. To troubleshoot the problem:
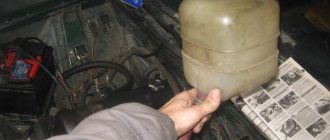
- Place the car over the inspection hole. This will allow you to assess the condition of the boots and check for any splashes of lubricant on nearby surfaces.
- Remove the CV joint. This must be done if traces of grease are found. Then the part is disassembled, the dust cover is removed, the internal surfaces are washed, the lubricant and boot are changed.
- Sand parts whose working surface is damaged. However, the procedure is ineffective and the problem will arise again. Experts recommend abandoning this idea and completely replacing the CV joint.
You can replace the boot and lubricant yourself, the main thing is to carefully treat all internal parts with gasoline or solvent. If you have no experience in such operations, then it is better to contact a specialist who will clearly demonstrate how to correctly replace the CV joint.
The malfunction of one part of the car affects the functioning of all systems. Timely identification and elimination of the problem will help avoid serious complications.
Design features of the CV joint
Based on the design features, the division occurs according to the type:
- Ball
- Tripods
- Cam
- Cardan pairs
There are no fundamental differences between them, only some minor points. All of them are connected at one end to the wheel, and at the other to the motor shaft.
The entire structure is protected by a tightly closed boot, which is held on the shafts with clamps. Inside, the entire boot is filled with lubricant, which protects the hinge from strong friction. A special lubricant is used that is able to withstand overheating and constant impacts. There are lubricants with molybdenum in the composition, and there are without it. The use of graphite lubricant is strictly prohibited. If the lubricant is not of proper quality, the hinge will quickly fail.
Checking the internal grenade
When checking the internal hinge while moving, it is also necessary to create the worst operating conditions for it, that is, maximum angles. Nothing depends on turning the steering wheel, so you will need to tilt the car as much as possible, moving in an arc at high speed under full traction.
A crunch from the inside of the car relative to the trajectory will mean wear of the internal joint on this particular drive. The opposite side, on the contrary, will reduce the angle of the fracture, so a crunch there can only appear from a node that is in a completely critical condition.
A test on a lift can be constructed in approximately the same way, loading the drive with brakes, and changing the angles of the suspension arms using hydraulic supports. At the same time, it’s quite easy to assess the presence of gaps and the condition of the covers. Long torn boots with dirt and rust inside will mean that the hinge must definitely be replaced.
Replacing the outer CV joint
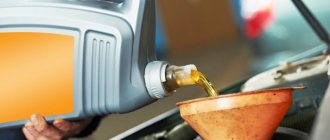
An experienced car owner with practical skills will not encounter any problems when taking on the task of replacing the outer CV joint. The list of tools necessary to carry out the “operation” has already been presented above. In addition to tools and supplies, there are a few other things worth doing. Before removing the wheel, drain a little oil from the gearbox - this will make it easier to work with. You will also need a pry bar - it will serve as a lever when removing the drive shaft.
Let's assume that the problem is on the right. Replacing the right CV joint begins with removing the wheel. We unscrew the hub nut, remove the brake disc, caliper, ball joint and steering tip. We take a pry bar or crowbar and remove the splined drive shaft. Using light blows of a hammer (a support, such as a wooden block, will come in handy), we knock out the outer hinge. Next we perform the following steps:
- It is necessary to remove the hub nut and tear off the wheel bolts. We put stops under the rear wheels.
- We jack up the car, hang it up and then remove the wheel.
- Remove the bolts holding the steering knuckle to the ball joint.
- Turn the steering wheel all the way. Pulling back the steering knuckle, we pull out the outer half of the hub along with the old CV joint. If the grenade does not budge, hit it lightly with a hammer.
- We remove the old boot and clamps and throw them in the trash.
- We remove the CV joint with hammer blows, rotating it along the axle shaft.
- We fix the installed new hinges in the hub together with the boot.
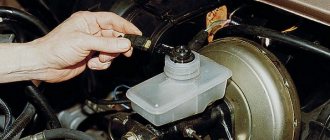
Replacing the left CV joint is carried out in the same way. When returning parts to their place, the above procedures should be done in reverse order. When knocking down a CV joint with a hammer, hit it clearly - some models are equipped with an ABS ring, which does not like strong blows to it. Don't forget to add gearbox oil. When installing the wheels back, be extremely careful to avoid falling apart.
The CV joint crunches at low temperatures, what to do?
As a rule, at low temperatures, the cause of crunching of CV joints is poor-quality lubricant, which is not able to perform its functions in extreme cold.
Car manufacturers, when supplying their products to Russia, must take into account the operating conditions.
The frozen lubricant binds the internal elements of the grenade and does not get into all the cavities of the assembly, which is why the crunch appears.
At this moment there is no need to turn sharply and pick up speed; after a few kilometers (20-30) the components will warm up and the crunching will disappear by itself.
But the problem is that the internal grenades warm up quickly, but the external ones at very low temperatures may not warm up and the crunch will remain.
There is an opinion (and not without reason) that the problem is not only in the lubrication, but also in the design of the CV joint itself. The fact is that the lubricant put into the product may not be suitable for this design, while on other car models it works well even at temperatures below -200C.
Some car owners are guilty of using polyurethane boots, which can be installed on some brands of cars instead of rubber ones. They say that in the cold they tan and make sounds. This is a controversial opinion that requires verification.
The problem can be solved by replacing the lubricant; some car owners recommend LM47, VERYLUBE, XADO, they performed well at low temperatures. But it’s difficult to give any advice here, the choice on the market is huge and opinions vary.
But, you need to change the lubricant not just by pressing it under the boot, but completely remove the assembly, disassemble it and press the new lubricant as much as possible instead of the old one into hard-to-reach places. It is these places that cause crunching in severe frost, especially for external grenades.
Causes of failure
Development on the CV joint cage
The reasons may be as follows:
- A manufacturing defect that was not identified before installation. There are often cases when counterfeit products are installed on new cars. This also includes the very low quality of the metal used to make the assembly.
- Insufficient amount of graphite lubricant or its absence. Poor quality of the anthers, as a result of which it ruptures and dust, dirt, sand, water and other debris gets onto the rubbing surfaces.
- How you drive and where you drive is also important. Aggressive driving coupled with poor-quality road surfaces means rapid wear of the grenades and prompt replacement.
We determine which CV joint crunches, the inner or outer one
Several methods are used to diagnose CV joints. The simplest of them is a visual inspection of the anthers and checking the shafts.
The main cause of problems associated with the appearance of crunching is the ingress of dirt into the nodes, which can only occur due to damage to the boot.
If the rubber element is torn, then upon inspection there will be traces of leaking lubricant on it, from which you can understand which of the units got sand and dust.
Also, during inspection, you should try to move the drive shaft in the transverse and longitudinal directions by hand. CV joints are highly precision-manufactured units, and if it feels like they have play, it’s time to take action.
If, during a visual inspection, no leaks in the boot are detected, but symptoms of a joint malfunction appear, several simple methods can be used to identify which of the CV joints is problematic.
Possible causes of crunching
An experienced driver can by ear determine the location of a car malfunction. This quality comes with age. However, it is very difficult to confuse the crunch of a grenade with another sound. Let's figure out what a CV joint is. On the outside it is made in the form of a bowl, and on the inside the body has semicircular grooves. There are six of them.
In the internal space there is a spherical fist (clip) with 6 grooves and a splined connection for the axle shaft. Rotation occurs through the force that the cage transmits to the body through the balls located in the separator. The balls, moving along the grooves, change the angle between the axes.
- low-quality or defective products, including counterfeit ones, have been identified;
- low-quality lubricants are used or they are absent;
- boot damage;
- driving on bad roads or aggressive driving style.
Each part has its own production resource. And over time, play appears in the hinges. The rolling of the balls, now more free, produces a sound reminiscent of crunching. It may appear when turning, sharp acceleration, or overcoming obstacles.
There are 2 grenades installed on the drive wheels (internal and external): the first transmits rotation from the gearbox, the second - from the axle shaft to the wheel hub. Therefore, if an extraneous sound occurs, you need to determine which CV joint is making the sound (located on the left or right, inside or outside).
The design of these grenades is the same, they differ only in size (the outer one is smaller). Outer CV joints wear out more intensively because the loads and turning angles are greater. Knowing the design and difference of grenades, which ones wear out, how quickly and why, the car owner will more carefully monitor the condition of the CV joints.