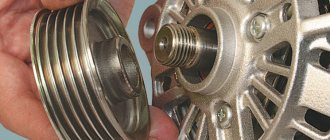
Electric generator VAZ 2109
The generator produces electricity and recharges the battery. Violation of the stable operation of the electric generator leads to a gradual discharge of the battery. As a result, the car ride will be short until the battery is completely discharged. A sudden breakdown of an electric generator often causes a lot of problems for the car owner. Although repairing a generator on a VAZ 2109 is a very simple procedure that you can easily handle on your own. Anyone can carry out repairs with their own hands; no special tools or professional skills are needed. The electric generator is located under the hood of the car and is driven by a drive belt. The causes of failure are the following common malfunctions: worn out (broken) brushes, broken diode bridge, charging relay, jammed shaft bearings.
Generator 2109: device and features
Let's start with the fact that alternating current generators are installed on the VAZ 2109: series -37.3701 (design using a V-belt drive) and series - 94.3701 (design using a poly-V-belt drive).
Let's take a closer look at the connection diagrams, methods of diagnosing and repairing the generator device on the VAZ 2109 (design features of automobile generators: series 37.3701 and 94.3701).
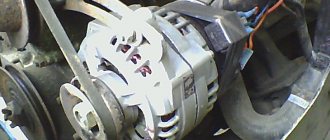
So, the generator is located in the front part and is mounted almost on the internal combustion engine of the car. Generators come in two types: traditional and compact. The main components of the generator on the VAZ 2109:
- frame;
- rotor;
- stator;
- brush assembly (VAZ generator brushes);
- rectifier block;
- voltage regulator.
The design of the generator series 37.3701 consists of more than 20 elements:
- bushing, clamping and buffer fittings;
- back cover of the unit, bolt fixing the rectifier device, rectifier unit with valve;
- capacitor component;
- pulley and rear bearing of the rotor shaft;
- impeller, shaft, brush connected to the output on the control mechanism, thrust ring;
- contacts for connecting electricity consumers;
- stator mechanism, rotor winding, etc.
A more complex design of the 94.3701 series generator, consisting of more than 30 elements, including:
- capacitor device, protective casing of the device;
- contact B+ and the common contact of additional diode elements with connection on the control device to output D+;
- fixing device for positive diodes of the rectifying mechanism and fixing for negative diode elements;
- shaft, coupling bolt, washers (regular, conical);
- bushing, brush assembly holder, etc.
In fact, the resource of the generator type 37.3701 is about 120 thousand kilometers; the generator 94.3701 has a slightly longer resource due to the slip rings (they are smaller in diameter).
The generator connection diagram will depend on its type. In general, the technical characteristics of generators for the VAZ 2109 are as follows:
- at a rated voltage of 14V, the highest output current for generators 37.3701 is 55A, for generators 94.3701 it is 80A;
- voltage is adjustable: 13.6-14.3V (37.3701) and 13.2-14.7V (94.3701);
- gear ratio – 1:2.04 (37.3701) and 1;2.4 (94.3701).
If we consider a generator, the general circuit includes the following elements:
- alternating current generator for VAZ 2109;
- negative and positive diode;
- car dashboard and warning light for generator and battery discharge;
- voltmeter device;
- fuse box installed in the engine compartment, under the windshield on the driver's side;
- additional resistor elements built into the fuse mounting block;
- vehicle ignition switch and relay;
- capacitor device, winding and car battery;
- generator voltage regulator relay installed in the engine compartment.
As for how to connect the VAZ 2109 generator, it will depend on the device model:
- generator model 37.370 - when you turn the ignition key, voltage is connected through the control light on the instrument panel and resistors. When the internal combustion engine is running, the voltage is supplied to the excitation winding of the valves on the rectifier block (the main voltage is supplied to the output of the regulator, the current does not pass through the control lamp and it does not light up)
- generator model 94.3701 - the connection circuit is similar to the previous one (after turning on the ignition, voltage is supplied to the regulator output through the control light).
Please note that the device works properly if the lamp lights up when you turn the key in the ignition switch, and then goes out after starting the engine. If the lamp does not go out immediately, but with some delay, this means that the generator is faulty.
Determining electrical system faults
One of the main advantages of the new VAZ 2109 is fuel injection. This type of supply of the fuel mixture is significantly more economical than the carburetor method. In addition to fuel consumption, the injector also improves the vehicle's driving characteristics. For the injector to work properly, the computer or, as motorists call it, “brains” must also work correctly.
In turn, the operation of the computer, as well as all electrical sensors and devices, directly depends on the constant current power. The device that is responsible for supplying power to the vehicle's devices is called a voltage regulator. The main sign of a malfunction of this element is the readings of the voltmeter on the instrument panel.
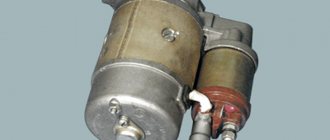
Generators for VAZ 2106 and 2107
Traffic controller signals: easy and simple!
The generator on the VAZ 2106-2107 costs the same as on the VAZ 2101 - G221. If you install additional external current consumers that operate constantly, this will lead to undercharging and insufficient current will be supplied from the relay regulator. These additional devices include:
- powerful audio systems;
- fog lights;
- TV;
- preheater;
- additional heater;
- fridge.
Any similar device will lead to greater power consumption and, consequently, to premature battery discharge, even when the engine is running at high speeds. Standard devices for 2106 were developed a long time ago and are not designed for modern energy-consuming add-ons.
In this case, it is recommended to replace the standard generator with a more powerful unit.
G 222
If you need to increase the current power, then, when deciding which generator is better to install on the VAZ 2106 or 2107, instead of the standard one, take the G 222, which was installed on the VAZ 2105, Nivakh. It would seem that it itself is no better than the standard one on the “six”, but you can take an upgraded version that will be more powerful. Unlike the 221, this unit is designed with a built-in regulator relay, assembled into one unit with brushes. The G 221 gives an output of 42 A, and the 222nd - 50 A. Increasing the cross-section on the rotor winding increases the power, although the design is completely similar to the G 221. However, to install it on the 2106 you will need minor modifications. The easiest way is to install brushes from G 221. They fit perfectly in place of the relay. This modification is quite feasible even for car enthusiasts who do not have the skill.
It can be installed on a VAZ 2106 G222 with a standard regulator, but then it is necessary to change the connection diagram of the electrical machine.
On 2107 everything is installed without problems.
Check the voltage at medium engine speeds at the battery terminals, if it is 14 V at 2500 rpm, then everything is fine. You can drive with a more powerful unit by connecting additional options.
Generator 2108
This installation has greater efficiency, delivering a current of 55 A. It is installed on both 2106 and 2107.
The mount is identical to the standard ones, there are no problems during installation. Just remember to remove the battery terminal. You'll have to tinker with the connection to 2106. There are 4 wires going to the standard device. On the “eight” - three, since the voltage relay is built-in. To get a good result, insulate the black wire, connect the rest according to the standard system. The light bulb - the discharge indicator will light up when the generator is running, and will go out if there is no charging.
It is useful to make some more minor modifications. Instead of the old relay, install a regular power one. Then the light comes on only when the engine starts and at low speeds.
On 2107 you only need to add a power relay.
2107-3701010
An even more powerful installation is from the VAZ 2107i, producing 80 A, which can also be installed on the VAZ 2106–2107. With such equipment it is possible to install any electrical systems. For VAZ 2106 only 2107-3701010 is suitable; You can use any generator of this series for the carburetor “seven”.
When installing this equipment on 2106, it is better to modify it: replace the relay regulator with a similar one from G 222.
We repair the voltage regulator and relay
Removing the voltage regulator in a VAZ 2109 car is not difficult. The technical features of this car model allow this work to be performed without removing the generator. The only tools you will need are standard screwdrivers and wrenches.
To replace the voltage regulator in a VAZ 2109, the first thing you need to do is purchase a new element. Nowadays, this will not be difficult, because it is sold in any auto store. Recently, the use and application of three-level regulators has become widespread. However, VAZ cars are still produced with standard regulators.
Therefore, it is better to entrust the replacement and connection of a three-level voltage regulator to an experienced electrician, because this process requires a slight modernization of the generator contact group.
The main difference between the three-level regulator and the standard one is the new relay. relay is much better in performance and quality than the standard one. This type of regulator makes the voltage more stable and of higher quality and protects the entire electrical system of the car from significant fluctuations in the network. Before performing any type of replacement work, it is recommended to charge the battery. After completion, install everything in the reverse order and take new measurements with a tester at the battery terminals.
Reasons why the VAZ 2109 generator does not charge
Repair of generator VAZ 2110, 2111, 2112
Good day, dear reader. In this article, I will tell you as simply as possible about the operating principle of the VAZ 2109 - 2114 generator and about the reasons why the generator does not charge. So that everything is clear to an ordinary person who has not studied electrical engineering, I will not delve into the physics of what is happening and use scientific terms, but I will explain everything, as they say, “on the fingers.” So, let's begin!
The principle of operation of the VAZ 2109 generator
In order to understand why on the VAZ 2109 - 2114 the generator gives little charge or does not charge at all, you need to understand how it works and know the principle of its operation.
The generator consists of five main parts shown in the figure below: armature - 5, stator - 6, relay-regulator paired with brushes - 10, diode bridge - 9, housing - 3.7.
The operating principle is as follows:
- a positive wire goes from the battery to the diode bridge (9) and the diode bridge (9) is connected to ground through the housing (3.7) of the generator
- voltage through the diode bridge (9) is supplied to the stator (6) of the generator and a magnetic field appears in the stator
- when the car starts, the engine, using a belt drive, turns the generator rotor (5)
- in the rotor (5), rotating in the magnetic field of the generator (6), a current appears
- The current is removed from the rotor by brushes (10) and through a relay-controller (10) is supplied to the car battery.
Failure to comply with any of the points leads to a malfunction of the VAZ 2109 - 2114 generator.
To find the reason why the VAZ 2109 2114 generator does not work or does not charge well, you need to check for serviceability each of the points above that describe the operation of the generator.
Point one: the diode bridge does not receive positive voltage from the battery.
The cause of the malfunction in this case may be the wire itself or its connection to the diode bridge or battery. Try cleaning the connection terminals, and if that doesn’t help, test the wire.
Poor contact with the negative wire is not considered, since in this case the engine would not start at all.
Point two: diode bridge and generator stator.
If voltage comes to the diode bridge, but charging does not occur, then it should be checked for functionality. To find out how this is done, read the article “Checking the diode bridge of VAZ 2109 - 2114”.
After checking the diode bridge, if it is working properly, we ring the stator winding. To do this, select the continuity mode on the multimeter and apply the probes to the first and second contacts of the stator, and then to the first and third.
If there are no cliffs anywhere, we move on.
Point three: VAZ 2109 - 2114 alternator belt.
The carburetor version of the VAZ had a thin V-belt, and the injection models have a wide belt with cores, but this does not change the operating principle. Charging may not go well due to belt slippage. This malfunction is manifested by a strong belt whistle. The belt may also start to whistle when you turn on energy consumers such as headlights, heated glass, stove fan, etc. If you hear a belt whistle, try to replace it as soon as possible. This is one of the reasons why the VAZ 2109 -2114 generator does not charge well.
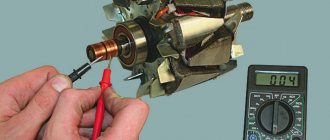
Point four: generator armature VAZ 2109 -2114.
There should be no breaks in the armature, as well as in the stator. Test it by placing the multimeter probes on the brush tracks.
If the anchor does not ring, it should be replaced.
Point five: brushes with a relay-controller.
The brushes of the VAZ 2109 -2114 generator wear off over time on the armature tracks. If their length is less than 5 millimeters, then they are not able to press tightly against the anchor, thereby not charging the vase battery.
But it happens that the relay-regulator fails before the brushes are worn out. To check it you will need:
- 12 volt light bulb
- car battery
- two 1.5 volt batteries
- several wires
We connect the light bulb and battery to the relay regulator as shown in the figure below. In this case, the lamp should be on.
Now we add two batteries to the circuit, as in the figure below. The light should not be on now.
If the light comes on in both cases - the relay - the regulator needs to be changed.
First aid for a car
The first step in such cases is to check the battery terminals; perhaps they are not making good contact. If there is poor contact at the battery terminals while driving , it will not be charged sufficiently, which may cause problems during further operation of the car. To fix this problem, you need to lubricate the terminals and tighten them.
If your car's alternator fails, you need to have it repaired immediately. the voltage regulator fails . The failure of this generator element has rather unpredictable consequences. While driving, the regulator controls the required amount of current for the car; if it fails, the voltage in the network changes and can be either more or less. Very often, fuses blow at high voltages.
VAZ 2109 3-level relay regulator
relay is clearly shown here
-regulator after replacement instead of the factory one (faulty...
How to change the voltage regulator (tablet) on a VAZ 2115-09, etc. (part 1)
EARNING ONLINE IN CASHBERY I invite you to Twitch...
2109 voltage regulator is located directly in the car’s generator itself. When it fails, most often the generator relay breaks. It consists of several elements such as an electromagnet, an armature and a switch. These elements interact with each other when electric current is applied to them.
How to remove the charger
Replacing the generator drive belt 37.3701 for VAZ 2108, 2109, 21099 cars
The generator for the ninth Zhiguli model is designed for alternating current and is three-phase with a built-in rectifier. The device is electronic, rotating clockwise. If you know how to check a current-generating device, you can save on car service costs. You can diagnose the charger using simple electrical measuring instruments (ammeter, voltmeter). A broken VAZ 2109 generator bearing can be identified by the sound it makes or by inspection.
In order to replace or repair damaged parts, the electrical current-generating device must be dismantled.
To do this, the car is driven onto an overpass or pit. Dismantling is carried out according to the following algorithm:
- the car is de-energized by disconnecting the battery terminals;
- then remove the rubber cap, which protects the negative terminal of the mechanism from moisture and dirt particles;
- then unscrew the fastening nut and remove the conductors from the stud;
- then disconnect the block with the wires on it from the generator connector;
- now you need to loosen the tightening of the generator fastening to the bar, which regulates its position relative to the vertical axis;
- it is necessary to lift the device to be dismantled to the highest point and remove the generator belt from the pulley;
- at the penultimate stage of dismantling the part, the bolt is unscrewed, with which the adjusting bar is attached to the cylinders;
- now two bolts are unscrewed from the bottom of the car, with the help of which the lower bracket is attached to the cylinder block;
- the mechanism can then be removed from under the hood.
The number of steps required to remove the generator is small, and dismantling can be done with your own hands. Upon completion of the repair work, you should check the condition of the belt and tighten it onto the generator pulley. The pulley size must exactly match the belt.
Replacing generator brushes without removing the generator
This method is used when the problem is definitely in the brushes and removal and inspection of the generator is not required.
- Disassemble the car's generator. But do not remove it completely (do not unscrew the generator mounting bolts).
- Clean the brush holder socket. It is better to do this by blowing with compressed air.
- Clean the brush holder with a cloth.
- Remove the brushes.
- Clean all contacts.
- Check the elasticity of the spring. If it is insufficient, replace the spring.
- Polish the slip ring if it has visible defects.
- Install the brushes and reassemble the generator in reverse order.
Replacing alternator brushes on a VAZ 21099 car is not at all difficult. Any car owner who prefers not to take their vehicle to a service center, but to carry out the maintenance themselves, can handle this.
For proper repairs, you only need detailed instructions given in this article and a tool that every car owner has.
Generator brushes can fail from time to time and require replacement. If this happens, you can independently carry out work in this area and restore the functionality of your vehicle.
Before starting work, it is very important to prepare in advance all the necessary details that may be needed to complete the action.
Disassemble the car and remove the alternator to make work easier. Having removed the generator, you can proceed directly to repairs. After completing all the work, install everything in its place and secure it as it should.
If you have a question about how to properly repair brushes, it is best to study the video material, which explains in detail how to quickly get the job done quickly and efficiently. The specialist also explains the main nuances that you need to pay attention to when carrying out the work. That is why, as statistics show, there are no problems after the work is completed.
The popular VAZ 21099 car in Russia has a short service life, but at the same time a simple design. A fairly common malfunction on this vehicle is excessive wear of the brushes in the generator. They definitely need to be replaced, because otherwise the generator will stop working normally and the engine will stop starting.
How to disassemble a VAZ 2110 generator: step-by-step instructions
In order to disassemble the VAZ 2110 generator, follow these steps:
- First of all, use a screwdriver or permanent marker to make a longitudinal mark on the body where the front and back covers separate. This will make it easier to assemble the generator in the future.
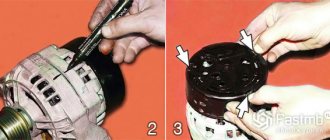
- We press the three spring-loaded latches on the plastic protective casing of the rectifier unit and remove it.
- Using a Phillips screwdriver, unscrew the two screws securing the voltage regulator and lift it up. Then remove the terminal of the appropriate wire from the regulator terminal and carefully remove the regulator completely. Electrically removable brushes are replaced along with the unit.
- Using a size 8 spanner, unscrew the three bolts connecting the rectifier unit to the annular terminals of the stator windings. We carefully move the conclusions to the sides. Remember the location of the thrust and insulating washers on the removed bolts. Now, using a Phillips screwdriver, unscrew the screw securing the noise suppression capacitor to the housing. Disconnect the appropriate wires. We remove the block itself and the capacitor. Using a 10 mm socket wrench, unscrew the two nuts of the contact bolts of the generator and take them out together with the spacer and insulating sleeve, and release the capacitor tip. It is worth noting that wear (or damage) of brushes is the most common cause of malfunction of the generator.
- Using a size 8 wrench, unscrew the 4 bolts holding the rear and front covers of the electric generator together. We push them apart with a face screwdriver and remove the back cover along with the stator winding.
- We remove the stator from the cover, having previously marked it with a mark of their relative position.
- If the front bearing needs to be replaced, remove the generator pulley. To do this, use a 22mm socket wrench to unscrew the nut securing the pulley to the rotor shaft, carefully holding it with pliers or wedging the rotor with a screwdriver. Do not damage the impeller blades, which are made of thin metal.
- Carefully remove the pulley, washers and spacer bushing.
- We return the nut to the rotor shaft, screwing it flush with the end of the armature shaft. Using a rubber hammer, knock the rotor (armature) out of the cover.
- It all depends on the degree of damage to its parts. So:
- First of all, use a screwdriver or permanent marker to make a longitudinal mark on the body where the front and back covers separate. This will make it easier to assemble the generator in the future.
- We press the three spring-loaded latches on the plastic protective casing of the rectifier unit and remove it.
- Using a Phillips screwdriver, unscrew the two screws securing the voltage regulator and lift it up. Then remove the terminal of the appropriate wire from the regulator terminal and carefully remove the regulator completely. Electrically removable brushes are replaced along with the unit.
- Using a size 8 spanner, unscrew the three bolts connecting the rectifier unit to the annular terminals of the stator windings. We carefully move the conclusions to the sides. Remember the location of the thrust and insulating washers on the removed bolts. Now, using a Phillips screwdriver, unscrew the screw securing the noise suppression capacitor to the housing. Disconnect the appropriate wires. We remove the block itself and the capacitor. Using a 10 mm socket wrench, unscrew the two nuts of the contact bolts of the generator and take them out together with the spacer and insulating sleeve, and release the capacitor tip. It is worth noting that wear (or damage) of brushes is the most common cause of malfunction of the generator.
- Using a size 8 wrench, unscrew the 4 bolts holding the rear and front covers of the electric generator together. We push them apart with a face screwdriver and remove the back cover along with the stator winding.
- We remove the stator from the cover, having previously marked it with a mark of their relative position.
- If the front bearing needs to be replaced, remove the generator pulley. To do this, use a 22mm socket wrench to unscrew the nut securing the pulley to the rotor shaft, carefully holding it with pliers or wedging the rotor with a screwdriver. Do not damage the impeller blades, which are made of thin metal.
- Carefully remove the pulley, washers and spacer bushing.
- We return the nut to the rotor shaft, screwing it flush with the end of the armature shaft. Using a rubber hammer, knock the rotor (armature) out of the cover.
Removing the electric generator from the car
Before removing, disconnect the ground from the battery, i.e. remove the negative terminal. Then we proceed in order:
- Before removing the entire electric generator, in order to avoid unnecessary work, let's start with the charging relay, remove it from the generator body to visually determine the wear of its brushes
- The charging relay is located at the rear of its housing, and is attached to the unit with two bolts
- To unscrew them we need a Phillips screwdriver.
- Unscrew the bolts carefully so as not to drop them, otherwise they will fall behind the housing protection, then getting them out will be a big problem
- To finally remove the relay, you need to disconnect the wire with the “female” contact.
Charging relay with brushes
Instructions for checking the serviceability of the relay - voltage regulator:
- We connect a 12-volt test light to the brushes (photo below)
- We apply a voltage of 12 Volts: “+” goes to the relay terminal, and “-” is connected to the “ground” of the brush holder
- The indicator light should light up
We connect the control light with contacts to the brushes, supply 12 Volts
- We increase the voltage to 15–16 Volts - the light should go out
- If the light does not go out or does not light up at 12 Volts, it is necessary to replace the relay with brush holder
- Checking the ease of movement of the brushes in the holder and protrusion
- When the brushes protrude less than 5 millimeters, it is necessary to replace the brushes, or, more simply, the entire relay along with the brush holder
- If chips or cracks are found on the brushes, the regulator must be replaced.
Now let's move on to removing the electric generator:
- We disconnect the wires - they are usually red and divided into two groups
- The first consists of two wires and is attached with a nut to a bolt on the back cover of our unit
- The second consists of a single wire and is connected to the generator terminal, with a male-female contact, also located on the back cover
- To disconnect the generator from the engine, we need to unscrew one bolt and a couple of nuts, in this order:
- We unscrew the first nut, which is located on the generator belt tensioner bar (located in the upper part of the electric generator)
Unscrew the nut on the tensioner bar - upper arrow
- Then we move the electric generator to remove the drive belt
- Unscrew the bolt that secures the tensioner bar to the cylinder block and remove it
Note: We remove the generator from the VAZ 2109 together with the bracket, otherwise it will be very difficult to remove the bolt that secures the unit to the bracket and the body spar will interfere.
- Unscrew the bolts securing the bracket
Unscrew the bolts securing the bracket
Now that we have removed the generator from the engine, we can begin disassembly and repair.
Necessary tool
- Vise
- Bearing puller
- A set of keys
- Screwdriver Set
We disassemble the electric generator
Disassembly is carried out in the following sequence:
- Using a key set to “19”, loosen and unscrew the rotor shaft nut that secures the impeller
- To do this, clamp the generator in a vice, use a screwdriver to hold the impeller from turning, and use a wrench to unscrew the nut in a counterclockwise direction.
Use a screwdriver to hold the impeller from turning, and use a wrench to unscrew the nut
- The generator impeller is attached to the shaft with a pin; after removing the impeller from the shaft, you need to remove this very pin so as not to lose
Important: You should definitely remember, or better yet, sketch the location of the spacer nuts and washers when you remove them. Each type and type of generators has some differences in their relative position, regardless of how it is indicated in books and car repair instructions. Do this to avoid problems later.
- Now turn the generator upside down with the back cover up, and use the “8” key to unscrew the four nuts
- We take out the four studs and remove the front part of the case
Unscrew the four nuts on the back cover
- There is a “front” bearing in the front cover of the electric generator, it is secured by plates
- Unscrew the nuts and remove the plates
- Then we knock the bearing out of its seat
- For this we use a wooden plank or a mandrel that matches the size of the bearing diameter
- Remove the spacer sleeve from the rotor shaft
- Remove the generator rotor from the back cover
- We disconnect the leads of the stator winding from the rectifier unit by unscrewing the nuts securing them
- After removing the nuts, remove the bolts that secure the terminals
- There are insulating pads on the bolts
- Now we remove the stator winding from the housing
Disconnect the winding terminals from the cover and remove the winding
Now you need to remove the diode bridge located in the generator cover, to do this:
- Unscrew the nut securing terminal “30″
- Next to pin “30″ there is a connector with a plug
- We remove the plug, first press out its latch using a small flat-head screwdriver
- Press the latch from the inside, then push the plug inward, the connector remains on the cover.
- We remove the diode bridge from the cover
Unscrew the output nut “30″, remove the plug, take out the diode bridge
Now we will need a vice again:
- We clamp the rotor shaft in a vice so that the “rear” bearing is at the top
- We take a bearing puller, put it on as shown in the figure and pull the bearing off the shaft
Use a puller to pull the bearing off the shaft.
So we have disassembled the VAZ 2109 generator, repairs and replacement of parts are still ahead:
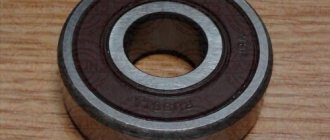
- And we have a pair of bearings - “front” (smallest) and “rear” (larger) - we check their markings and buy them with exactly the same markings
Important: As practice has shown more than once, when purchasing electric generator bearings, you need to remove the old ones, take them with you, or rewrite the markings in order to buy new ones in the store. And advice from sellers like: “they are all the same, interchangeable” or “if your electric generator is an old model, these will suit you” are very often erroneous. To save your time and money, it is easier to remove the old bearings and select similar ones based on their markings.
- This advice also applies to the diode bridge, which is located in the rear cover of the generator
- If there is visual damage on it, or the metal has oxidized, do not hesitate to remove it (it is screwed with four nuts to the back cover from the inside) and buy a new one
We check parts for defects:
- Inspecting the front cover of the generator
- If cracks are found (pay special attention to the mounting points), replace the cover
- We measure the diameter of the bearing seat in the front cover
- If the bearing seat is deformed or its diameter exceeds 42mm, replace the cover
- Inspecting the back cover of our generator
- If it is damaged, or the bearing seat ring is worn (broken), replace the cover
- We inspect the inner surface of the stator. There should be no scratches on it - traces of the anchor touching
- If there is wear, it is necessary to replace the bearings or covers of the electric generator
Checking the stator:
- We check for breaks in the stator winding. To do this, turn on the 12 Volt indicator light using a battery
- We alternately connect the test light between the winding terminals
- The light should be on in three positions
- When the light does not light up, it means there has been a break.
- Replace the stator or winding
- We check that there is no short circuit of the armature windings to the housing. To do this, turn on the 12 Volt indicator light from the battery
- We connect the lamp to the output of the rotor winding, and the wires from the battery to the stator housing
- When the light comes on, it means there is a short circuit: then you need to replace the stator or winding
Checking the rotor:
- Inspect the contact rings. If burrs, scratches, marks, signs of wear, etc. are detected, the rings must be sanded
- When damage to the rings cannot be removed with sandpaper, we grind them on a lathe, remove a minimum layer of metal, then grind them
- We check the resistance of the rotor winding with an ohmmeter (tester) by connecting the device to the slip rings
- When the tester shows “∞”, this means there is a break in the windings - the rotor must be replaced
- We check with a test light that there is no short circuit of the armature winding to the housing. Turn on the 12 Volt indicator lamp from the battery
- We connect one wire to the armature body, the second one in turn to each ring
- In both cases the light should not light up.
- When the lamp lights up, the winding is closed: you need to replace the armature
Repair costs
Approximate price of parts:
- Bearings (set) – 150 rub.
- Diode bridge – 200 rub.
- Charging relay - 140 rubles
- Bearing puller – 100 RUR
- Total: 590 rub.
Assembling an electric generator
After diagnosing and replacing defective parts, we proceed to assembly:
- Install the rear bearing. We do this using a plank and a hammer
- We apply two or three strong blows and press the bearing onto the shaft
- In the case when the diode bridge was removed, screw it back into the back cover of the case
- We put the back cover on the anchor so that the entire bearing “sits” into the seat in the cover, to make it easier, you can use a hammer, lightly hit the cover, “put” it on the shaft
- We replace the small (aka front) bearing in the front cover and secure it in the seat with plates
- We take the generator out of the vice and before putting on the front cover, place a spacer ring on the shaft, between the thrust groove and the front bearing
- We put on the front cover, then tighten the stud nuts “crosswise”, so they are tightened evenly
- We install the pin in the recess on the armature shaft, then put on the impeller and tighten it with a nut
- Our generator is assembled, all that remains is to install the relay in its original place - the charging regulator with brushes
- Don't forget to connect the wiring from the generator to it (this relay)
Installing the generator in place
To install the generator in place, perform the steps in reverse order:
- We screw the mounting bracket to the generator
- Screw the bracket with the electric generator into place, do not tighten the nut all the way
- We attach the dust protection with self-tapping screws
- We put the drive belt back on the generator pulley
- Then install the tensioner bar
- We tighten the belt so that the deflection is 1 - 1.5 centimeters and at the same time tighten the nut on the tensioner bar
- Now you can tighten the nut on the generator bracket until it stops
That's it, we installed a generator on the VAZ 2109, the repair is completed. Make sure that the terminals are removed from the battery, then connect all the wires back to the generator.
Important: Remember that there are three wires: we attach the pairs using a nut to the pin that is on the back cover, the male plug is inserted into the female connector.
Now we put the terminals on the battery and start the car engine. The generator supplies the voltage necessary for full operation of the car. To be sure, check the voltage output from the generator with a voltmeter. Additionally, you can watch our video on this topic, or type in the search: VAZ 2109 repair generator video.
Replacement and repair of generator on VAZ 21099, VAZ 2109, VAZ 2108
Power supply location: engine compartment, to the right in the direction of travel of the vehicle.
Required materials and tools:
- open-end, spanner wrenches;
- knob, heads;
- torque wrench for precise clamping force;
- new drive belt as needed;
- plastic spatula for removing the belt;
- screwdrivers with a set of bits to change the brushes.
Step-by-step replacement instructions:
- We turn off the car engine.
- Open the hood.
- Loosen the terminals and remove them from the battery.
- Loosen the bolt that secures the bracket.
- We bring the generator set down.
- Remove the drive belt.
- We remove the IP from the engine compartment for further prevention.
- Upon completion of the diagnostic work, install the parts in reverse order.
After dismantling the IP, the master cleans it, performs an initial inspection, and determines possible breakdowns. The components are replaced with new ones, the terminals on the rotor are cleaned.
The part cannot be installed if cracks are found in the housing. Subsequent operation of the technical device is unsafe.
We check the integrity of the rotor winding with a multimeter. The diode bridge is also subject to prevention. Do not forget to check the integrity of the fuse, replace it with a new one as necessary, and observe the amperage.
Subject to the recommendations of specialists, subsequent maintenance of the power source after 30 - 40 thousand km.
To extend the life of electrical equipment, follow the technical inspection schedule. Purchase parts with original catalog numbers; a complete list of serial numbers is indicated in the table data.
Contact service station specialists for help if you encounter any difficulties with repairs or maintenance of electrical installations.
Sources
- zapchasti.expert/generator/generator-vaz-21099-2109-2108.html
- avtozam.com/vaz/2108/podklyuchenie-i-remont-generatora/
- drive2.ru/l/466490074268172978/
- twokarburators.ru/tehnicheskie-harakteristiki-generatorov-2108-2109/
- remont-inomarki.ru/generator-vaz-2108.html
Symptoms of a problem
One of the signs is that the battery will discharge very quickly and become unusable faster. Any car owner who prefers to repair their vehicle with their own hands can cope with the elimination of this breakdown. In this article we will figure out how to change the brushes on a generator.
Experts recommend changing alternator brushes every 50,000 kilometers or every four years.
The principle of how to change generator brushes is no different from the fuel injection system; it is the same for the carburetor and injector.
A sign of too much wear on the alternator brushes is when the brushes become so worn that the alternator cannot maintain a charge to the battery. But keep in mind that there can be many reasons for the battery draining too quickly, however, it is better to check them.
Malfunctions of the VAZ 2108, 2109, 21099 generator
The generator is responsible for power supply to the entire on-board network of the car with the engine running. Signs of a malfunction of the generator of VAZ 2108, 2109, 21099 cars
After starting the engine, the battery discharge indicator lamp in the instrument panel lights up
The generator does not produce the required charging current. Simultaneously with the light on, the voltmeter readings tend to zero. The battery is constantly not recharged. Using a voltmeter (multimeter), we check the voltage at the battery terminals (the engine is idling). The voltmeter readings should be as follows: generator 37.3701 - 13.6 V, generator 9402.3701 - 13.2 V.
The “folk” method of checking a generator by removing the terminal from the battery while the engine is running is only suitable for carburetor engines. If the engine stalls after removing the terminal, it means the generator has stopped producing electric current.
If it is less, then the problem is not in the faulty wiring going to the control lamp and voltmeter, but in the generator. Next, sequentially, from simple to complex, from the most probable to the least probable, we look for the cause of the malfunction.
— The generator drive belt tension is loose
The belt slips on the pulley, and the generator rotor stops rotating at the required frequency. In this case, a “whistle” from the generator drive is possible. We check and adjust the belt tension if necessary.
— The generator voltage regulator is faulty
There may be a short circuit between its terminals “B” (“D+”), “W” (“DF”) or “stuck” (the brushes of the brush assembly have worn out). The easiest way to check the voltage regulator is to install a known good one. We replace the faulty regulator with a new one. Read more: “Checking the generator voltage regulator for VAZ 2108, 2109, 21099 cars.”
— The diode bridge (rectifier unit) of the generator is faulty
Most likely there is a “break” in its valves or a short circuit in the negative valves. The power diodes of the excitation winding may also be damaged. The diode bridge can be checked using an ohmmeter (multimeter in ohmmeter mode) both directly on the car and on a removed generator.
Checking the diode bridge of the generator of VAZ 2108, 2109, 21099 cars
— The generator stator is faulty
“Open” or short circuit in the stator winding. We check the stator with an ohmmeter, and if there is a malfunction, replace it with a new one.
checking the stator windings of generator 37.3701 for “break”
— The generator rotor is faulty
Perhaps the leads of the excitation winding located on the rotor have become detached from the contact rings to which the brushes are pressed. We check the rotor and replace it with a new one if necessary.
generator winding terminals 37.3701 for VAZ 2108, 2109, 21099 cars
The battery is recharged and “boils”
The generator produces too much charging current, higher: generator 37.3701 - 14.6 V, generator 9402.3701 - 14.7 V, which is checked with a voltmeter at the battery terminals. The needle on the standard voltmeter is in the red zone at the end of the scale.
— The voltage regulator is faulty
Most likely there is a short circuit between its terminal “Ш” (“DF”) and “ground”. Replace the voltage regulator with a new one or a known good one.
The generator makes noise or “howls” when operating
The nut securing the generator pulley has come loose, the generator bearings are worn out, there is an interturn short circuit or a short circuit to ground in the stator winding (the generator “howls”), a short circuit in one of the generator valves.
Notes and additions
— The causes of such malfunctions as: the warning lamp does not light up after turning the key in the ignition switch and starting the engine (the standard voltmeter shows normal voltage) or the lamp does not light up and the voltmeter does not work (or the control devices do not work completely) are not a malfunction of the generator, but a burnout of the control panel lamp, a break in its power supply circuit, a blown fuse No. 5 (F16) in the mounting block (responsible for supplying current to the excitation winding of the generator), a break in the power supply circuit of the instrument cluster (orange and orange-blue wires), a malfunction of the ignition switch.
— If the discharge warning lamp lights up at idle, and goes out when you press the gas pedal and while driving, you must first check the tension of the generator drive belt, and if that doesn’t help, then the problem is most likely in the additional resistors located in the relay mounting block and fuses. If they fail, the generator is not excited at low speeds, and therefore does not charge. It is necessary to either completely change the mounting block, or unsolder additional resistors and replace them with new ones.
More articles on generators for VAZ 2108, 2109, 21099 cars
Electric generator diagnostics
Let's start by identifying the causes of the breakdown:
- Noisy operation of the electric generator means wear on the generator bearings
- If the voltage at the “output” is low, most likely the brushes are worn out or the tension of the drive belt has simply weakened
- An increase or decrease in the electrical voltage at the “output” may indicate a malfunction of the diode bridge
We carry out initial diagnostics of faults:
- We check the voltage at the battery contacts with a voltmeter. If the generator is working properly, then with the engine running, the voltage at the terminals should be 13.8 - 14.5 volts
- We place our palm against the body of the unit and detect vibration. If the shaft bearings are worn out, vibration on the housing will be noticeable; it is almost impossible to confuse it with another malfunction
- Check the belt tension: with the engine turned off, press the belt with your finger, the deflection does not exceed 1 - 1.5 centimeters (if more, then it is necessary to increase the belt tension)
We check the diode bridge using a 12-volt test lamp and a battery:
Note: The rectifier unit (aka diode bridge) is checked without removing the electric generator from the machine. To do this, disconnect the wires from the battery, then the generator, and remove the block from the voltage regulator.
- To check the positive diodes, we connect a test light to the “+” (plus) of the battery, and the second contact of the lamp to terminal “30” of the electric generator, and the wires coming from the “-” (minus) of the battery to any bolt of the diode bridge. If the light is on, this means a short circuit in the positive diodes - the unit needs to be replaced
- To check the negative diodes, we connect a test light to the “+” battery and the second contact of the lamp to any bolt of the diode bridge, and connect the wires coming from the “-” battery to the unit body. If the light comes on, this means a short circuit in the negative diodes - the unit must be replaced
Powerful generator for VAZ 2109 Carburetor
VAZ generator replacement
,
VAZ generator
80 ampere,
generator
,
Powerful generator
for
VAZ 2109
Carburetor.
If you find a sleeve, but without an elastic band. You can use the rubber band from your original generator, having previously cut it to size. Then we knock out the split metal bushing from the bottom bracket and put a tensile bushing in its place. Alternator belt from 8 valve 10 (from 16 valve longer)
Replacement procedure: First, the access issue must be resolved. It is natural to raise the front of the car. It will be somewhat more convenient to work this way, but this is not at all necessary. We remove the crankcase protection and the right fender liner (if you have them naturally). Then the right engine mudguard. There is an option not to remove the wheel. It's quite easy to turn the steering wheel to the right according to the full program. Disconnect the mass from the battery. We remove the old generator, and then the upper and lower fastenings, the generator pulley. It will be necessary to clean the holes in the block for additional mounting bolts. Installing a new generator and pulley does not cause any problems. Before installing the engine splash guard, it is good to make a hole here for the socket head directly opposite the generator pulley bolt and close it with a suitable plug. Otherwise, when replacing the alternator or timing belt, you will have to remove the mudguard and protection, because Now there is simply no other way to get to the pulley bolt.
Replacing the VAZ 2107 generator with a more powerful one.
We connect the wires - power and excitation, battery mass. We start the engine and check the voltage on the battery.
If the generator is seriously damaged, it does not have to be repaired, but completely replaced. Parts necessary for repair may be missing, or the breakdown may not be repairable at all. Meanwhile, the on-board voltage and the quality of battery charging depend on the good operation of the power unit. It's a shame when, despite a good motor, electrical equipment does not work properly.
And if we are talking about VAZ cars, then sometimes a replacement is in demand due to the lack of power of standard devices. Modern automakers offer many additional devices that increase the level of comfort when traveling, but they also consume a large amount of electricity, and old devices cannot cope, so they have to be replaced with more powerful ones.
Many people are interested: which generator to buy if they have a VAZ? Here you need to consider them separately by model, so before you go shopping, read the recommendations of specialists and compare them with your wishes and capabilities.
Replacing brushes on the carburetor and injector with removal of the generator
- First loosen the generator.
- Remove the alternator belt. Please note that an inoperative alternator belt may also be a symptom of alternator problems. To check the belt, you need to bend it and inspect the surface for cracks. If there is deformation, replace the belt.
- Start the engine.
- De-energize the battery by removing the ground wire. This operation must be carried out to prevent a short circuit.
- Remove the wire going to the generator.
- Remove the engine crankcase protection.
- Unscrew the bolt that secures the generator from below.
- Lock the rotor with a minus screwdriver to immobilize it.
- Unscrew the pulley.
- Remove the generator casing.
- Remove the plastic protection to gain access to the generator brushes.
- Using a screwdriver, hook the power plug that comes from the brush holder.
- Pull the brush holder up. You must continue to apply force until it is removed. Perform the operation more carefully so as not to damage the soldering.
- Remove the plug and brushes of the generator.
- Unscrew the bolts securing the brushes, as well as the brush holder.
- Remove the voltage regulator. Remove the brushes and the brush holder. Don't be afraid of damaging them, because they will have to be replaced anyway.
- Remove the two pairs of bolts securing the two parts of the generator.
- Remove the back cover. To do this, you need to insert the generator and the cover into the slot. Pull up. This way you will remove the cover.
- Screw the nut onto the generator rotor.
- Carefully remove the generator.
- Visually inspect the generator parts for wear. If it is too big, replace them.
- Loosen the brush holder bolt.
- Replace the generator brushes with good ones.
- Reassemble in the opposite order and install the generator in its place.
Rotor and stator windings
First, it’s worth talking about what a stator winding is. It is from it that the voltage is removed to power the vehicle’s on-board network and charge the battery. On a VAZ-2109 car, the generator is very similar to an AC asynchronous motor. However, if you make minor changes to the design, the generator can also be used as an electric drive. Three windings on the rotor, each with a beginning and an end. The ends are connected at a common point. This connection is called a “star”.
As for the rotor winding, it is much simpler. There are no extra taps, the copper wire is wound in bulk on the rotor. The ends of the winding are connected to contacts that are located on the back of the rotor
Particular attention, of course, is paid to the magnetic circuit, due to which the field is formed around the coil. When rotating, the magnetic field induces a certain potential in the stator windings
Actually, this is what the entire operation of the generator is based on. But there are many smaller nuances that we can talk about for as long as we like.
Repairing a generator - VAZ features
To check the car's power supply, you need to take measurements at the battery terminals. To do this, you need to start the car and let it run for a few minutes. After this, take readings with a terminal tester. Next, turn on all possible car devices, dimensions, tape recorder, heating and repeat the measurements. With a properly functioning voltage generator, as well as its regulator, the average voltage in the network should be 12–13 Volts.
The most normal voltage in a VAZ 2109 is 14.1 Volts. If your readings are more or less than the acceptable average, then you need to start repairing your generator. First of all, you need to check the ground on the generator block. It often happens that it oxidizes under the influence of moisture. Because of this, it may not carry enough current to the vehicle. This terminal is located on the generator block; it needs to be cleaned and lubricated.
Another reason for a lack of vehicle current is a sufficiently worn or loose alternator belt. Using a belt, the generator is driven by the operation of the car engine. If the belt is not tensioned enough, it will slip while driving. Thus, the car generator will not perform the required number of revolutions, and accordingly, the required amount of current will not flow.
If the generator does not produce enough voltage, the battery is not fully charged, which significantly affects its service life. To fix the problem, you need to replace the belt or tighten it. It is very important not to overtighten it, as during movement it will stretch much faster or may even burst. You should not buy belts of dubious production - a low-quality belt wears out very quickly, dries out and stretches.
Lada Priora - generator replacement
The Priora requires a powerful generator; the car has a lot of electronics and a weak installation cannot cope with it.
A generator labeled 5102.3771 is recommended for the Priora, providing a power of 80 A; on luxury versions with even more electronics, a 115 A device is installed. Then which generator is better to install on the Priora?
Car owners recommend a unit produced by KZATEtm Samara plant under number 9402.3701-14, producing 115 A.
There is no need to modify it during installation, you just need to find the connector, because there are differences from the standard one. You can use a plug from a VAZ-2108 from the limit switch for turning on the reversing lights, which costs only 20 rubles.
Next, you will have to make a little modification when connecting to the “B+” power terminal in order to fit it to the desired size.
The cost, of course, of domestic units is higher than that of Chinese or Bulgarian ones, sold for 2200 and 3000, respectively. For Russian ones they ask for about 4000. But if you need repairs with Russian-made components, you can easily find spare parts.
Symptoms of a problem
One of the signs is that the battery will discharge very quickly and become unusable faster. Any car owner who prefers to repair their vehicle with their own hands can cope with the elimination of this breakdown. In this article we will figure out how to change the brushes on a generator.
Experts recommend changing alternator brushes every 50,000 kilometers or every four years.
The principle of how to change generator brushes is no different from the fuel injection system; it is the same for the carburetor and injector.
A sign of too much wear on the alternator brushes is when the brushes become so worn that the alternator cannot maintain a charge to the battery. But keep in mind that there can be many reasons for the battery draining too quickly, however, it is better to check them.
How to check the generator yourself
How to check a VAZ generator using the example of model 2109. Generator type 94.3701 alternating current, three-phase, with a built-in rectifier unit and an electronic voltage regulator, right-hand rotation.
Generator connection diagram. The voltage to excite the generator when the ignition is turned on is supplied to terminal “D+” of the regulator (terminal “D” of the generator) through indicator lamp 4 located in the instrument cluster. After starting the engine, the excitation winding is powered by three additional diodes installed on the generator rectifier block. The operation of the generator is controlled by a warning lamp in the instrument cluster. When the ignition is turned on, the lamp should be on, and after starting the engine, it should go out if the generator is working. If the lamp is brightly lit or glows half-lit, it indicates a malfunction.
The “minus” of the battery should always be connected to ground, and the “plus” should always be connected to the “B+” terminal of the generator. Failure to turn the battery back on will immediately cause increased current through the generator valves and damage them.
It is not allowed to operate the generator with the battery disconnected. This will cause short-term overvoltages to occur at the “B+” terminal of the generator, which can damage the generator voltage regulator and electronic devices in the vehicle’s on-board network.
It is prohibited to check the functionality of the generator “for spark” even by briefly connecting the “B+” terminal of the generator to ground. In this case, significant current flows through the valves and they are damaged.
Replacing brushes on the carburetor and injector with removal of the generator
- First loosen the generator.
- Remove the alternator belt. Please note that an inoperative alternator belt may also be a symptom of alternator problems. To check the belt, you need to bend it and inspect the surface for cracks. If there is deformation, replace the belt.
- Start the engine.
- De-energize the battery by removing the ground wire. This operation must be carried out to prevent a short circuit.
- Remove the wire going to the generator.
- Remove the engine crankcase protection.
- Unscrew the bolt that secures the generator from below.
- Lock the rotor with a minus screwdriver to immobilize it.
- Unscrew the pulley.
- Remove the generator casing.
- Remove the plastic protection to gain access to the generator brushes.
- Using a screwdriver, hook the power plug that comes from the brush holder.
- Pull the brush holder up. You must continue to apply force until it is removed. Perform the operation more carefully so as not to damage the soldering.
- Remove the plug and brushes of the generator.
- Unscrew the bolts securing the brushes, as well as the brush holder.
- Remove the voltage regulator. Remove the brushes and the brush holder. Don't be afraid of damaging them, because they will have to be replaced anyway.
- Remove the two pairs of bolts securing the two parts of the generator.
- Remove the back cover. To do this, you need to insert the generator and the cover into the slot. Pull up. This way you will remove the cover.
- Screw the nut onto the generator rotor.
- Carefully remove the generator.
- Visually inspect the generator parts for wear. If it is too big, replace them.
- Loosen the brush holder bolt.
- Replace the generator brushes with good ones.
- Reassemble in the opposite order and install the generator in its place.
Replacing generator brushes without removing the generator
This method is used when the problem is definitely in the brushes and removal and inspection of the generator is not required.
- Disassemble the car's generator. But do not remove it completely (do not unscrew the generator mounting bolts).
- Clean the brush holder socket. It is better to do this by blowing with compressed air.
- Clean the brush holder with a cloth.
- Remove the brushes.
- Clean all contacts.
- Check the elasticity of the spring. If it is insufficient, replace the spring.
- Polish the slip ring if it has visible defects.
- Install the brushes and reassemble the generator in reverse order.
Replacing alternator brushes on a VAZ 21099 car is not at all difficult. Any car owner who prefers not to take their vehicle to a service center, but to carry out the maintenance themselves, can handle this.
For proper repairs, you only need detailed instructions given in this article and a tool that every car owner has.
Generator brushes can fail from time to time and require replacement. If this happens, you can independently carry out work in this area and restore the functionality of your vehicle.
Before starting work, it is very important to prepare in advance all the necessary details that may be needed to complete the action.
Disassemble the car and remove the alternator to make work easier. Having removed the generator, you can proceed directly to repairs. After completing all the work, install everything in its place and secure it as it should.
If you have a question about how to properly repair brushes, it is best to study the video material, which explains in detail how to quickly get the job done quickly and efficiently. The specialist also explains the main nuances that you need to pay attention to when carrying out the work. That is why, as statistics show, there are no problems after the work is completed.
The VAZ 2109 car is a second group car with a hatchback body type, common among the middle class of people. The presence of a generator in a VAZ 2109 car is not new; every motorist should know this.
The generator supplies the car with electric current, which is needed to operate all electrical appliances. It also recharges the car battery, which is necessary for its movement. A generator malfunction will result in the vehicle running autonomously. The car's operation will be automatically transferred to the battery, but without recharging, the battery will not last long. The car's generator may fail to work due to a malfunction of the brushes that collect and conduct current. They might just wear off.