Causes of breakdown and repair of VAZ-2107
In many ways, of course, the wear and tear of the structure and parts depends on the frequency and accuracy of use. Many novice drivers have no idea how to repair a G7 engine; they don’t even know where to start. For convenience and complete understanding, we explain that the car is far from new, its gasoline consumption is enough to drive, but it itself has lost its traction, so in fifth gear it will refuse to go uphill, so you have to drag yourself to something smaller.
The actual consequences of such driving:
- overheating of the engine itself;
- the appearance of unnecessary noise when driving;
- the appearance of knocks;
- oil pressure pump overvoltage.
All this forces you to get to your original destination on suction. As a result, we notice that the engine temperature exceeds the normal temperature, after which the car simply stalls. And of course, then you will try to figure out what the cause of the breakdown is, but having not found it safely, you will go to the service station to have your car repaired.
In such cases, these are the following malfunctions:
- complete wear of the distribution shafts and the appearance of potholes, nicks and burrs on them;
- defects in the spline, grooves on the shaft with associated clogging of its filter with unnecessary debris.
What reason?
With such engine overloads, the lubrication functions of the motor did not change for the better. The engine simply lost its properties, therefore, the parts that rub became unusable, and the engine simply jammed.
At the service station you were repaired, given a check for a tidy sum, and you are at a loss as to what they did to your car, and this is what was done:
- your chains have been tightened;
- replaced the oil pump with a new one;
- changed the oil in the engine, after washing it;
- cylinder heads were replaced;
- replaced most of the gaskets and oil filter;
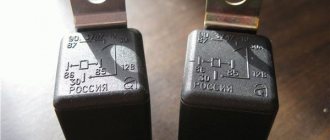
- Installed a new relay and changed the spark plugs.
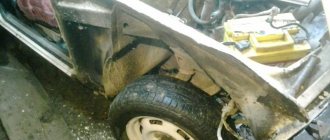
Replacing thresholds with your own hands
Before changing the thresholds 2107, preliminary work is carried out related to the preparation of the tool and body. Required repair kit:
- pliers;
- Bulgarian;
- electric arc welding machine;
- drill;
- chisel;
- new threshold, amplifier;
- anti-gravel mastic;
- anticorrosive;
- sandpaper R-80;
- automotive putty;
- primer, degreaser;
- auto enamel.
Step-by-step algorithm for preparatory work:
- It is necessary to raise the car onto an overpass or level on a flat surface.
- Disconnect the negative terminal from the battery.
- Remove the doors. Leave the loops in place. In some cases, if the outer panel and amplifier are completely changed, the fender will be removed.
- Remove the headlights and front bumper.
- Carry out initial corrosion cleaning to mark replacement angles. If the threshold is cut out completely, remove the plastic lining from the pillars, wrap the floor covering, and protect the body paintwork with mounting tape or film.
Dismantling for complete replacement
Since the VAZ 2107 was produced for 30 years, depending on the year of manufacture, the car sills have a different design. The box may have one or two seals, a solid or separate amplifier. The instruction manual indicates the specific version of the unit for each year's car.
Cutting out a part during a complete replacement takes place in the following stages:
- Determine the lines of welding connections to the bottom.
- Cut the threshold with a grinder in sections, starting from the front door, then to the rear and center, going around the base of the central pillar to avoid cutting out the pillar reinforcement.
- Drill out the factory contact welding spots.
- Remove the element.
- Clean the burrs and remove traces of cutting.
- Try on a new element. To do this, install the part on bolts or screws. The holes from the screws are then welded.
- Place the car in transport position, check the gaps between the door and the fender, and adjust the position of the new part if necessary.
After dismantling and preliminary fitting, all elements are welded. The inside must be treated with a rust converter and an anti-corrosion oil or paraffin compound.
Welding work
Overcooking the thresholds begins with installing the amplifier. The part is welded to the bottom through perforations; if a metal plate acts as an amplifier, then holes with a diameter of 6 mm or more should be drilled in advance. Step-by-step instructions for welding work:
- The amplifier is welded semi-automatically; for convenience, the plate is pressed with welding clamps. The order of welding the clamps: in the area of the front wheel arch, the central part, the rear wheel arch.
- For ease of work, if the amplifier in the area of the central pillar is not damaged, the overlay is welded on top of the old, pre-treated piece of the amplifier.
- The threshold cover is welded. It is recommended to secure the exterior with the doors already installed.
- The connector is attached. The part is connected to the underbody panel; it is more convenient to carry out welding work from the bottom of the car.
Overwelding can be carried out in two ways of connecting the part to the body: end-to-end and overlapping. When making butt joints around the perimeter of the parts being welded, there is no need to apply an additional layer of putty to level the surface.
An overlap connection is simpler; with this method, it is necessary to leave up to 1 cm of the old threshold in order to place a new element on the old part. This method is not used if corrosion has affected the bottom of the car, otherwise it will be necessary to weld metal patches or inserts for reinforcement.
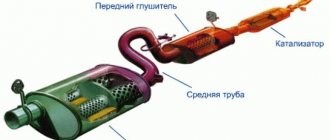
Engine and service station
If you thought that you could do everything yourself, then we have to disappoint you - you cannot do without help at the station. You simply cannot do the procedures that a master at a service station will do, unless, of course, you have done this before. The technician will bore the cylinder block, grind the crankshaft, and the like.
Engine repairs from the “seven” can only be carried out in the service stations designated for such, where the necessary equipment, machines and qualified workers are available.
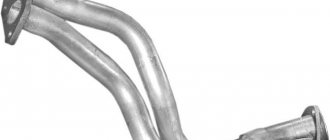
VAZ-2107 engine and its inherent problems
- Problems and malfunctions of the power system, the fuel pump and both pipelines may even completely stop working.
- The presence of unnecessary dirt in the fuel and air jets.
- Malfunction of the intake device membranes due to their damage.
- Debris in the pump filter and its malfunction.
- Complete wear of the camshaft, timing belt, cylinders and pistons.
- Breaks of high-voltage wires and breakdowns of spark plugs.
There are also defects in the injection engine that you can eliminate with your own hands without outside help, if you try a little.
Motor malfunctions
When a driver takes care of a car, makes sure it is clean and in good working order, this shows that he cares both about the car and about himself, because a well-maintained car is pleasing to the eye and breaks down many times less often. And, of course, care helps save fuel consumption and improve engine performance.
Contamination of the injector on the VAZ-2107 is the cause of a decrease in the throughput for fuel injection into the combustion chamber and a violation of the composition of the fuel-air mixture.
The injectors can be cleaned up a bit by electronic systems. But this method is not the main one, since it will not be possible to completely clean the injectors initially, which means that your “seven” will continue to consume more fuel and traction will decrease.
DIY threshold repair
Repair of thresholds without complete or partial replacement of parts is carried out in the following cases:
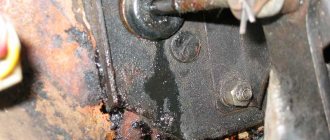
- Small areas of corrosion on the outer panel.
- Dents from mechanical damage.
- Renewing the anti-gravel coating and painting after winter if the paintwork has peeled off due to exposure to salt reagents and electrolyte.
Depending on the defect, the repair method is selected. Since the sills on the seven are not removable, it is advisable to place the car on a flat, high surface or lift it with a jack.
Before repairs, the condition of the hinges on the doors is checked. The displacement of the elements and the skew of the door indicates that the amplifier and connector are rotten and the body is deformed. Then a complete replacement of all parts is necessary.
For minor corrosion damage, repairs proceed in the following stages:
- Use an angle grinder (grinder) to remove the old paint.
- The surface is cleaned with emery. If there is a through hole, then it is necessary to cut out or knock out the waste metal and check the condition of the amplifier.
- The surface is degreased and primed.
- The hole is sealed with fiberglass and epoxy glue.
- If there is no through damage, automotive putty is used.
- After drying, a layer of anticorrosive is applied, and then the part is painted with enamel.
Types of mechanism, design of window lifters
Some internal mechanisms are different. There are rack and cable drive types. Each device differs in technical characteristics and has its own advantages and disadvantages:
- The rack and pinion device is more reliable. The risk of glass distortion is minimized even after long-term use. The movement of the device is carried out thanks to gears that run along a belt rack. However, the carriage requires regular lubrication, which is why you have to disassemble the door card at least once a year.
- The cable device breaks more often. It often jumps off the rotating mechanism. Slow movement and resistance of the rubber seals can cause the cable to come off. This happens if you turn the handle sharply. The main advantage of the mechanism: good maintainability without serious financial costs.
The devices have the same location. The window regulator of the front right door of the VAZ 2107 car is located identical to the mount in the driver's side panel. The design includes:
- handle;
- cladding with a lock;
- socket, roller bracket;
- screws;
- mechanism with gears;
- pressure plate;
- glass;
- cable;
- roller: upper, tension;
- fasteners.
Damage diagnostics
How to understand that an injector needs to be replaced, checked or repaired? Even without sensors, you can understand that repair of fuel system elements is required if there are 1 of 2 main signs in models 2107, 21074:
- Unstable engine operation. Sometimes it may stall or have difficulty starting.
- A much less obvious sign is loss of power. This effect is noticeable if you mostly drive at medium speeds, but at high speeds it is very noticeable.
- The last sign is recorded only by sensors - the pressure inside the system increases.
The cause of such failures is clogged injectors; even diagnostics are not needed. Cleaning helps restore the engine to its original performance. If the problem has not been resolved after cleaning, it is worth checking the tubes and injectors for damage or breakdowns. In such cases, it is better not to start repairs, but simply replace the damaged parts with new ones.
Sometimes it is impossible to determine on your own where the damage is, and only then will diagnostics at service centers come in handy. A blockage can cause quite serious damage to the VAZ 2107 injector, as well as rupture of channels. The pressure that arises inside the system can easily destroy the most fragile parts. Here you won’t be able to fix the situation with your own hands, even if you have a complete diagram of the car at hand. There is only one conclusion - you need to devote a lot of time and attention to cleaning injectors and do it regularly.
How is the front suspension designed?
View of levers from below
The front suspension of the VAZ 2107 has an independent design and consists of two levers: one at the top, the second at the bottom. There is also a coil spring and a telescopic strut shock absorber. The suspension has an anti-roll bar.
The lower arm is firmly bolted to the suspension cross member, and it, in turn, is supported by the front side members. The upper arm is attached to the mudguard strut, but the lever does not have its own axis - it is a long bolt that passes through the strut.
To ensure the rotation of the levers around the axis, the design includes silent blocks, which are rubber-metal hinges. At the ends of the arms there are ball joints, to which a steering knuckle with a pin for installing the hub is attached. The coil spring is located between the mudguard post and the lower control arm. To prevent it from moving, the ends are installed in support cups. Inside the spring there is a hydraulic shock absorber. The shock absorber body is attached to the lower arm via a rubber-to-metal joint.
The shock absorber rod is attached to the body through rubber cushions. The anti-roll bar is attached at its ends to the lower arms of the chassis, and at the center to the side members. To prevent contact between the side members and the stabilizer, rubber cushions are placed between them.
Run-in
Engine running-in is carried out with the vehicle stationary. The engine starts and runs for half an hour. Gradually it is necessary to increase the speed to approximately 2000 revolutions.
While the engine is running, listen for any extraneous noise, which is extremely undesirable. Do not be alarmed by the noise in the first seconds of engine operation, since the oil has not yet entered the engine and it will operate for a short time with more noise than usual. Monitor engine tightness and other issues of improper operation and, if necessary, stop the engine, find the fault and continue repairs. These instructions for replacing the piston, as well as the necessary videos, will help you carry out this rather labor-intensive process yourself.