How to diagnose the trunk door lock of a Lada Granta liftback
During the operation of Lada Granta liftbacks, owners may encounter a situation where, while driving, the door open indicator lights up on the instrument cluster. Or, when the fifth door is closed, the light in the trunk is on and the car cannot be set to alarm. To identify the causes of these malfunctions, LADA dealership centers use information letter No. 87-19 “On diagnostics of the tailgate lock of Lada Granta liftback cars.”
The diagnostic technique is as follows
:
1. Open the tailgate (the trunk light is on), note that in this case a two-position lock 21910-6305010-10 (84500-02338) is used.
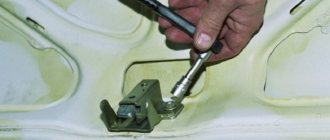
2. With the door open, manually close the lock 2 clicks using a screwdriver with a diameter of up to 6 mm, moving it beyond sector “B”. Closing the lock by 2 clicks is shown by the levers “A” located at the right point of movement until it stops according to the photo below:
Check that there is a guaranteed gap between the emergency trunk release lever and the inner panel of the tailgate. The gap should be from 0.3 mm to 0.9 mm.
If there is no guaranteed gap between the lever and the door panel, or the lever is jammed, with the formation of rubbing on the lock lever, it is necessary to remove the lock to modify the plane of the plastic lever. Using a mechanic's tool, remove 0.5 mm of the width of the lever to eliminate harmful contact causing blocking of the lever and blocking of the limit switch.
If, after carrying out the above actions, the lighting in the trunk when closing the trunk lock manually with a screwdriver for two clicks with the tailgate open, while the interior doors are closed (make sure the door limit switches are in working order, if any, taking into account the configuration), and the hood is closed (make sure the limit switch is in good condition if it is included in the package), dismantle the trunk lock and check the limit switch circuit along the circuit of pins No. 1 – 2 for opening when the lock is closed.
If the lock's limit switch does not open the circuit at pin No. 1–2 when closing it, replace the lock and consider the lock to be a defective part.
If there is no closed circuit at pins No. 1–2 when opening the lock, also replace the lock and consider the lock to be a defective part.
3. If the lock is in good working order after carrying out diagnostics according to point 2, and the defect “the light is on in the trunk” is absent when the lock is manually closed with two clicks on the open tailgate, but the defect is present when the tailgate is actually closed, while the door is in the gaps has no deviations relative to the body, and it is impossible to determine visually how many clicks the tailgate lock is closed; it is necessary to adjust the door lock latch.
Let us remind you that you will find other instructions for self-repairing Grants in this section.
Electric trunk lock Granta liftback installation
For work we will need:
1. Liftback)) 2. Opening button with connector or 2 female wires. 3. Electric drive (installed StarLine SL-2). 4. Cable (approximately 30 cm) and 2 clamps. 5. Electrical tape, wire cutters, wires, flat and Phillips screwdrivers, 8 and 7 wrench.
To install the drive, you need to get rid of the lock rod, probably many people know, it is firmly in place and will not allow the drive to open the lock until you insert the key into the lock, so we install a cable instead, this way you can open the trunk from the outside.
Disassembling the trunk door
We pull off the central plastic (2 pistons and on the edges of the latch)
Unscrew the 2 opened screws and pull them off (on two pistons)
A pair of screws have opened again, unscrew them
We will pull off the main casing from these corners, and before that we unscrew the 2 bolts in the front handles
The trim comes off very easily and this is what's underneath
And here is the thrust of the lock (from the cylinder to the lock itself), we will get rid of it.
The drive we will implement
We select a place for it, I found it here, we make notches for the holes
Pulling off the traction from the larva
We drill holes for the self-tapping screws, put the drive together with our rod inward and just attach it to our place to determine the length of the rod. We hooked up the drive, pulled it out to its full length and the door lock should be open. On the top of the lock there is a ring that you need to pull to open it (it will be clear later in the photo), we bring the rod to the ring and make a notch with wire cutters.
Now we take everything out, the electric drive and the lock itself, by unscrewing 2 bolts with a 8 key. We pull out the right corner of the lock and unhook the second end of the rod, then completely pull out the lock and remove the connector.
Here is the drive rod with a notch, at a distance of 2 cm from the notch we chop off the excess tail with a chisel
Along the notch we bend the rod into the letter “G” and insert it into the lock
Review and installation of limit switches on the Lada Granta Liftback. Recommendations from experts
The Lada Granta Liftback car in the “Standard” configuration is equipped with only one limit switch at the driver’s door. The remaining three doors have built-in rubber plugs.
The “Norma” configuration has a similar arrangement, but the owner can additionally install limit switches on the Grant Liftback independently. To do this, first remove the decorative inserts on the thresholds. Only the “Lux” configuration provides a full set of functional limit switches for four doors.
The operating principle is as follows:
- when the driver's door is activated, the limit switch contacts open, the indicator on the dashboard lights up, and the interior lighting turns on;
- When the remaining three doors are activated, only the interior lamp lights up.
What are the characteristics of the trunk?
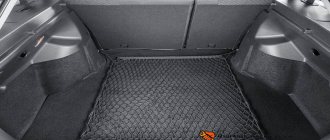
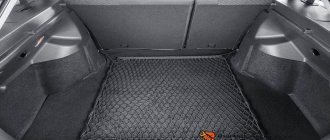
What is the actual volume in liters? If you fold the rear row of seats, the Granta's trunk volume will reach 770 liters, and in the standard position of the rear passenger row, the trunk volume will be 440 liters. This model is the first ever liftback among the entire AvtoVAZ family. In terms of luggage compartment capacity in its standard state, the Granta managed to outstrip such a popular European hatchback as the Volkswagen Golf. However, with the rear row seats folded, the Golf takes the lead thanks to the trunk volume of 1200 liters, which turned out to be unattainable for the Lada designers. After all, the primary goal was to maintain a single wheelbase and platform similar to a sedan.
So, what is the real opinion of Granta owners about the capacity and ease of use of the luggage section, because its volume in liters is quite impressive. The Internet is replete with an incredible variety of photographs posted by the owners. Sometimes the Lada Granta liftback can plunge you into amazement - how much useful luggage its luggage compartment is ready to accommodate. However, in reality, not everything becomes as rosy with the amount of space in the trunk as it is positioned in advertising.
The rear seats have the only ability to fold completely when the front seats are moved close to the instrument panel. The inconvenience is that the rear headrest requires preliminary dismantling before folding. The top shelf in the luggage compartment can be removed without any extra effort, which is very convenient when transporting large items. Due to this action, space will not be added, but the luggage will not rest against anything. Niches on the right and left sides are suitable for storing medium-sized bags or a set of essential tools in case of an unexpected breakdown.
Above these technological recesses there are hangers designed for bags, which eliminates the need to clutter the rear seats with them. There is a light above the left niche, but it turns on when the low beam of the head optics is activated. An excellent solution for cloudy weather or dark periods of the day, however, the inconvenience is that you may forget to turn on the headlights beforehand.
Under the luggage mat you can find a full-fledged spare wheel, to which the manufacturer has added traditional attributes: a jack and a wheel wrench. There is enough space in the niche to accommodate a spare wheel with a large radius (if you wish to install 16-inch wheels). There is still room for the tool. This is easy to verify, you just have to look at the photo.
The wipers do not adhere well to the glass
The luggage compartment mat in the LADA Granta liftback made of rubber has not become popular among owners. The quality of the material is a little worse than expected, and it will not be possible to stick a traditional “motorist’s bag” to its surface with Velcro. The option of a rug with a pile covering will not be practical, since it is subject to the risk of contamination from spills of various liquids or dirt.
The rubber cover in the trunk can be easily placed on top of the standard one. If the niche for the spare wheel will be used for other luggage, then you should take into account the fact that one mat will rest against the niches on the sides of the trunk. If you place any object above the spare wheel niche, it will fall into its recess.
Review of Manufacturer Prices
| Name/article | Price, rub.) |
| Limit switch with cap 1118-3710199 | from 160 |
| 11190-3710200 | —/— |
| Rubber cap 11190-371020600 | from 35 |
| 104035756 | from 175 |
| Dello 3094705636N0 | —/— |
| Hans Pries 104035756 | —/— |
| 11190-371020000 | —/— |
*prices are current as of 10/07/18.
The service life of factory rubber caps is limited, only 1.5 - 2 years. The reason lies in the low quality of materials. In winter, drivers often encounter freezing of the limit switch and hardening of the rubber cap. As a result, lighting activation is delayed. The central lock often blocks the doors due to unstable operation of the limit switch. There are several ways to troubleshoot the problem, which we will discuss below.
Illumination of the ignition switch Lada Granta
Algorithm for the operation of the ignition switch illumination of the Lada Granta.
help the channel: https://www.donationalerts.ru/r/rybkin EARNINGS ON YOUTUBE: https://join.air.io/aleksei-NN, go in, register, add.
Illumination of the ignition switch on the Lada Granta, the car's comfort unit is responsible for ignition and extinction, connected.
Hi all. Look what a little thing. It’s NICE. The price was 46 rubles, and this miracle lasted about a month! Here is the link to.
Replacing the ignition switch for Lada Granta. Replacement of front door locks of Lada Granta. Removing and installing handles.
Using the example of several instrument panels, I show how to find +12V when turning on the ignition on the Priora panels.
You can read about my car here https://www.drive2.ru/r/lada/1303800/
Order this and more. here https://www.drive2.ru/users/anatolii775/#blog.
Illumination of the ignition switch. The diagram is here. https://www.drive2.ru/l/5942802/?key=0G0bAAAAAAB_9nKNvyfSCAAATpnjlw2JzXZClniIuFzX-fNNLZM.
At a cost of 100 rubles. The installation took 30 minutes - the result is amazing! group in VK https://vk.com/club147258483.
Cool! Illumination of the Ignition Switch in the Auto! From Aliexpress! I bought it here: https://ali.pub/1ef355 also: https://ali.pub/1ef3al And here: https://ali.pub/1.
Door switches on Lada Granta Liftback
Structurally, each limit switch is located in the lower right corner of the doorway. As soon as the door opens, the contacts open and a signal is transmitted to the dashboard and interior lighting unit.
Freezing of the rubber tip contributes to the hardening of the cap and unstable operation of the door activation mechanism. To maximize the service life of rubber tips, they are periodically lubricated with silicone grease to maintain (increase) elasticity. Fixation to the body is carried out using spacer clamps made of plastic. When the base is inserted into the socket, the clamps expand, preventing the base from moving freely.
To connect the sensor to the power circuit, two terminals “+” and “-” are connected to the wires coming from the interior lighting. Be sure to observe polarity! As a rule, “plus” is indicated by red insulation, and “minus” by white with a black stripe.
The process of replacing door switches
To carry out this procedure, in addition to the door sensor itself, you will only need a 10-mm open-end wrench. The sequence of actions will be as follows:
- First you need to disconnect the wire of the negative terminal of the battery;
- Then you need to grab the end switch and carefully remove it from the seat, overcoming the resistance of the clamps holding it;
- Afterwards you will need to squeeze the limit switch block clamp and disconnect the wiring harness block from it;
- Your next step will be to remove the protective cap from the limit switch;
- Installing a new device involves performing actions similar to those described above, but done in the opposite order.
Using this method, you can easily remove and change the limit switches located on all car doors.
Where is the trunk limit switch of the Lada Granta Liftback
The trunk lid activation sensor is located on the left side, closer to the lamp. However, it is installed only in the “Lux” configuration. Rubber plugs are inserted into “Standard” and “Norma”.
In order to prevent sudden activation of the central locking and door locking, owners optionally install sensors. Considering the simplicity of the procedure, you can do this either independently or by contacting a service station for help from specialists. After installing the trunk end switch into the seat, we lay and connect the electrical wiring. “Plus” is powered from the side lights of the lamp, “minus” can be from the body or on the block with wires. Black with a white stripe is “minus”, red is “plus”.
In the Luxury package, the sensor is built into the trunk lid lock by default. When the lid is closed, the sensor automatically turns off the power from the light.
Lada Granta white cloud › Logbook › Trunk lock, disassembly, limit switch
Like many others, I encountered the fact that the trunk light stopped working.
The reason is simple - the limit switch in the lock has died. The purpose of the preparation is to clarify the cause and take measurements. Result: 1. Worn limit switch 2. Width between contacts - 10mm I poked the switch, checked it with a tester, put everything back together, the lock worked. Apparently the switch is stuck, or the contact pair has oxidized. I’ll buy an analogue in radio components. Disassembly is hampered by the rivet, which is the axle. Sharpen it. Unclip the housing and move it away from the metal part. Then the pressed cover will come out of the grooves.
The limit switch was re-soldered. I bought one similar in size from radio parts, but with a ski. Because with a long pusher it was not.
Sequence of actions for self-installation of limit switches on the Lada Granta Liftback
- silicone grease;
- rags;
- rubber tips;
- screwdriver with a flat bit.
Replacing door switches
- Remove the rubber tip.
- Use a screwdriver to pry up the sensor housing and remove it from its seat.
- From the back side, remove the block with wires.
- We install a new sensor.
- We assemble the structure in reverse order.
Replacing the trunk limit switch
- Open the luggage compartment lid.
- Remove the rubber protective cap from the sensor.
- We take out the limit switch, remove the block with wires.
- We install a new sensor and complete the assembly of the structure.
Trunk lid lock with electric drive Lada Granta Liftback
- RUR 1,890
- Description
- Characteristics
- Reviews (0)
- Question answer
Electric trunk lid lock for Lada Granta Liftback. Not suitable for Lada Granta Sedan
Product characteristics
We recommend watching
Trunk lock connector for Lada Granta and Vesta cars. Suitable for Granta se...
Original factory trunk lock for Lada Granta cars in the liftback body. ..
New items
An analogue of the original rear door seal for the Lada Vesta station wagon (not suitable for a sedan). The seal must be replaced..
An analogue of the original rear door seal for the Lada Vesta sedan (not suitable for a station wagon). The seal is subject to...
Crankcase and gearbox protection for Chevrolet Niva (Lada Niva) and Niva Travel. Sheriff protection is designed to protect...
Sheriff protection is designed to protect components and assemblies that are located in the lowest points of the car. I am developing Sheriff protection...
Front springs for Lada Vesta cars (sedan and SW station wagon, except Cross) from the manufacturer Phobos. Springs are made m..
A set of original front and rear plastic fender liners for Lada Xray cars (not suitable for Xray Cross). Cost..
Set of springs (repair kit) of front brake pads for Lada Vesta, Largus, Xray Cross cars (not suitable for regular...
A set of original front and rear plastic fender liners for Lada Xray Cross cars (not suitable for regular Xray)..
A set of original front and rear plastic fender liners for Lada Granta FL cars from 2022 (all body types). Stop..
LECAR tire cleaner is designed for high-quality express cleaning and renewal of the side surfaces of tires and rubber tires.
An effective product designed to restore the original appearance of tires, bumpers, as well as rubber and plastic...
Anti-scotch spray LECAR is designed for quick removal of stickers, tape, decals and various adhesive compounds from bumpers, glass..
LECAR rust solvent is designed to facilitate the disassembly of rusted, oxidized threaded connections, moving parts and...
Universal Teflon grease is intended for lubrication of bearings, cables, chains, gears, guide rails, rollers...
LECAR graphite lubricant is intended for lubrication of friction units of automobiles and industrial equipment. Reduces contact friction..
The multifunctional product is intended for use in everyday life and industry. Penetrates perfectly into thin gaps, softens and...
Fast-acting penetrating lubricant TERMOKEY with a freezing effect. Destroys layers of corrosion products due to shrinkage deformation..
LECAR hand cleaner quickly and effectively removes dirt, oil, soot, ink, resin and other technical contaminants. Thank you..
Graphite lubricant is intended for lubrication of rough, heavily loaded mechanisms (open gear drives, threaded connections..
Set of springs (repair kit) of front brake pads for cars Lada Vesta (except Vesta Sport), Largus, Xray Cross (not ..
How to place an order (step-by-step instructions with photos)
Add item to cart
Add the items you want to your cart.
Go to checkout page
To do this, click on the cart icon and then on the Place an order button.
✔ 3. Specify data
Indicate the last name, first name, patronymic of the parcel recipient, delivery address, phone number and email.
Select delivery
The site will calculate the cost and delivery time. You only need to choose the appropriate option.
Select payment
Choose a convenient payment method for your order
How to extend the service life of the door activation sensor using the traditional method
Craftsmen have come up with many ways to resuscitate a rubber cap, prevent it from deforming and freezing. We present the most effective methods:
- insert for the rubber tip of the spring. The diameter of the coil is “6”, the length is 1.0 cm. When the door is opened, the spring pushes the tip to its original position, the contacts close, the interior lighting is activated;
- replacement of standard caps with parts from the second generation Opel Astra. The dimensions are identical, the only difference is in the shape, it is more convex, which contributes to the sensor’s quick response to opening/closing the door;
- systematic application of silicone lubricant to a rubber product to restore elasticity.
Elimination of operational failures
Devices begin to fail at low air temperatures. On the Lada Granta the door switch is protected.
The cause of equipment failures is the protective caps.
The protective shell is made of rubber. The cap loses its plasticity in severe frosts, which prevents the contacts from opening. To prevent failures of limit switches in Lada, the following measures are used:
- Install the springs under the rubber cover. Spring parameters: diameter - 12 mm, length - 20 mm, wire thickness - about 1 mm. The elastic spring will not let you down even at minus 40°C.
- We remove the protective caps for the winter. You will get rid of the cause of the problem, but the switch remains defenseless against moisture and dirt.
- Lubricate rubber surfaces with silicone. Can help with mild frosts (minus 10°C).
- Treat with water-repellent liquid. This is a temporary measure. Temperature range - up to minus 50°C.
- We replace Lada brand products with imported analogues from DAEWOO NEXIA or CHEVROLET AVEO doors. When purchasing, you should take a factory sample to compare sizes. The housing is inserted into the standard hole and secured with a self-tapping screw.
Refinement of the Lada Granta alarm system will increase the degree of protection of the car, and interior lighting when opening the rear door will create comfort for passengers.
Reviews
| № | Positive |
| 1. | Kirill: I knew about the problem of freezing tips initially when I bought the machine. I immediately bought silicone grease and lubricated it on the inside once a quarter. It's been a year now that I haven't had any problems. |
| 2. | Vasily: after the first winter the sensor jammed several times. I took the cap off, cleaned it, and lubed it. Works properly, no comments. What happened is also my fault, since I did not carry out preventive measures in a timely manner. |
| 3. | Konstantin: I bought Grant at a dealership six months ago, the activation sensor works properly, the light comes on without delay, and an indicator lights up on the dashboard. |
| 4. | Ignat: a year has passed since the purchase, I have not made any investments, there are no comments on the mechanisms. Once there was a malfunction of the sensor. Moisture got inside, after drying the defect was eliminated. |
| 5. | Sergey: I agree with the majority of positive reviews, the limit switch works properly, the workmanship is good. Every month I lubricate the rubber tip with silicone. |
| 6. | Vladimir: It’s been the second year since I bought the car, I haven’t made any investments other than scheduled maintenance. I heard about the “disease” of the sensors on Grant, but I can’t confirm it. |
| 7. | Ivan: once in the winter the limit switch jammed, I didn’t buy a new one, I cleaned the old one. It still works fine. |
| Negative | |
| 1. | Victor: I can’t speak positively about the activation sensor, since this is the second time in a year that I change it at a service station. The doors of the Lada Granta locked themselves twice. |
| 2. | Vyacheslav: after the winter the sensor jammed, the doors were locked, the keys remained in the cabin. I called a service station technician to open it. |
| 3. | Alexey: I can’t recommend factory door activation sensors, as their quality is poor. Comrades advised installing from Opel, they say that the diameter is identical. |
Conclusion Limit switches on a car should always be in good working order. Provided proper maintenance and lubrication, the service life is at least two years. It is necessary to regularly analyze the condition of the limit switches in order to notice and prevent malfunctions in time. You should also adhere to the operating instructions.
Video - Lada Granta - door switches freeze? 3 solutions to the problem.
Lada Granta › Logbook › Adjusting the trunk opening force
Good day everyone. Can anyone tell me if on a Grant sedan it is possible to somehow regulate the force of the torsion bars of the trunk opening lid?
You don’t have to write advice like installing struts or springs. After looking at the mechanism, it seemed to me that without additional gadgets you can change the force, I just can’t figure out how.
According to the principle, there is the same mechanism as on the classics, maybe someone regulated it or there is a link to the material, otherwise I don’t come across something, but what I need is on the Internet
For clarification and in case I called something wrong, here is the mechanism for raising the trunk lid and theoretically it is adjustable. question - how?
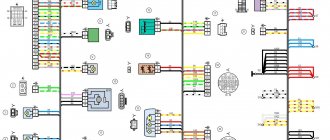
Connection points for car alarms on Lada Granta, the cheapest equipment
Ignition switch: +12 – brown ign1 – blue/black starter – red
Instrument panel: turns – blue and blue/black handbrake – brown/blue (diode breaks)
Driver's threshold: driver's limit switch - red/green, we connect the rest of the doors to it
Under the hood: Tahoe - white/black on the ignition module, the hood tip is in its normal place
Trunk limit switch – we install the connector on the trunk (the limit switch is already in the lock).
central locking .
Connecting the signaling to the central locking system
Now we get to the most interesting part. The contacts of the signaling relay must be connected to the gap in the brown wire (see diagram in Chapter 1). Moreover, this will be required regardless of the configuration. Oddly enough, we won’t need power cables at all. And the task now looks like this: you need a two-wire signal cable connected to the break in the brown cord.
- If you were able to remove the central lock control unit, connect the cable to the break in the wire connected to pin “7” of the control unit;
- If you have removed the door trim, then pull the cable out of it (from the point where the brown cord breaks).
It is clear that the second side of the cable must reach the relay connector of your alarm.
Option for the “Lux” package
So, this means that there is a button on the armrest in the cabin that allows you to lock the locks. From one of the contacts of the button, to which a “plus” is applied when pressed, you need to stretch the cord to the signaling unit. Nothing else is required, and you can connect the alarm according to the following scheme:
According to reviews, this option is suitable if we are talking specifically about the “luxury” configuration. By the way, the resistor can be connected to the gap in the wire designated “blue” (the common contacts are then connected with a jumper).
It must be remembered that when working with any electrical equipment, you must first remove the negative terminal from the battery.
Each cord that is re-laid must not touch metal surfaces. Otherwise, in places of contact, the wire is protected with a tube that can withstand temperatures of 250 degrees. This is how you can protect yourself from unforeseen consequences.
Option for the “Norma” configuration
Let's say there is no button in the cabin that allows you to perform emergency closing. Then you need to connect the signaling to the central locking system according to the following scheme:
As you can see, unlike the first option, there are no resistors here, and positive voltage is not used at all. But in the luxury configuration the effect that is characteristic of this scheme will not be observed:
- We perform closing from the key fob - all locks are locked;
- We try to open the locks with the key fob - only the driver's lock unlocks.
If you are satisfied with this property, try to implement the scheme in practice. And other options, more advanced, look much more complicated.
Read what is said about installation safety in the previous chapter. Do not neglect the advice about disconnecting the negative terminal. We work only with signal circuits, so nothing will fail even if connected incorrectly. However, be careful not to confuse the locking and unlocking relays, which are located in the alarm unit. This unit is usually equipped with a 6-pin connector (for details, see the signaling manufacturer's instructions).
Car alarm connection points for Lada Granta 2012
Ignition switch: + 12V - pink IGN_1 - blue Start - red
Left threshold: Turns - blue and blue/black Fuel pump - gray Driver's limit switch - red/green Handbrake - brown/blue
Tidy: Driver's limit switch - red/green Handbrake - brown/blue
Central locking - install an electric drive in the driver's door, if there is no electric drive in the door Trunk - white/black; harness in the trunk (install a diode) Tachometer - brown/red; In the configuration, the standard can be taken on the electric power steering unit
If the car has painted bumpers (standard equipment), then there is no need to install an additional activator; we connect pins 2 and 7 on the door lock using a power circuit. The locks on the doors are Kalinovsky, the activator is built inside, but the wires are not routed.
There is only a driver's door switch. The rest need to be installed and connected to the driver's limit switch, i.e. to red/green in the threshold. The limit switches are the same as the engine compartment on the Priora. The limit switches will have to be taken with a connector and wiring.
Size-independent trunk lighting Grants
| The trunk lighting of the VAZ 2190 is no different from previous AvtoVAZ cars, and only works if the dimensions are turned on and the trunk lid is open. To simplify the circuit, it is proposed to make the trunk lighting independent. |
The Lada Granta trunk light connector has two wires:
- Black and white is a mass.
- Yellow-red - this +12V appears when the lights are on.
Goal: route a permanent plus to the trunk light, and connect it instead of the yellow-red one. As a result, the trunk light will turn on when it is opened, regardless of whether the tailgate is on or not.
- White and red are a constant plus.
- Black is constant mass.
- Brown and green - mass from limit switches.
You can take the permanent positive from the ignition switch, we need the red wire.
The permanent plus from the radio (ISO connector) hangs on pin A4.
Some people are used to taking the permanent positive from the cigarette lighter (how to remove it); in the Lada Granta it is a white-red wire.
These are just some of the options where it is convenient to connect to constant +12V. We lay the wires inside the cabin under the plastic thresholds or under the headliner. By the way, the standard lighting in the Granta trunk is very dim, it is recommended to modify it.
Similar materials
- Author
- Message
Trunk light (does not go out)
Post by Spekrob » Thu Dec 18, 2008 5:31 pm
Re: Trunk light (won't go out)
Post by NeedAngel » Thu Dec 18, 2008 6:28 pm
Re: Trunk light (won't go out)
Post by Hranitel » Thu Dec 18, 2008 8:18 pm
Re: Trunk light (won't go out)
Post by Magadanec » Thu Dec 18, 2008 10:20 pm
Re: Trunk light (won't go out)
Post by Lehatrd » Thu Dec 18, 2008 11:19 pm
Re: Trunk light (won't go out)
Post by Hranitel » Fri Dec 19, 2008 11:35 am
