Let's not beat around the bush, but get right down to business. So, let's consider two cases.
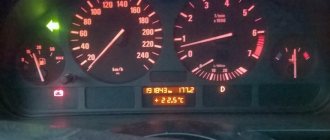
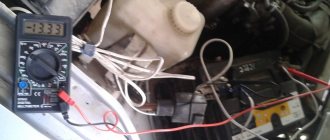
First: the battery charging lamp goes out when the speed increases, and the on-board computer signals an increase in the charge voltage. And as soon as you release the gas pedal, the readings decrease and the lamp starts to glow again.
The malfunction indicates a breakdown of the rectifier, or as it is also called a “diode bridge”. Another option is that the brush assembly has failed. In most cases, these are the reasons.
There is another example of a malfunction.
The battery light goes out after pressing the gas pedal, but only until the next time. In this case, the cause is the generator excitation circuit. Inspect the alternator on your car. Along with the positive terminal, another thin wire connects to it. This wire comes from the dashboard. Over time, the contact oxidizes or breaks, which leads to “recharging the battery.”
There is only one way out - to look for where the conductor breaks. Some drivers who have encountered a similar problem talk about the variable appearance of the lamp signal. After some time, a “one-time” malfunction develops into a permanent problem. In this case, you need to look for the break point on the copper terminals of the generator stator windings.
And one more recommendation from personal experience. When a malfunction occurs, many drivers blame the battery itself. They check the charge and electrolyte level, but all in vain, the problem is in the contacts themselves. On a new battery this may not be the cause of the problem.
What else could be causing the problem?
The appearance of a light on the dashboard does not always indicate a complete malfunction of the generator. However, problems are associated with it:
- The belt has become loose. The alternator belt slips on the pulley, causing the alternator to produce low voltage.
- Brush wear. The generator components wear out due to natural causes, which again leads to the supply of low voltage current.
- Poor contact on the generator. Unfortunately, the metal terminals that go from the alternator to the battery are susceptible to oxidation. This creates excessive resistance through which sufficient current does not flow.
- The battery itself. A worn-out battery cannot accept a charge, which is why the light on the dashboard lights up.
Troubleshooting - where to start
The first thing you should check is whether there is an overload in the on-board network. Of course, if your car has nothing installed other than a standard radio, then you don’t need to do this, but if you are a tuning enthusiast, then you should start checking with this option.
In order to check the load on the network, you will need to at least visually estimate the number of additionally installed light and sound devices, as well as compare their total power with the power of the generator.
If it ultimately turns out that these two values are approximately equal or the power consumption even exceeds the generated power, then you will need to remove some devices (what exactly to “sacrifice” is up to you).
After this procedure, you will need to start the car and check the operation of the generator. If the battery starts to charge, then the reason was precisely the overload.
The fact that the power generated by the generator is not unlimited should always be remembered when connecting new electronic devices to the vehicle’s on-board network.
The second thing you will need to check is the compliance of the generator and battery installed in the car. Thus, some motorists who install additional equipment on their cars also install batteries with increased power, thinking that they will be able to provide energy to all newly installed devices.
What's the result?
If a malfunction occurs, the driver needs to check the battery, generator and wiring. According to statistics, most often the problem occurs with oxidized contacts. But who knows what will happen to your car.
Do you have any questions or something to add about the article? Write in the comments, perhaps this will greatly help readers in the future. Also subscribe to our channel in ZEN.
First: the emergency battery charge lamp fades smoothly with increasing engine speed. In this case, the on-board computer (or a multimeter at the terminals) shows an increase in the charge voltage. When you release the gas pedal, the voltage readings drop again and the lamp lights up again.
This is a typical sign of failure of either the rectifier (“diode bridge”) or fatigue of the brush assembly. In 90% of cases, the described picture fits into these two diagnoses.
Also, there is a second scenario. When the battery charge lamp is on, but goes out with gas until next time.
But here the generator excitation circuit is usually to blame. If you look at the generator, you will see that in addition to the thick “plus”, there is a thin wire going to it. It comes from the dashboard, passing through that same red light, and when it oxidizes or breaks, a symptom of “one-time undercharging” occurs.
Treatment: look for a break in this wiring. However, it often happens that undercharging begins to manifest itself sporadically. At first, the lamp begins to burn irregularly and weakly, and the charging voltage, although it does not disappear completely, floats. This situation progresses every day until it turns into a regular problem when there is not enough charge to properly power the battery. In this case, you need to check the contacts on the terminals of the copper windings of the generator stator.
And one last piece of advice from experience.
Very often, with any problem with the battery charge, they begin to blame the battery itself, namely its capacity. They say that the battery capacity does not correspond to the original factory one - hence all the problems. Various articles on the Internet have repeatedly proven in detail (with formulas and figures) that such “advice” is complete nonsense and has no connection with reality. The capacity of the battery does not at all affect the efficiency of its charging in a working car.
Well, it never hurts to carry out battery maintenance. I described in detail how to do this (even on supposedly maintenance-free batteries) here.
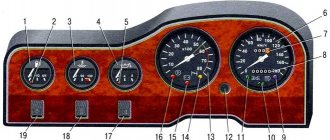
The instrument panel is the interface through which the car “conducts a dialogue” with its owner. It is thanks to the dashboard that you have the opportunity to identify various problems and errors that often arise during the operation of the car.
All modern cars, including the VAZ 2114, have a fairly informative dashboard, which displays a whole range of various information - about the condition of the battery, engine, oil and gasoline levels, water in the windshield washer reservoir, brake fluid, etc.
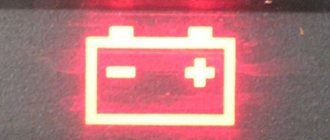
The battery light on the VAZ is on
In what cases is it necessary to change the original battery?
If you don’t know which battery is best to choose for the VAZ 2115, then we are ready to help you in this matter. But first, let's figure out in what cases the battery needs to be replaced. As a rule, there is only one need for this - the battery has worn out completely or partially and can no longer hold a charge. If the device, even after charging, is not able to crank the starter to start the engine, then this indicates that most likely the device has exhausted its service life. Even if, after charging the battery, the engine starts, but upon subsequent attempts to start it nothing happens, then most likely in the near future there will be a need to purchase a new device.
Engine compartment of VAZ 2114
WHY IS THE INSTRUMENT PANEL LIGHT ON?
Attention must be paid to the instrument panel regularly, both before starting the car and while driving. If you find an active indicator, you need to immediately stop the car and figure out the cause of the error, which was indicated by the on-board computer number fourteen. Otherwise, if you ignore the light, you risk serious damage to your car, which may require a lot of money and time to fix.
The battery light on the instrument panel may light up in different ways:
- Constantly;
- Periodically (only while driving);
- The VAZ 2114 battery charging lamp is dimly lit.
For new owners of the fourteenth, or simply for inexperienced drivers, all this may seem very complicated, since there are really many reasons, and if the indicator lights up, you need to check each of them, but in practice everything is much simpler.
As practice shows, problems most often arise with the generator, and it is this that must be dealt with first.
It is worth noting that if you wish, you can go to the fourteenth service station, where the battery will be checked by specialists, but this requires additional financial expenses, so it would be more rational to deal with the problem on your own.
VAZ 2115 battery polarity
All batteries, especially different car models, have different polarities. There is a distinction between direct and reverse polarity. With direct polarity, the battery has the positive terminal (large cross-section) located on the left, and the negative terminal, respectively, on the right side.
Therefore, when purchasing, you need to find out the polarity. Since an incorrectly selected battery can cause a lot of problems not only for the car, but also for its owner.
The VAZ-2115 battery has straight polarity.
IDENTIFYING THE CAUSES OF THE MALFUNCTION
And so, the battery lights up on the instrument panel. What to do? If the combustion light is bright, then the reason is most likely a completely discharged battery.
When the battery stops receiving energy, it begins to work like a regular battery, giving its charge to communications that use electricity. In the best case, the battery charge will last for 1 hour, but if you haven’t charged the battery stationary for a long time, even less.
Weak charging of the VAZ 2114 battery is a consequence of a failed energy generator that cannot cope with its functions.
A generator is a device whose functional purpose is to convert mechanical energy generated during the rotation of the crankshaft into electricity. The generator is the “heart” of the car, which powers both the battery and other systems that require electricity to function.
There are eight main reasons why the battery light on the instrument panel lights up:
- The battery fuse has failed;
- Problems with the diode bridge;
- The wiring is shorted;
- Problems with the generator;
- The battery is simply dead;
- The generator belt is broken;
- There are gaps in the generator relay;
- The cooling fan belt is stretched.
If the battery icon is on, then the car must be stopped immediately, since the generator can produce either an insufficient level of electricity, which can only lead to the battery being discharged and you will not be able to continue driving without replacing it, or an excessive amount of energy - a more serious problem. which can damage all electronics of the car.
Place in the chain
There are only two sources of electromotive force (hereinafter EMF) in a car: a generator and a battery. The main purpose of the battery is to start the engine. After startup, the generator is switched on, which is designed not only to replenish the lost energy reserve of the battery, but also to ensure the constant functioning of the electrical consumers of the machine.
To put it simply, the indicator on the dashboard serves to indicate the EMF source that powers the vehicle’s network.
Operating principle of the display
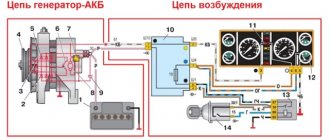
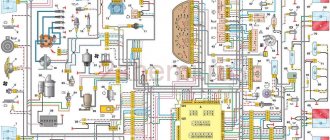
First, let's look at the fundamental elements of the circuit, which will subsequently help to logically exclude the possibility of malfunction of certain elements. Otherwise, you will not be able to understand why the “no charging” icon on the instrument panel lights up.
- 1 – Generator;
- 5 – indicator (sensor);
- 6 – dashboard;
- 8 – relay battery charging regulator;
- 10 – ignition switch relay;
- 11 – ignition switch.
When the driver turns the ignition switch to position 3 (On), the battery powers the electrical network, and with it the charging icon on the dashboard. This happens due to a potential difference, since one terminal of the light bulb is connected to the “+” of the battery, and the second to the generator, which, in turn, is connected to the ground of the car through the primary excitation winding. Thus, the circuit is closed and the light bulb lights up.
As soon as the generator is switched on via a belt drive, it begins to produce a voltage greater than what is available at the battery terminals. Otherwise, there will be no potential difference and the current will not “flow” through the circuit. Now on one of the terminals of the light bulb there will be “+” from the battery, and on the other “+” from the generator. Since there is no potential difference in such circumstances, the indicator stops glowing. Now you know when the battery charging light comes on.
CHECKING THE GENERATOR VAZ 2114
When identifying the reason why the battery charging light does not go out, you will need the help of another person, who must sit in the driver’s seat, start the fourteenth and keep the engine speed within 3-3.5 thousand. During the check, all electricity consuming systems must be turned on - high beam headlights , stove, glass heaters, tape recorder.
Checking the generator requires a tester that determines the level of the supplied voltage.
During normal operation of the fourteenth generator (like the VAZ 2115 and VAZ 2113), it should be 13.2-13.7 V.
If the indicator is lower, the problem is a shorted or broken generator winding. Also, the winding could simply oxidize during operation.
Oxidized winding wires are treated by wiping with solvents - acetone, toluene, or gasoline. If inspection of the generator reveals the presence of a belt that has lost elasticity or is torn, it must be tightened or replaced with a new one.
If the battery light is dim, indicating that the alternator is not running at full capacity, you need to check the alternator bearing. The fact that the bearing is worn out is indicated by the hum that accompanies its operation. In this case, it is necessary to change the entire generator, since replacing the stock bearing, as practice shows, does not give the desired result - it still continues to “whistle”, and the red light on the battery is on.
The cost of a new generator is about 3 thousand rubles. As evidenced by reviews from VAZ 2114 owners, the 2170 115A K3ATE generators have proven themselves to be the best.
The battery charging lamp is on, which means the generator is not working, the car owner’s first thought when he saw the battery icon on the dashboard. However, the reason why the charge indicator lights up is most often much more trivial - it is a loose drive belt tension or poor contact. But it is also possible that you will have to disassemble the generator because wear of the generator brushes or failure of the diode bridge, as well as some others, is possible.
The first thing to do if the battery charge light comes on while the engine is on is to check the voltage at the battery terminals. This is necessary in order to determine the location of the repair site - in the engine compartment or in the dashboard of the car.
- weak alternator belt tension;
- significant wear or complete breakage of the generator belt;
- wear of the brush assembly, wear of the generator brushes;
- problems with the voltage regulator;
- the diode bridge has completely or partially failed;
- wear (wedging, play) of pulley bearings;
- poor generator output contact;
- poor contact on the generator ground;
- generator winding break.
- complete or partial failure of the battery;
- low electrolyte level in the battery;
- oxidation of battery terminals;
- problems with battery wiring.
- poor contact at the generator output;
- poor contact on the generator ground;
- loose belt.
- the wire running from the generator to the battery is damaged;
- poor contact on the voltage regulator.
- break or poor output contact on one of the generator phases;
- failure of one or more diodes;
- soldering failure in the diode rectifier bridge.
- damage to the generator output contact;
- damage to the generator ground contact;
- Damage to the lead wire to the battery.
- weak alternator belt tension;
- significant wear or complete breakage of the generator belt;
- wear of the brush assembly, wear of the generator brushes;
- problems with the voltage regulator;
- the diode bridge has completely or partially failed;
- pulley bearing wear;
- poor generator output contact;
- poor contact on the generator ground;
- generator winding break.
- complete or partial failure of the battery;
- low electrolyte level in the battery;
- oxidation of battery terminals;
- problems with battery wiring.
- break of one of the generator phases or damage to the output contact;
- failure of one or more diodes;
- damage to the diode soldering.
- belt slippage.
- brush wear;
- play and vibration of the generator pulley bearings and/or tension roller;
- breakage of the output contact or ground contact;
- damage to the wire from the generator to the battery;
- critical damage or breakage of the generator belt.
- break of one of the generator phases or damage to the output contact;
- failure of one or more diodes;
- damage to the diode soldering.
- poor belt tension.
- problems with the voltage regulator.
- damage to the signal lamp wiring (its insulation);
- broken contact in the connector of the mounting block.
- complete or partial failure of the battery;
- low electrolyte level in the battery;
- oxidation of battery terminals;
- problems with battery wiring.
System monitoring sequence using the battery charging lamp
p, blockquote 5,0,0,0,0 —>
Fault monitoring is carried out in three stages:
p, blockquote 6,0,0,0,0 —>
When the ignition is turned on
When the ignition is turned on, the battery icon should light up.
p, blockquote 7,0,0,0,0 —>
If the battery charging light does not light up when the ignition is turned on, this may indicate:
p, blockquote 8,0,0,0,0 —>
- malfunction of the light bulb itself;
- lack of battery charge (discharge);
- faulty electrical circuits or fuses;
- malfunction of the generator.
In any case, it is extremely undesirable to start a car, much less drive it, without identifying the causes of the malfunction.
When starting the engine
If the indicator lights up at the first stage, start the engine. If even after starting the engine the battery icon on the panel lights up, the following malfunctions are possible:
p, blockquote 10,0,0,0,0 —>
- malfunction of the generator voltage regulator relay;
- malfunction of the dashboard control unit;
- damage to electrical wiring;
- poor battery terminal contacts;
- slippage or breakage of the generator belt;
- generator jamming.
In this case, you should start moving only in case of urgent need or to travel during daylight hours to a parking place or repair.
Video - possible cause on VAZ cars:
p, blockquote 12,0,0,0,0 —>
p, blockquote 13,0,0,0,0 —>
While driving
If the battery icon goes out in the second stage, but while driving the battery charging lamp lights up again or starts blinking, you can continue driving, but only to the place of the proposed repair.
p, blockquote 14,0,0,0,0 —> adsp-pro-1 —>
The cause of blinking may be:
p, blockquote 15,0,0,0,0 —>
- alternator belt slipping;
- electrical wiring fault;
- generator jamming;
- malfunction of the dashboard control unit;
- increased load currents of the vehicle's on-board network;
- malfunction of the generator voltage regulator relay.
Reasons why the battery charge lamp is on
When the power supply is in good condition, the battery warning lamp on the dashboard lights up only when the engine starts, and after one or two seconds it goes out. If this does not happen, or, for example, the icon is activated when the engine is idling or while driving, this is a sign of a malfunction, and you need to look for the reason why the battery warning light is on. So, the causes of this malfunction may be problems with the following units.
Generator
Most often, the battery light comes on if the generator does not transfer energy to the battery after starting the engine. This happens when the following problems occur:
- Loosening the belt tension. Or a critical situation - its breakdown. In this case, the belt will slip along the pulley, due to which the generator pulley will not rotate at the required angular speed and, accordingly, generate electricity at a low voltage, insufficient for normal battery recharging. Another option for belt slippage is contamination of its inner surface and/or the surface of the generator pulley. In such situations, during the cold season, a whistle appears from under the hood.
- Brush wear. Over time, generator brushes wear out naturally, causing the generator to produce electricity at low voltage.
- Problems with the voltage regulator relay. The task of this unit is to limit the voltage transmitted from the generator to the battery. If the specified regulator fails, then usually the voltage is not transmitted to the battery at all, as a result of which the battery lamp on the panel lights up.
- Diode bridge. Its function is to convert the alternating current produced by the generator into direct current. Accordingly, if it fails, the generator will not charge the battery.
- Faulty generator pulley bearings. So, with significant wear (or with a very strong belt tension), significant bearing play or jamming may occur. This usually results in belt slippage with the consequences described above.
Battery
The battery icon on the panel lights up when the battery simply cannot accept a charge. The first reason for this is the old age of the battery or its partial failure. Alternatively, there is a low level of electrolyte in it. The second reason is oxidation of the terminals and contacts suitable for it or contamination of surfaces.
Signal lamp
On many domestic cars, for example, VAZ 2109, VAZ 2110, VAZ 2114, VAZ 2115, an old type lamp with a filament is installed as a battery warning lamp. On these models, it is possible to change this lamp when dismantling the instrument panel if it fails.
However, some car enthusiasts, due to inexperience or ignorance, install an LED lamp instead of an incandescent lamp. This leads to the fact that after starting the engine and idling, the lamp (at a voltage of just over 12 Volts) continues to burn. However, if you force the engine speed up to about 2000 rpm, the battery light goes out.
Wiring
Often the cause of incorrect operation of the battery lamp is damaged wiring. For example, when a lamp burns at half intensity or even dimmer, and in a variety of situations. Often the wiring is to blame. For example, a wire going from the battery to the generator. In particular, there are cases when, with a damaged wire (fracture, damage to the insulation), the lamp begins to glow a little even with a slight load on the battery.
Similarly, the battery lamp may burn at half incandescence due to poor contact on the voltage regulator (the so-called “chocolate bar”). Poor contact may be due to corrosion or mechanical damage.
Connection diagram
p, blockquote 16,0,0,0,0 —>
The classic connection diagram for a battery charging light is the diagram shown in the figure:
p, blockquote 17,0,0,0,0 —>
p, blockquote 18,0,0,0,0 —>
When the ignition switch contact group K is turned on, positive battery voltage is supplied to the left terminal of the battery charging lamp.
p, blockquote 19,0,0,0,0 —>
If the generator does not rotate, there will be a low voltage at the right terminal of light bulb L. It will glow. At the same time, the lamp provides starting current to the generator armature. In such a switching circuit, if the light bulb is faulty, there will be no starting armature current, and the generator will not begin to supply voltage for charging after the engine starts.
p, blockquote 20,0,0,0,0 —>
After starting the car engine, voltage from the additional rectifier bridge will be supplied to the right terminal of the light bulb L. There will be no potential difference at the terminals of the light bulb, and the indicator goes out.
p, blockquote 21,0,0,0,0 —>
In modern cars, to provide starting current, even more reliable shunt resistors are installed parallel to the charging lamp, which ensure charging even when the lamp is faulty.
p, blockquote 22,1,0,0,0 —>
In most cars manufactured after 2000, the battery charging lamp is controlled by an electronic unit on the dashboard. A digital circuit measures the voltage of the on-board network and gives a signal to turn on the indicator if it does not comply with the set values.
p, blockquote 23,0,0,0,0 —>
Cars from BMW, VW, AUDI and other “reputable” manufacturers are equipped with a battery charging control system, which allows you to increase the battery life and avoid boiling and overcharging phenomena.
p, blockquote 24,0,0,0,0 —>
In such schemes, the battery charging lamp is controlled by these systems, the operating algorithm of which is quite complex. This has its advantage: the system accurately diagnoses the location of the fault. If the charging indicator lights up, just connect computer diagnostics, and it will independently determine the specific location or node of the fault.
Diagnostics and repair
In a situation where the red battery icon lights up during ignition while the engine is running, first of all you need to check whether the battery really is not receiving a charge, or whether the light is on but there is charging.
In road conditions, when you don’t have a multimeter at hand, this can be done using the following algorithm... In the dark, if the car is running solely on battery power, over time it will be seen that the headlights, instrument lighting on the panel, as well as internal lighting devices begin to change over time. shine more dimly.
Another “old-fashioned” method of checking a generator is performed using the following algorithm:
- Start the engine and turn on a load on the battery, such as headlights or heated rear window.
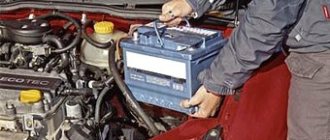
- Open the hood and disconnect the negative terminal of the battery. Usually it is screwed on with a 10 key, so it is advisable to unscrew it first. You can simply lift the wire above the battery.
- If the engine continues to operate properly, the headlights have not gone out and no other changes in the operation of the car are observed, then the generator is working.
- If the engine stalls and the headlights go out, it means that the generator has failed and needs to be diagnosed.
For a more detailed check, you will need a multimeter (preferably digital) capable of measuring DC voltage. So, the primary check is performed according to the following algorithm:
- Check the condition and tension of the generator drive belt. The tension force should be such that it can be manually rotated 90° (that is, placed vertically), but no more. In addition, the belt must be dry; there should be no moisture or process liquids on its surface (both external and internal).
- Check the voltage on the battery in static conditions. After stopping the engine, the corresponding value should be about 12...13 Volts. If the voltage is lower, check the generator.
- Measure the voltage at warm-up speed. To do this, you need to warm up the car and measure the voltage at low idle speed. Its value should be within 13.8...14.5 Volts. If it’s less, it’s undercharged; if it’s higher, it’s overcharged.
- Increase engine speed to 2000…3000 rpm. Make sure that the voltage on the battery does not increase (does not exceed 14.5 Volts). Otherwise, you need to check the voltage regulator.
- When the engine is idling, you need to turn on the consumers - high beam headlights, heated rear window, radio. In this case, the voltage on the battery should not fall below 13.8 Volts.
If, during testing, the voltage value on the battery is within the described limits, and the lamp is on, this means a false alarm, and it is necessary to diagnose the vehicle’s electrical system - the sensor and the dashboard. If measurements show that the voltage on the battery is about 12.6...12.7 Volts and drops, then the battery is indeed not charging and the car battery light is not in vain. In this case, it is necessary to check all connection terminals on the battery and generator, as well as perform additional diagnostics.
Generator brushes
In order to verify the functionality of the generator brushes, its housing must be dismantled and disassembled. In particular, remove the brush assembly and visually inspect them. Their wear will be visible to the eye. Also, when the brushes wear out, traces of sparks that occur in such conditions are often visible on the brush assembly. Naturally, if necessary, worn brushes need to be replaced with new ones.
Voltage regulator
The voltage regulator can fail for various reasons - a short circuit in the circuit, mechanical damage to the unit, natural wear and tear, improper connection to the battery terminals. To test the voltage regulator you will need an electronic multimeter. The check itself is simple.
Diode bridge
You can check the diode bridge yourself using a multimeter. Let's consider the verification algorithm using the example of the domestic generator 37.3701, installed on VAZ 2108, VAZ 2109, VAZ 21099 cars. First you need to check that there is no short circuit in its circuit. The verification algorithm is performed in the following sequence:
- Switch the electronic multimeter to resistance measurement mode (ohmmeter).
- Place one multimeter probe on terminal 30 of the generator, and the other on the generator body.
- If the diode bridge is working properly, the resistance value should tend to infinity.
Next you need to check the positive diodes for breakdown. The procedure is as follows:
- Place one probe at pin 30 on the generator.
- Place the second multimeter probe on one of the diode bridge mounting bolts.
- If the diodes are working properly, then the resistance value will tend to infinity.
Checking negative diodes for breakdown:
- Place one multimeter probe on one of the diode bridge mounting bolts.
- Place the second probe on the generator housing.
- If the diodes are intact, the resistance tends to infinity.
Checking additional diodes:
- One probe is placed at terminal 61 of the generator.
- The second probe is placed on one of the diode bridge mounting bolts.
- If the diodes are working properly, the resistance value will tend to infinity.
Bearing faults
A damaged pulley bearing can cause it to become unbalanced or seized. In the first case, the belt will “eat up” and it will wear out. In the second case, the generator shaft simply will not spin or will jam. In any case, it is necessary to change the bearing, if possible, or the pulley itself.
As for the tension roller bearing, the entire roller is usually replaced with a new one.
Poor contact on the generator
It is necessary to inspect the positive output contact of the car generator. In particular, it should be free of traces of corrosion, oil, various process fluids, dust, and dirt. Accordingly, all contacts need to be cleaned. Same with “mass”. You need to check the quality of the contacts on it. It is also advisable to lubricate the closed contacts with a special protective lubricant.
Generator circuit open
If there is a break in one of the phases of the generator or failure of the power diodes, after removing it, the following diagnostic measures must be performed:
- Check the bolted connections of the generator phase output to the diode bridge. Most often, one of the contacts has corrosion, a loose (loose) bolt, or possible contamination. Accordingly, it is necessary to inspect not only the damaged one, but also other similar contacts for preventive purposes. If there is a wire break, you can try to replace it, but this depends on the specific situation. Often in such cases (or in case of damage to the insulation), the wires (winding) are replaced with a new one. Or change the entire generator.
- Identify damaged power diodes and replace them (change the diode bridge). Sometimes a situation arises when the soldering on the diodes is broken. In this case, the diodes are soldered.
- Check the stator winding for darkening of the turns. At the same time, it makes sense to check the integrity of the insulation visually and using a multimeter by checking the insulation resistance value. If darkening occurs on the wire insulation, this means that the generator has already worn out significantly, and it is better to replace such a winding with a new one (rewind).
Improve contact
If the wiring from the generator to the battery is damaged, it is necessary to inspect it and, if necessary, replace the wire with a new one. In parallel with this, it is imperative to clean all contacts, both on the generator and on the battery (terminals). It is necessary to clean the contacts of the diode bridge on the generator and its positive output contact.
If the contact areas of the generator brushes have become oxidized, then they must be cleaned at the same time. At the same time, pay attention to ensure that the graphite does not spread from the brushes to other elements of the generator. If the brushes are worn out, they need to be replaced with new ones. Sometimes it is enough to improve the “chocolate” contact.
Conclusion
If the battery charging lamp is on, but charging is in progress, it is necessary to perform a comprehensive check of the battery, generator, as well as fuses, lamp and wiring. According to statistics, most often the cause of this breakdown is wear of the generator brushes, or problems with its contacts. Less often the diode bridge fails.
Secondly, a problem noticed in time often allows you to save a decent amount of money aimed at eliminating errors and repairing your iron friend.
Modern cars, even domestic ones, are equipped with various sensors, which, with minor changes in the operation of the car, display error data on the dashboard. If the battery lights up on the instrument panel and does not go out after the car is started, then the car owner needs to establish the cause as soon as possible in order to avoid big troubles. The figure below shows very well where this sensor is located. This is designation number 16.
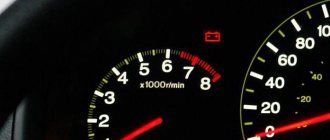
Indicators on the dashboard of a VAZ 2114
Descriptions of other indicators can be found here.
The indicator can indicate problems in the system in different ways:
- The sensor is constantly on.
- Lights up periodically while driving.
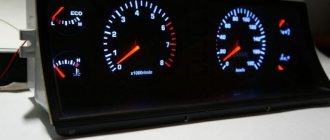
- The battery charging lamp is dim. In this case, the light can sometimes only be seen at night.
The procedure for diagnosing the battery charging system in various light bulb situations
p, blockquote 27,0,0,0,0 —>
Doesn't light up at all, under any conditions
The most likely failure is the lamp itself.
p, blockquote 28,0,0,0,0 —>
It can only be accessed by removing the dashboard. In many cases this is not an easy task, so it is better to start monitoring by checking the charging voltage with the engine running. If it is between 13 and 14.5 Volts, then the charging system is normal.
p, blockquote 29,0,0,0,0 —>
The fuses serving the instrument panel should be checked. You can disconnect and connect the dashboard connector. Sometimes you can, without removing the dashboard, feel for the generator light socket on the back of the panel and, by rotating a quarter turn counterclockwise, remove the lamp. After this, it must be ringed and, in case of malfunction, replaced.
p, blockquote 30,0,0,0,0 —>
The lack of light on the light bulb may be due to a break in the wiring going to the generator. A thick wire (positive charger) cannot break, but in some car models it has a fusible insert, structurally fixed to the wire in such a way that it may not be noticed.
p, blockquote 31,0,0,0,0 —>
You should check the presence of battery voltage at the contact of the thick wire of the generator. The thin conductor going to the generator is often faulty.
p, blockquote 32,0,0,0,0 —>
Sometimes, in order to urgently start the generator, positive voltage from the battery is supplied to a thin conductor through a small (interior) light bulb, thereby providing starting current. If the voltage regulator relay is working properly, the generator starts working, in which case you can drive to the repair site.
The battery charging light is not on, but there is charging
Possible malfunctions include a broken light bulb filament or faulty dashboard contacts. Many car enthusiasts, knowing that the battery is charging, neglect this malfunction and continue to operate the car. For the time being, for the time being.
p, blockquote 34,0,0,0,0 —>
Experience suggests that the battery may discharge at the most inopportune moment, and you need to know about this in advance. That's what the charging indicator is for!
The battery charging light may not light up if the ground is bad. If the car starts normally from the battery, the contact between the car body and the negative terminal of the battery, the car body and the engine may be broken. This is a fairly common malfunction, even for cars with low mileage.
p, blockquote 36,0,0,0,0 —> adsp-pro-2 —>
Flashes while driving
The blinking of the light bulb is evidence of “dips” in the generator voltage. It is better, of course, in this case to diagnose the on-board network voltage in dynamic mode.
p, blockquote 37,0,0,0,0 —>
Even a simple OBD scanner can do this. After connecting the scanner to the car, you should pay attention to fluctuations in the voltage of the on-board network while driving, changing the rhythm of movement, turning on and off various electrical appliances.
p, blockquote 38,0,0,0,0 —>
Possible causes of such a malfunction are short circuits in the electrical wiring, slipping of the generator pulley. Particular attention should be paid to the problem if blinking is accompanied by the presence of foreign odors in the cabin of flammable origin. A short circuit in the electrical wiring is the main enemy of the car enthusiast (after an accident and traffic cops).
p, blockquote 39,0,0,0,0 —>
Works normally, but no charging
In this case, you should pay attention to the quality of the terminals, the reliability of the “ground” in the connections: the negative terminal of the battery - the car body, the car body - the engine. In some cases, the electronics system may malfunction and not see the lack of charging.
p, blockquote 40,0,0,0,0 —>
Every motorist, when starting to drive, must check the readings of monitoring devices, including the battery charge indicator.
p, blockquote 41,0,0,0,0 —>
Idle air regulator IAC, what is it and how to check its functionality.
How can you treat car doors to prevent them from freezing during the cold season?
Video - what could be the problem if the battery charging light is on, but there is charging:
p, blockquote 43,0,0,0,0 —> p, blockquote 44,0,0,0,1 —>
Causes of malfunction
In fact, there are several reasons why the battery lights up on the instrument panel of a VAZ 2114:
- fuse is blown;
- the diode bridge is faulty;
- gaps in the generator relay;
- tear in the generator belt;
- short circuit in wires;
- the generator itself;
- The fan belt may slip;
- There is not enough electrolyte in the battery.
As you can see, there are a lot of reasons and it’s quite difficult to figure it out right away, especially for an inexperienced driver. Most problems are related to the generator, but first you need to rule out other problems.
Specialists from any technical automotive center can very quickly reveal the “secret” of why the battery charging light does not go out, but this is an additional and sometimes considerable expense.
Where to look for a fault if the battery icon on the instrument panel blinks or lights up
The battery charging light is one of the main indicator devices on the dashboard. It is no coincidence that even on many modern cars with on-board computers, the battery charging indicator is located as a separate element.
p, blockquote 1,0,0,0,0 —>
p, blockquote 2,0,0,0,0 —>
When starting to drive, you need to make sure that the battery charging system is working properly. This information is provided by the battery charging light (LED).
p, blockquote 3,0,0,0,0 —>
p, blockquote 4,0,0,0,0 —>
How to find a fault
First of all, you need to check the battery charging, as well as the ground (contacts). It may be a simple matter of oxidation of the wires or terminals. But in frequent cases, the battery light comes on precisely when the generator or its parts are faulty.
The car generator is designed to measure the mechanical rotational power in the crankshaft and convert it into electrical power. With its help, the battery device is charged, and all energy consumers in the car are “powered”: the diagnostic system, the ignition system, the panel (on-board) computer. Poor charging of the VAZ 2114 battery, in the overwhelming majority, is precisely a malfunction of the generator or its components.
There are few downsides to this: the battery is completely discharged and, as a result, you stop on the highway. I replaced the battery and moved on. But if the level of output power is greater than declared, then in this case the entire electrical system of the machine may fail. And then the cost of repairs increases significantly. But all this can be foreseen when the battery light is constantly on.
It is possible to replace the entire generator as a whole, but it will be cheaper to change some of its components. But before we get into that, we need to check the fuses and the unit itself. If a problem is found in it, then it must be replaced.
Generator device
Generator 37.3701
Generator removed from VAZ-2114 (original)
Generator from a VAZ-2114 with the cover removed, the diode bridge is visible
Before identifying generator malfunctions, it is necessary to have some understanding of its design and structure. So, let's look at what main parts it consists of.
On models of the VAZ 2113-2114-2115 family, a generator marked 37.3701 is installed.
VAZ generator device
Generator 37.3701: 1 – cover on the side of the slip rings; 2 – rectifier block; 3 – rectifier block valve; 4 – screw for fastening the rectifier unit; 5 – contact ring; 6 – rear ball bearing; 7 – capacitor; 8 – rotor shaft; 9 – output “30” of the generator; 10 – output “61” of the generator; 11 – voltage regulator; 12 – terminal “B” of the voltage regulator; 13 – brush; 14 – stud securing the generator to the tension bar; 15 – pulley with fan; 16 – rotor pole piece; 17 – spacer sleeve; 18 – front ball bearing; 19 – drive side cover; 20 – rotor winding; 21 – stator; 22 – stator winding; 23 – rotor pole piece; 24 – buffer sleeve; 25 – bushing; 26 – clamping sleeve
Now, let's look at the design of the generator in a disassembled state.
Generator disassembly diagram
Generator parts 37.3701: 1 – capacitor; 2 – voltage regulator assembled with brush holder; 3 – terminal block for additional diodes; 4 – insulating bushings; 5 – rectifier block; 6 – contact bolt; 7 – stator; 8 – rotor; 9 – spacer sleeve; 10 – inner bearing mounting washer; 11 – drive side cover; 12 – pulley; 13 – outer bearing mounting washer; 14 – coupling bolt; 15 – front rotor ball bearing; 16 – bushing; 17 – cover from the side of the slip rings; 18 – buffer sleeve; 19 – clamping sleeve.
Why the generator does not charge (main reasons)
If the generator has stopped providing a proper charge to the battery, as well as in the on-board network, the voltage drops when the engines are running, there are only two reasons for this. Let's look at which ones exactly.
Device overload
Additional equipment draws energy. This is what generator overload looks like
This effect is often caused by connecting additional lighting and other devices with high energy requirements. In this case, the factory generator cannot cope with its task and begins to lose efficiency, and ultimately may fail.
Battery and alternator mismatch
Battery and alternator mismatch
When installing additional equipment, many car enthusiasts make an irreparable mistake and install a larger power battery on their “iron horse”, without increasing the power of the generator. Failure of power characteristics between nodes leads to the fact that the generator cannot provide proper charging of the battery, which subsequently reduces the performance of the first one.
troubleshooting
To find the problem you will have to delve into the electrical part of the car. There is nothing complicated here, but you will have to work hard and learn some design features of auto electrics. Let's look at what causes poor charging and what you should pay special attention to:
- Weak contact connections.
- Breaks in part of the winding.
- Short circuit on the rotor.
- Mechanical failures.
- Stator short circuit.
What to do if there is no required voltage (solution methods for VAZ-2114)
Basically, the methods for solving the problem are banal - replacing the generator. But, due to the high cost of the part, most motorists try to repair the unit. So, let's consider possible solutions to the problem of incomplete charging or lack of charging from the generator.
Weak contact connections
Damage to the contact group leads to charging problems
If the contacts are loose, this may be due to contamination or corrosion. To eliminate problems, you need to clean them with a sharp object or a special solution. Copper paste is suitable for lubricating and protecting external contacts . The internal contact connection is quite difficult to protect, so they are simply cleaned and installed in the seat.
Breaks in part of the winding
Measurement to detect problems with the winding
Breaks in the winding are usually treated by replacing the winding. As practice shows, it is not cost-effective to rewind this unit, so motorists are looking for an alternative, which is a supported part.
Short circuit on the rotor
Diagnostic operations on the rotor
A short circuit in the on-board network that ends on the rotor can be treated by replacing the faulty part, but most motorists still agree that the generator will have to be replaced.
Mechanical breakdowns
Generator shaft deformation is one of the mechanical failures
Mechanical failure usually cannot be repaired and the damaged part is replaced with a new one. This is considered the most optimal solution to the issue. In terms of price, it may seem a little expensive, but cheaper than replacing the entire generator.
Stator short circuit
Diagnostic operations for rotor performance
Stator short circuit can also be treated by replacing the part or installing a new generator on the car. This is necessary so that the effect does not recur and the stator does not have to be changed again. When choosing a new spare part, we recommend that you familiarize yourself with the material: “difficulties in selecting a generator for a VAZ-2114.”
Faulty wires at the generator
Attention! All work at the generator unit must be performed with rubber gloves! This is an electrician.
Generator
Inspect the generator assembly. White deposits indicate oxidation; carefully remove the deposits with sandpaper.
Broken wires and a characteristic smell indicate burnout; such wires must be replaced.
If visual faults are not visible, more in-depth diagnostics will be required.
A little theory: scheme of work
To solve the existing problem, you must understand the essence of the interaction between the vehicle generator and the power source (battery).
While driving, the battery is in constant charging mode with a voltage of 13.6-14.2 Volts. As engine speed increases, the voltage at the generator output increases. But this is unacceptable.
To limit the voltage, a small relay regulator is inserted into the rotor excitation circuit. Its task is to reduce the current to a normal level (even with a significant increase in the speed).
The result is maintaining the battery charge voltage at a stable level. If the battery light is on, this indicates a lack of charging from the generator.
How does the scheme work? After turning on the ignition, voltage through fuse No. 10 (for VAZ-2107) is supplied to the battery charge indicator lamp.
Next, the “+12V” voltage passes through a diode, a built-in relay-regulator (we mentioned it above), a brush, a slip ring and a winding.
As soon as the rotor speed increases, the phase voltage also increases. As a result, the voltage at the terminals of the battery warning light is equalized and it goes out. At the same time, the battery is charging.
Malfunctions in the timing belt
The belt may be torn, stretched, or simply wet.
Timing belt drive
- A belt that is torn or shows signs of physical wear must be replaced.
- Loose, without signs of wear - tighten it. A correctly tensioned belt should not bend by more than 1.5 cm when pressed.
Important! Excessive timing belt tension will damage the generator bearings, which will require time-consuming and expensive repairs. The deflection should be 1-1.5 cm.
- If there is moisture, dry it.