Hello everyone, I have this problem: on my way home from work, the charger disappeared, it was raining and there were quite deep puddles. As soon as the “battery light” came on, I immediately stopped and turned it off, looked at the generator - it was dry, the belt was in place and tensioned as it should.
I arrived at the garage and spent a long time fooling around with a book that says: Check fuse F1 under the steering column, but for some reason I don’t have it there at all. In short, I checked all the fuses - everything is fine.
I took off the generator, examined it, but didn’t really notice anything. Guys, tell me why this happened, I’m no stranger to electrics.
Guys, save me, this is the problem, I installed a new generator, the charging disappeared, before that the generator was rated at 115A, now I bought a new one at 90A, everything worked fine on the old one, until the bearing jammed and the seat and threads were ground off, I had to get a new one, before that I installed it at 100A , charging still doesn’t appear, when you turn on the light, the lamp goes out, but it still doesn’t charge, what the hell is this?
Tell me who made the curtains for the front doors
by Adminrive · Published 06/28/2013
I flashed the car
by Adminrive · Published 06/19/2015
Knowledgeable people tell me
by Adminrive · Published 12/16/2014
24 comments
- Comments 24
- Pingbacks 0
Did you remember to connect the thin wire?
See all the masses
Vladislav, the thin wire is connected, well, I somehow blame it, but according to the diagram, where does this wire go in general? there is simply no diagram
Denis, what kind of generator do you have?
Matthew, the mass is in order
Vladislav, what do you mean?
Vladislav, I honestly don’t remember, but this is the second generator, a new one, there shouldn’t be any problems with it, we looked at the device and it works clearly
No charger? Let's figure it out!
By the way, problems with charging on all those cars that I personally had to use occurred extremely rarely. For the most part, this began after the 90-100 thousand mileage mark. Priora is no exception. If on a relatively new car, when the new generator and all other components are in perfect order, these problems are practically eliminated, then on a used car, problems with battery charging can occur quite often.
What do you need to remember?
We looked at the main reasons for the battery not charging from the generator. According to statistics, most motorists with such problems turn to service. This is normal, but the information will be useful to you in order to understand the cause of the breakdown on the spot. In addition, if you are aware of the situation, it will be difficult for cunning car service employees to extract extra money from you for repairs.
It’s one thing when you tell the mechanic, “I need to tighten the alternator belt,” and quite another, “I’ve got something broken there.” For this you will be charged twice as much.
And finally, what you need to remember when using the battery.
Periodically, with the engine running, check the voltage at the battery terminals. This value may differ on different cars, but should fall within the range of 13-14.4 volts. If the voltage is higher, then the process of hydrolysis of water with the release of hydrogen will actively occur in the battery. If the value is less, the battery will not charge normally when traveling.
In both cases, you need to contact a specialist to fix the problem.
That's all on this issue. We wish you good luck on the roads! And we are waiting for your comments on the article! Return to content
My alternator belt is constantly squealing. Too lazy to pull it up. That's how I go. But the battery seems to be charging normally. Ugh, ugh
Driving without a seat belt is like walking with your pants down. Damn quitters!
Recently the alternator belt broke. It was good at home. I drove on the battery for only 10 minutes. It was almost completely dead.
It infuriates such smart morons who, after reading such articles, come “I need to tighten my belt” or “I need to clean the injectors”, and then “oh it didn’t help, what should I do, I don’t want to pay, there are no changes”, do a diagnosis, then decide to do it or not, stars.
Help, the battery on the Ford Skate is not charging, everything checked the generator, the working belt is normal, the light on the battery is on and is not charging
The battery has failed to charge (the lamp comes on). I got to the market and went about my business. The car cooled down, started up, charging appeared, some time after warming up, the battery light came on again (the brushes are on their last legs, and when they heat up, the gaps change). Definitely BRUSHES on the generator. Moreover, they departed without repair for almost 200 thousand km. not counting how much I was stuck in traffic jams. (new gen. 17,000 RUR VALEO) (relay regulator 4,000 RUR) Replaced the brushes, the problem disappeared. Many people write on forums that they use brushes from just about anything, from an angle grinder, etc. This is not entirely correct and will not last long. There are three types of brushes: carbon brushes - designed for 220 volts and a small amperage, copper-plated carbon brushes - used in battery tools (amperage is not large up to 15A), copper-graphite brushes - these are what you need for a car, you have a battery of 50-60 amperes. Finding such brushes is problematic, so you buy a relay regulator from VOLGA and resolder the brushes (the price is 300 rubles). I took a different route, bought a jumper from a classic Lada for 60 rubles (two brushes in a plastic case) and unsoldered the brushes, but unlike the classic, unlike the Volga, they are a little thicker, which is easily adjusted with sandpaper.
Vova, it’s very similar if you check the serviceability of the generator when it’s cold.
One day, on the way to the dacha, the generator broke down, I drove to the dacha and returned home. A total of 235 km. Naturally without music, air conditioning and high beams.
By the way, problems with charging on all those cars that I personally had to use occurred extremely rarely. For the most part, this began after the 90-100 thousand mileage mark. Priora is no exception. If on a relatively new car, when the new generator and all other components are in perfect order, these problems are practically eliminated, then on a used car, problems with battery charging can occur quite often.
Why is there no battery charging and where to look for it?
In fact, there are a great many reasons why charging may fail. And most of them are connected with the most important unit in this regard - the generator. Let's look at the main ones that can most often occur.
- Wear of generator brushes on Priora. As mentioned above, when all the parts are still new and without wear, then such malfunctions essentially cannot exist. But when the mark is 90-100 thousand km. has already been overcome, the first calls begin. And the most common reason for the battery not charging is excessive wear of the brushes. This issue can be easily resolved - replace them with new ones. The price of the assembled part is about 350 rubles.
- The second reason can also be compared with brushes, since it is with this part that they come into contact during operation. These are the armature slip rings. It is worth removing the plastic cover of the generator and looking at the contact points of the brushes and rings to understand how much wear these parts have had! It is not always possible to carry out this replacement on your own, but almost any electrician will do it in half an hour.
- Failure of the generator diode bridge. Even if one of the diodes breaks through, there will be poor charging, which will lead to a constant discharge of the battery. In this case, the rectifier unit is replaced.
- Failure of the regulator relay - it is replaced as an assembly with the brush assembly, while the brushes themselves can be replaced separately (again, with the help of a good electrician).
- More serious problems occur with parts such as the stator, rotor, bearings, etc., which are actually much less common than the above cases.
Removal and installation instructions
As practice shows, the main reason why a unit fails is the connection of various electronic devices to the car’s on-board network. Many energy consumers need high voltage generators. Therefore, when purchasing a node, you need to consider how many devices will connect to it. If you take a 115A or 120A mechanism, this will be the most reasonable choice for cars “stuffed” with electronics.
Find out more about dismantling and installation below:
- To perform the work, you will need a 13 key. First of all, you need to disconnect the battery.
- In accordance with the operating instructions, dismantle the mechanism drive belt. After this, you can disconnect the wiring block from the D+ connector on the device.
- Then you will need to move the rubber boot and unscrew the nut. Having done this, you can disconnect the wiring from the terminal pin.
- After these steps, unscrew the nut of the screw of the lower clamp of the assembly to the special bracket. The nut itself can be removed with a spacer sleeve.
- Next, remove the retaining screw. After this, the nut securing the assembly to the upper mount can be completely unscrewed. The adjusting screw also needs to be completely unscrewed, then remove the tension bar.
- After completing all these steps, you can remove the mechanism from the machine. The unit is being repaired with the replacement of all necessary elements. After the repair is completed, the generator can be put back in place; the installation procedure looks identical to dismantling, only all steps are repeated in reverse order. After installation, it is necessary to adjust the strap tension. If the belt is not adjusted, this may cause the mechanism to malfunction. After all the actions completing the repair procedure, the tension bar fixation nut must be tightened to a torque of 20 Nm.
Symptoms of loss of battery charging on a Priora
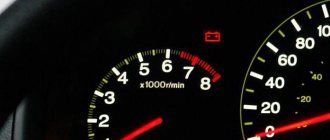
The very first thing that many people pay attention to is that the battery charging light on the dashboard came on. If you have a multimeter at hand, you can measure the output charging current by connecting the contacts to the “+” and “-” terminals, respectively. If even without a load the device readings are less than 13 Volts, this indicates that there are certain problems with charging.
Of course, it is possible (although it is highly not recommended) to remove the “-” terminal from the battery while the engine is running, thereby checking the functionality of the generator. If the engine stalls, this will indicate that there is actually no charging, and accordingly, the generator is faulty.
Also, the charging lamp may glow at half-glow, which also indicates insufficient charging current. If one of the symptoms listed above occurs, it is necessary to diagnose the generator and its parts. If necessary, replace them with new ones. If you have anything to add to this article, you can comment below.
Leave a reply Cancel reply
You must be logged in to post a comment.
Source
Fuse
The element that protects the battery indicator (lamp) is usually responsible for other consumers on many cars. Therefore, its malfunction can be easily identified if you also check the operation of these same powered elements - as a rule, other control signals on the device go out at the same time. If they are in working order, then there is no point in climbing into the fuse box.
There is usually no need to perform resistance diagnostics. It is enough to replace the removed fuse with a known good element. If the battery charging light comes on, the fault has been proven. However, in some cases (for example, you don’t have a new fusible protector at hand), it’s worth doing the following trick:
- measure the current on the fuse legs - done with a multimeter set to 20 V (one probe for ground, the second for the leg);
- check how voltage indicators change in the entire electrical circuit (current surges, short circuits);
- test resistance parameters.
The relay regulator (a charging relay that is installed on some cars to adjust the current of the on-board network and battery in a given range of 13.8-14.5 V) can also present considerable problems. Recently produced cars have become equipped with extremely unreliable devices. Parts quickly fail, apparently due to a well-known defect of Chinese production.
Remote charging relay
So, if the continuity described above showed that the problem is likely in a faulty voltage regulator (relay), you need to make sure of this. To do this, they again use a test lamp with a clamp, but the latter is connected to the battery positive. The second probe of the tester touches the terminals of the same block (control and pre-excitation line) that is on the generator (there are also remote ones). Naturally, the plug is removed before this.
If the device light does not light up, this proves that there is a malfunction in the relay regulator (most likely an internal break). With such a defect, there is nothing left but to replace the voltage regulator.
Priora generator does not charge
Several times I found myself in an unpleasant situation when the prior generator did not charge, and at the most inopportune moment, due to the battery being discharged, I could not start the car.
At the same time, the control light did not light up while driving, but the fact that it did not light up and when I turned on the ignition, I did not pay attention to it. The generator was not charging. When you turn on the ignition, a lot of warning lights come on and it’s very difficult to see that any are off, and you almost never pay attention to them.
The car started, the pressure light went out, and the rest did not affect the speed. Yes, and it’s built into the subconscious if the charge is lost, then the battery sign will light up.
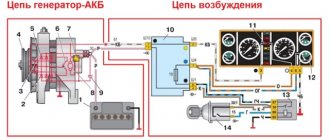
Relay-regulator connection diagram
According to the diagram, the HL 4 LED will light up if a plus from the ignition switch comes to connector pin 21 and diode VD 1 passes the minus from the LED through connector 32 to the positive brush of the regulator relay, where through the armature winding and the minus brush the LED finds a minus and lights up. In my case, there was no contact on the positive brush due to the fact that it was worn out and jammed in the seat, in short, it froze. I just changed the relay regulator with new brushes and charging appeared. I'm lucky. It was more difficult if the LED or VD 1 diode burned out and would have to be replaced.
Fault diagnosis
In any case, it is necessary to connect the circuit from the VD 1 diode to the connector on the generator relay regulator. The easiest way to do this is to remove the connector from the generator that receives the plus for the excitation winding and connect it to ground
When the ignition is turned on, the indicator light with a picture of the battery should light up. Everything is most likely the same as in my case, the problem is in the brushes.
When the engine starts and the light goes out, this means that the electronic unit supplies the generator excitation current to the relay brush, diode VD 2 passes the positive signal, but diode VD 1 closes due to its property of passing current in one direction and the LED goes out
Principle of operation
The autogenerator voltage regulator is designed to maintain the voltage of the on-board network within the required limits under any operating mode and at different generator speeds, load changes and changes in external temperature. It is also capable of performing additional functions - protecting the generator from overloads and emergency operation, automatically connecting the excitation windings or the generator failure alarm system to the on-board circuit.
The operation of any voltage regulator is based on the same principle and is determined by the following factors:
- Rotor speed.
- The current strength that the generator delivers to the load.
- An indicator of the magnetic flux created by the field winding current.
Higher rotor speeds determine an increase in generator voltage. An increase in current strength on the excitation winding makes the magnetic flux stronger, and at the same time the voltage. Any voltage regulator stabilizes it by changing the excitation current. When the voltage increases or decreases, the regulator decreases or increases the excitation current, regulating the voltage within the required limits.
The relay regulator itself is an electronic circuit with outputs to graphite brushes. It is installed both in the generator body itself next to the brushes, and outside it, and then the brushes are attached to the brush holder.
Reasons why the generator does not charge the battery
If the battery discharge indicator lights up in the instrument cluster, it means that current is not flowing from the generator to the on-board network and the battery's energy reserves are being consumed. Once the battery is discharged to its minimum value, the engine management system will stop working and the engine will stall. Let's look at the main reasons why charging from the generator to the battery does not occur.
A car has two power sources: a battery (battery) and a generator. The battery is used when starting the engine (to power the starter), as well as for other consumers when the engine is not running. After starting the engine, the main source of current is the generator. It supplies current to all consumers, including the ignition system, and charges the battery.
How long can you drive without a battery-powered generator?
To save battery energy, turn off unnecessary electricity consumers: audio system, heated seats, etc. Also try not to stop and start the engine unless necessary. Under normal conditions, a fully charged battery in the absence of charging current lasts for approximately one hour of driving. See experiment with Lada Largus.
How to find the reason why the generator does not charge the battery
:
1. Check to see if the accessory drive belt (or alternator belt) is broken. If the belt is intact, check its tension.
2. If the belt tension is normal, but the warning light is still on, check that the wiring harness block and the positive wire terminal are securely connected to the generator. Please note that wires may be broken or broken within the insulation.
3. Check the reliability of the wire connections to the battery terminals.
4. Check the integrity of the generator fuse in the engine compartment mounting block. Replace the blown fuse if necessary.
If, after all the measures taken, the charging lamp continues to light up while the engine is running, then most likely the generator is faulty (for example, the voltage regulator is faulty). We told you how to check the generator earlier.
Source
Types of generator faults
Due to the fact that any generator is an electromechanical device, there will be two types of faults - mechanical and electrical.
The first includes the destruction of fasteners, housing, malfunction of bearings, pressure springs, belt drive and other failures not related to the electrical part.
Electrical faults include winding breaks, diode bridge faults, brush burnout/wear, turn-to-turn short circuits, breakdowns, rotor beating, and relay-regulator faults.
Often, symptoms that indicate characteristics of a faulty generator can also appear as a result of completely different problems. As an example, poor contact in the fuse socket of the generator field winding circuit will indicate a generator malfunction. The same suspicion may arise due to burnt contacts in the ignition switch housing. Also, the constant lighting of the generator malfunction indicator lamp can be caused by a breakdown of the relay; the blinking of this switching lamp may indicate a generator malfunction.
The main signs of a faulty generator:
- When the engine is running, the battery discharge warning lamp flashes (or stays on continuously).
- Discharging or overcharging (boiling) of the battery.
- Dim car headlights, a rattling or quiet beep when the engine is running.
- Significant change in headlight brightness with increasing speed. This may be acceptable when increasing the speed (re-throttle) from idle, but the headlights, having lit up brightly, should not increase their brightness any further, remaining at the same intensity.
- Extraneous sounds (howling, squeaking) coming from the generator.
It is necessary to regularly monitor the tension and general condition of the drive belt. In case of cracks and delaminations, immediate replacement is necessary.
Reasons for Priora battery not charging
Hello everyone, I have this problem: on my way home from work, the charger disappeared, it was raining and there were quite deep puddles. As soon as the “battery light” came on, I immediately stopped and turned it off, looked at the generator - it was dry, the belt was in place and tensioned as it should.
I arrived at the garage and spent a long time fooling around with a book that says: Check fuse F1 under the steering column, but for some reason I don’t have it there at all. In short, I checked all the fuses - everything is fine.
I took off the generator, examined it, but didn’t really notice anything. Guys, tell me why this happened, I’m no stranger to electrics.
If a battery that is more than 5-7 years old is not charging , then the answer to the question is: “ why ?” most likely lies on the surface. After all, any battery has its own service life and over time loses some of its basic performance characteristics. But what if the battery lasted no more than 2 or 3 years, or even less? Where then should we look for reasons why the battery does not want to charge? Moreover, this situation occurs not only when recharging from a generator in a car, but even when it is replenished from a charger. Answers must be sought depending on the situation by performing a series of checks followed by procedures aimed at eliminating the problem.
Most often, you can expect 5 main reasons that manifest themselves in eight different situations:
| Situation | What to do |
| Oxidized terminals | Clean and lubricate with special lubricant |
| Broken/loose alternator belt | Stretch or change |
| The diode bridge has failed | Change one or all diodes |
| Voltage regulator faulty | Replace graphite brushes and the regulator itself |
| Deep discharge | Increase the charging voltage or reverse polarity |
| Incorrect electrolyte density | Check and adjust to the required value |
| Sulfation of plates | Perform a polarity reversal, and then several cycles of full charge/discharge with low current |
| One of the cans is closed | Actions to restore a battery with such a defect are ineffective |
The battery is low
It is always recommended to start checking from the engine compartment. On vehicles similar to Mercedes-Benz, the battery is located in the trunk. Therefore, in this case we need to move back. The task is to check the battery charge and find the cause of the problem. As a rule, in such cases the headlights shine dimly and the sound signal is weak.
Deep discharges of the battery should not be allowed, as this leads to sulfation of the plates and complete destruction of the battery.
There are several ways to check your car's battery charge using various tools. Let us give as an example a variant with a load fork test, which is considered the most accurate:
- the plug is connected to the battery terminals and supplies short circuit voltage - this simulates the operation of the starter;
- Readings are read on the instrument scale, which determine how much the charge drops when starting the car.
You can verify that the battery is 100% charged (that it is not the cause) by the load plug indicator of 10.2 V. On the contrary, if the voltage drops below 7.8 volts, this will indicate a complete, zero percent charge. Other battery charge levels are determined in the same manner: 9.6 V - 75%, 9 V - 50%, 8.4 V - 25%.
The main reasons why the battery may not charge
To understand in detail all the possible malfunctions due to which the car battery does not charge, first of all, clearly define the situation:
| The battery quickly discharges and dies | or he | does not charge at all (does not accept charge) |
In general, when the battery refuses to charge, the following options are allowed:
- plate sulfation;
- destruction of plates;
- terminal oxidation;
- decrease in electrolyte density;
- short circuit
But you shouldn’t worry so much right away, everything is not always so bad, especially if such a problem arose while driving (indicated by a red battery light). It is necessary to consider special cases in which the car battery does not take charge only from the generator or from the charger as well.
The charging system of a car battery contains a number of external devices, on which the performance of the battery itself and the charging process can also greatly depend. To check all external devices, you will need a multimeter (tester); it will allow you to measure the voltage at the battery terminals under different engine operating modes. You will also have to check the generator. But this is only true when the battery does not want to be charged from the generator. If the battery does not take a charge from the charger, then it is advisable to also have a hydrometer to check the density of the electrolyte.
Control of other elements of the charging system
To determine why the alternator is overcharging or not charging the battery at all, you may need a multimeter. Using the tester, you can measure the battery voltage in two modes. With the engine turned off, the charge parameter should be in the range of 12.5-12.7 volts, and with the engine running - 13.5-14 volts. If these indicators are lower when the internal combustion engine is switched on, this may indicate problems in the operation of the diode bridge or brush assembly. By the way, brushes can wear out, so they need to be changed periodically.
If the cause of overcharging or lack of charging is a relay, it can be eliminated by replacing or resoldering the diodes. If the diodes will be soldered, it is necessary to select devices that are closest in technical characteristics. Otherwise they may overheat.
How do you know if the battery is not charging?
The battery does not charge from the generator . The first signal that the battery is not charging is a lit red battery light! And to make sure of this, you can check the battery voltage. There should be 12.5... 12.7 V at the battery terminals. When the engine is started, the voltage will rise to 13.5... 14.5 V. With consumers turned on and the engine running, the voltmeter readings, as a rule, jump from 13.8 to 14.3V. No changes on the voltmeter display or when the indicator goes beyond 14.6V indicates a generator malfunction.
When the generator runs but does not charge the battery, the cause may lie in the battery itself. Apparently it was completely discharged, which is called “zero”, then the voltage is less than 11V. A zero charge may occur due to sulfation of the plates. If the sulfation is insignificant, you can try to eliminate it. And try charging using a jump charger.
How to understand that the battery is not charging from the charger ? When a battery is connected to a charger, evidence that it is fully charging is a constantly changing voltage at the terminals and jumping voltage or current readings on the device dial. If there is no charge, there will be no change. When the battery is not being charged from an Orion type charger (which has only indicators), you can very often observe a buzzing and rare blinking of the “current” light.
Design of a car generator
Any generator, with the exception of direct current models, creates multiphase alternating current - three or four phases, depending on the power. Why such a complication if the on-board network uses only direct current anyway? The fact is that a multiphase alternating current generator has higher efficiency, and most importantly, the current is removed not by brushes from the rotating rotor, but from the stationary stator windings. Accordingly, there are no problems with burnout of the collector (the current in it is much less than what the generator produces), and the collector itself is simpler - two rings, and not a set of insulated lamellas.
To convert polyphase alternating current into direct current, a diode bridge is used. At a minimum, it contains several powerful diodes with twice the number of phases - they are engaged in rectifying the current. Some generators also have additional diodes that provide power to the relay regulator.
The relay-regulator itself is no longer a relay: instead of an electromechanical device, electronic circuits are used to control generators, but the name “relay-regulator” has already firmly established itself behind it. They operate in the same way - by changing the current in the rotor winding (and the magnetic field in the core), they increase or decrease the voltage at the generator output so as to keep it within specified limits from 13.7 V (old low-power generators) to 14.5 V (modern generators designed for high power consumption of the on-board network and accelerated battery charging). Modern generators are no longer independent units, but are integrated with on-board controllers: the ECU controls the voltage, raising it after the engine starts to speed up battery charging, and then lowering it to normal.
What can you do when your car battery is not charging?
The first step is to find out the cause, and only then take action to eliminate it. To do this, you need to measure the voltage at the battery terminals, check the level, density of the electrolyte and its color. It is also, of course, necessary to visually inspect the surface of the battery, the car wiring, and also to determine the current leakage.
Let us consider in detail the possible consequences of each of the reasons for poor battery performance, and also determine what needs to be done in a given situation:
Oxidation of contact terminals
both prevents good contact and contributes to current leakage. As a result, we get a quick discharge or unstable/absent charging from the generator. There is only one way out - check not only the condition of the battery terminals, but also the condition of the generator and the ground of the car. Heavily oxidized terminals can be removed by cleaning and lubricating the oxides.
Generator malfunction
(belt, regulator, diodes).
Belt break
you would probably notice, but the fact is that even a slight loosening of the tension can contribute to slippage on the pulley (as well as oil ingress). Therefore, when powerful consumers are turned on, the light on the panel may light up and the battery will discharge, and on a cold engine a squeaking sound can often be heard from under the hood. This problem can be eliminated either by tensioning or replacement.
Diodes
in normal condition they should pass current only in one direction; checking with a multimeter will make it possible to identify the faulty one, although often they simply change the entire diode bridge. Improperly functioning diodes can cause both undercharging and overcharging of the battery.
When the diodes are normal, but they get very hot during operation, it means the battery is being overcharged. The regulator is responsible for the voltage . It is better to change it immediately. In a situation where the battery is not fully charged, you need to pay attention to the generator brushes (after all, they wear out over time).
During deep discharge
, as well as with a slight shedding of the active mass, when the battery does not want to be charged not only in the car from the generator, but even the charger does not see it, you can reverse the polarity or give a high voltage so that it grabs the charge.
This procedure is often carried out with AVG batteries when there is less than 10 volts at its terminals. Reversing the polarity allows you to start a completely discharged battery. But this will only help if the poles on the battery have actually changed, otherwise it can only cause harm.
The change of battery poles (both lead-acid and calcium) occurs in the event of a complete discharge, when the voltage of some battery banks, which have a smaller capacity than the others connected in series, decreases much faster than others. And having reached zero, as the discharge continues, the current for the lagging elements becomes charging, but it charges them in the opposite direction and then the positive pole becomes minus, and the negative pole becomes positive. Therefore, by briefly changing the charger terminals, such a battery can be brought back to life.
But remember that if the polarity change on the battery does not occur, then if there is no protection on the charger from such a situation, the battery can be permanently damaged.
This process will not work if:
- the plates crumbled and the electrolyte became cloudy;
- one of the cans is closed;
- There is no required electrolyte density in the battery.
The polarity reversal method works well for desulfation, but only no more than 80-90% of the capacity can be restored. The success of this procedure lies in the thick plates; the thin ones are completely destroyed.
Diagnostics
The search for a faulty element begins with checking the battery charge level. To measure the voltage at the terminals, use a multimeter or voltmeter. It is necessary to take readings in two modes:
- without load with the ignition turned off and the minus terminal removed;
- under load: by turning the key in the ignition and turning on any consumer (low beam headlights, air conditioning).
The multimeter probes in voltmeter mode are connected in series: the positive terminal is a red contact, the negative terminal is a black one. The normal value of the battery voltage at rest with a 100% charge is 12.05 - 12.6 Volts.
The test under load should be carried out carefully, observing safety precautions: when turning on the ignition, do not touch the power terminal and cable with your bare hands. The multimeter readings are taken twice: when the engine starts, and after 20-30 seconds. When starting the engine, the power current can reach a peak of up to 670 Amps, depending on the power of the unit. The battery supplies a significant part of the energy to the starter for the initial crankshaft rotation - at this moment the voltage at the terminals drops. A value of 8-9 V is considered normal; if the drop during startup is critical and reaches 6 V, then the battery is completely faulty.
After measuring under load, the voltage on a working battery is restored within 15-30 seconds. It is measured again, determining the charge capacity. Next, be sure to check the oxides on the terminals, the condition of the power cable for damage to the insulation, and the reliability of fastening the ground wire to ground.
A blown fuse in the mounting block is diagnosed by the condition of the fusible link. In order to determine which of them is responsible for the battery indicator light, you need to use the electrical diagram in the technical description of the car (the location differs depending on the brand of the power unit). The fuse is included in the common circuit and controls several consumers: all indications on the dashboard, cigarette lighter illumination, interior light. Typically this is socket F3, rated at 10 Amps.
The electrical circuit is first inspected, checking the contact fastenings and breaks. If no visible violations could be detected, then the multimeter is turned on in ohmmeter mode and each section is “ringed” separately: from the battery to the generator, from the rotor terminals to the fuse mounting block, the ignition coil and the instrument panel (contacts of the control light).
A faulty relay in the mounting block is tested for voltage with the on-board power supply turned on. The voltage at the relay output must be at least 9 Volts.
Additional information: the location diagram of the battery light relay in the circuit is indicated on the electrical diagram of the unit: in domestic cars (VAZ, GAZ) fuses and relays are mounted in two rows.
The diode bridge and the generator voltage regulator relay are checked with the engine running: at idle, the unit speed is increased to 4000 rpm and the voltage is measured with a multimeter at the rotor terminals. If the indicator is around 14.5 Volts, then the generator components are working properly.
Often the reason for the lack of battery indication is a minor reason: a burnt out light bulb or a poorly secured fuse in the socket. To eliminate the violation, it is enough to move the fallen fuse and put it in place in the socket until it stops.
If the failed element is not installed and the warning light does not light up, then computer diagnostics are carried out, reading error codes in the ECM. To do this, use the ODB-2 connector (under the steering column), a computer or laptop with the program installed, or a special scanner. All errors are recorded by the system in the ECU (electronic control unit) memory log; the structure of the codes is given in the technical description of the car - they are different for all models. Using a scanner or laptop, they decipher the system error and determine the cause of the failure. This diagnostic method provides a complete picture of the condition of all components over the entire period of their operation.
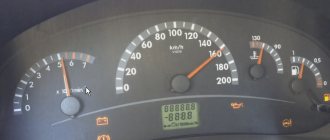
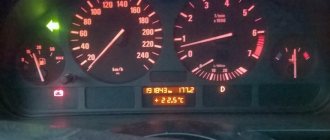
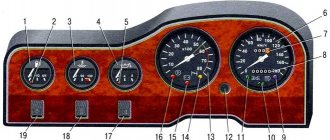
The dashboard of a modern car is filled with all kinds of indicators and lights. Some of them are emergency, others are warning, others are simply service, and their operation should not cause any concern.
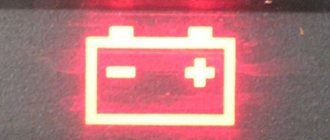
Among the lamps that are activated when the ignition is turned on is the battery indicator. If it doesn't light up, it's not a very good sign. There is a reason to conduct a diagnosis and determine why this is happening.
This is a typical situation that many motorists who own cars of different brands, models and ages have encountered.
Causes of malfunction of starter car batteries
The service life of a battery discharged by 25% is significantly reduced if:
- malfunction of the generator and voltage regulator;
- starter malfunctions leading to an increase in current or an increase in the number of attempts to start the engine;
- oxidation of power wire terminals;
- constant use of powerful consumers during long periods of idle time in traffic jams;
- repeated cranking of the crankshaft with the starter on short trips.
A reduced electrolyte level during battery operation is also a key reason for rapid battery failure. Therefore, the cause of the malfunction may be:
- Rare electrolyte level monitoring. In summer, checking should be done more often because high temperatures promote rapid evaporation of water;
- Intensive use of the car (when the mileage is more than 60 thousand km per year). Requires checking the electrolyte level at least every 3-4 thousand kilometers.
Graphic representation of the situation when the battery is not charging. Infographics
To enlarge the image, just click on the picture.
By the way, problems with charging on all those cars that I personally had to use occurred extremely rarely. For the most part, this began after the 90-100 thousand mileage mark. Priora is no exception. If on a relatively new car, when the new generator and all other components are in perfect order, these problems are practically eliminated, then on a used car, problems with battery charging can occur quite often.
Why is there no battery charging and where to look for it?
In fact, there are a great many reasons why charging may fail. And most of them are connected with the most important unit in this regard - the generator. Let's look at the main ones that can most often occur.
- Wear of generator brushes on Priora. As mentioned above, when all the parts are still new and without wear, then such malfunctions essentially cannot exist. But when the mark is 90-100 thousand km. has already been overcome, the first calls begin. And the most common reason for the battery not charging is excessive wear of the brushes. This issue can be easily resolved - replace them with new ones. The price of the assembled part is about 350 rubles.
- The second reason can also be compared with brushes, since it is with this part that they come into contact during operation. These are the armature slip rings. It is worth removing the plastic cover of the generator and looking at the contact points of the brushes and rings to understand how much wear these parts have had! It is not always possible to carry out this replacement on your own, but almost any electrician will do it in half an hour.
- Failure of the generator diode bridge. Even if one of the diodes breaks through, there will be poor charging, which will lead to a constant discharge of the battery. In this case, the rectifier unit is replaced.
- Failure of the regulator relay - it is replaced as an assembly with the brush assembly, while the brushes themselves can be replaced separately (again, with the help of a good electrician).
- More serious problems occur with parts such as the stator, rotor, bearings, etc., which are actually much less common than the above cases.
Possible malfunctions and ways to eliminate them
The operation of Lada Priora generating devices may occasionally fail.
For what reasons may a generator from Priora not work correctly:
- Elements F12 have burned out on the fuse diagram. In this case, the devices on the dashboard will stop working, and the lamp will not light up when the ignition is turned on. Replacing the part will solve the problem.
- There has been a break in the power supply circuit of the instrument devices; the symptoms will be similar to those described above. To fix the problem, you need to check the connections, as well as the contacts from the orange wiring.
- The ignition switch refuses to function. Regardless of what kind of lock it may be, it needs to be changed.
- Souring or wear of the mechanism brushes, oxidation of slip rings. Symptoms of malfunction will be the same. To solve the problem, you need to change the voltage regulator on the Lada Priora, and also clean the contacts. Many priority drivers today use a three-level voltage regulator - three levels allow you to always control the voltage level in the network.
- The excitation winding leads have broken. The problem can only be solved by replacing the rotor of the unit.
- If the drive belt slips, the battery discharge lamp will indicate this - adjusting the tension will solve the problem.
- Another reason why the Priora Lux generator may be faulty is damage to the valves of the rectifier device. The block itself will have to be replaced.
- The battery discharge lamp may appear when the diode batteries of the excitation winding are damaged. In this case, the rectifier unit will also have to be changed.
- A short circuit or break may occur in the stator winding - it will be necessary to repair the latter or install a new one instead. Also, the stator needs to be changed in case of an interturn short circuit or a short circuit to ground.
- The bearing elements have worn out - the car owner will be informed about this by third-party sounds when the generator unit is operating. In the video below you can familiarize yourself with the procedure for repairing a mechanism at home (the author of the video is Repair and Tuning).
Symptoms of loss of battery charging on a Priora
The very first thing that many people pay attention to is that the battery charging light on the dashboard came on. If you have a multimeter at hand, you can measure the output charging current by connecting the contacts to the “+” and “-” terminals, respectively. If even without a load the device readings are less than 13 Volts, this indicates that there are certain problems with charging.
Of course, it is possible (although it is highly not recommended) to remove the “-” terminal from the battery while the engine is running, thereby checking the functionality of the generator. If the engine stalls, this will indicate that there is actually no charging, and accordingly, the generator is faulty.
Also, the charging lamp may glow at half-glow, which also indicates insufficient charging current. If one of the symptoms listed above occurs, it is necessary to diagnose the generator and its parts. If necessary, replace them with new ones. If you have anything to add to this article, you can comment below.
Source
Circuit and device
The generator diagram shows how the unit is connected to other components of the car. Lada Priora with air conditioning and power steering received model 5102.3771, which has a number of advantages over generators of previous generations. Increased current output at low engine speeds is one of the advantages of the device: the timing rotor speed is reduced by 300 min, while the output is increased by 4-6 A. This innovation made it possible to use an automatic transmission, and also increased performance for the winter period.
The diagram shows that the operation of the device is monitored by a warning lamp that is installed in the dashboard. When you turn the key in the ignition, the lamp should light up, and after starting it should go out. This is how a working generator works. If the lamp continues to light while the engine is running, then there is a malfunction in the operation of the unit; the diagram will help you understand it.
Once the circuit has been studied, you can move on to the details of the generator.