The thermostat is responsible for maintaining the temperature balance of the power plant. It determines in which circle the coolant will circulate and how much of it will enter the radiator. If it fails, the motor temperature rises above the recommended range. As a result of engine overheating, thermal destruction of the oil occurs, carbon deposits form on the cylinders and accelerated wear of the internal combustion engine occurs. Under the most unfavorable conditions, the pistons may jam and the engine will completely fail.
Description of the thermostat and problems with it on the Chevrolet Lacetti
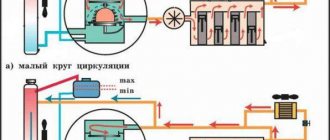
The thermostat determines whether liquids circulate in a large or small circle. The cooling intensity of the power plant depends on this. On a Chevrolet Lacetti, the flow of liquid into the radiator begins when it reaches 85-87 degrees. Full opening of the thermostat occurs at 102°C. In this case, all the coolant begins to circulate unhindered in a large circle.
If the valve is not closed tightly, coolant constantly flows into the radiator. As a result, the engine warms up longer. In winter, the power plant may never reach rated operating temperature. A loosely closed thermostat reduces the life of the power unit, requires a long time interval for warming up and causes increased fuel consumption.
Valve jamming leads to the fact that the liquid continues to circulate in a small circle after reaching the operating temperature and exceeding it. Further heating leads to boiling of the power unit. This causes warping of main components and parts, jamming of pistons and thermal destruction of oil and rubber products. Therefore, it is extremely undesirable to allow the Chevrolet Lacetti to be operated with a jammed valve.
Another thermostat problem is a coolant leak. If there is significant leakage, a critical decrease in the coolant level is possible, which will result in overheating of the power plant.
What happens when the thermostat breaks down?
If the thermostat breaks down, the fluid overheats, and, accordingly, the entire engine compartment . Next, an effect occurs that is known to many - “the engine boils.” The device does not work even at peak times, which means it’s time to make a small upgrade to our Lacetti, replace the thermostat.
In addition to the fact that the engine constantly overheats, some additional unpleasant moments arise:
- fuel consumption increases;
- additional carbon deposits appear in the cylinders;
- the engine may jam;
- There is poor heat flow into the cabin.
Symptoms of thermostat problems
Symptoms that your thermostat may need to be replaced include:
- reduction in the warm-up rate of the power plant;
- when starting a cold engine, heating of the large circle pipe is observed until the internal combustion engine reaches operating temperature;
- a sharp increase in temperature during movement or its significant excess of the nominal value;
- a visual inspection revealed that the gasket or housing had leaked;
- When the engine temperature is high, the large circle pipe remains cold.
If any of the above problems are identified, further operation of the car is not recommended until the problem is eliminated. Otherwise, a significant reduction in service life or complete failure of the power plant is possible.
Signs of breakdown
Signs of a malfunction of the Chevrolet Lacetti thermostat may include the following factors:
- Prolonged engine warm-up (more than 3-5 minutes under normal conditions). This means that the coolant always circulates in a large circle.
- As the engine warms up, the temperature of the incoming radiator pipe increases.
- When driving in moderate mode, the engine quickly heats up and overheats. The cooling fan runs constantly. This means that circulation occurs only in a small circle, switching to a large circle does not occur.
- After warming up the internal combustion engine above 95 °C, the radiator pipes do not heat up.
If one or more of the above problems are detected, operation of the vehicle is not recommended until the problem is completely eliminated.
Checking the Thermostat
In order to check the functionality of the thermostat, you must follow the instructions below.
- Remove the thermostat from the Lacetti.
- Pour water into a saucepan.
- Place the thermostat in the container.
- Start heating. In this case, it is necessary to control the temperature using, for example, a multimeter with a thermocouple.
- When it reaches 85-87 degrees, the damper will begin to open. When the multimeter shows 102°C, the thermostat valve should open completely.
It is possible to check the proper condition of the thermostat without removing it from the car. To do this, you need to check the temperature of the pipes. The main disadvantage of this method is its low accuracy, as a result of which it is possible to incorrectly determine the culprit in the malfunction of the cooling system.
Operating principle
You will be interested in: Kama Irbis tires: reviews, descriptions, features
This thermal valve works very simply. When the wax melts under the influence of hot coolant, it will begin to expand - its state will change from solid to liquid. When the wax ball melts and expands completely, pressure will be created. Under the influence of this pressure, a metal pin will be squeezed out of the metal body, which will open the valve, thereby allowing antifreeze access to the radiator. When the liquid in the radiator begins to cool, the wax will again take a solid state, its usual shape, and the thermal valve will close - the coolant will again circulate in a small circle.
Due to the bypass valve, liquid can only move along the line to the radiator. The outlet pipe of the pump is connected to the radiator pipe. The bypass valve is a structure consisting of a disc and a return spring.
Thus, thanks to the thermostat, the car warms up faster, since the valve prevents the circulation of cold liquid in a large circle. Antifreeze does not enter the radiator and does not cool even more. And when the liquid is fully heated (up to +85 degrees Celsius or more), the valve begins to slowly open. The standard element opens at +85-87 degrees. But they put the thermostat on the Lacetti at 92 degrees. Usually they replace the factory element with a non-standard one so that the car warms up faster. However, as practice shows, there is not much difference in this. If the factory valve is working normally, there is no need to change anything in the cooling system.
Cost and article number of the original thermostat and its analogues
The Chevrolet Lacetti uses two types of thermostats, which differ in the housing material. The plastic one has article number 96835286 and has a price of about 1600 rubles. The metal thermostat has a collapsible body and has catalog numbers 96460002 and 92062728. Its price is higher than that of a plastic product and ranges from 2000 to 2500 rubles.
In the case of a metal thermostat, it is possible to replace only its internal filling. To do this you will need:
- seal with article number 94580530;
- thermocouple with article number 96143939;
- housing seal with catalog number 96143112.
In addition to the original Chevrolet Lacetti thermostat, it is possible to purchase analogues from third-party manufacturers. The best of them are shown in the table below.
Table - Analogues of the original Chevrolet Lacetti thermostat.
| Manufacturer | vendor code | Cost, rub |
| MOTORAD | 34788 | 460-480 |
| KAVO PARTS | TH1003 | 480-500 |
| NIPPARTS | J1530901 | 540-560 |
| MEYLE | 29282280000 | 800-850 |
| VERNET | TH622287J | 600-620 |
| CTR | 92062728 | 750-800 |
| BEHR-HELLA | TI987 | 870-1000 |
| GATES | TH15087G1 | 1200-1300 |
| MAHLE ORIGINAL | TI987 | 800-830 |
| ONNURI | 92062728 | 800-810 |
| BLUE PRINT | ADG09217 | 1900-2000 |
Removing and installing the thermostat Chevrolet Lacetti 2004 - 2013
Removing and installing the Chevrolet Lacetti thermostat
Previously, at existential, I ordered a 92g thermostat insert from Opel. Today I purchased Felix antifreeze from the Tosol Sintez company (for some reason I trust it).
So, a guide to replacing the thermostat (insert) and antifreeze. Since I don’t know what kind of green antifreeze it turned into a cloudy green mud.
A slop of indeterminate green color called antifreeze G11
It was decided to replace it with a more modern and durable one, that is, G12+.
First of all, to replace G11 antifreeze with G12, you need to flush the system. I used Mannol radiator flush. Don't forget to turn on the heater in the cabin to full.
Antifreeze replacement kit and thermostat
As you can see in the picture, we will change to a thermostat with a starting opening temperature of Vernet 92ºС.
Thermostat, which was purchased for 75 UAH.
In a box marked quinton hazell QTH600K, the kit includes 3 o-rings, a clamp, sealant, and a cardboard tube (more on this separately later). Fill in the flush, run the engine according to the instructions for 10-30 minutes, drain.
We climb under the car, pulling off the corrugation with some wires with our finger, find a plastic plug for a Phillips screwdriver, prepare a container with a funnel (we use plastic bottles), and begin to twist the plug.
Attention! The main thing is not to unscrew it completely. We twist slowly to obtain an even stream from the hole of the “TV”, if the stream begins to splash in different directions, etc. perhaps the cork will fall out and scald us with boiling water (not hot). So we spin it thoughtfully. The hardest thing is to wait for the liquid to drain, changing containers on time, 25-40 minutes.
To completely drain the coolant, according to the manual, remove the throttle body heating pipe.
Throttle assembly
After draining the coolant, we see the following picture in the tank.
There's some kind of crap at the bottom. I tried to wash it, but I had nothing to use, so I gave it up.
But the camera, having looked into the tank and inhaled the fumes, began to show the otaku its beauty.
Without Photoshop
Next, having used almost 10 liters, almost distillate, we rinse the system: at first I simply poured distillate through, then filled the system, started the car and, adding water and gassing, rinsed and drained it.
Place a rag under the thermostat and on the belt, unscrew it with a 8mm spanner, and unscrew the thermostat bolts. Basically you have to twist your fingers. You can remove the thermostat housing from the hose or you can not remove it, take the tube included in the kit and, pressing counterclockwise, remove the thermocouple.
Clockwise, getting into the grooves, we install the new one in place.
Use solvent or gasoline to wipe off the mounting areas.
Apply a thin layer (as practice has shown, a lot of sealant is squeezed out) and screw everything back.
We fill the system with antifreeze, pour it in, wait, knead the hoses coming from/from the radiator, start it (don’t forget to tighten the tank cap), top it up, gas it, top it up. We smoke (after washing our hands). We check the level, top it up, put some antifreeze in the trunk for further topping up, and monitor the first 5-15 km. That's it, see you later.
Source: https://www.drive2.ru/l/4062246863888509452/
Required Tools
In order for the replacement of the thermostat on a Lacetti with a 1.6 liter engine to be successful, the tools shown in the table below are required.
Table - Tools and materials required to replace the thermostat.
| Name | Note |
| Pliers | Can be replaced with pliers |
| Hose | 1.5 meters long |
| Head "12" | Preferably with an L-shaped tubular wrench |
| Vorotok | With ratchet |
| Extension | For comfort |
| Tara | 3-6 liters |
Types and characteristics
Two types of thermostats can be installed on a Chevrolet Lacetti car. This is collapsible aluminum and non-dismountable plastic. The first one costs a little more and is sold complete with a standard thermal element. Which one is better to choose? Reviews say that it is safer to install an aluminum hot thermostat on the Lacetti. Here are some characteristics of the thermostat:
- The diameter of the large radiator pipe is 35 millimeters.
- The angle between the nozzles is 60 degrees.
- The center-to-center distance between the mounting holes is 75 millimeters.
- The diameter of the pipe that enters the engine block head (external) is 39 millimeters.
- The length from end to flange is 18 millimeters.
- The diameter of the pipe going to heat the engine throttle valve is 10 millimeters.
Description of replacing the thermostat on a Chevrolet Lacetti
In order to replace the thermostat on a Lacetti, you must follow the instructions below.
- Remove the engine protective cover.
- Cover the generator drive belt with polyethylene.
- Relieve pressure in the circuit. To do this, unscrew the coolant reservoir cap.
- Remove the clamp.
- Quickly remove the thin pipe and in its place put on a hose through which the coolant will be drained. It is also advisable to start the power plant and let it run for 15-25 seconds.
- Dismantle the second pipe.
- Unscrew the thermostat mount.
- Remove thermostat.
- Install the new thermostat into the seat.
- Reassemble everything in reverse order.
- Check the operation of the cooling system.
<
Hot or Cold Thermostat: What's the Difference?
The standard Chevrolet Lacetti thermostat is designed for an opening temperature of 87 °C. This is the optimal threshold for ensuring minimal fuel consumption and reducing harmful emissions into the atmosphere.
The disadvantage of high-temperature options is the rapid wear of lubricants and the power unit.
Some users change "hot" to "cold". The replacement is due to the fact that when the damper opens early, the temperature decreases by an average of 10-20 °C. This makes it possible to extend the life of the engine oil and the power plant as a whole.
The procedure also has a downside. A “cold” valve provokes an increase in fuel consumption, resulting in an increase in harmful emissions into the atmosphere.
To summarize: a “hot” thermostat saves fuel, but wears out oil, gaskets, and seals faster. “Cold” allows you to extend the life of consumables and oil, but at the same time fuel consumption increases.
Preparing for replacement
Before replacing the thermostat on the Lacetti, you need to make sure that the engine has completely cooled down. Since we will be tampering with the cooling system, we can easily get burned. Therefore, if the engine has recently been running, wait until it cools down. Next we need a clean container to drain the antifreeze. We will not drain all of it, but only some of it. Therefore, the volume of the container can be no more than three liters. We also need a one and a half meter hose with a diameter of 10 millimeters. For safety reasons, cover the generator belt with plastic wrap or a bag. We cover the areas near the hose with pieces of rags so that the antifreeze does not get where it is not needed.
What's next?
You need to open the expansion tank cap. This will equalize the pressure in the system with atmospheric pressure. Using pliers, we press the tendrils of the clamp of the engine cooling system pipe, which drains the antifreeze. It is the thinnest among the others and is located on the right side of the engine in the direction of travel of the car. You need to loosen it, but not remove it completely. Next, we prepare our one and a half meter hose. We quickly install it in place of this pipe, and lower the other end into the prepared container.
We wait until the liquid drains from the engine block. We then perform the same operation with the large pipe. Then disconnect it completely. At the next stage, take a 12 L-shaped wrench (if you don’t have one at hand, you can use a regular head) and unscrew the two bolts that secure the thermostat to the block. Be prepared that you will have to put some effort into unscrewing, as the fasteners may stick. It is acceptable to use a lever. It is important not to break the bolts themselves. If the O-ring is in good condition, you can leave it. If there is damage, it is better to replace it with a new one. Also, a square seal is placed on the new thermostat. The round one should go to the engine cylinder block.
After this, install the thermostat in the reverse order. Do not tighten the bolts too much. The thread is designed in such a way that when unscrewing the nuts go tighter. Therefore, we turn them with a key using one hand, without additional leverage.
Next, pour our liquid into the expansion tank and start the engine. It should not be surprising that the level was higher than the maximum - an air lock could have formed in the system. It will go away on its own if the engine is idled for a couple of minutes with the expansion tank cap open. We turn off the engine and tighten the plug. The fluid level should level out.
Change process
The lack of a stable temperature regime under the hood leads to the fact that, sooner or later, the thermostat cannot continue to function normally. It doesn’t matter if periodic overheating occurs or vice versa - the engine does not warm up enough. Deviation from the norm is critical for the mechanism of this part.
To begin the replacement, it is worth collecting the necessary tools, a standard set of heads is enough, as well as a new product and coolant. When everything is assembled, we proceed directly to the replacement process:
- Disconnect the negative terminal from the battery.
When checking the thermostat on a car after starting a cold engine, the lower hose leading from the radiator should remain cold for some time. In this case, the thermostat valve is closed, and the liquid circulates in a small circle, bypassing the radiator. Once the fluid temperature reaches 87 °C, the lower radiator hose should begin to heat up quickly, indicating that the coolant has begun to circulate in a large circle. Drain the liquid from the engine cooling system.
We unscrew the drain plug on the engine and drain the coolant until the level is below the thermostat.
Using sliding pliers, we compress the ends of the clamp securing the radiator supply hose and slide the clamp along the hose. Remove the hose from the thermostat cover pipe. Remove the hose from the thermostat cover pipe.
Disconnect the thermostat heating element wiring.
Remove the housing with the thermostat cover.
Unscrew the four thermostat mounting bolts.
Fill the system with coolant to the level. Let's let the car run. After the air has been bled out, you can add liquid again. For the first 30-50 km, you should monitor the coolant level and prevent the car from overheating.
Description
So what is this element? The thermostat is a temperature-sensitive valve designed to regulate the flow of coolant in the system. The valve device includes a plate mounted on the body. The latter performs the function of a cylinder in which the rod is installed. One end of the rod rests against the upper frame of the thermostat, and the other against the rubber cavity of the housing. The device also has a heat-sensitive element, which consists of copper and granulated wax.
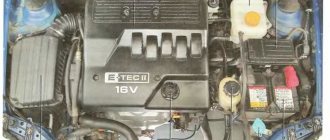
Where is the thermostat located in the Lacetti? This element is attached to the engine cylinder block. Located on the left side of the exhaust manifold.

