Troubleshooting
To quickly check the injectors without removing them, you will need an indicator screwdriver. It consists of a metal rod and handle on which a switch and a contact are located to create a conductive circuit, clamped by one of the fingers. When moving the switch forward towards the rod, the device becomes less sensitive; when moving to the upper position, its sensitivity increases. In the first case, the red indicator lamp will light up or flicker, in the second case, the green lamp will light up.
Before carrying out the test, the screwdriver switch must be moved forward, towards the working part (rod) until it stops, and your finger must be pressed against the open contact located on the handle of the indicator screwdriver. The hand must remain in this position during the entire test, closing the electrical circuit, otherwise there will be no indication.
The working rod of the screwdriver must be positioned so that it touches the metal bracket on the block holding the nozzle. There is an opinion that it is enough to simply bring the rod to the block for an indication to occur, but this is not so. The metal clamp catches the electromagnetic pulse generated during the operation of the injectors; a potential difference and alternating currents arise in it, which the device records.
This test checks the injector while the engine is running, so it must be started and left at idle. When the rod of the indicator screwdriver comes into contact with the metal bracket on the screwdriver, the red indicator should light up. This checks performance on all cylinders. If the injector of one of the cylinders is not working, the indicator will not light or blink.
Using the indicator does not necessarily indicate that the injector is faulty, it signals that it is not working. The problem may be there, or in the voltage supply system, poor contact, failure in the electronic control unit, etc.
Some models do not have metal pad clamps in which currents are generated; in this case, is it possible to determine the faulty injector without removing it from the engine? Yes, this can be done using the same indicator screwdriver. To do this, you need to set the switch in the uppermost position (this is the highest level of sensitivity of the device) and perform additional manipulations.
After starting the engine, the screwdriver rod is brought to the injector block, and no indication will appear, even if it is working. Therefore, you need to attach a metal bracket to the screwdriver shaft, which will serve as an antenna where electromagnetic oscillations will occur. A paper clip carefully pressed around the rod with pliers is suitable for this.
During the fuel injector test, the switch remains in the highest sensitivity up position. With the engine running at idle speed, you need to bring the bracket as close to the block as possible, it should cover it. A blinking indication should appear on the device due to currents excited by the electromagnetic field that occurs during operation of the nozzle. If there is a non-working injector under the column, there will be no indication. This technique is also suitable for pads equipped with a metal bracket.
Conclusion
Testing with an indicator screwdriver will help you quickly find a problem when the engine is misfiring due to an injector, or other problems from the list above arise. If you have this tool, you can carry out diagnostics in your garage, and having identified a malfunction, fix it, if possible. The proposed test only reveals the fact that the injector is not working, and this can be done without disassembling the engine.
To identify the reasons why the fuel does not ignite in the cylinder, more detailed diagnostics and subsequent repairs will be required. However, it is not always necessary to replace the nozzle; there are other reasons why it does not function or is unstable. Sometimes you just need to seal the pad contact and the problem of stable engine operation is immediately solved; in more complex cases, for example, to clean the injectors, you will need to contact specialists.
Source
When to change self-diagnosis
The fuel system of an injection engine has a fairly extensive architecture and faults can only be identified after an accurate diagnosis of each of the system elements. For example, a drop in engine power may be the result of either a malfunction of the injectors, insufficient performance of the fuel pump or a clogged fuel filter.
In addition, jerks and dips, unstable idle and difficult starting, increased consumption, can occur when the injector is simply clogged.
You can check the injectors themselves directly on the engine without removing them. To do this, just start the engine and remove the wires from the connector one by one. If the stability of the engine changes in this case, the engine begins to trip, then the injector
in order. If, when removing the wires from the connector, the stability of the motor does not change, the injector needs to be cleaned or replaced.
Cleaning Priora injectors
There are two options for washing injectors: with and without removing them from the car. The removed injectors are washed on special stands using ultrasound, under the influence of which even the oldest contaminants disappear. Ordinary drivers do not have such stands, so below we will consider a more popular option for washing injectors without removing them from the Priora. Here's what you'll need for this:
- liter of special flushing fluid;
- two automobile nipples;
- automobile fuel filter;
- a pair of metal clamps;
- a meter piece of rubber hose with a diameter of 12 mm;
- drill with 13 mm drill bit;
- electric pump;
- two liter plastic bottle.
Important nuances
There are a few things to keep in mind when cleaning your injectors. Here they are:
Flushing fluid from Wynns is the best option for Priora injectors
The plastic bottle must be removed carefully after washing the Priora injectors.
Replacing injectors is a long procedure. Nevertheless, it is quite within the power of a novice driver if he has at least a vague understanding of the structure of an injection engine. When cleaning the injectors, the situation is much simpler: you just need to be able to use a drill and know where the main fuel hose is located.
Source
How to Check Injectors on a Priora
Let's check that the injectors are working. Lada Priora, changing and washing procedure
Owners of Russian Lada Priora cars note the build quality and reliability of the car's parts. But most comments and questions from car owners are related to engine and fuel system maintenance. Injectors, which provide fuel injection into the engine cylinders, play a major role in the injection dynamics of a car. They often need cleaning or even replacement.
What attachments are installed on Priora cars
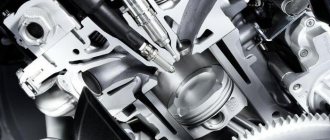
Injectors are an integral part of the operation of any power unit with continuous injection. Structurally, they are electromagnetic valves, which, when opened, provide fuel injection (injection) in the required volume into the engine cylinders. In this case, the main purpose of the part is to save fuel, so the valve opens at regular intervals, depending on the driving mode.
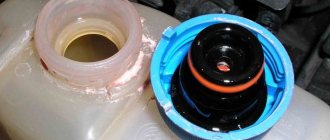
Have a red cap
Imported injectors are installed on Priority and are equipped with an injection-type engine. Bosch and Siemens products are highly reliable and durable. Their resource is determined by the range of 100-150, after which it is recommended to change them.
It is usually available in black.
Difference in nozzles for 8 and 16 valve engines
For different modifications, Priors installs parts from the same model. For power supplies with 8 and 16 valves there are no differences. The only thing you need to do is be careful when choosing injectors for engines of different sizes: for example, for a 1.5 engine, the parts will be different in markings, color and thickness from 1.6.
It is recommended to select materials from the same manufacturer that the vehicle was installed with at the factory.
READ Replacing Hydraulic Compensators Daewoo Nexia 16 Valve
Also check out
- For convenient removal of the cabin filter of the Lada Priora, a special tongue is made. It will most likely not be possible to do this carefully, but there is nothing wrong with a damaged filter, since it is no longer suitable for further use anyway.
- As you can see in the photo, the old filter is covered in dust.
- The new filter is installed easily using special arrows indicating the direction of installation.
- Lower the rolled filter between the motor and the socket and install it. How to install the filter by bending it along the notches is shown in the photo.
- After we have replaced the cabin filter of the Lada Priora, we need to close the cover by placing the lower shank in the slot. Press the top until it clicks. The foam seal should be on the outside.
- Finally, we fasten the engine compartment trim, after which you can return the vacuum booster hose to its place.
This completes the replacement of the Lada Priora cabin filter.
Characteristics of the VAZ 2110 injector 8 valves with a working volume of 1.5 and 1.6 liters.
• Engine VAZ 2111 1.5 l. 8-valve injector ➤ Displacement – 1499 cm3 ➤ Number of cylinders – 4 ➤ Number of valves – 8 ➤ Cylinder diameter – 82 mm ➤ Piston stroke – 71 mm ➤ Power – 76 hp (56 kW) at 5600 rpm ➤ Torque - 115 Nm at 3800 rpm ➤ Compression ratio - 9.9 ➤ Power system - distributed injection ➤ Acceleration to 100 km/h - 14 seconds ➤ Maximum speed - 167 kilometers per hour ➤ Average fuel consumption – 7.2 liters • Engine VAZ 21114 1.6 l. 8-valve injector ➤ Displacement – 1596 cm3 ➤ Number of cylinders – 4 ➤ Number of valves – 8 ➤ Cylinder diameter – 82 mm ➤ Piston stroke – 75.6 mm ➤ Power – 81.6 hp (60 kW) at 5600 rpm ➤ Torque - 115 Nm at 3800 rpm ➤ Compression ratio - 9.6 ➤ Power system - distributed injection ➤ Acceleration to 100 km/h - 13.5 seconds ➤ Maximum speed - 170 kilometers per hour ➤ Average fuel consumption – 7.6 liters
Basic faults
The main malfunction characteristic of the VAZ 2110 is the appearance of the engine tripping effect. Malfunctions can occur for various reasons. Let's consider the factors that cause unstable engine operation, as well as methods of elimination. If the stove doesn't heat up, look here, and about replacing the valves here.
Poor quality fuel
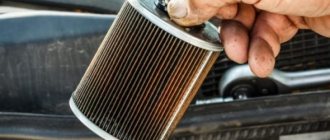
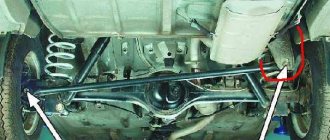
The first thing you need to check is how high-quality the fuel was poured into the vehicle. If the gasoline was of poor quality, then most likely one of the elements of the fuel system was forgotten. So, the motorist will have to find out what the fuel supply scheme is and find parts that could have failed. So, the first element that comes under scrutiny is the spray nozzles. Malfunctions of the injectors can cause unstable operation of the engine, which will lead to tripping. A special stand is used to diagnose and clean the unit, but many motorists carry out the process themselves, using carburetor cleaning fluid. Also, unstable engine operation may be caused by clogged fuel filters. One is located under the rear right wheel, and the second is in the fuel pump. There is a filter mesh on the fuel pump intake that needs to be replaced. The process is quite complicated, since you have to remove the rear seats and remove the fuel supply element. But the fuel filter under the wheel can be changed quickly and without any problems.
Ignition system
Damage to spark plugs or high-voltage wires can also cause tripping. So, it is necessary to check all the elements using a tester, as well as visually inspect them. If there is damage, it is recommended to replace the entire set.
Sensors and ECU
Another major reason for engine tripping is the failure of one of the engine sensors, as well as a malfunction in the electronic control unit. To carry out diagnostics you need to connect to the “brains”. Next, based on the errors shown, find the faulty meter and replace it. If this does not help and the error in the ECU remains, then it is recommended to reset, and in some cases flash the control element.
Maintenance
Engine maintenance is carried out every 10-12 thousand kilometers. The schematic map is available from official representatives of the manufacturer. But, as practice shows, it all comes down to changing the oil and oil filter. Many car enthusiasts ask the question - what is the best engine oil to pour into the VAZ 2110 8-valve power unit? The best option remains semi-synthetic motor oil of domestic or foreign production labeled 10W-30 or 10W-40.
Engine chip tuning circuit
Not many car enthusiasts can boast of a powerful 2110 engine. Thus, to improve the power characteristics of the engine, it is necessary to carry out chip tuning of the VAZ 2110. To do this, they usually turn to specialists, but more and more vehicle owners are doing the process themselves.
The chip tuning scheme is quite simple. To perform the operation yourself, you will need an OBD II cable (USB-Auto), a laptop computer and software. It is worth remembering that there are three options for modifying the power unit: for power (but this will increase consumption), for reducing consumption (leading to a loss of power) and balanced (balance between the optimal indicators of consumption and power). Typically, chip tuning of a VAZ 2110 is done with the aim of reducing fuel consumption, therefore, if the owner of the car decides to do it himself, then it is necessary to select the appropriate software. But, it is recommended not to take risks and turn to professionals for help.
Purification process
Cleaning the nozzles itself should be done on a clean surface - for this you can cover the working surface with a piece of cloth.
Prepare a hose and a can for cleaning the carburetor. To flush, secure a plastic hose clamp at the inlet of the nozzle (make sure the length is at least 20 cm). The nozzle will need to be turned on, and the end of the hose itself will need to be lowered into the liquid that is used to flush the carburetor. Cleaning can be carried out by any of the proposed ones - RunWay, Liqui Moly or Hi-Gear.
But there is no need to add cleaning additives advertised on the market to the fuel: it very often happens that they harm the engine. The acidified dirt itself after such cleaning can create a blockage that will prevent normal access to the fuel-air mixture. Otherwise, fuel access may be blocked.
Cleaning is complete. Now do the installation in reverse order.
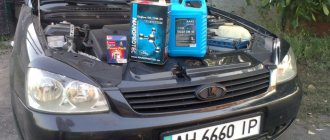
I decided to start cleaning the injectors on my car. The car ran no less, but so to speak, I decided to do preventive maintenance on cleaning the injectors on my car. The whole purchase began with Wynn's injector flushing fluid 1
Wynn's flushing liquids are used for washing injector nozzles without dismantling, cleaning the cylinder-piston group (partial removal of carbon deposits from the cylinder walls and sealing rings) as well as the exhaust system without harming the catalytic converter.
And since I did not want to remove the injectors from the engine, this was the flushing fluid that suited me as a flush. I once found information on the Internet about cleaning injectors in this way and decided to do the same operation without removing the injectors on my car. In general, for this I needed to buy some things that were necessary for this DIY flushing device. For this I needed:
For this I needed. 1. Flushing liquid 1l. 2. Fuel filter. 3. Clamps 2 pcs. 4. Two nipples. 5. Hose 12mm -1 meter. 6. Two liter bottle. 7. Drill 13 8. Compression pump
Flushing liquid 1l
Do-it-yourself injector cleaning - VAZAuto
Cleaning injectors with your own hands is a very simple process that must be done for prevention, since the “excellent” quality of our fuel quickly contaminates the injectors.
This article will describe a simple method for cleaning (rinsing) injectors.
You can easily determine when it’s time to clean the injectors on your own.
You just need to pay attention to whether symptoms of “dirty” injectors have appeared on your car
Probably one of the most basic symptoms is a decrease in engine power and reaction speed. The next symptoms are engine detonation.
Engine detonation is a process of spontaneous ignition of the combustible mixture in the cylinders, which has the nature of a blast wave.
Most likely, your car will have an unstable idle, possibly difficult starting when hot, and increased exhaust emissions.
These symptoms apply to injectors, provided that the remaining components and assemblies of the car are in good working order.
Injectors can be cleaned by removing them from the engine (ramp) or without removing them. The option without removing the injectors is easier, but in this case it is impossible to determine the quality of cleaning the injectors.
If washing will be carried out with dismantling the injectors, then it is necessary to replace the sealing rings.
There are several ways to clean injectors yourself.
The simplest thing is to add special liquids to the fuel tank.
Using products that are produced by almost all auto chemical manufacturers, you can clean everything from the gas tank to the injectors. But you need to take into account that you risk clogging the injectors even more with the washed dirt. This method will be effective if the fuel line is relatively clean and should be used as a preventive measure.
Injectors removed from the engine are cleaned using special compounds that are passed through the injector. This method is not complicated and can be easily implemented in the garage.
1. We will need to remove the injectors from the engine. This is done slightly differently on different cars.
2. Prepare a “device” for washing the injectors.
We will need a can of liquid for cleaning injectors or carburetor, a syringe (5 ml) and any container.
3. Now you need to connect the injector to the power supply to simulate engine operation.
Cleaning the injector with your own hands occurs when a voltage of 12 V is supplied to the injector, and in order not to burn the injector, we need to connect a 12 volt light bulb to the “+” gap of the injector wire. We need a switch to briefly supply voltage to the injector.
4. The circuit has been assembled, now you can start washing the injectors yourself.
5. Pump up the pressure into the syringe (by spraying from the can a couple of times) and briefly apply 12 volts to the nozzle.
6. Continue until the liquid spray becomes uniform.
7.Assemble everything in reverse order, not forgetting to install new O-rings.
Good luck to everyone on the roads.
My blog is found using the following phrases
to your website.
xn--80aaecx8b1a.xn--p1ai
Prevention is better and cheaper than treatment!
It should be noted that, as with most technical issues. vehicle maintenance, prevention is always better and cheaper than treatment (repair). One of the simplest, cheapest and most effective ways to prevent fuel injection problems is to maintain a healthy ignition system. One of the most important conditions for the “health” of injectors is cleanliness! It is important to refuel with high-quality fuel and change filters on time. Also, to prevent contamination of injectors, as well as combat deposits, experts recommend using a special liquid to clean fuel injectors. In addition, there is a “flush” that allows you not only to prevent the accumulation of dirt and deposits, but also to completely clean the fuel injector system.
If your problem is more serious, then you will most likely need to consider having your fuel injectors professionally cleaned. Of course, this will cost much more than flushing liquid, but the result will be much better. And besides, it is much cheaper than replacing injectors or repairing the engine.
How to remove injectors on a Priora with air conditioning
Removing and installing Lada Priora injectors
- Signs of injector failure may include:
- – difficult engine starting;
- – unstable engine operation;
- – the engine stalls at idle;
- – reduced crankshaft speed of the VAZ 2171 at idle;
- – the engine does not develop full power, insufficient engine response;
- – failures in engine operation when driving;
- – increased fuel consumption;
- – increased content of CH in the exhaust gases.
You will need: a 5-point hex key, a flat-blade screwdriver, a 17-point key (two), an autotester.
1. Disconnect the connecting block of the injector wiring harness and the engine harness by pressing the lock.
2. Carry out an initial check of the injector windings of the VAZ 2172. To do this, connect an ohmmeter to the contacts of the pads one by one.
The block has five contacts: four for supplying a control signal to the injectors and one common “+12 V” (a crimson wire with a black stripe is connected to it).
3. In turn, connect the four control contacts to the common contact and measure the resistance in each case. It should be 11–15 ohms. If during one or more measurements the resistance value differs from the specified one, the Lada Priora injectors being tested or their wiring harness may be faulty.
4. For a more accurate check and replacement of injectors, remove the fuel rail from the Priora fret (see “Removing and installing the fuel rail”).
5. Use a screwdriver to pry off the spring retainer of the injector...
Removing injectors on Priora (Lada 2170, VAZ 2112)
Thank you so much for watching my videos, tell your friends, leave comments and subscribe...
Removing injectors on a Priora.
Washing is HERE...
6. ...remove the clamp...
7. . and remove the injector from the fuel rail. Remove the remaining injectors in the same way.
8. To identify a faulty injector, connect an ohmmeter to the contacts of the Lada Priora injectors. It should show a resistance of 11-15 ohms. If the winding resistance is not normal, replace the faulty injector, as it cannot be repaired.
Check the injector for the shape of the sprayed fuel spray and for leaks at specialized service stations, since such a check directly on the car is very fire hazardous.
The injectors of the VAZ-21126-00 VAZ 2170 engine have an original design and are not interchangeable with the injectors of VAZ priora injection engines of other models. Buy new injectors with exactly the same markings.
9. Whenever removing injectors, be sure to replace the O-rings on all injectors on the ramp side. Using a screwdriver, carefully pry the edge of the ring...
10. ...remove the sealing ring from the Lada Priora injector...
11. ...and similarly remove the ring from the sprayer side.
12. If you are installing the previous Priora injectors, carefully wash their nozzles with solvent or Lada Priora carburetor cleaner.
Install new O-rings carefully, without using any tools, after lubricating them with engine oil.
The sealing rings on the injectors are identical to other rings installed on early VAZ models with fuel injection systems and are interchangeable with them.
13. Before installing the injectors, lubricate the O-rings with engine oil or WD-40.
- 14. Install the injectors in the reverse order of removal, securing them to the ramp with clamps, after tightening them a little.
- 15. Having installed the Priora fuel rail, connected the fuel line and connected the wiring harness block, secure the minus terminal on the battery, turn the ignition key 3-4 times to position “I” (ignition) at intervals of 2-3 s between turns on and check tightness of the pipeline connection and priora injector seals.
- 16. Install all removed parts of the VAZ 2170 in the reverse order of removal.
When to change: self-diagnosis
Lada Priora Sedan 16kl Kvartsukha Logbook REPLACING THE FUEL FILTER
The fuel system of an injection engine has a fairly extensive architecture and faults can only be identified after an accurate diagnosis of each of the system elements. For example, a drop in engine power may be the result of either a malfunction of the injectors, insufficient performance of the fuel pump or a clogged fuel filter.
In addition, jerks and dips, unstable idle and difficult starting, increased consumption, can occur when the injector is simply clogged.
You can check the injectors themselves directly on the engine without removing them. To do this, just start the engine and remove the wires from the connector one by one. If the stability of the engine changes in this case, the engine begins to trip, then the injector
in order. If, when removing the wires from the connector, the stability of the motor does not change, the injector needs to be cleaned or replaced.
Checking Lada Priora injectors
As mentioned above, both the fuel system ECU and the injector itself can fail. To carry out a complete diagnosis of the ECU, special software is required, which the average motorist simply does not have. Therefore, the only option is to diagnose the machine at a service center. The program, connected to special equipment, will quickly detect ECU errors and correct them.
A full check of Priora injectors is possible only on a special stand
And if problems arise in the mechanical part of the injector, then the diagnostic program will be useless. The maximum that it can do is indicate which cylinder is not working correctly. After this, the car owner can only replace the failed injector on the specified cylinder, since these devices cannot be repaired.
In order to clean the injectors in VAZ 2114/2115 cars, it is recommended to read this material: https://vazweb.ru/desyatka/pitanie/zamena-forsunok-vaz-2114.html
Reasons why the Priora 16 valve engine is tripping. Nothing new
- Supply system;
- Ignition;
- Sensors
- The most common cause of 16 valves on a Priora is damage to the injector winding. You can check this by removing the cover and manifold. Then measure the resistance on the injector winding; it should be within 15-15 Ohms. If it is faulty, it should be replaced. Read more about how to do this in the article “How to check an injector nozzle”;
- Another reason is a clogged injector. This usually happens when using low-quality fuel. You can also “clog” these engine elements yourself by pouring various cleaners into the tank. They partially destroy sediments. Which, in the form of a suspension, enter the injector, where they get stuck in the nozzles. To fix the problem, you need to flush the injectors. You can do this yourself without removing them from the engine.
- First, let's visually evaluate the candle. It should be brown-sand color. If it is darker, then it may be faulty. It is advisable to check it on a special stand. The spark should be blue and white. If it is yellow or red, then this is a bad sign. You can, of course, try to clean it with sandpaper, but this may not bring the desired effect;
- Try using another spark plug and check how the engine runs. If everything returns to normal, then the cause has been found. Also check the high voltage wire;
- After this, check the ignition coil. It is the weakest ignition part in the Priora. To check, we reset errors from the ECU. And with the ignition off, they swap the supposedly non-working ignition coil with the obviously working one. The engine starts for a couple of minutes. The diagnosis is repeated. If the flash miss “migrated” along with the coil, the problem is in it. Replace it with a new one.
AutoFlit.ru
Replacement or cleaning?
In order to understand what needs to be done with the nozzle, change it or simply clean it, it is better to diagnose them on a special stand. Under such conditions, you can test it in operation under different pressures, and also visually see how tightly it closes, and whether it is “snotty.”
If any of the injectors needs to be replaced, then you should buy a new one with exactly the same part number as the old one. Also, during installation of cleaned injectors, all O-rings should be replaced (2 pieces on each injector - approx.).
Installation is carried out strictly in the reverse order, similar to the removal procedure.
How to check fuel injectors on a fuel injection engine
There are several methods for checking the performance of an injector. Let us list them in order with a detailed indication of the algorithm of actions.
Check using resistance measurement
You can check the injectors without removing them using a multimeter. First, check which injectors are installed on your car - high or low impedance (electrical resistance). This data will be necessary to perform an accurate diagnosis. In order to check the injectors with a tester without removing them from the engine, you must adhere to the following plan:
Measuring the resistance of the injector winding
- remove the high-voltage wires from the injectors;
- set the multimeter to the mode for measuring insulation resistance (ohmmeter) in the range from 0 to 200 Ohms (depending on the technical parameters of the device, the upper limit may differ, the main thing is that the ohmmeter can show a resistance value of several tens of Ohms);
- turn off the ignition and remove the negative terminal from the battery;
- disconnect the electrical connector on the injector being diagnosed (as a rule, to do this, unclip the fastening clip located on the block body);
- connect the tester's measuring probes to the injector terminals and take measurements.
High impedance injectors have an insulation resistance of 11.17 ohms, and low impedance injectors have an insulation resistance of 2.5 ohms.
If the measured insulation resistance value differs significantly from the specified value, this indicates that the injector is faulty. Accordingly, the injector must be dismantled and detailed diagnostics performed.
It is important to know that the voltage to the injectors from the ECU is supplied in pulsed and not constant form. Therefore, it is recommended to measure resistance not only with an ohmmeter, but also with an oscilloscope, so you can see what peak values the resistance and voltage take. And the tester shows the average value
And the tester shows the average value.
How to check power to injectors
Checking the power supply to the fuel rail of VAZ 2110-2112
Let's look at checking the availability of power to the ramp using the example of VAZ 2110, 2111, 2112 cars, as some of the most popular. But first, let us recall that in the block with contacts, four of them supply power to the injectors, and one (pink wire with a black stripe) is the common ground. You need to act according to the following algorithm:
- disconnect the power plug;
- on the multimeter, set the upper limit of the measured resistance to around 200 Ohms (this value depends on the specific model of the tester);
- measure each of the four contacts from the injectors with a common connector in pairs.
The resistance value should be within 11.5. 15.5 ohms. Remember that this way you will only measure the power supply on the ramp to each injector.
You can check the injector simply for vibration. When the engine is running, a working injector should vibrate slightly. If there is no shaking, it means it is out of order.
Checking the power supply from the car's electrical circuit is quite simple, you just need:
- it is necessary to disconnect the supply wire block from each injector one by one;
- After this, use two pieces of wire to connect the injector directly to the battery;
- turn on the ignition.
If the injector starts spraying fuel, then the problem must be looked for in the wiring.
How to check the starting injector
First, let's say a few words about the monoinjector. Today, such units are becoming less and less common, since the system is outdated. Its essence lies in installing only one injector - in front of the throttle valve. They can be found on old models of foreign cars from VW, Audi, Skoda, Seat and others.
Let us describe the algorithm for checking the resistance of an injector on a monoinjector:
- check the contacts from the injectors in pairs and compare them with the data from the manual (as a rule, these values should be within 1.2. 1.6 Ohms);
- when checking pins 1 and 4, you need to make sure that the DATV (intake air temperature sensor) is working correctly; for this, also use the resistance data from the manual;
- if the resistance value is outside the acceptable limits, it is necessary to diagnose the injector in more detail.
Supply system
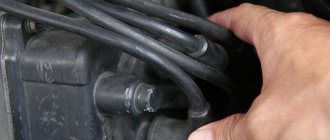
If the Priora engine (16 valves) is tripping, the reasons may be trivial. When there is no flash in the cylinder, perhaps there is simply no fuel there. If it has a normal compression ratio, it is worth diagnosing the power system. You should pay maximum attention to the air filter and the pipe. It is necessary to make sure that the clamps are securely tightened, whether the purifier body itself is intact, and whether there is any air leakage from the outside
Also pay attention to the tubes. They must be tightly secured to the throttle assembly
Fuel leaks, cracks, and broken plastic may indicate that some parts are faulty.
Injector maintenance
To ensure uninterrupted operation of the injectors, attention must be paid to them periodically. An extra inspection of the injectors won't hurt. If the injectors have not been turned on for a long time, they must be checked for functionality.
Clean and adjust if necessary. In the winter season, it is imperative to use antifreeze washer fluid. Freezing of injectors leads to their wear and premature failure. If you follow the recommendations proposed in this article, then you will not need to replace the washer nozzle on the VAZ 2112 for a long time. And the windshield will be washed as the video shows
If the injectors have not been turned on for a long time, they must be checked for functionality. Clean and adjust if necessary. In the winter season, it is imperative to use antifreeze washer fluid. Freezing of injectors leads to their wear and premature failure. If you follow the recommendations proposed in this article, then you will not need to replace the washer nozzle on the VAZ 2112 for a long time. And the windshield will be washed as the video shows.