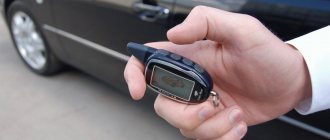
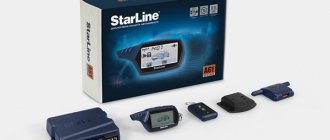
Since the A6 Starline is not produced, many consumers believe that the functionality of the security system leaves much to be desired, but this is not the case. If the alarm does not receive signals, you need to make sure that the antenna adapter is connected correctly. It is also necessary to check that there are no metal objects nearby that would interfere with the transmission of impulses.
Features and Functions
How to install an alarm?
How to set up the key fob?
User guide
Download the operating instructions for the Starline A6 security system in PDF format
Video “How to program the Starline A6 remote control”
Comments and reviews
Features and Functions
Main features of Starline Twage car alarms:
- the frequency of the channel through which control signals are transmitted is 433.92 MHz;
- The widest range of the remote control is 600 meters;
- the maximum range of the transceiver in security mode is 1200 m;
- operating range of the backup remote control - 15 meters;
- the temperature range in which the alarm can perform all its functions is from -40 to +85 degrees;
- the voltage value of the on-board network of the car in which the alarm is installed ranges from 9 to 18 volts;
- the current consumed by the system when the security mode is turned on is 25 mA.
According to the technical manual, the use of the security complex allows you to implement many useful functions for the car, including:
- activation and deactivation of the system using a remote key;
- the system operates in silent mode, arming and disarming occurs without sound;
- the ability to temporarily or permanently turn off the siren when the security mode is turned on;
- presence of panic mode;
- confirmation of safe mode activation with a sound signal;
- warn the car owner that someone is trying to get into the car;
- the ability to unlock and close door locks;
- function to search for a car in a parking lot;
- the ability to open the trunk door using the remote control;
- Anti-HiJack option, which can be activated from the remote control or using a special key.
Equipment
What elements will be included in the feedback system as a whole:
- operating instructions with which the car owner can install and connect to the on-board network;
- main control unit with elements for installation and fastening;
- remote control with screen;
- additional keychain;
- sensitivity regulator, classified as two-level sensors;
- transceiver;
- diode indicator for determining the operating mode of the complex;
- emergency or service passage button;
- Anti-HiJack mode activation key;
- a special device for implementing the function of remote starting of an internal combustion engine;
- two support elements equipped with 30 amp fuses;
- limit switch for installation on the tailgate or hood.
Characteristic features of Starline lines
Characteristic differences between Starline alarm units without or with feedback:
- unique shape of the keychain;
- body color;
- screen orientation type;
- number and location of control buttons;
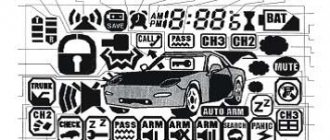
- icons on the remote control display and their purpose;
- antenna type (external or built-in).
Model range A
Key fobs of the Starline A-model anti-theft system (Twage A4, A6, A8, A9) can be described as follows:
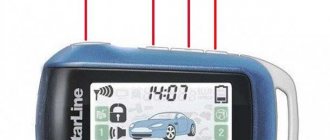
- These remote controls are characterized by the presence of an external antenna located on the left side of the device. It is 2 centimeters long and is protected by a black plastic cap that is removable.
- StarLine A4 stands out from the rest due to the large image of the car with the inscription “BRAKE” on the windshield.
- A9 and A8 differ from A6 in the greenish tint of the lower icons on the display and a different set of icons on the left side of the screen.
Similar models have been discontinued and are found on vehicles manufactured in 2000 or earlier.
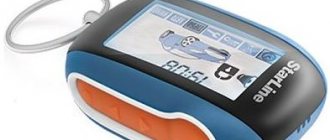
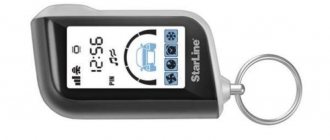
The type of anti-theft system key fobs of the Twage A4, A6, A8, A9 model range are shown in the photo:
Features of the A61 and A91 models (no longer produced):
- they are similar to B-model devices, but, unlike them, are completely Russified;
- the antenna, as in the Twage generation, is external, but is already completely fused with the key fob body;
- the A61 series has icons at the bottom of the display that differ from the A91 and are made in a more minimalist style.
The photo shows key fobs of models A61 and A91:
Features of the A64, A94 model line:
- the devices have the shape of a parallelepiped and are made in blue-black color with a screen frame that follows the contours of the body;
- control buttons have the same gray color;
- The A94 model has green icons on the display, while the A64 has blue icons.
The appearance of the key fobs of the A64 and A94 models is shown in the photo:
Models A63, A93 can be identified as follows:
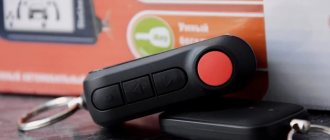
- the key fobs of this alarm have the shape of a parallelogram with streamlined edges and are made in black and white colors;
- there are 4 buttons on the top of the case, one of which is larger than the others and painted red;
- older types A63 and A93 have a horizontal screen orientation, while those released later have a vertical screen orientation;
- Visually, the A-models 93 and 63 are no different, but they can be compared by the presence of an autostart function: the latter does not have it.
Appearance of old and new models of key fobs A63/93
Model range B
The Starline security complex B-models - B6 and B9 have the following features:
- key fobs are similar to devices of the A61/91 model: the external antenna is combined with the remote control in a monolithic case in the same way;
- however, there are differences between the A and B series in the lower icons - in the latter, the inscriptions on the pictograms are two-line, and the hood and headlights of the car depicted are black;
- The B6 and B9 signaling panels can be distinguished by the presence of a thermometer icon on the ninth model.
The photo shows key fobs of models B6 and B9:
You can identify key fobs of models B62, B92 by the following criteria:
- The type of body of these key fobs is distinguished by its rounded shape and orange buttons;
- The B62, compared to the B92, does not have icons for engine auto-start based on a timer and temperature in the engine compartment;
- The latest generation of the B series retained a similar body, but the display changed from LCD to OLED.
Appearance of the key fob for models B62/B92
You can determine the key fob of models B64, B94 as follows:
- the devices have exactly the same body as the B62/92;
- The display has a wider range of functions, for example, it has a shock/tilt sensor and supports PIN code authorization.
At the moment, these models are discontinued and are found on cars of an earlier year of production.
Keychain models B92/94
Model range C
Features of Starline car alarm key fobs C-model (C4, C6, C9):
- have a blue plastic body with a thin and unreliable carbine eye (on the right side), which often breaks;
- They are identical in appearance, but differ in the location of the icons on the display.
Control units of the Starline C-model security complex:
Advantages and disadvantages
The Starline Twage A6 security alarm system has the following advantages:
- Availability of autorun option. This allows you to start the car engine remotely, which is especially important in winter. The power unit is started by a command sent from the remote control if the remote control is within the operating range of the system. The launch can be done by timer, after a certain period of time, or by temperature. The function saves time and warms up the car in advance if the driver is in a hurry.
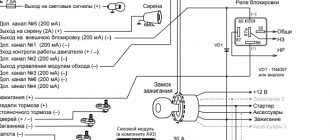
- Easy to install. With minimal knowledge and skills, any motorist can install the system. Also, if you use the instructions that we will look at below. The alarm must be connected according to the diagram included in the kit.
- Budget. Today, the alarm system on A6 models has been removed and finding them on sale is problematic, but still possible. The cost of the security complex is approximately 2,700 rubles.
- High range of the key fob. Thanks to this, the owner of the car, even being away from the car, will be able to inquire about its condition.
- The presence of two engine locks makes it possible to block the operation of the power unit in the event of an unauthorized attempt to start the internal combustion engine.
The signal has no special disadvantages. In some cases, false alarms of the siren are possible, but this is usually due to incorrect settings of the sensitivity sensor.
Modern models
The cheapest A-series uses different key fobs depending on the generation. StarLine A93/A63 initially used a key fob in the shape of a beveled parallelepiped; the protrusion of the first button was retained.
However, this car alarm has become an enviable long-liver, and to “refresh” the appearance, the key fob on the latest series was modified, receiving a display in the style of modern fifth-generation alarms (alarms with auto start), but unlike them - in traditional, and not inverse, colors.
On the Starline A39 and A36 alarm systems (these are the same A93 and A63, but supplied exclusively to car dealerships), the key fob was used unchanged from the base model. The key fob did not change in the “economical” configuration of the A93 ECO, but in the A63 ECO it was updated.
Subsequently, a “full-fledged” fourth-generation A-series entered the market. These alarms were distinguished by the original integration of the CAN module in all trim levels and the shape of the key fob - the designers returned to the days of Dialog Flex alarms.
Simultaneously with the release of the fourth generation of StarLine alarms, the company’s marketers identified a separate line of alarms for SUVs, calling it the D-series. The “off-road” series alarms did not have any real differences in design, except for the new rectangular key fob. The Starline D64 and D94 alarm key fobs were sold in two colors: blue and red. At the same time, unlike the A61 4x4 and A91 4x4, the fourth button of the key fob is functional, and the key fobs themselves are absolutely identical in appearance.
How to install an alarm?
Installation instructions:
- First, the central unit is installed. You need to choose the most hidden installation location. The unit should not be placed in the engine compartment, as high temperatures prevail under the hood, especially if the engine is running and hot. It is not possible to place the device in the trunk, as the driver must be able to access the device while sitting in his seat. Some installers “get worried” and install the unit under the door trim, but this should not be done, since moisture can accumulate in such places. The best place will be the empty space behind the dashboard. To install, unscrew the screws securing the steering column trim, dismantle the control panel and disconnect all plugs with wires from it. Install the block and securely fasten it with self-tapping screws. Make sure there is no play where the device touches the surface, otherwise the device will vibrate.
- The next step will be installing a siren. The device is located under the hood. The siren should not be placed in close proximity to the cylinder block, as high temperatures will damage it. Find the least dirty and hidden place in the engine compartment, secure the siren to the body using self-tapping screws. It is advisable to direct the horn of the device to the side or down.
- To enable automatic engine start depending on the temperature, a thermostat is installed in the engine compartment. The sensor must be built into one of the cooling system lines. Securely secure the device in the pipe so that it is not washed away by a stream of antifreeze. The wires to connect the device must be pulled out.
- Then the transceiver is installed. The antenna adapter is mounted in the car; the location should be chosen as high as possible. The transceiver is installed in the area of the windshield; there should be no metal objects near the installation site, as their presence will cause interference with signal transmission. The alarm may not sound when you press a button on the remote control. Install the adapter and glue it with double-sided tape or special glue, which may be included in the kit.
- The engine lock relay is installed under the ignition switch housing. The device is connected according to the circuit to the engine starting circuit.
- The Jack service mode button is installed. The installation should be done in a hidden place, since having access to the button, a criminal can quickly turn off the siren and steal the car.
- When all the components of the security complex are installed, they are connected to the central unit; for this it is necessary to lay wires and connect all the elements with electrical circuits. The electrical wiring is located under the car's interior trim. There should be no moving mechanisms where the wires pass. Devices are connected according to the diagram included in the kit.
Photo gallery
Photos of electrical circuit connection diagrams are presented below.
Model identification by built-in functions
You can determine from the key fob which Starline brand alarm system is installed by the functions displayed on the device display in the form of icons. For example, the option to autostart the internal combustion engine is present only in models with the number “9”, and alarms A6/A9 and A91 do not have the ability to work with the CAN module.
A car owner who knows all the functions of the control panel can easily determine the model of the Starline security system using the table:
| Function | A6, A9 | A61 | A64 | A91 | A94 | A93 | B64 | B94 | D64 | E60 | E90 |
| Dialogue code | There is | There is | There is | There is | There is | There is | There is | There is | There is | There is | There is |
| Shock sensor | There is | There is | There is | There is | There is | There is | There is | There is | There is | There is | There is |
| Tilt sensor | There is | There is | There is | There is | There is | There is | There is | There is | There is | There is | There is |
| Interior temperature sensor | There is | There is | There is | There is | There is | There is | There is | There is | There is | There is | There is |
| Automatic engine start | No | No | No | There is | There is | There is | No | There is | No | No | There is |
| Turbo timer | There is | There is | There is | There is | There is | There is | There is | There is | There is | There is | There is |
| CAN interface | No | No | There is | No | There is | There is | There is | There is | There is | There is | There is |
| Modular architecture | No | No | There is | No | There is | There is | There is | There is | There is | There is | There is |
| Flexible service channels | No | No | There is | No | There is | There is | There is | There is | There is | There is | There is |
| Silent operation of the unit (disabling sound alerts) | No | No | There is | No | There is | There is | There is | There is | There is | There is | There is |
| Communication channel control | No | No | There is | No | There is | There is | There is | There is | There is | There is | There is |
An overview of the Starline alarm key fob and control of its buttons is presented by the “REALAUT0” channel.
How to set up the key fob?
For correct operation, you need to configure the remote control. The first button is programmed first.
The configuration is done like this:
- Key number 3 is pressed several times quickly to move the cursor on the display counterclockwise or clockwise. To change the direction of movement, you need to pause for one second between presses.
- Move the screen cursor using the 3 key to a position that will correspond to a specific command, for example to activate or deactivate security mode.
- After selecting a function, press button 3 for six seconds until you hear two and then three beeps.
- To activate, press button 1.
With this setting, by pressing button 1, you can activate or deactivate the protection mode. When pressed, an indicator corresponding to the parameter you set appears. To change button settings, repeat the previous steps.
Button number 2 is programmed as follows:
- Briefly press button 3 several times, this will allow the cursor to move around the screen.
- While holding the same button, move the cursor to the position that will correspond to a specific function.
- When an option is selected, press button 2.
If you plan to use the AutoPlay feature, you will need to set the clock for this:
- To set up, press button 3 and hold it until you hear two short beeps. After this, the indicator on the watch will flash. Press button 1 to increase the value, press button 2. You can hold buttons 1 and 2 to quickly increase or decrease the reading.
- Once the clock settings are set, the minutes are set in the same way, only press button 3 to access this menu.
- To exit the clock setting menu, press and hold button 3 until you hear a beep.
On the main remote control you can configure the alarm operation:
- To program, press and hold button 3 until the remote control beeps twice.
- Then press button 3 successively until the alarm icon appears on the screen. In this case, the clock symbol will flash. To increase the reading, press button 1; to decrease it, press button 2.
- The alarm hours are set first, and then the minutes; to install the latter, press button 3.
When the alarm is set, you need to quickly press button 3, this will allow you to enter the menu to turn the feature on or off. Activation is carried out by pressing button 1, deactivation is carried out by pressing button 2. To exit the alarm setting menu, press and hold the third button. A beep should sound and the remote control will automatically exit the menu. When the alarm goes off, the remote control will emit a melodic signal. To turn off the feature, press the third key on the pager.
If the alarm option is activated, the corresponding indicator will be shown on the remote control display.
Alexander Shkurevskikh spoke about the procedure for binding the Starline A6 alarm key fob.
To set the timer, press the third button on the remote control and hold it in this position until the remote control emits two beeps. Using the same button, you need to move the cursor to the position of the hourglass indicator. The procedure for setting the timer is the same as for the alarm clock. The security complex allows you to set a timer up to 19 hours 59 minutes. When the function is activated, the status will be displayed on the remote control screen and the hourglass icon will start flashing. Once the time has been set, the countdown will begin. After the set time has elapsed, the remote control will beep eight times and the hourglass icon will disappear from the screen.
Twage a6, Control keys
Page 7
- Image
- Text
7
Twage A6
Control key fobs
The car alarm performs its intended functions either automatically or
or by signals from the key fob when pressing buttons. Part of the provided functions
and some system operating parameters can be changed by
programming. The StarLine Twage car alarm has a 3-button control key fob with
liquid crystal display. Purpose of button 1 of the key fob
programmable. The purpose of button 2 is quickly selected by moving
cursor on the key fob display using button 3. When pressing the key fob buttons
The fluorescent backlight of the display turns on for a few seconds. When the alarm executes a command from the key fob, the relevant information
appears on the display and a melodic sound signal sounds. When the alarm performs any actions automatically
the relevant information is also displayed on the key fob display and
accompanied by sound signals or vibration. If more than one key fob is used to control the alarm, then
the status of the car and car alarm will only be displayed on
display of the key fob from which the last command was issued. In case of malfunction or loss of the main double-sided key fob
communication and LCD display, the system comes complete with
additional 4-button control key fob. Most functions and
alarm operating modes can be activated from this key fob as well,
but below the operating instructions are written for the use case
main key fob with LCD display.
User manual
What you need to know about the button assignments to use a checkmark:
- Key 1 is programmable and can be configured to perform any function. Initially, the button is designed to turn the protection mode on and off using confirmation sounds.
- Key 2 can be used to program a function corresponding to the current cursor position on the remote screen. Initially, it is designed to open the trunk; to do this, you need to hold it for three seconds.
- Pressing number buttons 1 and 2 simultaneously for three seconds will activate the search function. The car lights will start flashing. If you quickly press these buttons simultaneously, for half a second, the security system will perform a procedure for monitoring the condition of the car and the temperature inside the car.
- Briefly pressing button 3 will check the position of the cursor on the screen. If the remote starts beeping, pressing the button will turn them off. By holding the button down for three seconds, the car owner can access the alarm, timer and clock settings menu. Long pressing the button for six seconds will program the first button.
- If you hold down buttons 3 and 1 for half a second, the remote control will go to the device notification menu.
User Yaroslav540 briefly spoke about the functions and capabilities of the A6 security complex.
If the pager is broken or lost, you can activate the security mode, but to do this you need to use the service button:
- Insert the key into the ignition and find the emergency button, press it four times.
- Turn off the ignition. If everything is done correctly, the system will emit an audible signal and the direction indicators will flash once.
- Within twenty seconds you must get out of the car and lock the doors. As a result, you should hear the first beep and a melodic signal on the remote control.
20 seconds after the ignition is turned off, the security system goes into security mode, regardless of whether the doors are closed or not.
The turn lights should flash once. The LED indicator will flash to indicate that the protection mode is activated. With this safety feature activated, if one of the safety zones is activated, the alarm lights will flash four times and the siren will also beep four times. If you do not disable the protection mode, the alarm cycle will sound after 20 seconds.
Disabling the security mode without remote control is carried out as follows:
- The car door locks are unlocked with a key. Upon signal, the siren will turn on, and the indicator in the form of an open lock will light up on the remote control screen.
- The ignition is on, there is no need to start the engine.
- To disable it, the car owner must know the personal password. First, the service key is pressed as many times as it corresponds to the first digit of the code.
- The ignition turns off and on again.
- The service button is manipulated. The second digit of the password has now been entered.
- After turning off the ignition, the alarm should stop. Security mode will be disabled.
Twage a6, Purpose of additional key fob buttons
Page 9
- Image
- Text
9
Twage A6
Button 1 • On/off security with confirmation sounds Button 2 • Search mode (0.5 sec) • Panic mode (3 sec) Button 3 • Channel 3 (0.5 sec) • Trunk unlocking (3 sec) Button 4 • On/off silent security (0.5 sec) • Channel 2 (3 sec) Buttons 1+3 • Disabling the sensor by levels Buttons 1+4 • Valet service mode Buttons 3+4 • Anti-robbery mode (ignition on) • Recording key fob in programming mode
The four-button open-loop key fob uses a lithium cell
power supply CR2032, 3B. Battery operating time depends on frequency
use of the key fob and the type of battery installed. To replace the battery, unscrew the screw on the back of the key fob and open the cover.
Remove the old battery and install a new one in its place, observing the polarity.
Then close the key fob cover and tighten the fixing screw.
Replacing the main key fob battery is performed in the following order: 1. Open the cover on the back of the key fob and remove the old battery. 2. Briefly press button 1 of the key fob. 3. Install the new battery, observing the correct polarity, and close the cover.
(The correct position of the battery is indicated on the key fob body under the cover). 4. After replacing the battery, adjust the clock and alarm readings.
Re-programming of button 1 of the key fob is not required.
Purpose of the additional key fob buttons
Button 1
Button 2
Button 3
Button 4
Video “How to program the Starline A6 key fob”
User viieer aleks talked about how to link the control panel of the Starline A6 security complex.
One hundred percent protection of the car against theft is guaranteed by the specialized anti-theft device Starline twage a6. The unique features of this alarm allow you to control it remotely using a key fob.
It's no secret that there are several sources of interference in large cities. Since the key fob is required to use all the car's service functions, the question arises: "Will a pager work well in a big city?" Starline developers will answer this question without hesitation: “Yes!”
ATTENTION! I found a completely simple way to reduce fuel consumption! You do not believe me? Even a mechanic with 15 years of experience didn’t believe it until he tried it. Now save 35,000 rubles a year on gasoline! Know more"
Since each transmitter has its own frequency, the code is also transmitted through an encrypted signal. At the same time, the kit also includes a spare wheel. It is, of course, weaker in parameters than the main one, but will still be of help in case of failure or loss of the main transmitter.
If the pager is lost or broken for any reason, you can purchase a new one and re-register it under the alarm control unit. At the same time, there is no need to fear that the code may subsequently be stolen by the “code provider.” Such cases are almost completely excluded due to the fact that the code is transmitted at “frequency hopping”. In other words, it’s impossible to go wrong when purchasing a Starline a6 car alarm. This will provide the best protection against theft or break-ins. » You can install the alarm yourself or contact technical service. But it should be borne in mind that not all employees will do the installation. Therefore, you should choose those services that are known to friends, acquaintances or relatives. Well, if the choice fell on installing a car alarm yourself, then you need to stock up on time, tools, measuring equipment and, of course, operating instructions. The most important thing is to connect the wires correctly, as incorrect connection will result in a short circuit. And, in turn, will shut down the entire system.
How to determine the model
In order to determine the model without errors in the case of Starline, you need to rely on clues (labels, papers or list of functions), find information online or contact professionals.
By labeling
One way to find out the alarm model is to search for the markings, which are located on the back cover of the key fob. Under it there is a barcode and a model of 1 letter and 1-2 numbers (like 02) is written. If the set does not have the main key fob, then on the back of the additional copy there is a designation like StarLine 2Way-Remo.FCC ID: NJQEP02 (when decrypted - A91 or marked with id NJQLTX67C - A6). If the factory markings have been erased, then the name of the security system is duplicated on the inside of the remote control body (under the cover covering the battery).
By built-in functions
The next method to find out the Starline alarm model is to be able to determine its ownership by the functionality of the key fob. A certain brand has characteristic operating modes. The main options on an old device or a new one are indicated in the instructions and the table below:
| A6.9 | A61 | A64 | A91 | A94 | A93 | B64 | B94 | D64 | E60 | E90 | |
| Shock sensor | + | + | + | + | + | + | + | + | + | + | + |
| Autostart | + | + | + | + | + | ||||||
| Turbo timer | + | + | + | + | + | + | + | + | + | + | + |
| Can module | + | + | + | + | + | + | + | + | |||
| Module architecture | + | + | + | + | + | + | + | + | |||
| Flexible service channels | + | + | + | + | + | + | + | + | |||
| Quiet operation of the unit | + | + | + | + | + | + | + | + | |||
| Communication channel control | + | + | + | + | + |
According to the accompanying documentation for the car
When comparing alarms, it is worth predicting situations when the purchased car (especially a used one) was serviced at the same service center where it was purchased. Therefore, it makes sense to use the accompanying documents for the car and find the organization where the alarm was installed and serviced to request information. If there were any papers left over during the purchase, you can determine the company where the last adjustment was also carried out. Specialists from the dealership should help determine the Starline model using the key fob through a concluded sales agreement.
Using Internet services
You can correctly recognize the car alarm model using the key fob using the following Internet services:
- Official catalog on the Starline website. For each device (even discontinued ones) there is an image and the user can visually compare their remote control with pictures and instructions.
- Web resource "Ugona.net". There are photos of keychains of various series. And the specialists of this portal have additionally created a community where the car owner can find recommendations from other users.
- Google image search engine. Through it, you can easily upload a photo of your device and see the result of issuing pictures, under which the full name of the model is indicated.
We must not forget thematic forums and social network groups based on interests: they are less popular, but there you can also quickly get an answer.
What's inside the alarm box
The alarm kit includes all components necessary for installation in the car.
- Wires are required to supply power to the control panel and connect the rest of the system.
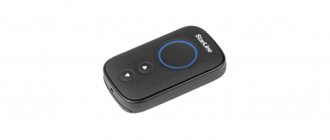
- Remote control is carried out using a key fob. It is also called a transmitter or pager. The set includes two: main and spare. The second is without an LCD screen. Of course, this is not always convenient, but it will be of great help if the main key fob is lost or broken.
- The central alarm unit (CBS) is the “brains” of the entire system. All encrypted codes go to him. And using it they are decrypted and the signal is transmitted to the appropriate parts of the car to perform the desired function.
- The transceiver receives the signal and sends it to CBS. Usually it is mounted on the windshield, since it must be directly accessible, otherwise the remote control signal will not work.
- Ending station. This thing is needed to send a signal to the pager about unauthorized opening of the hood. It is installed above the left headlight.
- Also included is an LED. The owner must be informed that the system is working.
- The service button is installed in the car.
- To simplify the operation and installation process, instructions and user manuals are included in the kit.
A key fob that transmits an encrypted signal to CBS to control all service functions of the vehicle. A keychain is a common item, so a comfortable position in the hand is not the last thing we paid attention to during development. In addition, the keychain is made with the expectation that the owner will look for it in his pocket by touch. This way, the buttons and their locations are easy to remember and can be easily found blindly later. The buttons are convenient and contain graphic images that only increase their information content. In addition, there is a slight click when pressed. This is necessary so that the owner is completely confident that the signal has been sent and the requested action has been completed.
Choosing a key fob for an alarm
: 3 years ago
Every motorist strives to provide maximum protection against burglary and theft for his car. The same goal is pursued by companies developing security systems for cars. Modern alarm systems allow you to provide reliable protection thanks to unique individual codes that are exchanged between the key fob and the system processor stationary unit. They help to avoid outside interference and ensure that another device cannot be reprogrammed and disable the alarm.
In addition to the functions of turning the alarm on/off, you can use the key fob to control a number of options, including receiving a signal about a car impact. The key fobs themselves take up no more space than a matchbox, are practically weightless, consume very little energy and operate over impressive distances. For example, using them you can monitor the condition of a car parked in the yard while in an apartment on the 15th floor.
However, if you have lost your key fob or need another one, finding a new one will not be so easy. At a minimum, because different manufacturers use encryption codes that do not correspond to each other. Moreover, finding a key fob for an outdated alarm can be problematic.
In addition, key fobs differ in a number of functions, so you need to select a model that suits your alarm system. Also, to work with the security system, the key fob needs to be programmed - information about this is contained in the alarm operating manual. Therefore, sometimes it will be easier to replace the security system than to select a new key fob.
However, if you still decide to choose a keychain yourself, you need to understand how they differ from each other.
Alarm model
The first thing you need to pay attention to when choosing a key fob is its compatibility with the alarm model installed on your car.
Firstly, this is the manufacturer. As we noted above, different manufacturers use different encryption code algorithms, and it is impossible to control your alarm with a key fob from another manufacturer.
Secondly, it is worth looking at the signaling model. As a rule, all key fobs indicate alarm models compatible with them, so this should not be a problem. If you were unable to find a keychain that suits you in this way, you should contact your keychain manufacturer directly.
Radius of action
An alarm key fob is a remote control module for your car's security system. All models are equipped with a built-in antenna, which allows you to use the device at a considerable distance from the stationary system processor unit in the car. The most popular values are from 500 to 2000 meters.
It should be taken into account that there are indicators for urban and non-urban conditions. In the second case, we mean a direct distance with no obstacles in the path of the signal. That is, concrete walls, trees, fences, other cars - all this reduces the range of the key fob antenna.
Therefore, the best key fobs will be those whose range indicators both in urban conditions and outside will be closest to each other. Ideally, they should be the same.
Signal encryption
The car alarm control code can be of several types, the most popular of which are dynamic and interactive.
Dynamic code is most common among car enthusiasts. The bottom line is that each press of a button on the key fob generates a new code. Given its length, it is quite difficult to calculate the law of change. However, any key fob has a descriptor - the law of code changes during the next generation - which allows you to synchronize a new key fob with the alarm system. This descriptor is constant for all alarm systems of the model range, which makes it a vulnerable point of the security system. That is, the newer, less serialized and unique the alarm, the lower the probability of calculating a descriptor from this model range.
Conversational code is the last step in encoding data transmission. It is based on the principle of “friend or foe” requests and the transfer of dynamic passwords. Each time you press a button, the key fob sends its unique ID number to the system processor stationary unit.
The system unit accepts it and, if it matches, sends a code generated according to a dynamic law, which must be used to encode the transmission of the command. The key fob encodes the command corresponding to the button pressed on it, using the received code, and sends it to the system unit.
He, in turn, decrypts the received code, executes the command and transmits confirmation of this back to the key fob.
Turning security mode on and off with one button
Today, the most popular key fobs are those on which the security mode is turned on and off using one single button. There are also models in which one button is responsible for turning on, and another for turning off. However, the second option is increasingly becoming a thing of the past.
Availability of display
An important parameter for many car enthusiasts may be the presence of an LCD display. On it you can see some data about the state of the car, a key fob charge indicator, as well as other optional functions. Key fobs without a display have only a few buttons, the execution of commands of which is confirmed by a light and/or sound signal.
Additional functions
Key fobs can not only turn the security mode on and off - they can also have a number of optional functions.
The presence of interception protection helps to calculate the interception of your key fob signal.
visual execution of commands simplifies working with the key fob. Typically these are beeps and flashing of the built-in LED, but on devices with LCD displays there can be much more variation.
Characteristics
The Staline a6 alarm system performs many functions, including:
- You can enable or disable vehicle protection using the button.
- Silent mode: Turn the alarm on or off without sound.
- Silence of the siren (temporary or not) signals when the car is armed.
- Panic mode and reset button.
- Confirmation by audible signal of vehicle insertion.
- Notification about an attempt to enter the car.
- Opening and closing doors.
- Search mode for cars in the parking lot.
- Opening the trunk with a key ring.
- Anti-Hi-Jack function, activated by a key fob or a special button.
The carrier frequency at which the signal is transmitted is 433.92 MHz, while using the remote control you can control the alarm at a distance of 600 M. The pager operates at a distance of more than 1 km. Additional remote control - 15 M. The remote control is able to operate smoothly at temperatures from -40 to + 85 ° C.
Self-installation of alarm systems
If the driver wants to install the alarm himself, this can be done relatively quickly using the instructions. But there are times when a driver is poorly versed in electronics and needs the help of an electrician.
What is needed to install the starline a6 alarm system yourself:
- The reporting itself;
- driver's door activator (I didn't have one);
- soldering iron, soldering iron, rosin;
- Screwdriver;
- Insulating tape;
- additional protection diode (1N4007) (there are only 4 diodes for the limit switches in the kit, but one more must be connected to the warning lamp in the handbrake instrument panel).
- And, of course, installation instructions that come with the car alarm.
Video “Overview of Starline alarms”
An overview of the StarLine alarm model range is presented by the Avtokasta channel. ru.
You can identify a specific type of Starline security system by visually comparing the main remote control with images of key fobs of the same brand. In addition, there are other proven ways to find out the Starline alarm model by key fob, for example, by its marking or using Internet services.
How to identify a model by markings?
Page 8
Operating and installation instructions
Button 1?? Programmable command (0.5 sec) ?? Arming/disarming
with strong signals
confirmation (3 sec)
Button 2?? Corresponding command
current cursor position
on the remote control display (0.5 sec)
?? Unlock boot (3 seconds) Buttons 1 + 2 ?? Search mode (3 seconds) ?? Monitoring the condition of the car and the temperature in the cabin (0.5 sec) Button 3 ?? Checking the cursor position on the remote control display (0.5 sec) ?? Interrupt remote control warning signals (0.5 sec) ?? Turning on and off the clock setting mode, alarm clock, timer, energy saving (3 sec) ?? Programming button 1 (6 sec) 3 + 1 buttons ?? Selecting the remote control notification mode (0.5 sec) Buttons 3 + 2 ?? Quick remote control timer setting (0.5 sec)
The key fob with a liquid crystal display uses a 1.5V AAA battery.
Battery life depends on how often you use the remote while it's on
pager frequency, depending on the selected notification mode, depending on the type
battery installed. Battery capacities are available in
sales may vary several times. Accordingly, the average time
The key fob battery life can range from 3 to 6 months.
When the battery is low, the display shows
>
Car alarm service functions
Page 6
- Image
- Text
6
Operating and installation instructions
Car alarm service functions
· Silent security mode · Security mode with the engine running · Activation of the security mode without a key fob · Automatic return to the security mode in case of accidental switching off (switching on) · Automatic activation of the security mode · Delay in turning on the security mode for the time the interior light goes out · Self-diagnosis when turning the mode on/off security · Silent activation of the security mode with the shock sensor disabled · Remote shutdown / activation of the shock sensor by levels
in security mode · Silent deactivation of the security mode · Remote control of the central locking · Control of the central locking from the ignition switch · Two-step unlocking of door locks · Two-pulse unlocking of door locks · Possibility of implementing the "comfort" function · Valet service mode · Emergency disabling of the security mode with a personal code · 4 additional channels for controlling vehicle devices · Control of car interior lighting · Car search mode · Remote programming mode for new key fobs and erasing lost ones · Possibility of resetting the values of programmable functions to factory presets · Call mode from the car · Indication of temperature in the car interior · Time display, timer, alarm clock · Battery discharge control of the main key fob via LCD display · Fluorescent backlight of the main key fob display
