The installation of a camshaft in the cylinder head of passenger cars led to a reduction in the metal consumption of the engine design, since the need for rods and rocker arms disappeared. But it was necessary to provide a camshaft drive. Initially, a chain was used for this, but over time it was replaced by a belt, although it did not completely replace the chain.
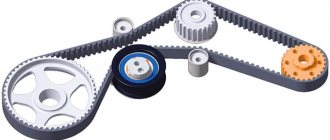
Timing drive diagram of a VAZ 2105 car
For the first time, a belt drive in VAZ cars was used on the VAZ-2105 model. But the engine with such a drive was experimental, so it was not installed on all cars; some models were sold with an engine from the VAZ-2101 and 2103, which had a timing chain drive.
Replacing the timing chain on a VAZ 2106 on your own
1. Remove the air filter housing from the carburetor.
2. Unscrew three nuts with a “10” wrench and four more with a “8” wrench.
3. Be careful not to drop anything above the carburetor, otherwise it will have to be removed, possibly even along with the intake manifold.
4. Next, remove the distributor cap and the fuel supply pipe.
5. Using a “10” wrench, unscrew the eight nuts securing the valve cover, then remove the washers with the plates.
6. Remove the choke cable and throttle valve drive.
7. Remove the valve cover with the gasket, which is also better to change.
8. Now you need to remove the protection from below and drain the antifreeze into the prepared container.
9. Loosen the generator mounting nut with a “19” key.
10. Loosen the clamps on the pipes and remove them.
11. Next, you need to loosen the clamp on the lower pipe of the water pump and remove it.
12. Turn off power to the fan and temperature sensor on the radiator.
13. The radiator, along with the pipes and thermostat, also needs to be removed.
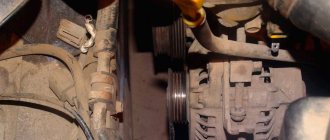
14. Loosen the generator tensioner nut, then use a pry bar to slide it forward.
15. Remove the VAZ 2106 generator belt.
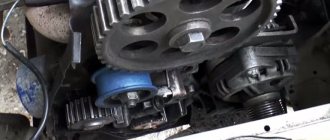
16. Using a key set to “36”, turn the crankshaft by the pulley to align the marks on the cover and pulley, as well as on the sprocket and camshaft bed casting.
17. Unscrew the “36” nut that secures the crankshaft pulley. Lock the pulley using a special key and unscrew it. If you do not have a special key, engage fifth gear, press the brake pedal, then use the key to unscrew it.
18. Remove the pulley. Using a “10” wrench, unscrew the six bolts and three nuts, as well as the three bolts from the bottom of the camshaft drive cover and remove the cover.
19. Unscrew the two nuts securing the chain tensioner, then remove it.
20. Unscrewed the bolt securing the camshaft sprocket and removed it. Mark or try to remember the alignment position. After that I saw the following picture.
- A fuse that prevents the circuit from jumping.
- Fastening the timing chain tensioner shoe.
- Crankshaft sprocket.
21. Using a “10” key, unscrew the fuse, as well as the tensioner fastening and the bolt securing the auxiliary drive sprocket.
22. Remove the sprockets and old timing chain. Check if the marks match; the crankshaft key should match the casting on the cylinder block.
23. Install new sprockets on the drive, accessories and crankshaft. Lubricate the new chain thoroughly and put it in place.
24. Place some kind of tool to prevent it from falling down.
25. The camshaft sprocket is placed in the chain so that during installation on the camshaft the descending branch of the chain is in tension and all marks coincide. Rotate the camshaft counterclockwise and back behind the crankshaft. This way the chain is tensioned and it is possible to evaluate the correct installation of the marks. If the marks do not match, transfer the chain to the tooth and repeat the procedure again.
26. Place the chain tensioner in place, then activate it. Tighten all mounting bolts and “lock” them. After turning the crankshaft two turns, make sure that the marks match and the valves do not meet the pistons.
27. Lubricate the crankshaft cover gasket with sealant and put it in place.
28. Place the pulley, check again that the marks match and tighten it.
29. Unscrew the nut on “13” of the distributor, then take it out and turn the slider so that it faces the contact of the fourth cylinder.
30. Install the distributor in place, and do not forget to turn on the ignition after completing the procedure for replacing the VAZ 2106 timing chain.
Then everything is assembled in reverse order, antifreeze is added, etc.
Actually, that’s it, replacing the timing chain on a VAZ 2106 with your own hands is completed, I hope it’s successful!? Thank you for stopping by, all the best, see you again at VAZ DIY Repair!
How to adjust the chain on a VAZ 2101-VAZ 2107?
1) First, loosen the chain tensioner nut.
Note! When unscrewing the nut, the tensioner shoe should move a little!
2) If the chain tensioner shoe does not move, then release the tensioner plunger, to do this: 1. Lightly hit the tensioner nut with a hammer.
3) Then turn the crankshaft bolt clockwise until it becomes difficult to turn. (Usually 1 or 1.5 turns is enough)
Note! For information on how to turn the crankshaft bolt, see the article, “Installing the piston of the fourth cylinder to the TDC position” (It is not necessary to set the marks!)
Installation: 1) Tighten the chain tensioner nut until it stops.
Important! 1) If you are not 100% sure that the timing chain on your car needs adjustment, then check the chain tension! (For information on how to check the chain tension on a car, see the article “Checking the chain tension on a VAZ 2101-VAZ 2107”). For newbies! Question: What does the chain tensioner shoe look like? Answer:
For newbies! Question: What does the chain tensioner shoe look like? Answer:
Additional video clip: After watching the video clip located just below, you will understand for yourself the principle of adjusting the timing chain, which is clearly perceived very simply. And the time it will take you to adjust will not be more than “10 minutes”. Enjoy your viewing:
source
Replacement procedure
The first step is to align all the marks by turning the crankshaft until the groove on the generator drive pulley aligns with the long mark on the front cover of the cylinder block. At the same time, the mark on the camshaft gear should be in front of the protrusion on the valve compartment cover. At the same time, the contact of the slider will be opposite the wire going to the spark plug of the 4th or 1st cylinder.
Further steps are performed in the following sequence:
- Loosen the tension pulley nut, turn it with a 30 mm wrench and reduce the belt tension, then remove it from the gears.
- Unscrew the roller completely and install a new one.
- Put on the new belt, being careful not to dislodge the marks. All that remains is to tighten it and assemble the mechanism in the reverse order.
When replacing the timing belt drive, it is important to consider one point. In addition to the crankshaft and camshaft, the belt rotates another gear - the drive shaft of the oil pump and mechanical ignition distributor
There are no marks on this gear, and it rotates quite easily, which is why, when replacing, you can accidentally disturb its original position.
This will not affect the operation of the oil pump in any way, but the distributor slider will move in one direction or another. This will lead to early or late formation of a flash in the cylinder, and the operation of the power unit will be extremely unstable.
A motorist whose V-5 belt broke while on the road will probably encounter this problem. In this situation, the procedure is as follows:
- Having aligned all the marks, as described above, you need to turn the gear so that the slider is positioned opposite the high-voltage wire of the 1st cylinder.
- Put on and tighten the timing belt, put back the covers, generator drive and battery.
- Screw in the spark plugs, connect the high-voltage wires and start the engine.
- The engine may not start, then you need to turn the crankshaft to align all the marks again.
- Remove the distributor cover, unscrew it from the cylinder block and lift it to remove the shaft from the splines.
- Rotate the slider 180° regardless of which cylinder it was “looking at” before - the 1st or 4th.
- Put the distributor in place and screw it on.
https://youtube.com/watch?v=se9V2Wo7I7g
After this manipulation the engine will start. There is an easier way - swap the wires on the cover, but then you may forget about it and not set up the ignition as expected.
Do-it-yourself: Replaced sprockets and timing chain after 220 thousand km
Hi all! As you know, the car has already covered 200 thousand km, so I decided to do a mini-overhaul, almost completely replacing the timing mechanism myself. I decided not to touch the rocker with the camshaft for now and work on the chain with sprockets that have been there since the factory. Various sources write that the life of the chain is somewhere around 100-150 thousand, although even at 220 thousand it was tensioned well by the tensioner, and I didn’t notice much noise, perhaps due to timely maintenance and good oil. However, during diagnostics at the service center, the technician said that the valve timing angles had already dropped a little, so it was better to replace it. I decided to play it safe and replace it along with the stars, as is done wisely.
I bought a set of sprockets, a chain, a new stabilizer and shoe, a front cover gasket, a front crankshaft oil seal, nuts, sealant, etc. from a trusted store.
First, let's provide access to the front cover - remove the cooling fan, radiator, drain the antifreeze from it, and decorative grille.
Then the engine protection and mudguard to provide access to the three cover mounting bolts from below. We will be replacing the mudguard, as it was rotten through and through and the generator was flooding in the puddles.
Now we unscrew the crankshaft pulley nut (ratchet), we need a 36 wrench, or better yet a head, but we couldn’t find one, and the standard stamped wrench was bent and did not want to unscrew the nut.
I also had to weld pipes from it for a 40 key, long enough to rest against the right side member.
It was not possible to unscrew it manually; I had to tear it off with the starter, resting it on the spar.
Next, remove the PCV sensor, alternator belt, valve cover and set the timing marks on the crankshaft pulley and camshaft sprocket at TDC of the 4th cylinder. Oddly enough, they completely coincided.
Then we remove the crankshaft pulley and the front cover, dismantle the shoe, damper, limiter and gears with the chain. We make sure that the marks do not go astray.
When comparing the old and new parts on the stars, I didn’t see any special workmanship, except for polishing on the sides.
The chain is also intact on the outside. The shoe and damper have minimal wear, as they have already been replaced relatively recently.
However, the old chain turned out to be 4-5 mm longer than the new one, which, according to the same data from the Internet, is already above the tolerance of 4 mm and requires its replacement.
Before installing new parts on the new camshaft sprocket and crankshaft pulley, I used a center punch to make additional marks at 90 and 180 degrees for convenience during subsequent valve adjustments.
We put them in reverse order according to the marks and keys: first the shoe with the damper, then the upper sprocket with the chain, then the small sprocket and the middle one, check the marks again and tighten the chain.
We carefully double-check everything and lock the retaining rings.
During assembly, due to inattention, I placed the small crankshaft gear with the “skirt” outward instead of inward, which is why the crankshaft was blocked when tightening the ratchet nut - I had to remove the cover again and rearrange it.
The marks coincided exactly again, as if nothing had changed, hmm..
Seal the front cover seal and gasket with sealant.
Also, instead of the usual nuts with engravers, I tightened the front cover with nuts with a nylon ring, which means they have the ability to unscrew and leak oil).
Well, at the end I installed a new engine splash guard.
- Set of stars – 680 rub.
- Chain – 630r
- Calmizer – 70 rub.
- Shoe – 90 rub.
- Oil seal – 110 rub.
- Nuts, washers, gasket – 200 RUR
- Engine splash guard – 400 RUR
- Ratchet key – 150 RUR
It took a couple of days to do everything, although it could have been done in one. After replacing, I did not notice any major changes in the operation of the motor. After a couple of thousand, after grinding in the parts, you will need to tighten the chain again. But then you can sleep peacefully with another couple of hundred thousand mileage).
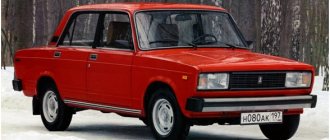
DEVICE AND FEATURES OF THE TIMING BELT DRIVE OF THE VAZ 2107 CAR
Production of the 8-valve 1.3-liter VAZ power unit with a belt instead of a timing chain began in 1979. Initially, the VAZ 2105 internal combustion engine was produced with the index 21011 and was intended for the Zhiguli model of the same name, but was later installed on other Tolyatti cars - the VAZ 2107 sedan and the VAZ 2104 station wagon. The decision to install a belt drive instead of a timing chain drive was caused by the increased noise of the latter. The engine, which was not the quietest, began to make even more noise as the mechanism parts wore out. The modernization made the power unit more modern, but in return it required increased attention to the condition of individual structural elements.
The functions that were previously performed by the chain were assigned to a belt drive. Thanks to it, it is set in motion:
Transverse teeth on the timing drive parts prevent slipping of the rubber structural element and ensure synchronous operation of the crank and gas distribution mechanisms. At the same time, during operation the belt stretches, so to prevent it from jumping on the pulley teeth, the drive was equipped with an automatic tension unit.
INTERCHANGEABILITY OF VAZ TIMING BELTS
The prototype of the VAZ “belt” engine was the OHC power unit, which was installed on the FORD Pinto passenger car. Its timing mechanism drove a fiberglass-reinforced timing belt that had 122 teeth. Due to the fact that the VAZ 2105 belt has exactly the same number of teeth and similar dimensions, some owners of the domestic “classic” had an alternative to Russian-made belts. Of course, only a few had such an opportunity - in times of total shortages, one had to be content with less reliable products. Initially, only belts from BRT were installed on the engine, but a little later, more durable belts from Gates, which is the world leader in this market segment, began to be supplied to the conveyors of the Volzhsky plant.
Today, the owner of a VAZ 2107 has a huge selection of spare parts, including for the timing belt drive. When purchasing, you must keep in mind that the VAZ 2105 power unit is suitable for timing belts with catalog number 2105–1006040 (in another spelling 21051006040). It has already been said above that rubber products produced by Gates and Bosch are considered to be some of the best. The products of global industry giants such as Contitech, Kraft, Hanse, GoodYear and Wego are no less high-quality. The cheaper offers of domestic Luzar cause the most criticism, despite the fact that they are not represented in the retail network as widely as the market leaders.
On my own behalf, I can add that owners of “sevens” can use a standard timing belt from FORD cars. Belts from OHC engines of Pinto, Capri, Scorpio, Sierra and Taunus cars of 1984 and later are suitable for the “five” engine. Please note that until 1984, the 122-tooth belt was installed exclusively on power units with a volume of 1800 cm3 and 2000 cm3. The drive element of the weaker 1.3 and 1.6 cc power units was shorter and had 119 teeth.
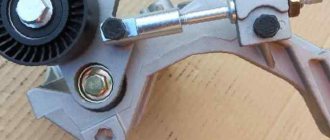
TENSION MECHANISM
In order for the timing belt of the VAZ 2107 to be constantly tensioned, a simple (one might even say primitive), but at the same time extremely effective and reliable design is used. Its basis is a shaped metal plate (hereinafter referred to as the tensioner lever), on which a smooth roller with a pressed-in rolling bearing is mounted. The plate base has a hole and a slot for movably attaching the lever to the cylinder block. The pressure on the belt is carried out thanks to a powerful steel spring, which at one end is connected to a bracket on the rotating plate, and at the other is rigidly attached to a bolt screwed into the cylinder block.
During operation, both the surface where the roller contacts the rubber belt and the bearing wear out. For this reason, when replacing the timing belt, be sure to check the condition of the tensioner unit. If the roller is in good condition, then the bearing is washed, after which a fresh portion of lubricant is added. At the slightest suspicion, the rotating structural element should be replaced. By the way, some drivers prefer to install a new roller at the same time as replacing the belt, without waiting until its bearing fails. It must be said that today the cost of this part ranges from 400 to 600 rubles, so their actions can be considered quite appropriate.
Main elements of the timing chain tensioning system
The timing chain in the engine is supported not only by the three sprockets mentioned above. It is supported by several other important devices.
The timing chain tensioning system consists of several critical elements
Let's look at them in more detail.
Timing chain stop pin
The timing chain in the VAZ 2107 engine is supported by a complex tensioning system. One of the elements of this system is the limiting finger. This is a small cylindrical part screwed into the wall of the cylinder block. The pin is located next to the crankshaft sprocket. The purpose of the pin is as follows: if the timing chain tension suddenly weakens, the pin will prevent the chain from jumping off the crankshaft sprocket.
The design of the restrictive pin is extremely simple - it is a regular bolt with a head truncated on the sides
At the same time, the chain will begin to touch the limiter with a characteristic ringing sound, which will certainly attract the driver’s attention, since this sound will be heard even in the cabin. If the chain breaks, the limiter will not allow it to completely fly off the sprocket and break the nearby oil pump and timing shaft sprockets. If the timing chain is tensioned normally, it does not touch the limiting pin, since in this case there is a constant gap of about 1.5 cm between it and the pin
If the timing chain is tensioned normally, it does not touch the limiting pin, since in this case there is a constant gap of about 1.5 cm between it and the pin.
About timing chain tensioners
The purpose of the timing chain tensioner is easy to guess from its name. He must constantly tension the chain, preventing it from sagging. If the chain sags by even half a centimeter, it may fly off one of the sprockets (although this happens quite rarely, much more often there are situations when the chain remains on the sprocket, but at the same time jumps several teeth forward, as a result of which the uniformity of its tension is completely disrupted , and the sagging increases even more). At different times, different types of tensioners were installed on the VAZ 2107.
Mechanical tensioners
In a mechanical tensioner, the force required for the tension shoe to press on the chain is created by a conventional spring. It presses on the rod, it moves out of the body and presses on the shoe. And the shoe, in turn, puts pressure on the chain, constantly dampening its vibrations.
The main element of the mechanical tensioner is the plunger spring
The spring in such a tensioner is adjusted with a conventional plunger nut. If the driver needs to tighten the chain a little, he simply tightens the nut slightly, eliminating any slack.
Mechanical tensioners for VAZ 2107 are reliable and simple in design
Automatic tensioners
Automatic tensioners were installed on later models of the VAZ 2107. Unlike mechanical devices, the design of this tensioner includes a toothed bar with a ratchet.
The main element of the automatic timing chain tensioner is a toothed bar
The plunger spring presses on this bar, and the bar transmits this force to the shoe. The ratchet prevents the bar from returning to its original position. This keeps the timing chain tension constant.
Finding automatic tensioners for VAZ 2107 on sale has become increasingly difficult lately.
Hydraulic tensioners
These tensioners were installed in the latest VAZ 2107 models. The main difference between these devices is the principle of their operation. The force in the hydraulic tensioner is created not by a spring, but by oil pressure. It is supplied to the tensioner through a reinforced high-pressure hose.
Oil is supplied to the hydraulic tensioner through a special reinforced hose
Timing chain tensioner
The timing chain tensioner is another indispensable element of the tension system, without which uniform operation of the timing chain is impossible. The damper is a metal plate that is attached to the wall of the cylinder block.
The timing chain adjuster on the “seven” is a simple metal plate held on by two bolts
This plate is located opposite the tensioner, that is, the damper acts on the second half of the chain. Since the tensioner presses the chain very sharply, the opposite side of the chain inevitably begins to vibrate. To dampen this vibration, a damper is needed. The chain, touching the damper plate, loses some of its energy and the amplitude of its oscillations decreases significantly. Without the restraining effect of the guide, the chain will stretch much faster.
replacing timing belt 2105. .
| Replacing the timing belt on a VAZ 2104-05 |
Click to view | In this video we will show you how to change the timing belt and tensioner pulley on a 1.3 engine on a VAZ 2104, VAZ... |
| Tags: |
| Replacing timing belt 2105. Timing belt 2105. |
| Click to view | Replacing the timing belt 2105. The M8 bolt on the tension roller broke off. Solution. |
| Tags: |
| Repair: Installation of timing belt on engine 2105. |
Click to view | Fast and easy. |
| Tags: |
| Replacing the timing belt on a VAZ with an 8-valve mp4 engine |
| Click to view | Replacing the timing belt on a VAZ car with an eight-valve engine. SUBSCRIBE TO THE CHANNEL … |
| Tags: |
| Installing VAZ 2105 timing marks. Checking the ignition system. |
Click to view | We check for air leaks and the serviceability of the ignition system. |
| Tags: |
| 2105. Is it possible to set the marks incorrectly when installing the timing belt? |
| Click to view | In this video you will see in detail how to replace a car's alternator belt with your own hands. ... |
| Tags: |
| How to replace the alternator belt VAZ 2107,2101,2106 |
| THERE IS A JOB FOR EVERYONE. You need to go to the site under the video you will find a registration form and where... |
| Tags: |
| Engine VAZ 2105 1.3 Timing belt Number of teeth: 122 width 19mm. |
| Click to view | Hello. Timing roller for the eighth family of VAZs, the old model from the Vologda Bearing... |
| Tags: |
| Timing roller 2105, 2108, 2109, 21099 old-style tensioner Vologda |
| Click to view | Useful technical advice. |
| Tags: |
| Timing belt VAZ 2105 |
| We do everything without panic and take our time. Everything is elementary, weakly tightened, strongly weakened. Roller when moving... |
| Tags: |
| Timing belt tension. What are the dangers of tightening the timing belt? |
| Click to view | The procedure for replacing the camshaft oil seal on a VAZ 2104-2105 with a 1.3 engine (belt). The procedure is practically similar... |
| Tags: |
| Replacing the camshaft oil seal VAZ 2105 |
| How to set the ignition on a VAZ Classic yourself. |
| Click to view | replacing the timing belt on an 8 cl engine. The belt tension roller was not shown correctly! Everything is in the opposite direction... |
| Tags: |
| Replacing the timing belt on the 8 cl engine VAZ 2108,2109,2110,2111,2113,2114,2115 |
| Click to view | Replacing the timing belt pulley and setting timing marks On the video VAZ 2110 8kl Our group on VK: ... |
| Tags: |
| How to quickly set timing marks on a VAZ 8kl |
Click to view | What to choose, which engine to take your car with, with a timing chain or a timing belt. Which one is better and hopefully... |
| Tags: |
| Ignition marks on the injector. Replacing the timing belt on an 8kL engine. Gap between DPKV and ignition pulley. |
| Click to view | Today we have Ivan Zenkevich and the Time Capsule in our episode again. Test drive and review of a unique, rare car... |
| Tags: |
| Ignition installation!!! It is so simple |
| Click to view | For those wishing to support financially: OR... |
| Tags: |
| Timing chain or belt. Which is better and more reliable? Just something complicated |
| Click to view | This is my personal way of tensioning the timing belt, I think it will be useful to many. And if I come in handy, then the belts will be... |
| Tags: |
| VAZ 2105 – Five | The rarest Zhiguli of the first series | Rare Cars of the USSR | Pro Cars |
| Click to view | The AvtoVAZ 8-valve engine is very simple and reliable, the timing drive is carried out by a belt, which needs... |
| Tags: |
| ICE theory: Why does the timing belt tear, eat, or slip on 21083 |
| Click to view | You can save time by checking (and, if necessary, replacing) the timing belt... |
| Tags: |
| Correctly tension the timing belt VAZ 2108-21083 |
| Click to view | Visit our group on VKontakte: Our YouTube channel: ... |
| Tags: |
| Timing marks 8 class VAZ! Installing the timing belt 8kl.VAZ! |
| Click to view | The adjustment is made to cold – 20-25 degrees. Zhiguli probe 0.15 in a circle. Alexander Ladenkov. How… |
| Tags: |
| timing belt replacement |
| Tool kits for car repairs Discounts on tools... |
| Tags: |
| Repair. Engine 2105. How can you set the crankshaft when installing the timing belt if you don’t have marks. |
| Click to view | After the repair, my timing belt slipped by a tooth, or I missed one tooth. I'll tell you what I had... |
| Tags: |
| Final assembly of VAZ 2105 |
| Click to view | Replacement of bushings and oil pump drive shaft. |
| Tags: |
| GT (Garage Topics) Adjusting valves on VAZ 2105 (2101 2107) |
| Click to view | Send donation: Replacing the timing belt. |
| Tags: |
| Determining knocking in a VAZ 2105 engine and replacing the small crankshaft sprocket” rel=”spf-prefetch |
| Click to view | Description missing |
| Tags: |
| The timing belt jumped a tooth. Symptoms and consequences. VAZ 8 class.” rel=”spf-prefetch |
| Click to view | Description missing |
| Tags: |
| VAZ 2105 engine 1.5 belt.” rel=”spf-prefetch |
| Click to view | Description missing |
| Tags: |
| Replacing the timing belt 8 valve engine VAZ 2108-2109, 2114″ rel=”spf-prefetch |
Features of the timing chain and belt
One of the components of servicing the VAZ-2105 engine, like any other, is replacing the gas distribution mechanism drive. But the difficulty of performing this operation on this car depends on the type of drive used. Replacing a VAZ-2105 timing belt is easier than replacing a chain, but it also needs to be changed more often.
The ease of replacing the belt is one of its most positive qualities. Additionally, the belt is not so noisy, costs much less, and does not stretch very quickly.
The main disadvantage of the belt is the possibility of it breaking. And although the negative consequences of this breakage are structurally reduced by applying special grooves on the pistons, eliminating the possibility of a collision between the open valve and the piston bottom, the fact of the breakage itself remains unpleasant. In addition, the service life of the belt can be significantly reduced due to engine fluids getting into it.
The possibility of a chain break when the engine is running is practically eliminated, given the fact that the VAZ-2105 timing chain is double-row. Another positive quality of the chain is that it has a significantly longer service life than a belt.
Related link:
What kind of oil to fill in the engine, gearbox and axles for the winter in a VAZ
But the chain stretches over time, and although there is a mechanism for tensioning it, when stretched, the noise of the engine increases significantly. Also, the chain requires lubrication, so it must be located inside the engine, which makes replacing the VAZ-2105 timing chain more complicated.
Where is the timing belt located?
First, let's remember where the timing belt is located and what it looks like. Its location is in front of the engine, but do not forget that motors come in longitudinal and transverse locations. In most cases, gas distribution mechanisms use a toothed rubber belt, but in a considerable number of car models from different manufacturers, a steel chain is also used for this.
Engine cylinders can be equipped with two or four valves with one and two camshafts (CV), respectively. The kinematics of the gas distribution mechanisms of such engines differ. We will show them using the example of 8- and 16-valve power units for the VAZ 2110, 2111 and 2112.
The scheme with two shafts is more complicated, and in it, in addition to the pulley of the second RV, a support roller is added. This also complicates the belt replacement procedure. It is most difficult to perform this operation after a break or severe stretching of the belt, when the factory timing settings can be completely lost. Replacing in normal mode is not so difficult that you can’t try to do it yourself.
Refinement of the power system
It is best to use Weber modifications; in this case, adjusting fuel consumption for each VAZ 2105 carburetor is not so difficult. And Weber’s reliability is better. To install it, you will need a set of plumbing tools, tees, hoses and manifolds from Oka, the markings of which are in the catalog. It is worth remembering that it can be very difficult to achieve synchronous operation of carburetors. And why this happens is difficult to say. Most likely, each VAZ 2105 carburetor is unique, and therefore the fuel consumption adjustment is not ideal. So two carburetors are quite a risk. Although if everything can be set up synchronously, then the VAZ’s internal combustion engine will begin to operate very smoothly. And fuel consumption on a VAZ will increase, but by no more than 1 liter.
Considering the problematic carburetor of the VAZ 2105, the adjustment of fuel consumption of which takes a lot of time, it makes sense to switch to an injector. To do this, it is better to buy all spare parts at the official VAZ center. There is a special diagram for installation; all the work can be done in a couple of days in the garage. After this, you can forever forget about the VAZ 2105 carburetor, the adjustment of fuel consumption of which was so exhausting. However, the injector may also require initial setup.
Replacing the timing belt on a VAZ 2105, 2104, 21072: tension, marks
In this article we will describe in detail the procedure for replacing the timing belt on VAZ 2105, 2104, 21072 cars. These models have one VAZ 2105 engine installed, so the procedure will be general.
Model features
If we turn to history, then for the first time the belt drive of the gas distribution mechanism in cars of the Volzhsky Automobile Plant began to be used on the VAZ 2105 model: an engine with such a drive was an experiment, and was not installed on all cars (some of them used a motor from the VAZ 2101 and 2103 models, having a timing chain drive).
And also, this version was the first in the Soviet era to drive the gas distribution mechanism using a belt instead of a chain, like other models. This experience can hardly be called a success, because the engine became known for its unstable operation and frequent leaks of engine oil.
But, thanks to the efforts of Soviet engineers, the mechanism is absolutely safe to use. A broken belt on a VAZ 2105 does not lead to a collision of pistons with valves, since the former have special rounded recesses on top, and this will not require engine repair.
During standard use, belt replacement in 2105 is necessary in the following cases:
- The mileage is around 60 thousand km.
- Damage appears on the rubber (tears, cracks).
- Major engine repairs are being carried out.
Engine parameters and features
The VAZ 2105 engine is used on the VAZ 2104, 2105 and 21072 models. It has a camshaft belt drive and the following main parameters:
- engine capacity 1.3 l,
- power 64 horsepower,
- maximum luggage compartment volume – up to 385 liters,
- fuel consumption in the city – 10 liters per 100 km,
- in the combined cycle - 8 liters per 100 km.
Cars based on this engine use 5W-30-15W40 oil and AI 93 fuel. The engine life, according to the factory, is 125, in practice - about 200, 4 cylinders and 2 valves, power system - carburetor, type - in-line. Torque is approximately 94 Nm at 3400 rpm. The piston stroke and cylinder diameter are 66 and 79 mm, respectively.
And also, when repairing the timing belt on the 2105, do not forget about the features of this engine. The use of a toothed belt in the gas distribution mechanism drive instead of a classic metal chain made it possible to achieve quieter operation of the machine. In addition, the belt tension has become automatic, removing an extra lubrication point, which has significantly reduced engine oil losses.
Replacement procedure
- Remove the alternator belt.
- Remove the top belt cover.
- Turn the crankshaft clockwise until the marks on the camshaft gear coincide with the marks on its housing, on the crankshaft pulley and the drive cover.
- Remove the middle and bottom belt covers (out of a total of 3 pieces, the first was removed in step 1)
- Remove spring 7, loosen bolts 3, move the bracket to the left as far as it will go and remove the belt.
- Put on a new belt, press out the bracket and install spring 7.
Tension adjustment
According to the regulations, it is required every 15 thousand km. Check the timing belt tension on this engine and adjust the tension if necessary.
To adjust the tension you need to:
- Remove the timing belt cover.
- Loosen bolts No. 3.
- Turn the crankshaft by the hexagon of the ratchet several turns. It must be turned clockwise.
- When performing the previous step, spring No. 6 will provide optimal tension automatically.
- Tighten No. 3 bolts.
- Put on the timing belt guard.
Frequency of replacing the timing belt on a VAZ 2105
Replacing the timing belt on a VAZ 2105 is necessary approximately every 60 thousand km during standard use, but in case of some damage it becomes necessary to replace the timing belt earlier than the standard period. Despite a certain motor resource set at the factory (in our case - 125), malfunctions occur quite often and their elimination is critical for continued use of the machine.
If folds, cracks, or fraying of the belt appear, it must be replaced, since when using a timing belt on a VAZ 2105 in this condition, there is a danger of rupture when the engine is running. When oiling, you should carefully wipe the belt with a cloth, after dipping it in gasoline.
What is the cost of a new VAZ 2107 tensioner?
In order to change an automatic tensioner, on average you need 600-700 rubles. TZA (Togliatti Automotive Units Plant) produces the best, “native” tensioners for “classics”. The package (blue) has the packer's number as well as an authentication sticker with a protective layer. Under the layer there is a code, when entered, you will receive an SMS confirmation. Inside there must be an insert - a form with the name of the product, the date of manufacture, and the blue original seals of the quality control department.
The need to install marks on the timing mechanism may arise during the repair process or when the chain is severely stretched. If the marks do not match, the stable operation of the motor is disrupted due to a phase shift. In this case, an adjustment is required. The work is carried out with the following tools:
- Screwdriver Set;
- key for rotating the crankshaft;
- a set of keys.
To install the chain according to the marks, you will need a standard garage tool kit. We carry out the procedure according to the following instructions:
- We dismantle the air filter box and the valve cover with the seal by unscrewing the fasteners.
- Loosen the tensioner clamp, press the screwdriver against the shoe and tighten the nut.
- Using a 38 mm wrench or a crank, turn the crankshaft until the marks on its pulley and the timing cover match, and the mark on the camshaft sprocket should be located opposite the protrusion cast on the body.
- If any of the marks do not coincide, turn on the fourth speed and unbend the lock washer on the camshaft sprocket.
- We unscrew the bolt and remove the gear.
- Remove the chain from the sprocket and set the desired position (step 3).
After installing the marks, we perform reverse assembly. You can turn the crankshaft with a 38 mm spanner.
DETAILS: Headlights VAZ 2106 diameter - All about the car || Tuning headlights for VAZ 2106
To do this, the new element is clamped in a vice, but so that it does not damage the body.
Next, the tensioner is removed from the vice. Then, holding it by the mounting ears with your hand, you need to rest the plunger against a hard surface and press on it so that it goes into the body.
Afterwards, the “charged” tensioning mechanism is installed in place and secured with two nuts.
In order for the tensioner to operate and extract, you need to loosen the cap nut again, after which you will hear a click indicating that the plunger has come out and extracted.
If you decide to replace the standard tensioner with an automatic one, then the removal sequence does not differ from that described.
It is already on sale with the rod fully retracted into the body, and it is secured with a pin in this position.
Before removing the rod fixation, the tensioner must be installed on the car and secured with nuts.
And only after this, the locking pin is removed with pliers, after which the spring will push the rod out, and the pawl will not allow it to go back.
All that remains is to screw the bolt into the hole in the end to prevent the spring from falling out. This bolt must be included with the tensioning mechanism.
In general, the operation of replacing a timing chain tensioner, whether standard or automatic, is not difficult if only the tensioning element itself is changed.
You can read about how to get to the shoe if you decide to change it, as well as how to immediately replace the drive chain here.
When the timing chain tensioner has been checked, in particular if it needs to be replaced, you need to start installing a new one. But do not forget that before starting installation it is necessary to charge this mechanism. To do this, you will need to push the plunger mechanism all the way, and then, holding it in this position, tighten the nut on the cap.
After this, you need to install the tensioner housing and tighten the bolts. Do not forget that you need to install a new gasket if the old one fails. Using a special wrench size 38 for the ratchet, turn the engine crankshaft at rpm. In this case, the timing chain is tightened. You need to make one turn, then loosen the cap nut to release the tensioner. After this you need to tighten it again.
Required Tool
Next, let's look at how to replace the chain and belt on the 2105. First, you need to understand the tools and accessories required to perform this operation; there are not many of them.
To replace the chain drive you will need:
- Open-end and spanner wrenches (10, 13, 17);
- Crankshaft pulley nut wrench (36);
- Flat screwdriver;
- Hammer;
- New chain;
And to replace the belt you will need even fewer tools:
- Open-end and spanner wrenches (10, 13, 30);
- Socket wrench (17);
- New belt;
- Chain replacement
Having all this, you can start working. First, let's look at the chain replacement sequence. To do this, it is better to place the car on an overpass or inspection hole, and put wheel chocks under the wheels.
Design of the VAZ 2106, 2107 chain drive
To drive the VAZ 2106/2107 with a carburetor, a double-row roller chain is used. It transmits force from a sprocket mounted on the crankshaft to another sprocket mounted on the end of the camshaft. The chain is a structure that develops large inertia, so a chain drive requires vibration damping. Even if the chain is well tensioned, it retains the property of “playing” in those places where there are no sprockets or tensioners.
The chain has virtually zero ability to stretch and compress, and fairly limited flexibility. Therefore, in order to provide it with constant tension while working in its place at any speed, it has to be literally shackled, using a system of tensioners and dampers.
This problem on the VAZ 2106/2107 is solved by a damper - an additional spring-loaded clamping bar. It has a steel frame covered with a layer of durable rubber. Tensioners and dampers dampen vibration and noise quite effectively . The chain is prevented from falling off by a stop pin that is screwed into the block or cylinder head. During normal operation the chain does not touch it.
Useful notes
If you have a “seven” with a carburetor, then after replacing the timing chain you need to adjust the ignition, because the drive sprocket of the ignition distributor-distributor (in common parlance, distributor) was also removed from its seat. Injection models do not require such adjustment.
Soviet and early Russian cars of the classic family were traditionally equipped with double-row timing chains. This provided increased reliability due to the fact that the break of one link did not provoke an instant collision of the piston with the valve in the open position. The disadvantage was the increased weight. In order to save money and simplify the design, the chain began to be made single-row. The resource of a double chain reaches 100 - 120 thousand kilometers, while a single chain is half as much. Some car owners are returning a double-row chain to their power units. True, for this you will also have to replace all the gears that mesh with the chain. Today, a set of such parts is quite difficult to find, so get ready for search work if you want to increase the reliability of the timing mechanism.
A double-row timing chain has a much longer life, but choosing a set of parts for its installation is much more difficult
The timing chain is a transmission mechanism, the condition of which the car owner must monitor especially carefully. It is not without reason that experienced drivers advise listening to their car. Extraneous noise with jingling notes is a sure sign that it’s time to open at least the cylinder head cover, crank the crankshaft and inspect the chain, at least externally. If there are alarming signs, the chain will need to be removed and replaced. Confidence, accuracy and these instructions will help you save a considerable amount of money, because replacing a chain or belt on a “classic” costs about 2,000 rubles in the country.
Timing phases and when to set them according to marks
Valve timing refers to those moments at which the piston in the engine moves up and down over a certain interval. When irregularities in the valve timing occur, the pistons move incorrectly along the interval, resulting in uneven engine operation on the VAZ-2107.
If the driver notices that the car’s power decreases, fuel consumption increases, and engine interruptions occur, then it is necessary to resort to setting the valve timing according to marks. How to set marks on a VAZ 2107 carburetor and injector, we will learn from this material, since the design of the timing mechanism is identical.
How to set timing timing marks
The procedure involves performing the following manipulations:
- The VAZ 2107 needs to be placed on a hard surface, with chocks placed under the wheels and the hand brake pressed all the way. The gear shift lever must be set to neutral mode.
- The cover is removed from the cylinder head by first unscrewing all the fixing nuts to “10”. It is better to replace the gasket with a new one, even if the old one shows no signs of damage.
- Using a key set to “24”, you need to turn the crankshaft on a VAZ 2107 car. This is done in order to be able to align the marks on the moving and stationary parts of the mechanism. To carry out these actions, it is recommended to use good lighting or use a flashlight. The crankshaft rotates until the mark on the pump and generator drive belt pulley coincides with the long mark marked on the block.
- Combining these risks, the mark on the sprocket should eventually coincide with the ebb on the camshaft bed. If the mark ends up at the bottom, then you should rotate the crankshaft 360 degrees.
- If you can’t make sure the labels match, then proceed to the next steps, which are described below.
- The crankshaft is rotated until the marks on the star and the bed ebb align.
- Using the key at “13”, you need to loosen the tensioner. The 2 nuts securing the tensioner are unscrewed, after which this device is removed.
- The bolt that secures the sprocket to the camshaft is unscrewed. To do this you will need to use the key at “17”.
- The sprocket is removed, after which it must be rotated until the marks on the VAZ-2107 timing belt pulley coincide with the long mark on the block. The star fastening bolt does not need to be unscrewed, since after removing the tensioner the camshaft star rotates.
- We put a chain on the sprocket, if it was decided to unscrew it, and install it in place. Finally, the tensioner is installed, for which you should tighten it with 2 nuts to “10”. You can install the tensioner first, but later you will need to use a crowbar or pry bar to get the sprocket into place. Finally, screw the tensioner nut to “13”.
This relative arrangement of the parts allows the piston of the 4th cylinder to be positioned at top dead center TDC.
If the camshaft fails
The camshaft on the VAZ 2106 model is rarely dismantled. Typically during repair or disassembly. Sometimes to replace it.
Signs
First, let's talk a little about the signs that indicate that the camshaft is faulty, its journals or beds are worn out. It is difficult to determine whether the shaft or something else is knocking in the VAZ 2106 engine, but it is possible. The knock of the camshaft is dull and clearly audible. As engine speed increases, the knocking becomes more frequent.
Some drivers determine knocking in this unit using a stethoscope or a stick through the valve cover. But often it is difficult for an inexperienced driver to do this. Therefore, the best way to diagnose the camshaft is to remove it, wash it and inspect it.
If the camshaft is faulty, the following symptoms may occur:
- a dull knock, reminiscent of hammer blows;
- it is impossible to adjust the valve clearances; while the crankshaft is turning, the camshaft is constantly in different positions.
This video shows how you can eliminate longitudinal runout of a camshaft.
The most reliable method for diagnosing problems with the VAZ 2106 camshaft is to dismantle it from the car and wash it. You can wash it in gasoline or other cleaning liquid. Next, you need to hold the shaft and hit the bed, when you hear the slightest knock, we determine whether the mechanism is worn out. Be sure to make sure that the shaft does not move in bed, because when it hits the limiter it will make a dull knock.
Removed shaft
The camshaft has a great influence on the pressure in the lubrication system. If the gaps between the bed and the camshaft are large, then the pressure will be low, and as a result, unsatisfactory lubrication of other parts.
Causes
The main malfunctions that result in the need to replace the camshaft are its wear, the appearance of various scuffs and grooves on the bearing journals. Likewise, replacing the camshaft is necessary if it is found to be deformed or cracked. When such malfunctions occur, the power unit loses power and also begins to function intermittently. Problems with the camshaft are identified by a knocking sound in the cylinder head.
The camshaft on the “six” is rarely removed. In addition to the above reasons for replacing and reconfiguring the power unit. After this, you can notice a significant increase in power, like in sports cars.
Tension adjustment
According to the regulations, it is required every 15 thousand km. Check the timing belt tension on this engine and adjust the tension if necessary.
To adjust the tension you need to:
- Remove the timing belt cover.
- Loosen bolts No. 3.
- Turn the crankshaft by the hexagon of the ratchet several turns. It must be turned clockwise.
- When performing the previous step, spring No. 6 will provide optimal tension automatically.
- Tighten No. 3 bolts.
- Put on the timing belt guard.
Possible faults
In the family of cars of the Volzhsky Automobile Plant, which are called “classics”, the timing drive is made in a chain version. The service life of a good double-row chain is longer than any belt, and the chain is better protected from any external influences while being inside the engine block. Instant stretching of the chain is excluded; moreover, the chain, unlike the belt, will not slip when the engine is suddenly revved up. The downside: noise and some cumbersomeness are not so noticeable when operating the VAZ-2107.
Tensioner diagram: 1 — camshaft sprocket; 2 - timing chain; 3 — chain damper; 4 — auxiliary drive sprocket; 5 — crankshaft sprocket; 6 — tensioner shoe; 7 — hydraulic chain tensioner; 8 - oil line fitting
Unfortunately, the chain also does not last forever. It also stretches - only not immediately, but gradually, as a result of the metal fingers working against the gear teeth.
Signs that the chain has stretched and you need to diagnose the degree of its serviceability are the following:
- extraneous knocking and clanking when the engine is running;
- severe stretching and metal wear can lead to irregular valve timing, increased fuel consumption and other malfunctions.
If the chain has only slightly stretched, you can compensate for the sag by increasing the pressure with the tensioner shoe. When the limit of adjustments has been exhausted, only replacing the chain can help.
Chain stretch even of a few millimeters is noticeable to the eye
In order to better understand when you can get by with little blood and when to change the chain, the manufacturer has established the approximate resource for normal operation of the timing drive, which on the “seven” is 60 thousand kilometers. When used beyond the specified period, there is a risk of not just stretching, but the teeth jumping during operation, or the unit breaking.
Jumping the chain by one or two gear teeth leads to a violation of the valve timing, which will affect malfunctions even at idle speed, not to mention operation under load.
An open circuit leads to the disappearance of synchronization between the revolutions of the crankshaft and camshaft. As a result, the pistons, by inertia, hit the valves open inside the cylinder, deform themselves and deform them. The pistons of the “seven” engine have special grooves that protect the valves from bending. But if the engine has undergone a major overhaul with the replacement of the cylinder-piston group, the pistons may well not have recesses, then the risk of serious damage increases. Monitor the drive chain and change it on time.
Timing marks on the injection VAZ 2107
The gas distribution mechanism and its drive of the seven engine produced by the Volzhsky Automobile Plant remained the same - chain. Extraction and excessive wear of the timing chain on the VAZ 2107 power unit by the injector-type power supply system leads to:
In order to avoid the negative consequences of weakening or stretching the chain drive of the VAZ 2107 car engine, it is necessary to carry out routine maintenance in a timely manner. The list of maintenance operations for the power unit with the injector power system is determined by the service book. The condition of the timing chain and the gaps between the camshaft cams and valve levers is monitored every 30 thousand km.
On warranty VAZ 2107 with an injector-type power system, such work is best carried out at an authorized auto repair center. If malfunctions occur due to the fault of the car plant, they will be eliminated at the expense of the manufacturer. At the end of this period, maintenance of the timing belt and other vehicle systems can be performed independently.
Diagnostics of timing chain VAZ 2107i
Over time, the timing chain stretches, resulting in lateral vibrations in the downstream section of the chain. These vibrations can break the damper, and in extremely advanced cases, lead to the chain jumping on the sprocket and, as a result, damage to the engine. When the chain is stretched, a characteristic metallic sound appears in the front part of the engine, increase the speed a little and if the sound becomes weaker or disappears altogether, this is a clear sign of wear on the timing chain. If you have a semi-automatic tensioner installed, try tensioning the chain. The procedure is described above. If this does not help, you will have to change all elements of the gas distribution mechanism.
It is recommended to carry out the tensioning procedure every 10 km.