Removing, replacing and tensioning the alternator belt on VAZ 2101, 2102, 2103, 2104, 2105, 2106, 2107
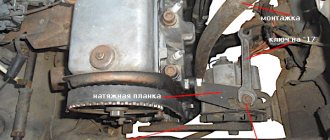
Hello, in this article you will learn how to remove, replace and tighten the alternator belt on a VAZ 2101, 2102, 2103, 2104, 2105, 2106, 2107. The alternator belt does not have an approximate service life. Usually it is changed when cracks appear on the belt or it is very stretched. If a whistle is heard from under the hood when starting the engine or when the speed increases, it means the belt is stretched, but as a temporary measure, you can first try tightening it, rather than immediately replacing it with a new one. The average cost of an alternator belt in the automotive market is 200-300 rubles. To replace or tension the generator belt, you will need wrenches 17 and 19. First of all, you need to loosen the nut that secures the generator to the adjusting bar
Next, try moving the generator towards the engine to loosen the tension on the generator belt. If this does not work, then you need to loosen the lower bolt securing the generator
After this, remove the alternator belt
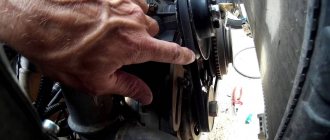
Install the alternator belt in the reverse order. To tighten the generator belt, you need to use a pry bar or something else to move the generator away from the engine so that the belt is tensioned, and tighten the top nut securing the generator to the adjusting bar. After tensioning, the alternator belt should bend by approximately 1 centimeter when you press it with your thumb with medium force; if this is not the case, tighten the alternator belt again.
Source
How does the gas distribution mechanism work?
On the VAZ-2105, a belt drive for a gas distribution mechanism was used for the first time. It became experimental, which is why you can still find cars equipped with a chain drive. They received their engines from VAZ-2103 and VAZ-2101.
The advantage of cars equipped with a belt drive is that they are easy to maintain - you can replace a worn part with your own hands, without visiting a service station. The disadvantage is that the belt needs to be changed more often than the chain. The main signs of wear are protruding threads, discoloration, and tears.
The chain wears out over a longer period of time and is less likely to break. It is double-row, but this does not protect against possible stretching during long-term use. The disadvantage of chain drive engines is that this timing element is located inside the engine due to the need for constant lubrication. Repairs need to be done at the moment when the engine begins to run noisier.
Replacing the alternator belt on a VAZ 2105
Current to power conversion calculator
Convert how many amperes a kW has online. Calculator for converting current amperes to power watts
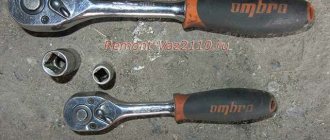
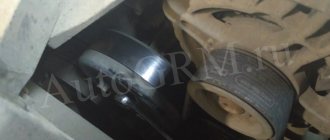
Replacing the alternator belt is identical for all VAZ car models from 2101 to 2107, since the design of the entire contents of the engine compartment and attachments is the same. In this photo report, the alternator belt will be replaced on a VAZ 2105 car. Of the necessary tools, you will only need 2 wrenches, 17 and 19. The replacement procedure is very simple and takes a minimum of time.
So, first you need to loosen the upper mount of the generator to the tensioner. To do this, we will use a 17-size open-end wrench.
Then we climb under the car and unscrew the lower fastening a little, or rather the bolt nut.
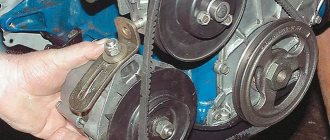
Now we take the fastening nut from above and move the generator to the right side, respectively, at this time the belt will loosen.
We achieve such a tension when the belt can be easily removed and removed from the generator pulleys on the VAZ 2105.
Source
Preparing and disassembling the unit
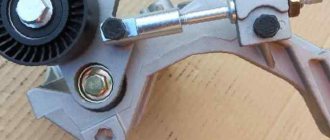
To perform the work of replacing the timing belt, no special devices are required, nor is an inspection ditch required. From the tool you will have to look for a 30 mm open-end wrench; it will be needed to turn the tension roller.
The remaining tools are listed below:
- a powerful flat-head screwdriver, useful for removing the belt;
- a set of standard size wrenches;
- rags for wiping the engine;
- spark plug key;
- cloth gloves.
A new timing belt and tension pulley should be purchased from a reliable supplier or dealer. When purchasing, you should not go for cheapness, but check the part for detachment of rubber or threads. When the preparation is completed, you can begin disassembly, which is more convenient to perform on a cooled engine in this order:
- Remove the battery by first unscrewing the terminals. It will interfere with the removal of the alternator drive belt.
- Loosen the alternator belt tensioner nut, move it forward and remove the belt from the pulleys.
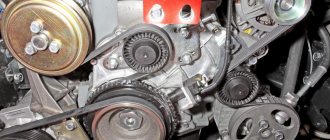
- Unscrew and remove the 3 plastic covers covering the front timing belt assembly.
- Remove the ignition distributor cap and unscrew the spark plugs. Without them, the crankshaft is easier to turn by hand.
The distributor cover is removed to monitor the position of the slider. This is very important when replacing a belt as a result of a break, when all the marks are lost.
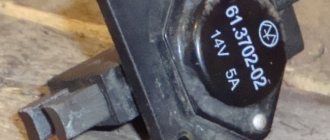
Checking the removed voltage regulator
To clarify the condition of the regulator, it must be removed. It is better to test the device complete with brushes and brush holder. This will allow you to immediately detect:
- poor contact between the terminals of the brush holder and the voltage regulator;
- breaks in the output conductors of the brushes.
A voltmeter or a 12 V lamp with a power of 1–3 W is connected to the brushes of the device removed from the generator 37.3701. For the regulator from the G-222 generator, the connection is made to terminals “B” and “W”. The “plus” of the power supply is connected to the terminals “B”, “C” (when they exist), and the “minus” to ground. First, a voltage of 12–14 V is applied, and after that – 16–22 V. A sign of the device’s serviceability will be the lamp lighting up (deviation of the voltmeter needle) in the first case and going out (zeroing the voltmeter) in the second.
When the lamp lights up in both cases, this means that there is a breakdown in the device. If in both cases the lamp does not light, then there is no contact between the regulator terminals and the brushes, or there is a break in the device. Another cause of improper voltage regulation can be worn or stuck brushes. They must protrude from the housing of the electronic device or the brush assembly of relay regulators by no less than 5 mm.
Generator care
The most important thing is to understand that the generator, like all components of the car, must be monitored and serviced in a timely manner. Change brushes in a timely manner, do not allow large amounts of dust and dirt to get in, not to mention water. Ensure that the alternator V-belt is properly tensioned so that it is neither loose nor overtightened.
It is recommended to check the technical condition of the generator every 15,000 km. mileage Typically, with proper care of the generator, it can last up to 160,000 km. mileage and repairing the generator with your own hands is simply not necessary, you just replace it and that’s it.
But in order for a car generator to last for so long, you need to learn how to properly maintain it, and you can’t do this without disassembling the generator.
The belt broke
Sometimes situations arise when the belt malfunction lies in the part itself - it simply breaks. In this case, there is only one way out - purchase a new belt and make sure that all the marks match during the installation process. Only after this will you be able to turn on the ignition and continue your journey.
It is worth noting that the designers of the VAZ-2105 engine, when developing the system, made sure that the unit was installed in a piston with recesses. Thus, the owners of this vehicle will not be able to connect the piston to the valve, which is not a very good point.
As a conclusion, we can give advice on how to restore the ignition if the timing belt breaks. You need to do the following:
- Install a new timing belt, making sure that all marks match.
- Start by placing the slider on the 4th cylinder. Additionally, it is necessary to ensure that the distributor is secured. Only after this can you start trying to start the engine.
If after completing the circuit the car still does not start, then the same sequence of actions must be repeated with the 1st, 2nd and 3rd cylinders. In some position the engine will definitely start. In any case, you should promptly carry out maintenance of such an important component in the car as the gas distribution mechanism.
Some numbers
Two sedans: VAZ 2105, -07 and station wagon -04 represented a new line of VAZ classics, which replaced the “penny” generation (2101, -02, -03, -06). The first-born of this family, the 5th model was equipped with three power units:
Car model Engine index Volume, cm? Power, l. With. VAZ 21051 -2101 1200 60 VAZ 2105 -2105 1300 64 VAZ 21053 -2103 1500 75
The 2105 engine was intended as a base engine. The weakest one was not particularly popular. The other two units have their supporters and opponents. Some technical characteristics of the “five” engine:
- The cylinder block is cast iron, unlined.
- The arrangement of 4 cylinders is in-line.
- Boring diameter - 79 mm.
- Piston displacement - 66 mm.
- Power* - 64 l. With. (note - at the beginning of the release the number 68 was indicated). Since there were no structural alterations, this was obviously caused by a change in the determination method.
- Torsion torque - 9.5 kgm at 3400 rpm.
- Volumetric compression - 8.8.
- Gasoline consumption AI-92: city - 10.2; track - 6.2; mixed cycle - 7.9.
What do you need for repairs?
Before repairing, you must prepare the necessary tools. If your car has a modern VAZ-2105 engine, then to repair the gas distribution mechanism you will need to have sets of ring and open-end wrenches (with numbers 10, 13, 17, 30), a socket wrench for 17. Purchase new components in advance - a tension roller and a belt.
You don’t need to choose a cheap belt, then it will last a long time and fit perfectly. It is not necessary to change the tension roller along with the belt, but most car enthusiasts do complex repairs. This is necessary so as not to disassemble the mechanism several times.
Rules for installing a new part
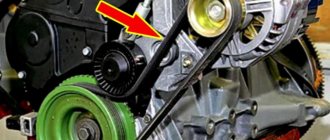
Belt layout
Using the head at “13”, the fastening of the roller is loosened. The key at “30” helps to turn the roller counterclockwise so as to loosen the unit in question. It is removed to the side and pulled out from under the hood of the car. The next step involves replacing the roller. It must be remembered that when replacing a belt, you must first clean the installation site of the new part from dirt and dust. Next, the tension roller is tightened taking into account the marks. This procedure is carried out with the key set to “13”.
When the marks match, you will need to check the position of the slider. If it is installed correctly, the VAZ 2105 engine starts, and the belt protection is installed in its original place. The final stage is putting on and tensioning the alternator belt.
What is the difference between replacing a chain?
If your car has a chain version of the timing mechanism, then before repair you need to prepare more tools. Additionally, take to
a 36mm hatch for the crankshaft pulley nut, a hammer and a flat-head screwdriver.
The chain drive is more difficult to access. Disassemble the mechanism and replace the chain according to the instructions:
- At the initial stage you need to remove the valve cover, otherwise you will not get to the camshaft sprocket.
- While controlling the crankshaft using the pulley mounting bolt, carefully turn it until the mark on the camshaft drive gear aligns with the mark on its housing. The latter was made using the casting method. The long mark located on the crankshaft pulley should match the marking on the timing cover. Once all the marks are set correctly, proceed to the next step of work. If this does not happen, continue to rotate the crankshaft.
- Unscrew the crankshaft bolt. Before doing this, engage 4th gear and install the handbrake. Do not immediately unscrew it completely. First, tear off the bolt and check whether the marks match. If they are in the required places, then you can continue to unscrew it.
- After unscrewing the bolt, remove the pulley.
- Remove the timing chain cover by removing all bolts and nuts.
- The easiest way to loosen the chain tension is to remove the chain tensioner along with the shoe. You can do it differently - recess the spring-loaded rod into the body, and then fix it.
- Now all you have to do is remove the bolts securing the sprockets of the auxiliary and camshafts. First you need to press out the lock washers using a flat-head screwdriver.
- Remove the chain along with the shaft sprockets, being careful not to turn them.
- Replace the chain and reassemble.
This job is a little more complicated than replacing a regular belt, but if you are well prepared for it, no problems will arise.
In what situations is replacement necessary?
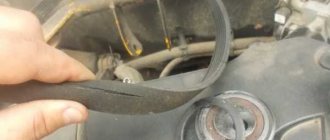
Element wear is characterized by such manifestations as cracks or tears in the blade, worn teeth and uneven edges
If you ignore such a deplorable state of a very important element, it will come back to haunt you with overheating and boiling of the engine, independent operation of the battery, which will lead to its rapid discharge
If the belt is severely worn, it also shows signs of noise to the owner - it begins to whistle, especially at low speeds. Another reason for a whistling belt may be moisture getting on its surface, which occurs due to worn-out pipes of the cooling system - antifreeze begins to leak.
Some belts - oak - whistle when the car is started in frosty weather, and after warming up the sound disappears. A weak tension is expressed by a whistle, but in this case it is enough to simply tighten it.