One of the important maintenance tasks is replacing the fuel filter in your Kia Spectra. This part, present in almost all modern cars, serves to remove small impurities from the fuel and prevent them from entering the engine working space. During transportation, storage and use of the vehicle, pieces of tank and gas tank linings, sand and dust can become trapped in the fluid and enter the fuel system. Over time, this can lead to clogging of engine injectors, mixture supply systems and corrosion of some components. This is especially true if low-quality fuel is used. Such situations can lead to serious problems with the car and the need for repairs. Moreover, failures of various systems develop quite slowly, which is difficult for a non-specialist to notice. All these problems can be prevented by timely replacement of the filter element, using only high-quality replacements or original parts.
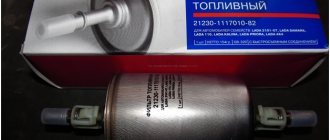
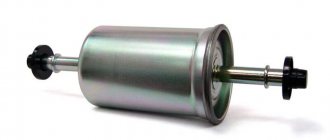
New original fuel filter for Kia Spectra
The following conditions may indicate that your Spectra fuel filter needs to be replaced:
- Reduced engine performance (poor traction under load, decreased acceleration dynamics)
- Noticeable increase in fuel consumption
- Check Engine Light Flashing on Dashboard (Check Engine Light)
- Engine shakes, runs irregularly, idle speed varies
- Engine won't start
Of course, all of these symptoms can indicate other, sometimes more serious problems with the car, and a full engine diagnostic performed by a professional will help detect them. Therefore, it is better to prevent this and replace the fuel filter in time. Experts recommend a replacement period of 30-50 thousand kilometers, depending on the operating conditions of the vehicle. The more severe the operating conditions (warm, dry climate, dust, city, national roads, regions with traditionally low fuel quality, etc.), the better the fuel filter. After purchasing a car on the secondary market, it is better to replace it to save yourself the extra hassle.
Return to contents
Article number and cost of a branded Kia Spectra fuel filter
The Kia Spectra has a fine fuel filter with catalog number 0K2AA20490. The cost of the original consumables ranges from 500 to 1200 rubles. Analogs of the original filter are available for sale. The table below provides a list of the best brands that have performed well on the Kia Spectra.
Table - Analogues of the fine fuel filter for the Kia Spectra car
| Company manufacturer | Article number | Estimated cost, ruble |
| Nipparts | J1330314 | 340-470 |
| Sakura | FS2906 | 400-500 |
| AMP | FF0614 | 420-530 |
| Denckermann | A110033 | 280-350 |
| Onnuri | GFFK022 | 240-280 |
Original Kia Spectra primary fuel filters do not have their own article number. They come complete with an expensive fuel pump. At the same time, filter meshes from other cars are suitable for Kia Spectra. The table shows the best options for replacing the coarse fuel filter.
Table - Fuel filter screens for the Kia Spectra car
| Manufacturer brand | Catalog number | Approximate price, ruble |
| VAZ | FP 1002 | 120-140 |
| QML | FP 1002 | 130-145 |
| AMD | AMD.FP163 | 40-55 |
| ARRANG | CT5 | 45-60 |
| GENERAL MOTORS | 96183953 | 80-90 |
| KRAUF | KR1012F | 130-150 |
| ATS | 221178 | 220-270 |
Typical faults
In practice, a list of typical faults has been compiled that require a complete filter change.
- Failure of the water sensor. Failures can be electronic or mechanical.
- Broken spiral in the heating system due to problems in the vehicle's on-board electrical wiring.
- Natural clogging of the fine or coarse mesh package due to regular use of fuel of questionable quality.
- The appearance of traces of oxidation on the surface of the contacts responsible for heating the fuel before supply.
- Depressurization of the neck body designed to drain condensed water.
It is important to note that the filter housing cannot be disassembled. Therefore, if the above malfunctions occur, you will have to purchase a new part.
Frequency of replacing the fuel filter
The frequency of filter replacement depends on the degree of fuel contamination. The manufacturer recommends installing a new consumable every 30 thousand km. According to the technical documentation, replacement of the coarse mesh is not provided, since its service life is designed for the entire duration of operation of the vehicle. Domestic fuel clogs the filter mesh much earlier, so drivers are often faced with the need to change it.
The car owner can understand that the fuel filter needs replacement by the following symptoms:
- jerks when the vehicle moves;
- the engine does not take the load well;
- changing the sound of the fuel pump;
- deterioration in the dynamics of the Kia Spectra;
- complication of starting the power unit;
- The engine periodically stalls, which is most noticeable during intense acceleration.
Why does the filter clog quickly?
You can extend the life of this part only if you find out what causes accelerated wear. The first and most important thing is low-quality fuel. In the hope of saving money, drivers buy gasoline or diesel at unknown gas stations or completely secondhand. Naturally, the fuel filter is responsible for your decisions.
The second problem is storing fuel in metal containers with rust. Almost every driver has an “emergency reserve” for an emergency. But over time, this fuel becomes contaminated, so it is recommended to make sure that there are no impurities or pieces of loose rust before use. Also, always keep an eye on the gas filler door. Most of the contaminants enter the fuel tank through it.
Required Tools
To replace fine and coarse fuel filters, you need the tools from the list below.
Table - Tools that will be needed to replace the fuel filter on a Kia Spectra car
| Tools | Addition |
| Socket head | "on 10" |
| Vorotok | With ratchet and extension |
| Screwdriver | Cross |
| Penetrating lubricant | For example, VD-40 |
| Rags | To clean dirt |
To replace the fine filter, access is required from the bottom of the vehicle. Therefore, in order to change consumables, you should be able to install the vehicle on a lift, overpass or above an inspection pit.
Determining whether the filter is clogged
You can diagnose problems with the filter component even without specialized equipment. There are a number of symptoms that will help determine the presence of a malfunction:
- increased fuel consumption;
- the car does not idle and stalls regularly;
- dips appear at high speeds;
- the engine starts with difficulty or does not start at all, even in warm weather;
- a “triple” effect appears, power and dynamics decrease;
- the engine responds poorly to pressing the gas pedal;
- When moving up an inclined plane, the car jerks.
Of course, all of this could indicate other problems, such as with the fuel pump or specific sensors. In the most exceptional cases, the electronic control unit is responsible for the incorrect operation of the motor, but do not panic and contact service centers for expensive diagnostics. The most affordable and simplest repair you can do on your part is to change the fuel filter.
A more accurate diagnostic method is to check the fuel system pressure. You will need to find a pressure gauge with a limit of 5 kgf/cm. Before checking, remove the pressure in the system by disconnecting the power supply from the fuel pump, and drain all the fuel from the line. Next we will describe in detail where the fuel filter is located on the Kia Spectra.
Then install a measuring device in the gap between the fuel pump and the line. Connect the wiring harness that you disconnected when the pressure dropped to the pump and start the engine. The pressure gauge at idle should read 2.65 kgс/cm2 or more. If the pressure is lower than required, look for a problem in the fuel system.
When the symptoms do not disappear even after replacing the filter, contact a diagnostician so that they can test the operation of the fuel pump and make sure that the lines are intact. It is quite possible that there is a leak somewhere. A full check of the Kia Spectra fuel pump is possible only by experienced specialists.
Replacing the fine fuel filter
Instructions for replacing the filter on a Kia Spectra are presented below.
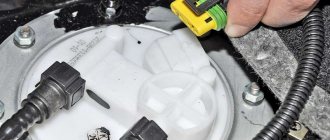
- Remove the rear seat cushion.
- Unscrew the three hatch screws.
- Remove the hatch.
- Press the plastic clip and disconnect the block.
- Start the engine and wait until it stalls.
- Crank the engine with the starter.
- Disconnect the pipeline from the filter connection.
- Release the remaining pipes
- Unscrew the clamp bolt.
- Remove the filter.
- Install a new consumable and assemble everything in reverse order.
- Check for fuel leaks.
Let's start replacing
To ensure the first stage, it is necessary to install the machine on an inspection hole or lift.
Then we reduce the pressure in the power system:
- set the gear shift lever to neutral position;
The filter is removed after compressing the clamps and disconnecting the pipelines
. Removing the fuel filter is preceded by releasing the clamp (it is necessary to unscrew the corresponding tightening bolt).
It is needless to mention that the operation is carried out with the utmost care; all actions to unscrew the bolts must be proportionate - in order to avoid breaking off the heads (deformation of the latter).
The new fuel filter is installed in exactly the same way - all operations are performed in reverse order. Here, special attention should be paid to the correct connection of the corresponding pipes.
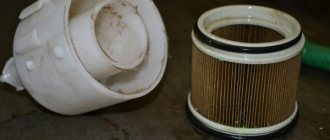
Replacing the mesh filter
The algorithm for replacing the filter mesh is presented below.
- Remove the rear row of seats.
- Unscrew the hatch.
- Disconnect the terminal block and hoses.
- Remove the fuel module.
- Disconnect the connector.
- Disassemble the glass.
- Remove the filter mesh.
- Install a new primary fuel filter.
see also
Comments 27
Hello! Today I also replaced the fuel filter from the same brand as yours. Compared to the old one, the tips where the hoses are put on were painted black, although in the one removed from the same company they were not painted, because of this it was difficult to put the hoses on the new filter. I had to sand these places with sandpaper and wipe off the paint, then it became easier to put the hoses on the filter. At first the thought of a fake arose, but then I thought about what to produce and decided to save money by leaving the places where the hoses were put on painted. I ordered from Exist.
Did you pull the hose under the bottom too hard or something? Did it fly off your fuel pump? I understand that
It turns out that it was strong, although somehow I didn’t notice that I pulled it out
I saw everything :-) I don’t understand, did you take the original or the deputy?
quote from the text: I bought a new fuel filter BIG Filter GB-3154
(original filter article number 0K2AA20490).
I got it here: www.exist.ru/price.aspx?pcode=GB-3154
fuel filter code, please?
re-read the text again
Did the whistle go away from the noise of the fuel pump?
It didn’t disappear completely, but it became somewhat deaf and much quieter.
One of the important car maintenance activities is replacing the Kia Spectra fuel filter. This part, present on almost all modern cars, serves to remove small contaminants from the fuel and prevent them from entering the engine working space. During transportation, storage of gasoline and operation of the machine, pieces of the coating of tanks and gas tanks, sand and dust can get into the liquid and penetrate the fuel system. Over time, this can cause clogging of engine injectors, mixture delivery systems, and corrosion of some elements. This is especially true when using low-quality fuel. Such situations can lead to serious problems with the car and the need for repairs. Moreover, the failure of various systems develops quite slowly, which is difficult for a non-professional to notice. But all this can be prevented by promptly changing the filter element and using only high-quality substitutes or original parts for replacement.
Replacement instructions
The work is done quickly, without the use of any tools. To replace, you only need a new part, gloves, rags and following the sequence of the process:
- Remove all contents from the glove compartment.
- To remove the part, press down on the side walls. In winter, the car is pre-warmed to avoid cracking of the plastic.
- To remove the protective panels, you need to press the latch and pull the plug towards you.
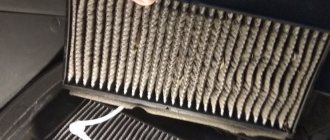
- The first half is mounted, which has a foam insert on the side. If foam rubber is missing, it is removed from the old filter and glued to the new one with double-sided tape. This will fill the free space of the seat.
- If the frame is installed incorrectly, cleaning will not be effective enough. Therefore, you need to make sure that the pen is located above the inscription.
- Now you can put the glove compartment in place, after installing the plugs.
- You can check the operation of the ventilation and the state of the microclimate in the cabin by taking a short trip.
Timely updating of the cabin filter will ensure fresh air inside the car. Regular inspection of the part will help determine the level of contamination and the need to replace it. The optimal period for carrying out such work is the beginning of autumn. The period of active flowering requires the most effective filtration.
Rules for choosing consumables
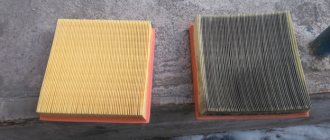
Modern manufacturers offer several types of filter elements. The most affordable and simple ones include dust models, which look like a frame with accordion-like strips of cellulose fibers. They perfectly retain large and small debris, rubber particles, soot, pollen, and volatile heavy mixtures.
For increased filtration, carbon models with a three-layer structure are designed. Their cost is much higher, but this is the optimal solution for protecting the interior for allergy sufferers.
Electrostatic models with a static charge are especially popular. Thanks to this, the cleaning efficiency increases significantly. However, when choosing, you should take into account the compatibility of the filter with the mounting sockets. If the dimensions do not match, replacing the part becomes impossible.
Installing the original model that was in the car before will help avoid the problem. Therefore, if you are not ready to pay about 1000 rubles for it, after every 10-15 thousand mileage, you can purchase a compatible analogue. The most popular include:
- Filtron K1282-2X;
- Amd AMDFC11;
- PMC PMB-007.
The effectiveness of these models is not inferior to branded products, but the cost does not exceed 500 rubles.
Changing the oil in a Kia automatic transmission
The entire range of Kia cars is distinguished by reliable and durable automatic transmissions. High-quality maintenance and repair of the Kia Spectra involves diagnosing the performance of the automatic transmission, identifying hidden faults and critical wear of certain parts, plus changing the transmission oil.
- A scheduled oil change in a Kia Rio automatic transmission is carried out with the selection of a working fluid that corresponds to the technical parameters of the previously used one.
In addition to replacing working fluids, our specialists will conduct a full technical inspection of the car and repair the Kia Rio if necessary.
- A quick oil change in the Kia Sid automatic transmission may be required even if there are no visible leaks and the automatic transmission is operating satisfactorily.
The thing is that on Kia Sid, changing the automatic transmission oil ,
as in other car models equipped with an automatic transmission, it should be carried out every 10–15 thousand kilometers. And all because during operation, the mass fraction of oil poured into the transmission gradually decreases (evaporates), which leads to increased friction of parts and, as a result, wear. Our car service provides high-quality technical maintenance with the replacement of consumables and repairs Kia Sid with a guarantee of 40,000 km.
KIA Spectra 2008, 101 l. With. — scheduled maintenance
Cars for sale
Kia Spectra, 2009
Kia Spectra, 2008
Kia Spectra, 2011
Kia Spectra, 2007
Cleaning automobile fuel from harmful impurities is a function that filter elements must perform. The reliable operation of the engine during operation largely depends on how carefully they cope with their task.
Any type of fuel, be it gasoline or diesel, is contaminated with harmful impurities. In addition, during transportation to its destination, debris (shavings, sand, dust, etc.) can also get into the fuel, which can disrupt its normal operation. Cleaning filters are designed to counteract this.
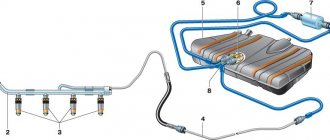
Structurally, the filter consists of 2 parts installed:
- directly next to the fuel pump there is a mesh that protects the engine from large debris getting into the cylinders;
- at the entrance to the fuel supply line there is a filter that cleans the fuel from small harmful impurities.
